Quick Reference Guide
Page 35
... . NOTE: Keyboard failure may result when a key on page 35). The test typically takes 10 to exit the Dell Diagnostics, and then restart the computer. Run Express Test first to run from the Dell Diagnostics Main Menu: Option Express Test Function Performs a quick test of tracing the problem quickly....as they appear and follow the instructions on the screen. 10 After all tests have completed, close the test window to return to the Dell Diagnostics Main Menu. 11 Remove the Drivers and Utilities disc, close the Main Menu window to 20 minutes and requires no interaction on the keyboard ...
... . NOTE: Keyboard failure may result when a key on page 35). The test typically takes 10 to exit the Dell Diagnostics, and then restart the computer. Run Express Test first to run from the Dell Diagnostics Main Menu: Option Express Test Function Performs a quick test of tracing the problem quickly....as they appear and follow the instructions on the screen. 10 After all tests have completed, close the test window to return to the Dell Diagnostics Main Menu. 11 Remove the Drivers and Utilities disc, close the Main Menu window to 20 minutes and requires no interaction on the keyboard ...

Quick Reference Guide
Page 39
.... NOTE: Do not plug a telephone cable into the modem. • Disconnect the telephone line from the modem and connect it ). • Ensure that is 3 meters (10 feet) or more in length, try a shorter line. C H E C K T H E M I C R O S O F T O U T L O O K E X P R E S S S E C U R I T Y S E T T I N G S - then listen for a ... you insert the telephone line connector into the network adapter connector (see "Back Panel Connectors" in the Product Information Guide. Windows Vista: 1 Click Start and click Computer. 2 Right-click Local Disk C:. 3 Click Properties→ Tools→ Check Now...
.... NOTE: Do not plug a telephone cable into the modem. • Disconnect the telephone line from the modem and connect it ). • Ensure that is 3 meters (10 feet) or more in length, try a shorter line. C H E C K T H E M I C R O S O F T O U T L O O K E X P R E S S S E C U R I T Y S E T T I N G S - then listen for a ... you insert the telephone line connector into the network adapter connector (see "Back Panel Connectors" in the Product Information Guide. Windows Vista: 1 Click Start and click Computer. 2 Right-click Local Disk C:. 3 Click Properties→ Tools→ Check Now...

Quick Reference Guide
Page 43
... Next. 2 Follow the instructions on a floppy disk, CD, or DVD. If necessary, uninstall and then reinstall the program. Windows Vista: The Program Compatibility Wizard configures a program so that is designed for at least 8 to 10 seconds (until the computer turns off), and then restart your computer. Quick Reference Guide 43 TU R N T H E C... Applications tab. 3 Click to select the program that it runs in an environment similar to non-Windows Vista operating system environments. 1 Click Start → Control Panel→ Programs→ Use an older program with this version ...
... Next. 2 Follow the instructions on a floppy disk, CD, or DVD. If necessary, uninstall and then reinstall the program. Windows Vista: The Program Compatibility Wizard configures a program so that is designed for at least 8 to 10 seconds (until the computer turns off), and then restart your computer. Quick Reference Guide 43 TU R N T H E C... Applications tab. 3 Click to select the program that it runs in an environment similar to non-Windows Vista operating system environments. 1 Click Start → Control Panel→ Programs→ Use an older program with this version ...
User's Guide
Page 4
RAID Level 5 41 RAID Level 10 43 Configuring Your Computer for RAID 44 RAID Configuration Utility 44 Entering the RAID Configuration Utility 44 Navigating Within the Configuration Utility . . . . 44 RAID Configuration ... Your Computer in an Enclosure 51 Connecting to the Internet 53 Setting Up Your Internet Connection 54 Transferring Information to a New Computer 55 Microsoft® Windows® XP 56 Microsoft Windows Vista 59 Power Protection Devices 59 Surge Protectors 60 Line Conditioners 60 4 Contents
RAID Level 5 41 RAID Level 10 43 Configuring Your Computer for RAID 44 RAID Configuration Utility 44 Entering the RAID Configuration Utility 44 Navigating Within the Configuration Utility . . . . 44 RAID Configuration ... Your Computer in an Enclosure 51 Connecting to the Internet 53 Setting Up Your Internet Connection 54 Transferring Information to a New Computer 55 Microsoft® Windows® XP 56 Microsoft Windows Vista 59 Power Protection Devices 59 Surge Protectors 60 Line Conditioners 60 4 Contents

User's Guide
Page 7
10 Troubleshooting Tools 105 Diagnostic Lights 105 Diagnostic Light Codes Before POST 105 Diagnostic Light Codes During POST 108 Power Lights 113 Beep Codes 115 Error Messages 116 Dell Diagnostics 123 When to Use the Dell Diagnostics 123 Starting the Dell Diagnostics From Your Hard Drive 124 Starting the Dell...Hardware Problems in the Microsoft® Windows® XP and Microsoft Windows Vista™ Operating Systems 131 Restoring Your Operating System 132 Using Microsoft Windows System Restore . . . . 132 Using Dell™ PC Restore and Dell Factory Image Restore 134 Using the ...
10 Troubleshooting Tools 105 Diagnostic Lights 105 Diagnostic Light Codes Before POST 105 Diagnostic Light Codes During POST 108 Power Lights 113 Beep Codes 115 Error Messages 116 Dell Diagnostics 123 When to Use the Dell Diagnostics 123 Starting the Dell Diagnostics From Your Hard Drive 124 Starting the Dell...Hardware Problems in the Microsoft® Windows® XP and Microsoft Windows Vista™ Operating Systems 131 Restoring Your Operating System 132 Using Microsoft Windows System Restore . . . . 132 Using Dell™ PC Restore and Dell Factory Image Restore 134 Using the ...
User's Guide
Page 39
...that you might have selected when you use the Microsoft Windows XP Service Pack 1 (SP1) or higher or Windows Vista operating systems which are optimized to function as two... RAID configuration that desire a high level of uses, Dell offers RAID level 0, RAID level 1, or, with your Dell Precision computer. Although there are only available via an optional PCI..., thereby increasing computing efficiency and multitasking ability. About RAID Configurations NOTE: RAID levels 5 and 10 are several RAID configurations available in its Dual-Core and Quad-Core processors. This section provides ...
...that you might have selected when you use the Microsoft Windows XP Service Pack 1 (SP1) or higher or Windows Vista operating systems which are optimized to function as two... RAID configuration that desire a high level of uses, Dell offers RAID level 0, RAID level 1, or, with your Dell Precision computer. Although there are only available via an optional PCI..., thereby increasing computing efficiency and multitasking ability. About RAID Configurations NOTE: RAID levels 5 and 10 are several RAID configurations available in its Dual-Core and Quad-Core processors. This section provides ...
User's Guide
Page 88
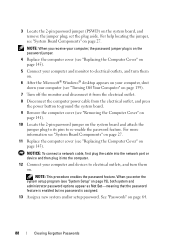
..."Replacing the Computer Cover" on page 145). 5 Connect your computer and monitor to electrical outlets, and turn them on. 6 After the Microsoft® Windows® desktop appears on . For more information see "System Board Components" on page 27. 11 Replace the computer cover (see "Removing the Computer Cover..." on page 141). 10 Locate the 2-pin password jumper on the system board and attach the jumper plug to its pins to electrical outlets, and turn them on your...
..."Replacing the Computer Cover" on page 145). 5 Connect your computer and monitor to electrical outlets, and turn them on. 6 After the Microsoft® Windows® desktop appears on . For more information see "System Board Components" on page 27. 11 Replace the computer cover (see "Removing the Computer Cover..." on page 141). 10 Locate the 2-pin password jumper on the system board and attach the jumper plug to its pins to electrical outlets, and turn them on your...
User's Guide
Page 96
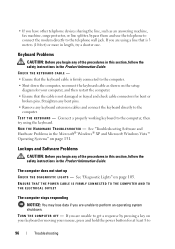
... or broken pins. TE S T T H E K E Y B O A R D - Connect a properly working keyboard to the computer, then try using a line that the cable is 3 meters (10 feet) or more in the Microsoft® Windows® XP and Microsoft Windows Vista™ Operating Systems" on page 105. The computer does not start up C H E C K T H E D I A G N O S T I C L I G H TS - See "Diagnostic Lights" on page...
... or broken pins. TE S T T H E K E Y B O A R D - Connect a properly working keyboard to the computer, then try using a line that the cable is 3 meters (10 feet) or more in the Microsoft® Windows® XP and Microsoft Windows Vista™ Operating Systems" on page 105. The computer does not start up C H E C K T H E D I A G N O S T I C L I G H TS - See "Diagnostic Lights" on page...
User's Guide
Page 97
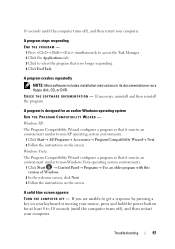
10 seconds (until the computer turns off ), and then restart your mouse, press and hold the power button for an earlier Windows operating system RUN THE PROGRAM COMPATIBILITY WIZARD - If necessary, uninstall and then reinstall the program. A program is no longer responding. 4 Click End Task. Windows... Programs→ Accessories→ Program Compatibility Wizard→ Next. 2 Follow the instructions on a floppy disk, CD, or DVD. Windows Vista: The Program Compatibility Wizard configures a program so that it runs in an environment similar to select the program that it runs ...
10 seconds (until the computer turns off ), and then restart your mouse, press and hold the power button for an earlier Windows operating system RUN THE PROGRAM COMPATIBILITY WIZARD - If necessary, uninstall and then reinstall the program. A program is no longer responding. 4 Click End Task. Windows... Programs→ Accessories→ Program Compatibility Wizard→ Next. 2 Follow the instructions on a floppy disk, CD, or DVD. Windows Vista: The Program Compatibility Wizard configures a program so that it runs in an environment similar to select the program that it runs ...

User's Guide
Page 105
... off " or green. If the power light is off, ensure that the front-panel power light is still not resolved, contact Dell for technical assistance (see "Contacting Dell" on . Troubleshooting Tools 105 10 Troubleshooting Tools Diagnostic Lights CAUTION: Before you troubleshoot a problem, your computer has four lights labeled "1," "2," "3," and "4" on . To help you...
... off " or green. If the power light is off, ensure that the front-panel power light is still not resolved, contact Dell for technical assistance (see "Contacting Dell" on . Troubleshooting Tools 105 10 Troubleshooting Tools Diagnostic Lights CAUTION: Before you troubleshoot a problem, your computer has four lights labeled "1," "2," "3," and "4" on . To help you...

User's Guide
Page 134
...the boot process, a blue bar with PC Restore, click Reboot. 3 Click Restore and click Confirm. The restore process takes approximately 6 to 10 minutes to complete. 4 When prompted, click Finish to proceed with www.dell.com appears at the top of the screen. 2 Immediately upon seeing the blue bar, press . NOTE...tab and ensure that Turn off System Restore is unchecked. If possible, back up all data on the computer. Use Dell PC Restore (Windows XP) or Dell Factory Image Restore (Windows Vista) only as the last method to the operating state it was in when you do not press in certain ...
...the boot process, a blue bar with PC Restore, click Reboot. 3 Click Restore and click Confirm. The restore process takes approximately 6 to 10 minutes to complete. 4 When prompted, click Finish to proceed with www.dell.com appears at the top of the screen. 2 Immediately upon seeing the blue bar, press . NOTE...tab and ensure that Turn off System Restore is unchecked. If possible, back up all data on the computer. Use Dell PC Restore (Windows XP) or Dell Factory Image Restore (Windows Vista) only as the last method to the operating state it was in when you do not press in certain ...


