Mobile Precision Re-Image Guide
Page 7
... Fingers touch with Stylus support on Mobile Precision 4th generation. o Latitude On / Precision On - Dell Latitude Ultrabook, E-Family & Mobile Precision Reimage "How-To" Guide o Dell Data Protection | Encryption(DDPE) - Latitude E-Family & Mobile Precision 3rd & 4th generation o Privacy Panel o Touch Screen Digitizer- Latitude E-Family & Mobile Precision 4th generation o Intel® Responsiveness Technologies - Latitude E-Family & Mobile Precision 4th generation o Dell Battery Management -
... Fingers touch with Stylus support on Mobile Precision 4th generation. o Latitude On / Precision On - Dell Latitude Ultrabook, E-Family & Mobile Precision Reimage "How-To" Guide o Dell Data Protection | Encryption(DDPE) - Latitude E-Family & Mobile Precision 3rd & 4th generation o Privacy Panel o Touch Screen Digitizer- Latitude E-Family & Mobile Precision 4th generation o Intel® Responsiveness Technologies - Latitude E-Family & Mobile Precision 4th generation o Dell Battery Management -
Mobile Precision Re-Image Guide
Page 11
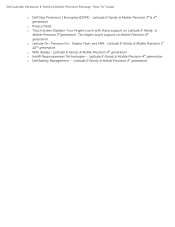
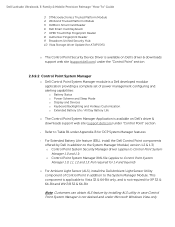
... Extended Battery Life - Control Point Connection Manager 3. Intel® Smart Connect Technology o Dell Premier Color application, 3rd & 4th generation Latitude Mobile Precision Control Point Security Manager (Requires Dell Control Point security driver pack) o Dell Feature Enhance Package (DFEP) - 2nd , 3rd & 4th generations Latitude E-Family & Mobile Precision o Dell Data Protection | Access - 3rd & 4th generations Latitude E-Family & Mobile Precision o Dell Data...
... Extended Battery Life - Control Point Connection Manager 3. Intel® Smart Connect Technology o Dell Premier Color application, 3rd & 4th generation Latitude Mobile Precision Control Point Security Manager (Requires Dell Control Point security driver pack) o Dell Feature Enhance Package (DFEP) - 2nd , 3rd & 4th generations Latitude E-Family & Mobile Precision o Dell Data Protection | Access - 3rd & 4th generations Latitude E-Family & Mobile Precision o Dell Data...
Mobile Precision Re-Image Guide
Page 12
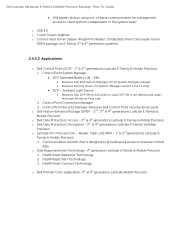
.... Note: eSATA is configured for AHCI mode (Advanced Disk Operation mode) which offers faster performance, eSATA support, and increased battery life. This mode supports AHCI mode features as well as disk mirroring (RAID-1). This mode supports AHCI mode features as well... under the "BIOS" section. IRRT allows data backup and restoration. Some of the Operating System. Dell Latitude Ultrabook, E-Family & Mobile Precision Reimage "How-To" Guide 2.5 BIOS Dell recommends flashing the latest BIOS available to Operating System performance and installation. This is configured to support RAID...
.... Note: eSATA is configured for AHCI mode (Advanced Disk Operation mode) which offers faster performance, eSATA support, and increased battery life. This mode supports AHCI mode features as well as disk mirroring (RAID-1). This mode supports AHCI mode features as well... under the "BIOS" section. IRRT allows data backup and restoration. Some of the Operating System. Dell Latitude Ultrabook, E-Family & Mobile Precision Reimage "How-To" Guide 2.5 BIOS Dell recommends flashing the latest BIOS available to Operating System performance and installation. This is configured to support RAID...
Mobile Precision Re-Image Guide
Page 20
... features - Winbond Trusted Platform Module 5. Authentec Fingerprint Reader 9. Dell Smart Card Keyboard 7. Broadcom Unified Security Hub 10. For Extended Battery Life feature (EBL), install the Dell Control Point components offered by installing ALS utility in case Control ...Battery Status o Power Scheme and Sleep Mode o Display and Devices o Keyboard Backlighting and Hotkeys Customization o Extended Battery Life / All Day Battery Life o The Control Point System Manager Application is not desired and under "Control Point" section - Dell Latitude Ultrabook, E-Family & Mobile Precision...
... features - Winbond Trusted Platform Module 5. Authentec Fingerprint Reader 9. Dell Smart Card Keyboard 7. Broadcom Unified Security Hub 10. For Extended Battery Life feature (EBL), install the Dell Control Point components offered by installing ALS utility in case Control ...Battery Status o Power Scheme and Sleep Mode o Display and Devices o Keyboard Backlighting and Hotkeys Customization o Extended Battery Life / All Day Battery Life o The Control Point System Manager Application is not desired and under "Control Point" section - Dell Latitude Ultrabook, E-Family & Mobile Precision...
Mobile Precision Re-Image Guide
Page 22
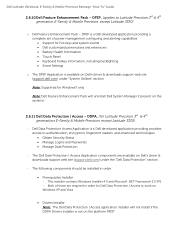
... power plans and extensions Battery Health Information Touch Panel Keyboard hotkey information, including backlighting Smart Settings o The DFEP Application is available on Dell's driver & downloads support web site (support.dell.com) under the "Dell Data Protection" section - Dell Latitude Ultrabook, E-Family & Mobile Precision Reimage "How-To" Guide 2.6.10 Dell Feature Enhancement Pack - The...
... power plans and extensions Battery Health Information Touch Panel Keyboard hotkey information, including backlighting Smart Settings o The DFEP Application is available on Dell's driver & downloads support web site (support.dell.com) under the "Dell Data Protection" section - Dell Latitude Ultrabook, E-Family & Mobile Precision Reimage "How-To" Guide 2.6.10 Dell Feature Enhancement Pack - The...
Mobile Precision Re-Image Guide
Page 40
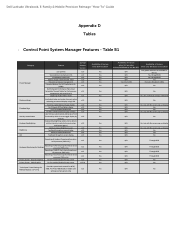
... B1 Category Power Manager Display settings Function Keys Hot Key customizaton Keyboard backlighting Brightness ALS Feature user profiles View battery manufacturer info. Discreet Graphics Fn+E to enale/disable ALS Feedback through BIOS Yes No (some Broadcom LOMs) .... Control Point System Manager Features - Dell Latitude Ultrabook, E-Family & Mobile Precision Reimage "How-To" Guide Appendix D Tables - battery charge enable/disable status Network card power management Extended Battery Life/ All Day Battery Life. (ADBL) Dell Enhanced Performance Plans (User Selectable Thermal Tables...
... B1 Category Power Manager Display settings Function Keys Hot Key customizaton Keyboard backlighting Brightness ALS Feature user profiles View battery manufacturer info. Discreet Graphics Fn+E to enale/disable ALS Feedback through BIOS Yes No (some Broadcom LOMs) .... Control Point System Manager Features - Dell Latitude Ultrabook, E-Family & Mobile Precision Reimage "How-To" Guide Appendix D Tables - battery charge enable/disable status Network card power management Extended Battery Life/ All Day Battery Life. (ADBL) Dell Enhanced Performance Plans (User Selectable Thermal Tables...

Owner's Manual (M4600)
Page 3
... Secure Digital (SD) Card 13 Installing The Secure Digital (SD) Card 13 3 ExpressCard 15 Removing The ExpressCard 15 Installing The ExpressCard 15 4 Battery...17 Removing The Battery...17 Installing The Battery...17 5 Subscriber Identity Module (SIM) Card 19 Removing The Subscriber Identity Module (SIM) Card 19 Installing The Subscriber Identity Module (SIM) Card...
... Secure Digital (SD) Card 13 Installing The Secure Digital (SD) Card 13 3 ExpressCard 15 Removing The ExpressCard 15 Installing The ExpressCard 15 4 Battery...17 Removing The Battery...17 Installing The Battery...17 5 Subscriber Identity Module (SIM) Card 19 Removing The Subscriber Identity Module (SIM) Card 19 Installing The Subscriber Identity Module (SIM) Card...

Owner's Manual (M4600)
Page 5
... 17 Graphics Card Fan 47 Removing The Graphics Card Fan 47 Installing The Graphics Card Fan 48 18 Coin-Cell Battery 49 Removing The Coin-Cell Battery 49 Installing The Coin-Cell Battery 50 19 Palm Rest 51 Removing The Palm Rest 51 Installing The Palm Rest 56 20 CPU and Heatsink 57...
... 17 Graphics Card Fan 47 Removing The Graphics Card Fan 47 Installing The Graphics Card Fan 48 18 Coin-Cell Battery 49 Removing The Coin-Cell Battery 49 Installing The Coin-Cell Battery 50 19 Palm Rest 51 Removing The Palm Rest 51 Installing The Palm Rest 56 20 CPU and Heatsink 57...

Owner's Manual (M4600)
Page 7
... 117 37 System Setup 123 System Setup Overview 123 Entering System Setup 123 System Setup Menu Options 123 38 Diagnostics 137 Device Status Lights...137 Battery Status Lights...137 Diagnostics...137 39 Contacting Dell 141 Contacting Dell ...141
... 117 37 System Setup 123 System Setup Overview 123 Entering System Setup 123 System Setup Menu Options 123 38 Diagnostics 137 Device Status Lights...137 Battery Status Lights...137 Diagnostics...137 39 Contacting Dell 141 Contacting Dell ...141

Owner's Manual (M4600)
Page 10
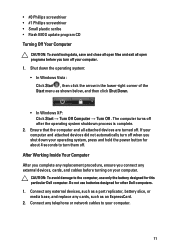
...may require the following steps before you service the computer. 7. NOTE: To avoid damaging the system board, you must remove the main battery before opening the display. Turn the computer top-side up. 9. NOTE: The color of the computer. Disconnect all attached devices from..., periodically touch an unpainted metal surface to ground the system board. CAUTION: Before touching anything inside the computer. 1. Remove the main battery (see Turning Off Your Computer). 3. Open the display. 10. Ensure that your computer and all network cables from the electrical outlet ...
...may require the following steps before you service the computer. 7. NOTE: To avoid damaging the system board, you must remove the main battery before opening the display. Turn the computer top-side up. 9. NOTE: The color of the computer. Disconnect all attached devices from..., periodically touch an unpainted metal surface to ground the system board. CAUTION: Before touching anything inside the computer. 1. Remove the main battery (see Turning Off Your Computer). 3. Open the display. 10. Ensure that your computer and all network cables from the electrical outlet ...
Owner's Manual (M4600)
Page 11
... devices did not automatically turn off when you turn them off. Do not use only the battery designed for this particular Dell computer. CAUTION: To avoid damage to the computer, use batteries designed for about 4 seconds to your operating system, press and hold the power button for other... Dell computers. 1. Ensure that the computer and all open programs before turning on your computer. After Working Inside Your Computer ...
... devices did not automatically turn off when you turn them off. Do not use only the battery designed for this particular Dell computer. CAUTION: To avoid damage to the computer, use batteries designed for about 4 seconds to your operating system, press and hold the power button for other... Dell computers. 1. Ensure that the computer and all open programs before turning on your computer. After Working Inside Your Computer ...
Owner's Manual (M4600)
Page 12
Replace the battery. 4. Turn on your computer and all attached devices to their electrical outlets. 5. Connect your computer. 12 CAUTION: To connect a network cable, first plug the cable into the network device and then plug it into the computer. 3.
Replace the battery. 4. Turn on your computer and all attached devices to their electrical outlets. 5. Connect your computer. 12 CAUTION: To connect a network cable, first plug the cable into the network device and then plug it into the computer. 3.

Owner's Manual (M4600)
Page 17
Remove the battery from the system. Slide the battery back into the unlock position. 3. Battery 4 Removing The Battery 1. Follow the procedures in Before Working On Your Computer. 2. Installing The Battery 1. The battery release latch will automatically click back to the locked position. 3. Slide the battery release latch into the system. 2. Follow the procedures in After Working Inside Your Computer. 17
Remove the battery from the system. Slide the battery back into the unlock position. 3. Battery 4 Removing The Battery 1. Follow the procedures in Before Working On Your Computer. 2. Installing The Battery 1. The battery release latch will automatically click back to the locked position. 3. Slide the battery release latch into the system. 2. Follow the procedures in After Working Inside Your Computer. 17

Owner's Manual (M4600)
Page 19
Pull out the SIM from the slot. 4. Subscriber Identity Module (SIM) Card 5 Removing The Subscriber Identity Module (SIM) Card 1. Follow the procedures in Before Working On Your Computer. 2. Slide the Subscriber Identity Module (SIM) card outward away from the slot. 19 Remove the Battery. 3.
Pull out the SIM from the slot. 4. Subscriber Identity Module (SIM) Card 5 Removing The Subscriber Identity Module (SIM) Card 1. Follow the procedures in Before Working On Your Computer. 2. Slide the Subscriber Identity Module (SIM) card outward away from the slot. 19 Remove the Battery. 3.

Owner's Manual (M4600)
Page 20
Replace the Battery. 4. Installing The Subscriber Identity Module (SIM) Card 1. Locate the Subscriber Identity Module (SIM) card slot in After Working Inside Your Computer. 20 Push the SIM card into the slot until it is fully engaged. 3. Follow the procedures in the battery compartment. 2.
Replace the Battery. 4. Installing The Subscriber Identity Module (SIM) Card 1. Locate the Subscriber Identity Module (SIM) card slot in After Working Inside Your Computer. 20 Push the SIM card into the slot until it is fully engaged. 3. Follow the procedures in the battery compartment. 2.

Owner's Manual (M4600)
Page 21
Slide the Bluetooth door upward and release from the Bluetooth card. 5. Follow the procedures in place. 21 Disconnect the Bluetooth cable from the slot. 4. Bluetooth Card 6 Removing The Bluetooth Card 1. Remove the single screw securing the Bluetooth card in Before Working On Your Computer 2. Remove the Battery. 3.
Slide the Bluetooth door upward and release from the Bluetooth card. 5. Follow the procedures in place. 21 Disconnect the Bluetooth cable from the slot. 4. Bluetooth Card 6 Removing The Bluetooth Card 1. Remove the single screw securing the Bluetooth card in Before Working On Your Computer 2. Remove the Battery. 3.

Owner's Manual (M4600)
Page 22
Remove the Bluetooth card. Tighten the single screw to the Bluetooth card. 4. Connect the Bluetooth cable to secure the Bluetooth card in After Working Inside Your Computer. 22 Installing The Bluetooth Card 1. 6. Locate the Bluetooth door compartment. 5. Follow the procedures in place. 3. Install the Battery. 7. Place the Bluetooth card on the Bluetooth door and align with the screw hole. 2. Slide the Bluetooth door onto the compartment until the tab is fully engaged. 6.
Remove the Bluetooth card. Tighten the single screw to the Bluetooth card. 4. Connect the Bluetooth cable to secure the Bluetooth card in After Working Inside Your Computer. 22 Installing The Bluetooth Card 1. 6. Locate the Bluetooth door compartment. 5. Follow the procedures in place. 3. Install the Battery. 7. Place the Bluetooth card on the Bluetooth door and align with the screw hole. 2. Slide the Bluetooth door onto the compartment until the tab is fully engaged. 6.

Owner's Manual (M4600)
Page 23
Base Cover 7 Removing The Base Cover 1. Press the rubber feet towards the rear of the system to the computer. 4. Remove the base cover from the computer. 23 Remove the screws that secure the base cover to disengage the bottom door. 5. Follow the procedures in Before Working On Your Computer. 2. Remove the Battery. 3.
Base Cover 7 Removing The Base Cover 1. Press the rubber feet towards the rear of the system to the computer. 4. Remove the base cover from the computer. 23 Remove the screws that secure the base cover to disengage the bottom door. 5. Follow the procedures in Before Working On Your Computer. 2. Remove the Battery. 3.

Owner's Manual (M4600)
Page 24
Install the Battery. 4. Slide the bottom door downwards and towards the front of the system. 2. Follow the procedures in After Working Inside Your Computer. 24 Tighten the screws that secure the base cover to the computer. 3. Installing The Base Cover 1.
Install the Battery. 4. Slide the bottom door downwards and towards the front of the system. 2. Follow the procedures in After Working Inside Your Computer. 24 Tighten the screws that secure the base cover to the computer. 3. Installing The Base Cover 1.
Owner's Manual (M4600)
Page 25
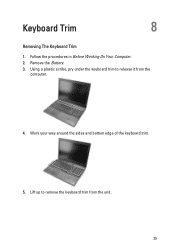
Follow the procedures in Before Working On Your Computer. 2. Using a plastic scribe, pry under the keyboard trim to remove the keyboard trim from the computer. 4. Work your way around the sides and bottom edge of the keyboard trim. 5. Keyboard Trim 8 Removing The Keyboard Trim 1. Lift up to release it from the unit. 25 Remove the Battery. 3.
Follow the procedures in Before Working On Your Computer. 2. Using a plastic scribe, pry under the keyboard trim to remove the keyboard trim from the computer. 4. Work your way around the sides and bottom edge of the keyboard trim. 5. Keyboard Trim 8 Removing The Keyboard Trim 1. Lift up to release it from the unit. 25 Remove the Battery. 3.

