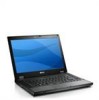
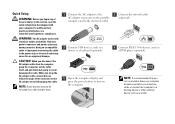
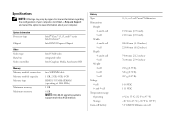
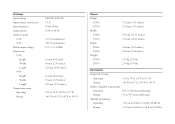
Latitude E5410 Computer - Dell
Latitude E5410 Computer
View Results Below
Free Dell Latitude E5410 manuals!
Problems with Dell Latitude E5410?
Ask a Question
Free Dell Latitude E5410 manuals!
Problems with Dell Latitude E5410?
Ask a Question
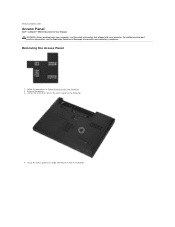
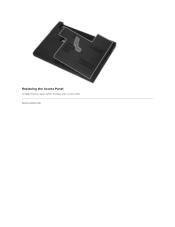
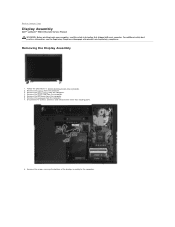
Related Manual Pages


Related Videos

Dell Latitude E5410.flv
Duration: 5:21
Total Views: 541
Duration: 5:21
Total Views: 541
Dell Latitude E5410 Laptop Power Jack Repair broken socket input port connector fix
Duration: 52:27
Total Views: 2,250
Duration: 52:27
Total Views: 2,250
Dell Latitude E5410 | Game 44
Duration: 2:00
Total Views: 1,103
Duration: 2:00
Total Views: 1,103
Dell Latitude E5410 E5400 E5500 E5510 7800 mAh Laptop Battery Replacement
Duration: 1:10
Total Views: 2,527
Duration: 1:10
Total Views: 2,527
In Cambridge: The Latitude E6530 reformats the Latitude E5410's hard drive
Duration: 1:49
Total Views: 75
Duration: 1:49
Total Views: 75