
Owners Manual
Page 3
Contents 1 Before You Begin 11 Recommended Tools 11 Turning Off Your Computer 11 Safety Instructions 11 2 Technical Overview 15 Inside View of Your Inspiron One 15 System Board Components 17 3 Back Cover 19 Removing the Back Cover 19 Replacing the Back Cover 21 4 Hard Drive 23 Removing the Hard Drive 23 Replacing the Hard Drive 25 5 Optical Drive 27 Removing the Optical Drive 27 Contents 3
Contents 1 Before You Begin 11 Recommended Tools 11 Turning Off Your Computer 11 Safety Instructions 11 2 Technical Overview 15 Inside View of Your Inspiron One 15 System Board Components 17 3 Back Cover 19 Removing the Back Cover 19 Replacing the Back Cover 21 4 Hard Drive 23 Removing the Hard Drive 23 Replacing the Hard Drive 25 5 Optical Drive 27 Removing the Optical Drive 27 Contents 3
Owners Manual
Page 23
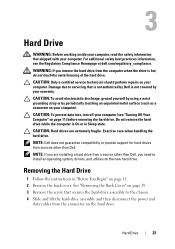
... you remove the hard drive from the connector on page 11. 2 Remove the back cover. Do not remove the hard drive while the computer is On or in "Before You Begin" on the hard drive. CAUTION: Hard drives are installing a hard drive from sources other than Dell. See "Removing the Back Cover" on page 11) before removing the hard drive. WARNING: If you are extremely fragile. Removing the Hard Drive 1 Follow...
... you remove the hard drive from the connector on page 11. 2 Remove the back cover. Do not remove the hard drive while the computer is On or in "Before You Begin" on the hard drive. CAUTION: Hard drives are installing a hard drive from sources other than Dell. See "Removing the Back Cover" on page 11) before removing the hard drive. WARNING: If you are extremely fragile. Removing the Hard Drive 1 Follow...
Owners Manual
Page 24
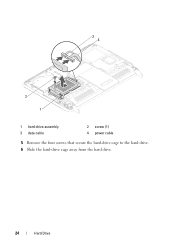
34 2 1 1 hard-drive assembly 3 data cable 2 screw (1) 4 power cable 5 Remove the four screws that secure the hard-drive cage to the hard drive. 6 Slide the hard-drive cage away from the hard drive. 24 Hard Drive
34 2 1 1 hard-drive assembly 3 data cable 2 screw (1) 4 power cable 5 Remove the four screws that secure the hard-drive cage to the hard drive. 6 Slide the hard-drive cage away from the hard drive. 24 Hard Drive
Owners Manual
Page 97
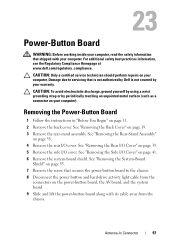
...-button board along with your computer. Antenna-In Connector 97 See "Removing the Back Cover" on page 39. 5 Remove the side I /O cover. Damage due to the chassis. 8 Disconnect the power button and hard-drive activity light cable from the chassis. CAUTION: To avoid electrostatic discharge,...information that is not authorized by Dell is not covered by periodically touching an unpainted metal surface (such as a connector on your computer). See "Removing the Rear I /O Cover" on your computer. See "Removing the Side I /O Cover" on page 19. 3 Remove the rear-stand assembly. CAUTION: ...
...-button board along with your computer. Antenna-In Connector 97 See "Removing the Back Cover" on page 39. 5 Remove the side I /O cover. Damage due to the chassis. 8 Disconnect the power button and hard-drive activity light cable from the chassis. CAUTION: To avoid electrostatic discharge,...information that is not authorized by Dell is not covered by periodically touching an unpainted metal surface (such as a connector on your computer). See "Removing the Rear I /O Cover" on your computer. See "Removing the Side I /O Cover" on page 19. 3 Remove the rear-stand assembly. CAUTION: ...
Owners Manual
Page 125
Then, turn off your computer. 2 When the DELL logo is lost. 29 System Setup Overview Use the system setup to: • Change the system configuration information after you add, change, or remove any hardware in your computer • Set or change a user-selectable option such as the user ...password • Read the current amount of memory or set the type of hard drive installed NOTE: Before you change system setup, it , ...
Then, turn off your computer. 2 When the DELL logo is lost. 29 System Setup Overview Use the system setup to: • Change the system configuration information after you add, change, or remove any hardware in your computer • Set or change a user-selectable option such as the user ...password • Read the current amount of memory or set the type of hard drive installed NOTE: Before you change system setup, it , ...


