
Ubuntu® Quick Reference Guide
Page 5
Contents Overview 5 Getting Started With Your Dell Desktop 6 Getting Started With Your Classic Desktop 8 Starting an Application 8 Customizing Your Desktop 8 Adding and Removing an Application Icon on Your Desktop 8 Getting Started With Ubuntu 9 Connecting to the Internet Using a Wireless or Wired Connection 9 Quickly Viewing a Window in Full Screen 10 System Preferences and...
Contents Overview 5 Getting Started With Your Dell Desktop 6 Getting Started With Your Classic Desktop 8 Starting an Application 8 Customizing Your Desktop 8 Adding and Removing an Application Icon on Your Desktop 8 Getting Started With Ubuntu 9 Connecting to the Internet Using a Wireless or Wired Connection 9 Quickly Viewing a Window in Full Screen 10 System Preferences and...

Ubuntu® Quick Reference Guide
Page 7
Overview Overview Welcome to get acquainted with the Ubuntu® operating system, perform basic functions, and set up your computer just the way you need more information, complete documentation on Ubuntu is available from the Help Center on the Panel, found at the top of your screen. 5 This guide helps you to your computer. To access the Help Center, click the Help icon on your Dell™ Inspiron™ Mini. If you want it.
Overview Overview Welcome to get acquainted with the Ubuntu® operating system, perform basic functions, and set up your computer just the way you need more information, complete documentation on Ubuntu is available from the Help Center on the Panel, found at the top of your screen. 5 This guide helps you to your computer. To access the Help Center, click the Help icon on your Dell™ Inspiron™ Mini. If you want it.

Ubuntu® Quick Reference Guide
Page 9
using the Plus icons. 2 Desktop - Click a category to view a list of the computer. 13 Notification area - The Ubuntu icon opens the Ubuntu menu. Getting Started With Your Dell Desktop 8 Panel - The more bars, the stronger the signal. 11 Battery/Charging status indicator - Includes a clock and icons ...to minimize all windows and to the launcher. Click the upper plus icon to view the list of bars indicating signal strength. From the Ubuntu menu, access applications, preferences, system commands, system settings, and tools. 6 Help icon - 1 Launcher - Click the icon to add ...
using the Plus icons. 2 Desktop - Click a category to view a list of the computer. 13 Notification area - The Ubuntu icon opens the Ubuntu menu. Getting Started With Your Dell Desktop 8 Panel - The more bars, the stronger the signal. 11 Battery/Charging status indicator - Includes a clock and icons ...to minimize all windows and to the launcher. Click the upper plus icon to view the list of bars indicating signal strength. From the Ubuntu menu, access applications, preferences, system commands, system settings, and tools. 6 Help icon - 1 Launcher - Click the icon to add ...

Ubuntu® Quick Reference Guide
Page 11
... connection, connect the network cable into the network port on the right side of the Panel. 2. Connecting to a Wireless Network 1. Getting Started With Ubuntu Getting Started With Ubuntu Connecting to the Internet Using a Wireless or Wired Connection Connecting to a Wired Network 1. Select the Show password checkbox to your computer from the Network...
... connection, connect the network cable into the network port on the right side of the Panel. 2. Connecting to a Wireless Network 1. Getting Started With Ubuntu Getting Started With Ubuntu Connecting to the Internet Using a Wireless or Wired Connection Connecting to a Wired Network 1. Select the Show password checkbox to your computer from the Network...

Ubuntu® Quick Reference Guide
Page 12
Getting Started With Ubuntu Quickly Viewing a Window in Full Screen Press to toggle between standard view and full screen view. 10
Getting Started With Ubuntu Quickly Viewing a Window in Full Screen Press to toggle between standard view and full screen view. 10

Ubuntu® Quick Reference Guide
Page 13
System Preferences and Administration From the Dell Desktop, use the tools available from → System to control the appearance and operation of your computer. • Select Preferences for settings of themes, keyboard shortcuts, and power management. • Select Administration to manage computer monitors and configuration tools functions such as network, printing, and users and groups. Getting Started With Ubuntu 11
System Preferences and Administration From the Dell Desktop, use the tools available from → System to control the appearance and operation of your computer. • Select Preferences for settings of themes, keyboard shortcuts, and power management. • Select Administration to manage computer monitors and configuration tools functions such as network, printing, and users and groups. Getting Started With Ubuntu 11

Ubuntu® Quick Reference Guide
Page 14
... a random screensaver, or select a screensaver of time that the Activate screensaver when computer is idle checkbox is active checkbox. 6. Click Close. 12 Getting Started With Ubuntu Setting Screensaver Preferences 1. Click → System→ Preferences→ Screensaver. The Screensaver Preferences window appears. 2. Ensure that you want your choice. 3. If you want the...
... a random screensaver, or select a screensaver of time that the Activate screensaver when computer is idle checkbox is active checkbox. 6. Click Close. 12 Getting Started With Ubuntu Setting Screensaver Preferences 1. Click → System→ Preferences→ Screensaver. The Screensaver Preferences window appears. 2. Ensure that you want your choice. 3. If you want the...

Ubuntu® Quick Reference Guide
Page 15
Getting Started With Ubuntu 13
Getting Started With Ubuntu 13
Ubuntu® Quick Reference Guide
Page 16
... are similar to bookmarks in the lower portion of the side pane. Browse to the location where you quickly open the file browser from the Dell Launcher, select Productivity→ Places. To add a bookmark 1. Use the bookmarks feature to help you want to bookmark, and open it. 2. The bookmark appears in... and folders using an interface similar to a web browser. Click File→ Create Folder, or rightclick and select Create Folder, or press . 3. Getting Started With Ubuntu Browsing Files and Folders The File Manager allows you want to create the new folder. 2.
... are similar to bookmarks in the lower portion of the side pane. Browse to the location where you quickly open the file browser from the Dell Launcher, select Productivity→ Places. To add a bookmark 1. Use the bookmarks feature to help you want to bookmark, and open it. 2. The bookmark appears in... and folders using an interface similar to a web browser. Click File→ Create Folder, or rightclick and select Create Folder, or press . 3. Getting Started With Ubuntu Browsing Files and Folders The File Manager allows you want to create the new folder. 2.

Ubuntu® Quick Reference Guide
Page 17
Getting Started With Ubuntu 15
Getting Started With Ubuntu 15

Ubuntu® Quick Reference Guide
Page 18
... Tabbed Browsing To open , but contained within the web browser. 1. Select a folder for the bookmark and click Add. Getting Started With Ubuntu Using the Web Browser You can have the Dell Desktop enabled, you to the Bookmarks Toolbar Folder appear on the tab or press . Adding Bookmarks to the Launcher If you...
... Tabbed Browsing To open , but contained within the web browser. 1. Select a folder for the bookmark and click Add. Getting Started With Ubuntu Using the Web Browser You can have the Dell Desktop enabled, you to the Bookmarks Toolbar Folder appear on the tab or press . Adding Bookmarks to the Launcher If you...

Ubuntu® Quick Reference Guide
Page 19
Getting Started With Ubuntu 17
Getting Started With Ubuntu 17

Ubuntu® Quick Reference Guide
Page 20
From the Dell Launcher, select Web→ Instant Messenger. 2. Click Add. 3. If you are opening Instant Messenger for the first time, in addition to your Buddy List, an ... options, right-click the Instant Messenger icon on the top panel. 18 Close the Accounts dialog box and, optionally, the Buddy List. Getting Started With Ubuntu Instant Messenger The Instant Messenger messaging client allows you to use multiple types of the account that you to add, enter the required information, and...
From the Dell Launcher, select Web→ Instant Messenger. 2. Click Add. 3. If you are opening Instant Messenger for the first time, in addition to your Buddy List, an ... options, right-click the Instant Messenger icon on the top panel. 18 Close the Accounts dialog box and, optionally, the Buddy List. Getting Started With Ubuntu Instant Messenger The Instant Messenger messaging client allows you to use multiple types of the account that you to add, enter the required information, and...

Ubuntu® Quick Reference Guide
Page 21
Check the list of the most frequently used applications include the following: NOTE: To view DVD movies, the portable Dell CD/DVD Player and Power DVD software are required. Click → Applications→ Add/Remove. 2. To remove an application... downloading, installing, and removing applications. Click Close. 19 When you have made in the confirmation window and click Apply. 6. Applications in Ubuntu Ubuntu comes with a wide variety of a bundle. To add an application, select the required application checkbox. Some applications may require additional supporting applications...
Check the list of the most frequently used applications include the following: NOTE: To view DVD movies, the portable Dell CD/DVD Player and Power DVD software are required. Click → Applications→ Add/Remove. 2. To remove an application... downloading, installing, and removing applications. Click Close. 19 When you have made in the confirmation window and click Apply. 6. Applications in Ubuntu Ubuntu comes with a wide variety of a bundle. To add an application, select the required application checkbox. Some applications may require additional supporting applications...

Ubuntu® Quick Reference Guide
Page 22
... to them easily. Turn on the computer. 2. Click Copy and the photos are automatically installed and the File Browser window appears. 3. Getting Started With Ubuntu Connecting Devices Ubuntu supports a wide range of peripheral devices and lets you connect to the selected location. 20 Digital Cameras 1. USB Drives 1. Select the photo(s) and the...
... to them easily. Turn on the computer. 2. Click Copy and the photos are automatically installed and the File Browser window appears. 3. Getting Started With Ubuntu Connecting Devices Ubuntu supports a wide range of peripheral devices and lets you connect to the selected location. 20 Digital Cameras 1. USB Drives 1. Select the photo(s) and the...

Ubuntu® Quick Reference Guide
Page 23
... code displayed on device... 21 Click Forward. 3. The Successfully configured new device message appears. Click Close. 6. Select the device you are listed. Getting Started With Ubuntu 5. or Browse files on your computer screen, and you wish to establish connection. Bluetooth™ Devices 1. A PIN code may be necessary to use and click...
... code displayed on device... 21 Click Forward. 3. The Successfully configured new device message appears. Click Close. 6. Select the device you are listed. Getting Started With Ubuntu 5. or Browse files on your computer screen, and you wish to establish connection. Bluetooth™ Devices 1. A PIN code may be necessary to use and click...

Ubuntu® Quick Reference Guide
Page 24
Restoring Your Ubuntu System Restoring Your Ubuntu System Use the Ubuntu LTS DVD that involve media. Use an external optical drive ...7. NOTE: Your computer may or may not have an optical drive. Turn off the computer. 2. Insert the Ubuntu LTS DVD in the system setup program. 6. NOTE: The next steps change the boot sequence for the procedures ... complete the installation. 22 Follow the instructions on the hard drive. Starting System Restore 1. CAUTION: Using the Ubuntu LTS DVD deletes all data on the screen to the devices specified in the external USB optical disc drive....
Restoring Your Ubuntu System Restoring Your Ubuntu System Use the Ubuntu LTS DVD that involve media. Use an external optical drive ...7. NOTE: Your computer may or may not have an optical drive. Turn off the computer. 2. Insert the Ubuntu LTS DVD in the system setup program. 6. NOTE: The next steps change the boot sequence for the procedures ... complete the installation. 22 Follow the instructions on the hard drive. Starting System Restore 1. CAUTION: Using the Ubuntu LTS DVD deletes all data on the screen to the devices specified in the external USB optical disc drive....

Setup Guide
Page 4
... a registered trademark and Atom is a registered trademark owned by Dell under license. Dell Inc. disclaims any manner whatsoever without notice. © 2009 Dell Inc. Information in this text: Dell, the DELL logo, Inspiron, and YOURS IS HERE are either trademarks or registered trademarks of... Microsoft Corporation in this document to refer to either potential damage to hardware or loss of data and tells you make better use of Dell Inc. Ubuntu...
... a registered trademark and Atom is a registered trademark owned by Dell under license. Dell Inc. disclaims any manner whatsoever without notice. © 2009 Dell Inc. Information in this text: Dell, the DELL logo, Inspiron, and YOURS IS HERE are either trademarks or registered trademarks of... Microsoft Corporation in this document to refer to either potential damage to hardware or loss of data and tells you make better use of Dell Inc. Ubuntu...
Setup Guide
Page 5
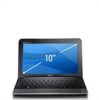
... AC Adapter 6 Connect the Network Cable (Optional 7 Press the Power Button 8 Microsoft® Windows® XP Setup 9 Ubuntu® Setup 9 Enable or Disable Wireless 9 Connect to the Internet (Optional 10 Using Your Inspiron™ Mini 10 14 Right Side Features 14 Left Side Features 16 Computer Base and Keyboard Features 18 Touch Pad... 24 Software Features 26 Solving Problems 28 Network Problems 28 Power Problems 30 Memory Problems 31 Lockups and Software Problems 32 Using Support Tools 34 Dell Support Center 34 System Messages 35 Hardware Troubleshooter 36...
... AC Adapter 6 Connect the Network Cable (Optional 7 Press the Power Button 8 Microsoft® Windows® XP Setup 9 Ubuntu® Setup 9 Enable or Disable Wireless 9 Connect to the Internet (Optional 10 Using Your Inspiron™ Mini 10 14 Right Side Features 14 Left Side Features 16 Computer Base and Keyboard Features 18 Touch Pad... 24 Software Features 26 Solving Problems 28 Network Problems 28 Power Problems 30 Memory Problems 31 Lockups and Software Problems 32 Using Support Tools 34 Dell Support Center 34 System Messages 35 Hardware Troubleshooter 36...

Setup Guide
Page 11
...the The Wireless Enable/Disable dialog box appears. 2. Click OK. CAUTION: Do not interrupt the operating system's setup process. Ubuntu® Setup If you through several procedures including accepting license agreements, setting preferences and setting up Windows XP for more operating ...the following: --Enable Bluetooth --Enable Wireless LAN 3. Doing so may take you ordered Ubuntu operating system with your computer, it is already configured. Setting Up Your Inspiron™ Mini 10 Microsoft® Windows® XP Setup If you ordered Windows XP operating system ...
...the The Wireless Enable/Disable dialog box appears. 2. Click OK. CAUTION: Do not interrupt the operating system's setup process. Ubuntu® Setup If you through several procedures including accepting license agreements, setting preferences and setting up Windows XP for more operating ...the following: --Enable Bluetooth --Enable Wireless LAN 3. Doing so may take you ordered Ubuntu operating system with your computer, it is already configured. Setting Up Your Inspiron™ Mini 10 Microsoft® Windows® XP Setup If you ordered Windows XP operating system ...


