

Owner's Manual
Page 1
Dell™ Dimension™ 3100/E310 Owner's Manual Service Tag CD or DVD activity light FlexBay for optional floppy drive or Media Card Reader headphone connector diagnostic lights 1234 CD or DVD eject button USB 2.0 connectors (2) hard drive activity light power button cover latch release card slots for PCI (2), PCI Express x1 (1) power connector sound-card connectors USB 2.0 connectors (4) network adapter VGA video connector (integrated) Model DCSM www.dell.com | support.dell.com
Dell™ Dimension™ 3100/E310 Owner's Manual Service Tag CD or DVD activity light FlexBay for optional floppy drive or Media Card Reader headphone connector diagnostic lights 1234 CD or DVD eject button USB 2.0 connectors (2) hard drive activity light power button cover latch release card slots for PCI (2), PCI Express x1 (1) power connector sound-card connectors USB 2.0 connectors (4) network adapter VGA video connector (integrated) Model DCSM www.dell.com | support.dell.com
Owner's Manual
Page 3
... 21 Network Setup Wizard 22 Power Management 22 Standby Mode 23 Hibernate Mode 23 Power Options Properties 23 About RAID Configurations 25 Using RAID with Hard Drive Passwords 25 RAID Level 1 25 Configuring Your Computer for RAID 26 Setting Your Computer to RAID-Enabled Mode 26 Configuring Your Computer for RAID Using...
... 21 Network Setup Wizard 22 Power Management 22 Standby Mode 23 Hibernate Mode 23 Power Options Properties 23 About RAID Configurations 25 Using RAID with Hard Drive Passwords 25 RAID Level 1 25 Configuring Your Computer for RAID 26 Setting Your Computer to RAID-Enabled Mode 26 Configuring Your Computer for RAID Using...
Owner's Manual
Page 4
Configuring Your Computer for RAID Using the Intel Matrix Storage Manager 28 Hyper-Threading 30 2 Solving Problems Troubleshooting Tips 31 Battery Problems 31 Drive Problems 31 CD and DVD drive problems 32 Hard drive problems 33 E-Mail, Modem, and Internet Problems 33 Error Messages 34 Media Card Reader Problems 35 Keyboard Problems 36 Lockups and...
Configuring Your Computer for RAID Using the Intel Matrix Storage Manager 28 Hyper-Threading 30 2 Solving Problems Troubleshooting Tips 31 Battery Problems 31 Drive Problems 31 CD and DVD drive problems 32 Hard drive problems 33 E-Mail, Modem, and Internet Problems 33 Error Messages 34 Media Card Reader Problems 35 Keyboard Problems 36 Lockups and...
Owner's Manual
Page 6
... Insert 75 Replacing the Drive-Panel Insert 75 Replacing the Drive Panel 76 Drives 76 IDE Drive Addressing 77 Connecting Drive Cables 77 Drive Interface Connectors 78 Power Cable Connector 78 Connecting and Disconnecting Drive Cables 79 Hard Drive 79 Removing a Hard Drive 80 Installing a Hard Drive 81 Adding a Second Hard Drive (optional 82 Floppy Drive 83 Removing a Floppy Drive 83 Installing a Floppy Drive 85 Media Card Reader...
... Insert 75 Replacing the Drive-Panel Insert 75 Replacing the Drive Panel 76 Drives 76 IDE Drive Addressing 77 Connecting Drive Cables 77 Drive Interface Connectors 78 Power Cable Connector 78 Connecting and Disconnecting Drive Cables 79 Hard Drive 79 Removing a Hard Drive 80 Installing a Hard Drive 81 Adding a Second Hard Drive (optional 82 Floppy Drive 83 Removing a Floppy Drive 83 Installing a Floppy Drive 85 Media Card Reader...

Owner's Manual
Page 10
...as memory, the hard drive, and the operating system • Customer Care - Contact information, service call status and support history, service contract, online discussions with other Dell customers NOTE: Corporate, government, and education customers can also use support.dell.com or contact technical... for your computer, you use the customized Dell Premier Support website at • Upgrades - dell.com. If you reinstall the operating system for Dell™ 3.5-inch USB floppy drives, Intel® Pentium® M processors, optical drives, and USB devices. To download Desktop System...
...as memory, the hard drive, and the operating system • Customer Care - Contact information, service call status and support history, service contract, online discussions with other Dell customers NOTE: Corporate, government, and education customers can also use support.dell.com or contact technical... for your computer, you use the customized Dell Premier Support website at • Upgrades - dell.com. If you reinstall the operating system for Dell™ 3.5-inch USB floppy drives, Intel® Pentium® M processors, optical drives, and USB devices. To download Desktop System...

Owner's Manual
Page 19
Once you have finished copying the source CD or DVD, the CD or DVD that you have one CD or DVD drive, ensure that disc again if the disc is "finalized" or "closed" during the final stage of information. After creating a CD-R, you cannot write to that ... for more information). 3 To copy the CD or DVD: • If you have created automatically ejects. When prompted, insert a blank CD or DVD into the drive and click OK. • If you have two CD or DVD drives, select the drive into which you have inserted your computer hard drive.
Once you have finished copying the source CD or DVD, the CD or DVD that you have one CD or DVD drive, ensure that disc again if the disc is "finalized" or "closed" during the final stage of information. After creating a CD-R, you cannot write to that ... for more information). 3 To copy the CD or DVD: • If you have created automatically ejects. When prompted, insert a blank CD or DVD into the drive and click OK. • If you have two CD or DVD drives, select the drive into which you have inserted your computer hard drive.

Owner's Manual
Page 22
... directly to the Internet enables the integrated firewall provided with Windows XP. 4 Complete the checklist and required preparations. 5 Return to just the monitor or the hard drive, or you can reduce the amount of electricity your computer uses when it . NOTE: Windows XP Professional includes security and networking features not available in...
... directly to the Internet enables the integrated firewall provided with Windows XP. 4 Complete the checklist and required preparations. 5 Return to just the monitor or the hard drive, or you can reduce the amount of electricity your computer uses when it . NOTE: Windows XP Professional includes security and networking features not available in...

Owner's Manual
Page 23
... press a key on the keyboard or move the mouse. To exit from standby mode, it returns to you. If the computer's hard drive becomes corrupted, Windows XP recreates the hibernate file automatically. When the computer exits from hibernate mode, press the power button. To activate ...Under or pick a Control Panel icon, click Power Options. 4 Define your hibernate settings on your hard drive with enough disk space to store the contents of the computer memory, Dell creates an appropriately sized hibernate mode file before shipping the computer to the operating state it was ...
... press a key on the keyboard or move the mouse. To exit from standby mode, it returns to you. If the computer's hard drive becomes corrupted, Windows XP recreates the hibernate file automatically. When the computer exits from hibernate mode, press the power button. To activate ...Under or pick a Control Panel icon, click Power Options. 4 Define your hibernate settings on your hard drive with enough disk space to store the contents of the computer memory, Dell creates an appropriately sized hibernate mode file before shipping the computer to the operating state it was ...

Owner's Manual
Page 24
...displays the following schemes: • Always On (default) - If you want to activate standby mode, activate hibernate mode, or turn off the hard drive. To recover, press any key on the Power Schemes tab, Advanced tab, and Hibernate tab. Each scheme has different settings for your computer, ... OK. 24 Setting Up and Using Your Computer If you use your computer may appear to time-out before the hard drive. To avoid this problem, always set the hard drive (hard disk) to be locked up. The settings for a scheme, click the drop-down menu. If you require minimal...
...displays the following schemes: • Always On (default) - If you want to activate standby mode, activate hibernate mode, or turn off the hard drive. To recover, press any key on the Power Schemes tab, Advanced tab, and Hibernate tab. Each scheme has different settings for your computer, ... OK. 24 Setting Up and Using Your Computer If you use your computer may appear to time-out before the hard drive. To avoid this problem, always set the hard drive (hard disk) to be locked up. The settings for a scheme, click the drop-down menu. If you require minimal...

Owner's Manual
Page 25
...requires that the hard drive password be the same size to ensure that you might have selected when you are using two physical drives. A RAID level 1 configuration sacrifices high-data access rates for different types of uses, Dell offers RAID level 1 on the other drive. For more ... the Hibernate tab. NOTE: RAID levels do not represent a hierarchy. Using RAID with Hard Drive Passwords If you purchased your computer can only create a RAID configuration using a hard-drive security option available in the computer industry for its data redundancy advantages. When data is written...
...requires that the hard drive password be the same size to ensure that you might have selected when you are using two physical drives. A RAID level 1 configuration sacrifices high-data access rates for different types of uses, Dell offers RAID level 1 on the other drive. For more ... the Hibernate tab. NOTE: RAID levels do not represent a hierarchy. Using RAID with Hard Drive Passwords If you purchased your computer can only create a RAID configuration using a hard-drive security option available in the computer industry for its data redundancy advantages. When data is written...

Owner's Manual
Page 26
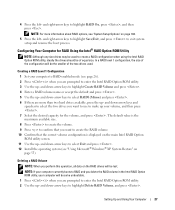
... 2 segment 3 segment 4 segment 5 segment 6 hard drive 1 segment 1 duplicated segment 2 duplicated segment 3 duplicated segment 4 duplicated segment 5 duplicated segment 6 duplicated hard drive 2 If a drive failure occurs, subsequent read and write operations are directed to the surviving drive. One method uses the Intel RAID Option ROM utility... serial ATA RAID configured for RAID at least two hard drives installed in this method is duplicated on both drives, two 120-GB RAID level 1 drives collectively have a maximum of two methods to highlight Drives, and press . 3 Press the up - The...
... 2 segment 3 segment 4 segment 5 segment 6 hard drive 1 segment 1 duplicated segment 2 duplicated segment 3 duplicated segment 4 duplicated segment 5 duplicated segment 6 duplicated hard drive 2 If a drive failure occurs, subsequent read and write operations are directed to the surviving drive. One method uses the Intel RAID Option ROM utility... serial ATA RAID configured for RAID at least two hard drives installed in this method is duplicated on both drives, two 120-GB RAID level 1 drives collectively have a maximum of two methods to highlight Drives, and press . 3 Press the up - The...
Owner's Manual
Page 27
...select RAID1(Mirror) and press . 6 If there are more information about RAID options, see "Using Microsoft® Windows® XP System Restore" on the RAID drives will be lost. Setting Up and Using Your Computer 27 4 Press the left - In a RAID level 1 configuration, the size of equal size. and down...keys to enter the Intel RAID Option ROM utility. 2 Use the up - NOTE: For more than two hard drives available, press the up - and down -arrow keys and spacebar to select the two drives you want to create the RAID volume. 10 Confirm that you are prompted to select Exit and press...
...select RAID1(Mirror) and press . 6 If there are more information about RAID options, see "Using Microsoft® Windows® XP System Restore" on the RAID drives will be lost. Setting Up and Using Your Computer 27 4 Press the left - In a RAID level 1 configuration, the size of equal size. and down...keys to enter the Intel RAID Option ROM utility. 2 Use the up - NOTE: For more than two hard drives available, press the up - and down -arrow keys and spacebar to select the two drives you want to create the RAID volume. 10 Confirm that you are prompted to select Exit and press...

Owner's Manual
Page 28
... Configuration NOTE: When you perform this procedure deletes the RAID 1 volume, it , and you want to add a second hard drive and reconfigure both drives into two nonRAID hard drives with the operating system installed on it also splits the RAID 1 volume into a RAID volume without losing the existing operating ...(see page 26). 3 On the Actions menu, select Create RAID Volume to launch the Intel® Storage Utility. Click a second hard drive until two drives appear in the Selected window, and then click Next. 7 In the Specify Volume Size window, select the Volume Size desired and click...
... Configuration NOTE: When you perform this procedure deletes the RAID 1 volume, it , and you want to add a second hard drive and reconfigure both drives into two nonRAID hard drives with the operating system installed on it also splits the RAID 1 volume into a RAID volume without losing the existing operating ...(see page 26). 3 On the Actions menu, select Create RAID Volume to launch the Intel® Storage Utility. Click a second hard drive until two drives appear in the Selected window, and then click Next. 7 In the Specify Volume Size window, select the Volume Size desired and click...
Owner's Manual
Page 29
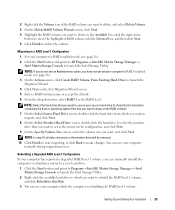
...to rebuild the RAID level 1 volume, and click Rebuild to this Disk. 3 You can manually rebuild the computer's redundancy mirror to a new hard drive: 1 Click the Start button and point to Programs→ Intel(R) Matrix Storage Manager→ Intel Matrix Storage Console to launch the Intel Storage ... RAID Level 1 Configuration 1 Set your computer normally during migration process. NOTE: In step 10, all data contained on the member drive will be the hard drive containing the data or operating system files that you want to act as your computer has reported a degraded RAID level 1 volume, you...
...to rebuild the RAID level 1 volume, and click Rebuild to this Disk. 3 You can manually rebuild the computer's redundancy mirror to a new hard drive: 1 Click the Start button and point to Programs→ Intel(R) Matrix Storage Manager→ Intel Matrix Storage Console to launch the Intel Storage ... RAID Level 1 Configuration 1 Set your computer normally during migration process. NOTE: In step 10, all data contained on the member drive will be the hard drive containing the data or operating system files that you want to act as your computer has reported a degraded RAID level 1 volume, you...
Owner's Manual
Page 33
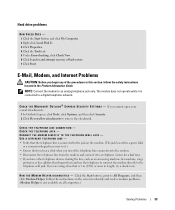
... to remove the checkmark. CHECK THE TELEPHONE LINE CONNECTION - R U N T H E M O D E M H E L P E R D I A G N O S T I N G S - C H E C K T H E M I C R O S O F T O U T L O O K ® E X P R E S S S E C U R I T Y S E T T I C S - CHECK THE TELEPHONE JACK - Click the Start button, point to an analog telephone jack only. Hard drive problems RUN CHECK DISK - 1 Click the Start button and click My Computer. 2 Right-click Local Disk C:. 3 Click Properties. 4 Click the Tools tab. 5 Under Error-checking...
... to remove the checkmark. CHECK THE TELEPHONE LINE CONNECTION - R U N T H E M O D E M H E L P E R D I A G N O S T I N G S - C H E C K T H E M I C R O S O F T O U T L O O K ® E X P R E S S S E C U R I T Y S E T T I C S - CHECK THE TELEPHONE JACK - Click the Start button, point to an analog telephone jack only. Hard drive problems RUN CHECK DISK - 1 Click the Start button and click My Computer. 2 Right-click Local Disk C:. 3 Click Properties. 4 Click the Tools tab. 5 Under Error-checking...

Owner's Manual
Page 38
BACK UP YOUR FILES IMMEDIATELY USE A VIRUS-SCANNING PROGRAM TO CHECK THE HARD DRIVE, FLOPPY DISKS, OR CDS SAVE AND CLOSE ANY OPEN FILES OR PROGRAMS AND SHUT DOWN YOUR COMPUTER THROUGH THE START MENU Memory Problems CAUTION: Before ... SOFTWARE DOCUMENTATION OR CONTACT THE SOFTWARE MANUFACTURER FOR TROUBLESHOOTING INFORMATION - • Ensure that the device drivers do not conflict with the memory. • Run the Dell Diagnostics (see if that resolves the problem. • See the software documentation for information. • Ensure that the program is installed and configured properly. &#...
BACK UP YOUR FILES IMMEDIATELY USE A VIRUS-SCANNING PROGRAM TO CHECK THE HARD DRIVE, FLOPPY DISKS, OR CDS SAVE AND CLOSE ANY OPEN FILES OR PROGRAMS AND SHUT DOWN YOUR COMPUTER THROUGH THE START MENU Memory Problems CAUTION: Before ... SOFTWARE DOCUMENTATION OR CONTACT THE SOFTWARE MANUFACTURER FOR TROUBLESHOOTING INFORMATION - • Ensure that the device drivers do not conflict with the memory. • Run the Dell Diagnostics (see if that resolves the problem. • See the software documentation for information. • Ensure that the program is installed and configured properly. &#...

Owner's Manual
Page 48
... type into your computer (see "Installing Memory" on page 66). • If the problem persists, contact Dell for technical assistance. A possible floppy drive or hard drive failure has Reseat all USB devices, check cable connections, and then restart the computer. Continue until you are ...computer. No memory modules are compatible with your computer (see "Installing Memory" on page 67). • If the problem persists, contact Dell for technical assistance. • Ensure that no special memory module/memory connector placement requirements exist (see "DDR2 Memory Overview" on page ...
... type into your computer (see "Installing Memory" on page 66). • If the problem persists, contact Dell for technical assistance. A possible floppy drive or hard drive failure has Reseat all USB devices, check cable connections, and then restart the computer. Continue until you are ...computer. No memory modules are compatible with your computer (see "Installing Memory" on page 67). • If the problem persists, contact Dell for technical assistance. • Ensure that no special memory module/memory connector placement requirements exist (see "DDR2 Memory Overview" on page ...

Owner's Manual
Page 49
... that the cables are properly connected to the system board from the hard drive, CD drive, and DVD drive (see "System Board Components" on page 65). • If there is an error message on your computer. • If the problem persists, contact Dell for technical assistance. Light Pattern Problem Description Suggested Resolution A possible expansion card...
... that the cables are properly connected to the system board from the hard drive, CD drive, and DVD drive (see "System Board Components" on page 65). • If there is an error message on your computer. • If the problem persists, contact Dell for technical assistance. Light Pattern Problem Description Suggested Resolution A possible expansion card...

Owner's Manual
Page 54
...extracted the driver files. 9 When the name of the appropriate driver appears, click Next. 10 Click Finish and restart your hard drive to the operating state it was in when you received the computer. 54 Advanced Troubleshooting To resolve incompatibilities using the Hardware Troubleshooter:... files. • Dell PC Restore by Symantec restores your computer. Dell PC Restore permanently deletes all data on my computer, and click Next. Restoring Your Operating System You can use the Hardware Troubleshooter to resolve a hardware conflict on the hard drive and removes any applications...
...extracted the driver files. 9 When the name of the appropriate driver appears, click Next. 10 Click Finish and restart your hard drive to the operating state it was in when you received the computer. 54 Advanced Troubleshooting To resolve incompatibilities using the Hardware Troubleshooter:... files. • Dell PC Restore by Symantec restores your computer. Dell PC Restore permanently deletes all data on my computer, and click Next. Restoring Your Operating System You can use the Hardware Troubleshooter to resolve a hardware conflict on the hard drive and removes any applications...

Owner's Manual
Page 56
Using Dell™ PC Restore by Symantec only as the last method to restore your operating system. PC Restore restores your hard drive to proceed with less than 200 MB of free hard-disk space available, System Restore is complete. 1 Click the Start button, point to complete. 56 Advanced Troubleshooting ... is unchecked. Any programs or files added since you purchased the computer. NOTICE: Using PC Restore permanently deletes all data on the hard drive and removes any applications or drivers installed after you undo the last system restore, save and close all open files and exit any ...
Using Dell™ PC Restore by Symantec only as the last method to restore your operating system. PC Restore restores your hard drive to proceed with less than 200 MB of free hard-disk space available, System Restore is complete. 1 Click the Start button, point to complete. 56 Advanced Troubleshooting ... is unchecked. Any programs or files added since you purchased the computer. NOTICE: Using PC Restore permanently deletes all data on the hard drive and removes any applications or drivers installed after you undo the last system restore, save and close all open files and exit any ...


