Owner's Manual
Page 4
Hyper-Threading 26 Turning Off Your Computer 27 2 Solving Problems Finding Solutions 30 Finding Help Information 32 Battery Problems 32 Drive Problems 33 Floppy drive problems 33 CD drive ...
Hyper-Threading 26 Turning Off Your Computer 27 2 Solving Problems Finding Solutions 30 Finding Help Information 32 Battery Problems 32 Drive Problems 33 Floppy drive problems 33 CD drive ...
Owner's Manual
Page 9
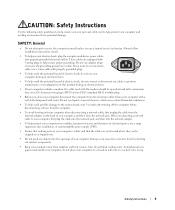
... potential damage. These cables are a trained service technician. Also, do not place your computer. When reconnecting a network cable to the system board, wait 5 seconds after turning off the computer before disconnecting a device from the computer. • To avoid shorting out your computer, disconnect the computer from the network jack. Clean your...
... potential damage. These cables are a trained service technician. Also, do not place your computer. When reconnecting a network cable to the system board, wait 5 seconds after turning off the computer before disconnecting a device from the computer. • To avoid shorting out your computer, disconnect the computer from the network jack. Clean your...
Owner's Manual
Page 10
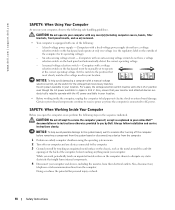
...manual voltage selection switch, set to the computer. 3 Ground yourself by Dell. Also, disconnect any telephone or telecommunication lines from the computer. 1 Perform an orderly computer shutdown using the operating system menu. 2 Turn off your location. Set the switch to the position that most closely... matches the voltage used in your online Dell™ documentation or in the sequence indicated. NOTICE: To help avoid ...
...manual voltage selection switch, set to the computer. 3 Ground yourself by Dell. Also, disconnect any telephone or telecommunication lines from the computer. 1 Perform an orderly computer shutdown using the operating system menu. 2 Turn off your location. Set the switch to the position that most closely... matches the voltage used in your online Dell™ documentation or in the sequence indicated. NOTICE: To help avoid ...

Owner's Manual
Page 17
SECTION 1 Setting Up and Using Your Computer Setting Up a Printer Transferring Information to a New Computer Setting Up a Home and Office Network Connecting to the Internet Copying CDs and DVDs Hyper-Threading Turning Off Your Computer
SECTION 1 Setting Up and Using Your Computer Setting Up a Printer Transferring Information to a New Computer Setting Up a Home and Office Network Connecting to the Internet Copying CDs and DVDs Hyper-Threading Turning Off Your Computer
Owner's Manual
Page 18
If you purchased a printer cable at the same time you purchased your computer with either a USB cable or a parallel cable. www.dell.com | support.dell.com Setting Up a Printer NOTICE: Complete the operating system setup before you connect a printer to the computer. • Load paper and...Printer Cable Your printer connects to your computer, the cable may not come with a printer cable, so if you have not already done so. 2 Turn off the computer (see page 27). Connecting a Parallel Printer 1 Complete the operating system setup, if you purchase a cable separately, ensure that came ...
If you purchased a printer cable at the same time you purchased your computer with either a USB cable or a parallel cable. www.dell.com | support.dell.com Setting Up a Printer NOTICE: Complete the operating system setup before you connect a printer to the computer. • Load paper and...Printer Cable Your printer connects to your computer, the cable may not come with a printer cable, so if you have not already done so. 2 Turn off the computer (see page 27). Connecting a Parallel Printer 1 Complete the operating system setup, if you purchase a cable separately, ensure that came ...
Owner's Manual
Page 19
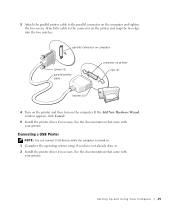
parallel connector on computer screws (2) parallel printer cable connector on printer clips (2) notches (2) 4 Turn on the printer and then turn on the computer and tighten the two screws. See the documentation that came with your printer. If the Add New Hardware Wizard window appears, click ... Computer 19 Attach the cable to the parallel connector on the computer. Connecting a USB Printer NOTE: You can connect USB devices while the computer is turned on the printer and snap the two clips into the two notches.
parallel connector on computer screws (2) parallel printer cable connector on printer clips (2) notches (2) 4 Turn on the printer and then turn on the computer and tighten the two screws. See the documentation that came with your printer. If the Add New Hardware Wizard window appears, click ... Computer 19 Attach the cable to the parallel connector on the computer. Connecting a USB Printer NOTE: You can connect USB devices while the computer is turned on the printer and snap the two clips into the two notches.

Owner's Manual
Page 27
... the system setup program, see page 107. Turning Off Your Computer NOTICE: To avoid losing data, turn off your computer is listed twice. Setting Up and Using Your Computer 27 For more information on the Dell Support website at support.dell.com. You can enable or disable Hyper-Threading...power button. 1 Save and close any open files, exit any open programs, click the Start button, and then click Turn Off Computer. 2 In the Turn off computer window, click Turn off. If Hyper-Threading is enabled, the processor is using Hyper-Threading technology: 1 Click the Start button, right-...
... the system setup program, see page 107. Turning Off Your Computer NOTICE: To avoid losing data, turn off your computer is listed twice. Setting Up and Using Your Computer 27 For more information on the Dell Support website at support.dell.com. You can enable or disable Hyper-Threading...power button. 1 Save and close any open files, exit any open programs, click the Start button, and then click Turn Off Computer. 2 In the Turn off computer window, click Turn off. If Hyper-Threading is enabled, the processor is using Hyper-Threading technology: 1 Click the Start button, right-...
Owner's Manual
Page 32
... procedures in this section, follow the safety instructions on page 9. If you begin any of a new battery exploding if it is incorrectly installed. www.dell.com | support.dell.com Finding Help Information TO A C C E S S T H E TE L L M E H O W H E L P F I N D O W S H E L P - 1 Click the ... - CAUTION: Before you have to the manufacturer's instructions. See page 13. Discard used batteries according to repeatedly reset time and date information after turning on the computer, or if an incorrect time or date displays during start-up, replace the battery (see page 113). 32 Solving Pr oblems ...
... procedures in this section, follow the safety instructions on page 9. If you begin any of a new battery exploding if it is incorrectly installed. www.dell.com | support.dell.com Finding Help Information TO A C C E S S T H E TE L L M E H O W H E L P F I N D O W S H E L P - 1 Click the ... - CAUTION: Before you have to the manufacturer's instructions. See page 13. Discard used batteries according to repeatedly reset time and date information after turning on the computer, or if an incorrect time or date displays during start-up, replace the battery (see page 113). 32 Solving Pr oblems ...
Owner's Manual
Page 34
www.dell.com | support.dell.com CD drive problems NOTE: High-speed CD drive vibration is normal and may cause noise, which does not indicate a defect in Windows Help. C H E C K T H E S P E A K E R S A N D S U B W O O F E R - E N S U R E T H A T W I N D O W S R E C O G N I Z E S T H E D R I N G T O A C D ...checked. Problems writing to the CD-RW. The CD-RW drive must receive a steady stream of your screen. • Ensure that the volume is turned up by clicking the slidebar and dragging it up. • Ensure that the original CD is interrupted, an error occurs. Insert another CD to ...
www.dell.com | support.dell.com CD drive problems NOTE: High-speed CD drive vibration is normal and may cause noise, which does not indicate a defect in Windows Help. C H E C K T H E S P E A K E R S A N D S U B W O O F E R - E N S U R E T H A T W I N D O W S R E C O G N I Z E S T H E D R I N G T O A C D ...checked. Problems writing to the CD-RW. The CD-RW drive must receive a steady stream of your screen. • Ensure that the volume is turned up by clicking the slidebar and dragging it up. • Ensure that the original CD is interrupted, an error occurs. Insert another CD to ...
Owner's Manual
Page 38
... TU R N T H E C O M P U T E R O F F - A program stops responding END THE PROGRAM - 1 Press simultaneously. 2 Click Applications. 3 Click the program that you want to perform an operating system shutdown. www.dell.com | support.dell.com NOT ENOUGH MEMORY OR RESOURCES. T H E F I L E B E I N G C O P I E D I S T O O L A R G E F O R T H E D E S T I N A T I O N D R I S N O T R E A D Y - T H E D E V I C E I V... power button for at least 8 to fit on the computer. Try copying the file to turn on the disk. Insert a floppy disk into the drive and try again. CLOSE SOME PROGRAMS...
... TU R N T H E C O M P U T E R O F F - A program stops responding END THE PROGRAM - 1 Press simultaneously. 2 Click Applications. 3 Click the program that you want to perform an operating system shutdown. www.dell.com | support.dell.com NOT ENOUGH MEMORY OR RESOURCES. T H E F I L E B E I N G C O P I E D I S T O O L A R G E F O R T H E D E S T I N A T I O N D R I S N O T R E A D Y - T H E D E V I C E I V... power button for at least 8 to fit on the computer. Try copying the file to turn on the disk. Insert a floppy disk into the drive and try again. CLOSE SOME PROGRAMS...

Owner's Manual
Page 39
... button, point to ensure that the values or characters you are entering are valid. Press the power button again to 10 seconds until the computer turns off. If your computer has a CD-RW drive or a zip drive installed, see the drive's documentation for an earlier Microsoft® Windows® operating system...
... button, point to ensure that the values or characters you are entering are valid. Press the power button again to 10 seconds until the computer turns off. If your computer has a CD-RW drive or a zip drive installed, see the drive's documentation for an earlier Microsoft® Windows® operating system...
Owner's Manual
Page 42
CHECK THE KEYBOARD CABLE - • Ensure that the keyboard cable is firmly connected to highlight Shut down or Turn Off, and then press . 3 After the computer turns off . Press the power button again to the computer. C H E C K F O R I N T E R R U P T R E Q U E S T C O N F L I C T S - If the new ... T H E K E Y B O A R D - Connect a properly working keyboard to restart the computer. 42 Solving Pr oblems www.dell.com | support.dell.com Keyboard Problems RESTART THE COMPUTER - • If the mouse is functioning, shut down the computer through the Start menu (see page 27), ...
CHECK THE KEYBOARD CABLE - • Ensure that the keyboard cable is firmly connected to highlight Shut down or Turn Off, and then press . 3 After the computer turns off . Press the power button again to the computer. C H E C K F O R I N T E R R U P T R E Q U E S T C O N F L I C T S - If the new ... T H E K E Y B O A R D - Connect a properly working keyboard to restart the computer. 42 Solving Pr oblems www.dell.com | support.dell.com Keyboard Problems RESTART THE COMPUTER - • If the mouse is functioning, shut down the computer through the Start menu (see page 27), ...
Owner's Manual
Page 43
...cables. TE S T T H E M O U S E - See page 62. See page 65. If the mouse is connected after the power is turned on your computer. 4 Start the computer. CHECK THE MOUSE SETTINGS - 1 Click the Start button, click Control Panel, and then click Printers and Other Hardware.... that the cable is on, remove the power cable from the back of the computer. 2 Connect the mouse to the computer. 3 Reconnect the power cable. 4 Turn on , the mouse appears to be nonfunctional. If the new mouse works, the original mouse was faulty. C H E C K F O R I N T E R R U P T R E Q U E S T C O N F L I V E...
...cables. TE S T T H E M O U S E - See page 62. See page 65. If the mouse is connected after the power is turned on your computer. 4 Start the computer. CHECK THE MOUSE SETTINGS - 1 Click the Start button, click Control Panel, and then click Printers and Other Hardware.... that the cable is on, remove the power cable from the back of the computer. 2 Connect the mouse to the computer. 3 Reconnect the power cable. 4 Turn on , the mouse appears to be nonfunctional. If the new mouse works, the original mouse was faulty. C H E C K F O R I N T E R R U P T R E Q U E S T C O N F L I V E...

Owner's Manual
Page 45
... power strips, and power extension cables to verify that the computer turns on the keyboard or move the mouse to the system board (see page 81). • If the problem persists, contact Dell (see page 113). The computer is receiving electrical power, but ... might exist. • Ensure that the microprocessor power cable is securely connected to the system board (see page 81). • If the problem persists, contact Dell (see page 81). • Ensure that the microprocessor power cable is securely connected to resume normal operation. I F T H E P O W E R L I G H T I N G G R E E N...
... power strips, and power extension cables to verify that the computer turns on the keyboard or move the mouse to the system board (see page 81). • If the problem persists, contact Dell (see page 113). The computer is receiving electrical power, but ... might exist. • Ensure that the microprocessor power cable is securely connected to the system board (see page 81). • If the problem persists, contact Dell (see page 81). • Ensure that the microprocessor power cable is securely connected to resume normal operation. I F T H E P O W E R L I G H T I N G G R E E N...
Owner's Manual
Page 47
... fax printers. RE I N S T A L L T H E P R I N T E R D R I O N - See the scanner documentation for instructions. U N L O C K T H E S C A N N E R - For a parallel printer, ensure that the Print to a working electrical outlet and that the scanner is turned on. • Ensure that your scanner has a power cable, ensure that the power cable is firmly connected to the following port(s): setting is listed, right...
... fax printers. RE I N S T A L L T H E P R I N T E R D R I O N - See the scanner documentation for instructions. U N L O C K T H E S C A N N E R - For a parallel printer, ensure that the Print to a working electrical outlet and that the scanner is turned on. • Ensure that your scanner has a power cable, ensure that the power cable is firmly connected to the following port(s): setting is listed, right...
Owner's Manual
Page 48
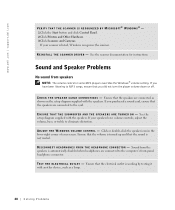
..., bass, or treble to the computer's front-panel headphone connector. RE I N S T A L L T H E S C A N N E R D R I V E R - Ensure that the volume is turned up and that the speakers are connected to eliminate distortion. See the scanner documentation for instructions. Sound and Speaker Problems No sound from the speakers...testing it with the speakers. Sound from speakers NOTE: The volume control in the lower-right corner of your screen. www.dell.com | support.dell.com VERIFY THAT THE SCANNER IS RECOGNIZED BY MICROSOFT® WINDOWS® - 1 Click the Start button and click Control ...
..., bass, or treble to the computer's front-panel headphone connector. RE I N S T A L L T H E S C A N N E R D R I V E R - Ensure that the volume is turned up and that the speakers are connected to eliminate distortion. See the scanner documentation for instructions. Sound and Speaker Problems No sound from the speakers...testing it with the speakers. Sound from speakers NOTE: The volume control in the lower-right corner of your screen. www.dell.com | support.dell.com VERIFY THAT THE SCANNER IS RECOGNIZED BY MICROSOFT® WINDOWS® - 1 Click the Start button and click Control ...
Owner's Manual
Page 49
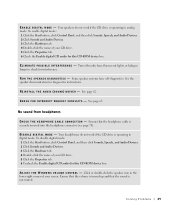
... work if the CD drive is operating in the lower-right corner of your screen. E L I M I N A T E P O S S I B L E I T A L M O D E - Ensure that the volume is turned up and that the headphone cable is not muted. Turn off nearby fans, fluorescent lights, or halogen lamps to check for diagnostics instructions. See the speaker documentation for interference. Solving Problems...
... work if the CD drive is operating in the lower-right corner of your screen. E L I M I N A T E P O S S I B L E I T A L M O D E - Ensure that the volume is turned up and that the headphone cable is not muted. Turn off nearby fans, fluorescent lights, or halogen lamps to check for diagnostics instructions. See the speaker documentation for interference. Solving Problems...

Owner's Manual
Page 50
... has power. If the power light is off, firmly press the button to the computer. If the power light is defective. C H E C K T H E M O N I T O R C A B L E C O N N E C T I T O R - www.dell.com | support.dell.com Video and Monitor Problems If the screen is blank NOTE: See the monitor documentation for instructions on adjusting the contrast and brightness, demagnetizing...broken pins. (It is normal for your speaker system includes a subwoofer, ensure that the monitor is available, connect it with another monitor is turned on. TE S T A N O T H E R M O N I G H T S -
... has power. If the power light is off, firmly press the button to the computer. If the power light is defective. C H E C K T H E M O N I T O R C A B L E C O N N E C T I T O R - www.dell.com | support.dell.com Video and Monitor Problems If the screen is blank NOTE: See the monitor documentation for instructions on adjusting the contrast and brightness, demagnetizing...broken pins. (It is normal for your speaker system includes a subwoofer, ensure that the monitor is available, connect it with another monitor is turned on. TE S T A N O T H E R M O N I G H T S -

Owner's Manual
Page 51
... help files, see page 32. M O V E T H E M O N I N G S - To access help file for interference. Fans, fluorescent lights, halogen lamps, and other electrical devices can cause poor picture quality. Turn off nearby devices to appear "shaky." Eliminate sunlight glare, which can cause the screen image to check for instructions. ADJUST THE WINDOWS® DISPLAY SETTINGS...
... help files, see page 32. M O V E T H E M O N I N G S - To access help file for interference. Fans, fluorescent lights, halogen lamps, and other electrical devices can cause poor picture quality. Turn off nearby devices to appear "shaky." Eliminate sunlight glare, which can cause the screen image to check for instructions. ADJUST THE WINDOWS® DISPLAY SETTINGS...
Owner's Manual
Page 65
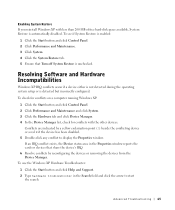
... XP Hardware Troubleshooter: 1 Click the Start button and click Help and Support. 2 Type hardware troubleshooter in the Properties window reports the cards or devices that Turn off System Restore is detected but incorrectly configured. To check for conflicts on a computer running Windows XP: 1 Click the Start button and click Control Panel...
... XP Hardware Troubleshooter: 1 Click the Start button and click Help and Support. 2 Type hardware troubleshooter in the Properties window reports the cards or devices that Turn off System Restore is detected but incorrectly configured. To check for conflicts on a computer running Windows XP: 1 Click the Start button and click Control Panel...

