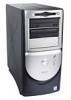

Dell Dimension 8100 Solutions Guide
Page 8
...instructions closely. 1 Turn off your computer, and then press the power button to ground the system board. Discard used batteries according to service the computer yourself, except as explained in this guide and elsewhere in Dell documentation. do not block cooling vents. Also, before touching anything...Hold a card by its edges or by shorting out interior components. • Keep your computer away from the computer. 4 Disconnect the power cable to your computer and all devices. 2 Ground yourself by the manufacturer. Replace the battery only with care. Doing so can cause ...
...instructions closely. 1 Turn off your computer, and then press the power button to ground the system board. Discard used batteries according to service the computer yourself, except as explained in this guide and elsewhere in Dell documentation. do not block cooling vents. Also, before touching anything...Hold a card by its edges or by shorting out interior components. • Keep your computer away from the computer. 4 Disconnect the power cable to your computer and all devices. 2 Ground yourself by the manufacturer. Replace the battery only with care. Doing so can cause ...

Dell Dimension 8100 Solutions Guide
Page 14
... then click Shut Down. 3 Click the pull-down menu under What do you have open. 2 Click the Start button, and then click Shut Down. 3 In the Shut Down Windows window, click Shut down and then click OK. Windows 98 Second Edition (SE) and Windows ... the system setup program (see page 64) and ensure that the parallel port is set to power. Windows 2000 1 Save and exit any other devices connected to operate in bidirectional mode. www.dell.com | support.dell.com If you connect an older printer and it doesn't work after you must perform the Microsoft...
... then click Shut Down. 3 Click the pull-down menu under What do you have open. 2 Click the Start button, and then click Shut Down. 3 In the Shut Down Windows window, click Shut down and then click OK. Windows 98 Second Edition (SE) and Windows ... the system setup program (see page 64) and ensure that the parallel port is set to power. Windows 2000 1 Save and exit any other devices connected to operate in bidirectional mode. www.dell.com | support.dell.com If you connect an older printer and it doesn't work after you must perform the Microsoft...

Dell Dimension 8100 Solutions Guide
Page 18
... instructions shown on the screen. Be sure that the electrical outlet is lit or blinking, the computer has power. www.dell.com | support.dell.com A C C E S S T H E TE L L M E H O W H E L P F I G H T - ACCESS MICROSOFT® WINDOWS® 2000 HELP 1 Click the Start button and then click Help. 2 Click the Search tab. 3 Type a word or phrase that describes your problem and...
... instructions shown on the screen. Be sure that the electrical outlet is lit or blinking, the computer has power. www.dell.com | support.dell.com A C C E S S T H E TE L L M E H O W H E L P F I G H T - ACCESS MICROSOFT® WINDOWS® 2000 HELP 1 Click the Start button and then click Help. 2 Click the Search tab. 3 Type a word or phrase that describes your problem and...
Dell Dimension 8100 Solutions Guide
Page 19
...electrical outlet. Swap the computer and monitor power cables to a nonbootable floppy disk or CD. Other causes of interference: power extension cables, keyboard and mouse extension cables, too many devices on a power strip, or multiple power strips connected to verify that the computer turns...access Windows Help: 1 Click the Start button and then click Help. 2 For Windows 98 and Windows 2000, click the Search tab. 3 For Windows 98 and Windows 2000, type standby and then click List Topics. S Y S T E M D I N T E R F E R E N C E - Call Dell for technical assistance (see page 68). ...
...electrical outlet. Swap the computer and monitor power cables to a nonbootable floppy disk or CD. Other causes of interference: power extension cables, keyboard and mouse extension cables, too many devices on a power strip, or multiple power strips connected to verify that the computer turns...access Windows Help: 1 Click the Start button and then click Help. 2 For Windows 98 and Windows 2000, click the Search tab. 3 For Windows 98 and Windows 2000, type standby and then click List Topics. S Y S T E M D I N T E R F E R E N C E - Call Dell for technical assistance (see page 68). ...
Dell Dimension 8100 Solutions Guide
Page 20
... HINT: See the monitor documentation for technical assistance (see page 68). If all four lights below the serial port are not green, call Dell for fault indications and troubleshooting procedures specific to the computer. See Windows Help. TE S T T H E E L E C T R I F U S E D ) - TE S T T H E V I D E O EX T E N S I O N ...another device, such as a lamp. Ensure that you firmly pressed the monitor power button. C H E C K T H E P O W E R L I T O R P O W E R B U T T O N - If the power light is defective. For Windows Me, click Changing the elapsed time before your...
... HINT: See the monitor documentation for technical assistance (see page 68). If all four lights below the serial port are not green, call Dell for fault indications and troubleshooting procedures specific to the computer. See Windows Help. TE S T T H E E L E C T R I F U S E D ) - TE S T T H E V I D E O EX T E N S I O N ...another device, such as a lamp. Ensure that you firmly pressed the monitor power button. C H E C K T H E P O W E R L I T O R P O W E R B U T T O N - If the power light is defective. For Windows Me, click Changing the elapsed time before your...

Dell Dimension 8100 Solutions Guide
Page 24
... dial tone. Disconnect the telephone line from the modem and connect it has a locking tab or button. C O N N E C T T H E M O D E M D I O N - C H E C K T H E P O W E R C A B L E C O N N E C T I V E R - Ensure that the scanner power cable is firmly connected to a working electrical power source and that the scanner cable is turned on the modem. (The green line-in jack has ... the modem. Verify that your scanner is connected to a telephone. Reinstall the scanner driver. See page 13. www.dell.com | support.dell.com RE I N S T A L L T H E P R I N T E R D R I O N -
... dial tone. Disconnect the telephone line from the modem and connect it has a locking tab or button. C O N N E C T T H E M O D E M D I O N - C H E C K T H E P O W E R C A B L E C O N N E C T I V E R - Ensure that the scanner power cable is firmly connected to a working electrical power source and that the scanner cable is turned on the modem. (The green line-in jack has ... the modem. Verify that your scanner is connected to a telephone. Reinstall the scanner driver. See page 13. www.dell.com | support.dell.com RE I N S T A L L T H E P R I N T E R D R I O N -

Dell Dimension 8100 Solutions Guide
Page 25
If you power on the computer, the mouse will not work. Click the Start button, select Control Panel, and then double-click the Mouse icon. VERIFY THAT THE MODEM IS COMMUNICATING WITH WINDOWS 1 Click the Start button, point to Settings, and click Control Panel. 2 In the Control Panel, double-click ...CABLE 1 Press to display the Start menu. 2 Use the keyboard arrow keys to restore mouse functionality: 1 With the computer on, remove the power cable from the back of the computer. 2 Reconnect the mouse as shown on the computer. If you connect the mouse after you are not installed...
If you power on the computer, the mouse will not work. Click the Start button, select Control Panel, and then double-click the Mouse icon. VERIFY THAT THE MODEM IS COMMUNICATING WITH WINDOWS 1 Click the Start button, point to Settings, and click Control Panel. 2 In the Control Panel, double-click ...CABLE 1 Press to display the Start menu. 2 Use the keyboard arrow keys to restore mouse functionality: 1 With the computer on, remove the power cable from the back of the computer. 2 Reconnect the mouse as shown on the computer. If you connect the mouse after you are not installed...

Dell Dimension 8100 Solutions Guide
Page 30
www.dell.com | support.dell.com A program crashes S E E T H E S O F T W A R E D O C U M E N T A T I E W " M O D E M P R O B L E M S " - See page 24. 30 Solving Pr oblems In the Close Program window, ... V I O N - Many software manufacturers maintain websites with information that is no longer responding. Then click the End Task button. The solid blue screen appears because you to a keystroke or a proper shutdown (see page 14), press the power button until the computer turns off. Follow the instructions on the screen. A program stops responding P R E S S < C T R L > < A L...
www.dell.com | support.dell.com A program crashes S E E T H E S O F T W A R E D O C U M E N T A T I E W " M O D E M P R O B L E M S " - See page 24. 30 Solving Pr oblems In the Close Program window, ... V I O N - Many software manufacturers maintain websites with information that is no longer responding. Then click the End Task button. The solid blue screen appears because you to a keystroke or a proper shutdown (see page 14), press the power button until the computer turns off. Follow the instructions on the screen. A program stops responding P R E S S < C T R L > < A L...

Dell Dimension 8100 Solutions Guide
Page 40
..., and disconnect them from their electrical outlets. 2 If a padlock is installed, remove it from the back of the computer, and then press the power button before you begin any of the procedures in this section, follow the safety instructions on the back panel. 3 Face the back of the computer and... slide the outer padlock ring to the left to unlock the cover release mechanism. To avoid damaging the system board, disconnect the power cable from the electrical outlet and from the padlock ring on page 7. NOTICE: The system board continues to receive a small amount of computer...
..., and disconnect them from their electrical outlets. 2 If a padlock is installed, remove it from the back of the computer, and then press the power button before you begin any of the procedures in this section, follow the safety instructions on the back panel. 3 Face the back of the computer and... slide the outer padlock ring to the left to unlock the cover release mechanism. To avoid damaging the system board, disconnect the power cable from the electrical outlet and from the padlock ring on page 7. NOTICE: The system board continues to receive a small amount of computer...

Dell Dimension 8100 Solutions Guide
Page 42
www.dell.com | support.dell.com power supply (page 44) front-panel release button (page 45) drive cage (page 52) hard drive bracket (page 52) drive cable (page 52) 42 Adding Parts
www.dell.com | support.dell.com power supply (page 44) front-panel release button (page 45) drive cage (page 52) hard drive bracket (page 52) drive cable (page 52) 42 Adding Parts

Dell Dimension 8100 Solutions Guide
Page 44
... tab Press and release the power button to rotate the system power supply out of the way: 1 Turn off the computer and devices, disconnect them from the securing tab by pressing the release tab. To access some of the components on page 7. www.dell.com | support.dell.com CAUTION: Before you may... need to drain the power from the computer, and then remove the computer cover (see page 40). 2 Make sure that the...
... tab Press and release the power button to rotate the system power supply out of the way: 1 Turn off the computer and devices, disconnect them from the securing tab by pressing the release tab. To access some of the components on page 7. www.dell.com | support.dell.com CAUTION: Before you may... need to drain the power from the computer, and then remove the computer cover (see page 40). 2 Make sure that the...

Dell Dimension 8100 Solutions Guide
Page 45
With the cover removed, release the front panel by pressing the green front-panel release button. 4 Press and release the power button to its original position until the release tab snaps into the securing tab. To remove the front panel, you begin any of the panel ...outward, away from the computer. Lift the panel away from the computer. When you have finished accessing components on page 7. front-panel release button retaining...
With the cover removed, release the front panel by pressing the green front-panel release button. 4 Press and release the power button to its original position until the release tab snaps into the securing tab. To remove the front panel, you begin any of the panel ...outward, away from the computer. Lift the panel away from the computer. When you have finished accessing components on page 7. front-panel release button retaining...

Dell Dimension 8100 Solutions Guide
Page 47
Save the screw to unplug your computer. 3 Remove the screw that the standby power LED on the system board. filler bracket CAUTION: Some network cards automatically start up the computer when they are connected. Insert the card firmly into ... the card connector. If the card is off the computer and devices, disconnect them from its connector on the system board. Press and release the power button to the computer, and remove the bracket from the computer, and then remove the computer cover (see page 43) is full-length, insert the card...
Save the screw to unplug your computer. 3 Remove the screw that the standby power LED on the system board. filler bracket CAUTION: Some network cards automatically start up the computer when they are connected. Insert the card firmly into ... the card connector. If the card is off the computer and devices, disconnect them from its connector on the system board. Press and release the power button to the computer, and remove the bracket from the computer, and then remove the computer cover (see page 43) is full-length, insert the card...

Dell Dimension 8100 Solutions Guide
Page 49
...instructions on page 7. 1 Turn off the computer and devices, disconnect them from their electrical outlets, and press and release the power button to drain the power from the computer. Adding Parts 49 CAUTION: Before you begin any of the procedures in this section, follow the safety instructions ...on page 7. 1 Turn off the computer and devices, disconnect them from their electrical outlets, and press and release the power button to drain the power from the computer. Wait at least 5 seconds, and then remove the computer cover (see page 64), select Integrated Devices,...
...instructions on page 7. 1 Turn off the computer and devices, disconnect them from their electrical outlets, and press and release the power button to drain the power from the computer. Adding Parts 49 CAUTION: Before you begin any of the procedures in this section, follow the safety instructions ...on page 7. 1 Turn off the computer and devices, disconnect them from their electrical outlets, and press and release the power button to drain the power from the computer. Wait at least 5 seconds, and then remove the computer cover (see page 64), select Integrated Devices,...
Dell Dimension 8100 Solutions Guide
Page 62
... video card (see manufacturer's specifications) NIC* NIC RJ45 connector Controls and Lights E-Support push button Power control push button Power lights green LED; blinking green in network capabilities. 62 Appendix orange LED for 10-Mb operation; www.dell.com | support.dell.com Ports and Connectors (continued) Secondary EIDE hard drive 40-pin connector on front panel...
... video card (see manufacturer's specifications) NIC* NIC RJ45 connector Controls and Lights E-Support push button Power control push button Power lights green LED; blinking green in network capabilities. 62 Appendix orange LED for 10-Mb operation; www.dell.com | support.dell.com Ports and Connectors (continued) Secondary EIDE hard drive 40-pin connector on front panel...

