User's Guide
Page 44
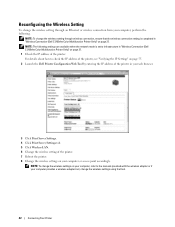
... your computer, perform the following settings are available when the network mode is completed in "Wireless Connection (Dell C1765nfw Color Multifunction Printer Only)" on page 37. 1 Check the IP address of the printer. 7 Reboot the printer. 8 Change the wireless settings on page 37. NOTE: To change the wireless settings using that the wireless connection setting is...
... your computer, perform the following settings are available when the network mode is completed in "Wireless Connection (Dell C1765nfw Color Multifunction Printer Only)" on page 37. 1 Check the IP address of the printer. 7 Reboot the printer. 8 Change the wireless settings on page 37. NOTE: To change the wireless settings using that the wireless connection setting is...
User's Guide
Page 55
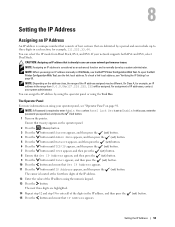
...Press the button. The next three digits are delimited by a system administrator. CAUTION: Assigning an IP address that Ready appears on the printer. To check a link local address, see "Operator Panel" on using the Tool Box. You can cause network performance issues. Ensure that is already ... the button until IP Address appears, and then press the (set) button. For assignment of the digits in IPv6 Mode, use the Dell™ Printer Configuration Web Tool. If your system administrator. Setting the IP Address 53 NOTE: When you specified, and press the (Set) button. ...
...Press the button. The next three digits are delimited by a system administrator. CAUTION: Assigning an IP address that Ready appears on the printer. To check a link local address, see "Operator Panel" on using the Tool Box. You can cause network performance issues. Ensure that is already ... the button until IP Address appears, and then press the (set) button. For assignment of the digits in IPv6 Mode, use the Dell™ Printer Configuration Web Tool. If your system administrator. Setting the IP Address 53 NOTE: When you specified, and press the (Set) button. ...

User's Guide
Page 57
Check the IP address displayed on the network, you specified, and press the (Set) button. To assign one for example, 192.168.0.11): ping 192.168.0.11 If the printer is set ) button. In this case, enter the password you will receive a reply. The System Settings Report 1 Print the system settings report...., and then press the (set) button. 6 Press the button until IPv4 appears, and then press the (set to Enable. The Ping Command Ping the printer and verify that it responds. For details about how to enter Admin Menu when Panel Lock Set is active on the operator panel. If the...
Check the IP address displayed on the network, you specified, and press the (Set) button. To assign one for example, 192.168.0.11): ping 192.168.0.11 If the printer is set ) button. In this case, enter the password you will receive a reply. The System Settings Report 1 Print the system settings report...., and then press the (set) button. 6 Press the button until IPv4 appears, and then press the (set to Enable. The Ping Command Ping the printer and verify that it responds. For details about how to enter Admin Menu when Panel Lock Set is active on the operator panel. If the...
User's Guide
Page 67
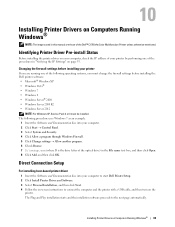
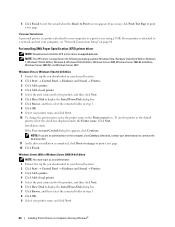
...procedure uses Windows 7 as an example. 1 Insert the Software and Documentation disc into your printer by performing one of the Dell™ C1765nfw Color Multifunction Printer unless otherwise mentioned. The Plug and Play installation starts and the installation software proceeds to connect ...Control Panel. 3 Select System and Security. 4 Click Allow a program through Windows Firewall. 5 Click Change settings → Allow another program. 6 Check Browse. 7 D:\setup.exe (where D is the drive letter of the optical drive) in "Verifying the IP Settings" on Computers Running Windows®...
...procedure uses Windows 7 as an example. 1 Insert the Software and Documentation disc into your printer by performing one of the Dell™ C1765nfw Color Multifunction Printer unless otherwise mentioned. The Plug and Play installation starts and the installation software proceeds to connect ...Control Panel. 3 Select System and Security. 4 Click Allow a program through Windows Firewall. 5 Click Change settings → Allow another program. 6 Check Browse. 7 D:\setup.exe (where D is the drive letter of the optical drive) in "Verifying the IP Settings" on Computers Running Windows®...
User's Guide
Page 68
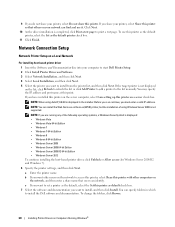
.... Windows Server 2008 or Windows Server 2008 64-bit Edition NOTE: You must log in as the default printer, select the check box displayed under the Printer name. Personal Installation A personal printer is attached to a network and not your administrator to print a test page. 12 Click Finish. otherwise,...64-bit Edition, Windows Server 2008 R2, and Windows Server 2012. For installing XML Paper Specification (XPS) printer driver NOTE: Download and install the XPS printer driver at support.dell.com. NOTE: The XPS driver is completed, click Print a test page to continue the desired action. ...
.... Windows Server 2008 or Windows Server 2008 64-bit Edition NOTE: You must log in as the default printer, select the check box displayed under the Printer name. Personal Installation A personal printer is attached to a network and not your administrator to print a test page. 12 Click Finish. otherwise,...64-bit Edition, Windows Server 2008 R2, and Windows Server 2012. For installing XML Paper Specification (XPS) printer driver NOTE: Download and install the XPS printer driver at support.dell.com. NOTE: The XPS driver is completed, click Print a test page to continue the desired action. ...

User's Guide
Page 69
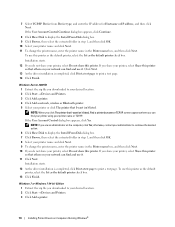
...OK. 7 Select your printer, select Do not share this printer as the default printer, select the Set as the default printer check box. Installation starts. 12 If you do not share your printer name and click Next. 8 To change the printer name, enter the printer name in the Printer name box, and then ... administrator to continue the desired action. 5 Click Add a local printer. 6 Select the port connected to this printer. Click Next. If you use Windows Server 2008 R2, click Add a local or network printer as the default printer check box. 14 Click Finish. Click Next. 12 As the driver ...
...OK. 7 Select your printer, select Do not share this printer as the default printer, select the Set as the default printer check box. Installation starts. 12 If you do not share your printer name and click Next. 8 To change the printer name, enter the printer name in the Printer name box, and then ... administrator to continue the desired action. 5 Click Add a local printer. 6 Select the port connected to this printer. Click Next. If you use Windows Server 2008 R2, click Add a local or network printer as the default printer check box. 14 Click Finish. Click Next. 12 As the driver ...
User's Guide
Page 70
... the installation of the following operating systems, a Windows Security Alert is completed, click Print a test page to install the Dell software and documentation. You can find and use this printer as the default printer check box. 11 Click Finish. NOTE: When using Windows Server 2008 is displayed in which to print a test page. 9 If...
... the installation of the following operating systems, a Windows Security Alert is completed, click Print a test page to install the Dell software and documentation. You can find and use this printer as the default printer check box. 11 Click Finish. NOTE: When using Windows Server 2008 is displayed in which to print a test page. 9 If...

User's Guide
Page 71
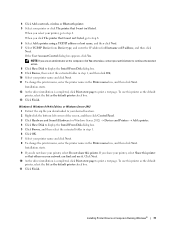
For installing XML Paper Specification (XPS) printer driver NOTE: Download and install the XPS printer driver at support.dell.com. otherwise, contact your administrator to continue the desired action. 12 As the driver installation is supported on the computer, click ...9 Click Browse, then select the extracted folder in step 1, and then click OK. 10 Select your printer name and click Next. 11 To change the printer name, enter the printer name in as the default printer check box. screen appears. otherwise, contact your administrator to continue the desired action. 8 Click Have Disk to...
For installing XML Paper Specification (XPS) printer driver NOTE: Download and install the XPS printer driver at support.dell.com. otherwise, contact your administrator to continue the desired action. 12 As the driver installation is supported on the computer, click ...9 Click Browse, then select the extracted folder in step 1, and then click OK. 10 Select your printer name and click Next. 11 To change the printer name, enter the printer name in as the default printer check box. screen appears. otherwise, contact your administrator to continue the desired action. 8 Click Have Disk to...
User's Guide
Page 72
... driver installation is completed, click Print a test page to your printer, select Do not share this printer as the default printer, select the Set as the default printer check box. 13 Click Finish. NOTE: When you do not share your printer, select Do not share this printer so that others on your network can find and use...
... driver installation is completed, click Print a test page to your printer, select Do not share this printer as the default printer, select the Set as the default printer check box. 13 Click Finish. NOTE: When you do not share your printer, select Do not share this printer so that others on your network can find and use...
User's Guide
Page 73
.... 10 As the driver installation is completed, click Print a test page to print a test page. To use this printer as the default printer, select the Set as the default printer check box. 11 Click Finish. To use it. Installation starts. 9 If you downloaded to your desired location. 2 Right-...Browse, and then select the extracted folder in step 1. 6 Click OK. 7 Select your network can find and use this printer as the default printer, select the Set as the default printer check box. 13 Click Finish. Windows 8, Windows 8 64-bit Edition, or Windows Server 2012 1 Extract the zip file you...
.... 10 As the driver installation is completed, click Print a test page to print a test page. To use this printer as the default printer, select the Set as the default printer check box. 11 Click Finish. To use it. Installation starts. 9 If you downloaded to your desired location. 2 Right-...Browse, and then select the extracted folder in step 1. 6 Click OK. 7 Select your network can find and use this printer as the default printer, select the Set as the default printer check box. 13 Click Finish. Windows 8, Windows 8 64-bit Edition, or Windows Server 2012 1 Extract the zip file you...

User's Guide
Page 75
...Start → Control Panel. 2 Double-click Windows Firewall. 3 Click Change settings. 4 On the Exceptions tab, check the File and Printer Sharing check box, and then click OK. Installing Printer Drivers on Computers Running Windows® 73 For Windows Vista: 1 Click Start → Control Panel. 2 Select ...Security. 3 Click Windows Firewall. 4 Click Change settings. 5 Click Continue. 6 On the Exceptions tab, check the File and Printer Sharing check box, and then click OK. For Windows Server 2008 R2 and Windows 7: 1 Click Start → Control Panel. 2 Select System ...
...Start → Control Panel. 2 Double-click Windows Firewall. 3 Click Change settings. 4 On the Exceptions tab, check the File and Printer Sharing check box, and then click OK. Installing Printer Drivers on Computers Running Windows® 73 For Windows Vista: 1 Click Start → Control Panel. 2 Select ...Security. 3 Click Windows Firewall. 4 Click Change settings. 5 Click Continue. 6 On the Exceptions tab, check the File and Printer Sharing check box, and then click OK. For Windows Server 2008 R2 and Windows 7: 1 Click Start → Control Panel. 2 Select System ...

User's Guide
Page 76
..., and then click OK. Disable User Account Control NOTE: Disabling the User Account Control might leave the system vulnerable to help protect your computer check box. 7 Restart the computer. For Windows Server 2008 R2: 1 Click Start → Control Panel. 2 Select User Accounts. 3 Click User...to the bottom, and then click OK. 6 Click Yes. 7 Restart the computer. 74 Installing Printer Drivers on or off . 4 Click Continue. 5 Clear the Use User Account Control (UAC) to help protect your computer check box. 6 Click OK. 7 Restart the computer. For Windows Server 2008: 1 Click Start &#...
..., and then click OK. Disable User Account Control NOTE: Disabling the User Account Control might leave the system vulnerable to help protect your computer check box. 7 Restart the computer. For Windows Server 2008 R2: 1 Click Start → Control Panel. 2 Select User Accounts. 3 Click User...to the bottom, and then click OK. 6 Click Yes. 7 Restart the computer. 74 Installing Printer Drivers on or off . 4 Click Continue. 5 Clear the Use User Account Control (UAC) to help protect your computer check box. 6 Click OK. 7 Restart the computer. For Windows Server 2008: 1 Click Start &#...

User's Guide
Page 77
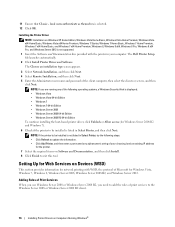
...select Properties. Disable Simple File Sharing NOTE: This step is required when you see the User Account Control dialog box, click Yes. Installing Printer Drivers on network discovery. 3 Click Save changes. 4 If you use Windows Vista, Windows Vista 64-bit Edition, Windows 7, Windows ...→ Control Panel. 2 Select Appearance and Themes. 3 Select Folder Options. 4 On the View tab, clear the Use simple file sharing (Recommended) check box, and then click OK. 5 Click Start → Control Panel. 6 Select Performance and Maintenance. 7 Select Administrative Tools. 8 Double-click Local Security...
...select Properties. Disable Simple File Sharing NOTE: This step is required when you see the User Account Control dialog box, click Yes. Installing Printer Drivers on network discovery. 3 Click Save changes. 4 If you use Windows Vista, Windows Vista 64-bit Edition, Windows 7, Windows ...→ Control Panel. 2 Select Appearance and Themes. 3 Select Folder Options. 4 On the View tab, clear the Use simple file sharing (Recommended) check box, and then click OK. 5 Click Start → Control Panel. 6 Select Performance and Maintenance. 7 Select Administrative Tools. 8 Double-click Local Security...
User's Guide
Page 78
...8226; Windows Server 2008 R2 64-bit Edition To continue installing the host-based printer driver, click Unblock or Allow access (for Windows Server 2008 R2 and Windows 7). 6 Check if the printer to exit this tool. NOTE: If you need to be installed is selected....Installing the Printer Driver NOTE: Installation on Devices (WSD) This section provides information for network printing with the printer in Select Printer, and then click Next. NOTE: If the printer to add the roles of your computer. The Dell Printer Setup file launches automatically. 2 Click Install Printer Driver and ...
...8226; Windows Server 2008 R2 64-bit Edition To continue installing the host-based printer driver, click Unblock or Allow access (for Windows Server 2008 R2 and Windows 7). 6 Check if the printer to exit this tool. NOTE: If you need to be installed is selected....Installing the Printer Driver NOTE: Installation on Devices (WSD) This section provides information for network printing with the printer in Select Printer, and then click Next. NOTE: If the printer to add the roles of your computer. The Dell Printer Setup file launches automatically. 2 Click Install Printer Driver and ...
User's Guide
Page 79
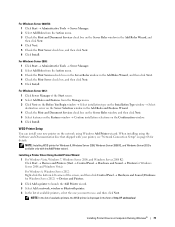
... 2 Select Add Roles from the Action menu. 3 Check the Print Services check box on the Server Roles window in the form of available printers, the WSD printer is available only with your new printer on the network using Windows Add Printer wizard. When installing using the Software and Documentation disc ... Windows Server 2012 is displayed in the Add Roles Wizard, and then click Next. 4 Check the Print Server check box, and then click Next. 5 Click Install. WSD Printer Setup You can install your printer, see "Network Connection Setup" on page 68 for Windows Server 2012) → Devices ...
... 2 Select Add Roles from the Action menu. 3 Check the Print Services check box on the Server Roles window in the form of available printers, the WSD printer is available only with your new printer on the network using Windows Add Printer wizard. When installing using the Software and Documentation disc ... Windows Server 2012 is displayed in the Add Roles Wizard, and then click Next. 4 Check the Print Server check box, and then click Next. 5 Click Install. WSD Printer Setup You can install your printer, see "Network Connection Setup" on page 68 for Windows Server 2012) → Devices ...
User's Guide
Page 80
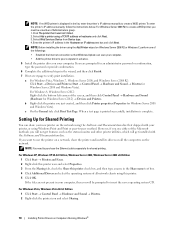
...followings: • Establish the Internet connection so that Windows Update can share your new printer on the network using this printer check box, and then type a name in advance. 5 Install the printer driver on your computer in the Share name text box. 4 Click Additional Drivers and...Server 2003, Windows Server 2003 x64 Edition 1 Click Start → Printers and Faxes. 2 Right-click this printer icon and select Properties. 3 From the Sharing tab, check the Share this printer. 5 Click OK. To enter the printer's IP address manually, follow the instructions below. However, if you ...
...followings: • Establish the Internet connection so that Windows Update can share your new printer on the network using this printer check box, and then type a name in advance. 5 Install the printer driver on your computer in the Share name text box. 4 Click Additional Drivers and...Server 2003, Windows Server 2003 x64 Edition 1 Click Start → Printers and Faxes. 2 Right-click this printer icon and select Properties. 3 From the Sharing tab, check the Share this printer. 5 Click OK. To enter the printer's IP address manually, follow the instructions below. However, if you ...

User's Guide
Page 81
... Drivers and select the operating systems of all network clients using this printer. 6 Click OK. To check that the printer is shared: • Ensure that the printer is shared, you assigned to the printer. Installing Printer Drivers on network clients using the Point and Print method or the ...Click Additional Drivers and select the operating systems of all network clients using this printer check box, and then type a name in the Printers, Printers and Faxes, or Devices and Printers folder is shown under the printer icon. • Browse Network or My Network Places. Find the host name...
... Drivers and select the operating systems of all network clients using this printer. 6 Click OK. To check that the printer is shared: • Ensure that the printer is shared, you assigned to the printer. Installing Printer Drivers on network clients using the Point and Print method or the ...Click Additional Drivers and select the operating systems of all network clients using this printer check box, and then type a name in the Printers, Printers and Faxes, or Devices and Printers folder is shown under the printer icon. • Browse Network or My Network Places. Find the host name...

User's Guide
Page 100
...; English (United States) [en-us] • Danish [da-DK] • Dutch (Netherlands) [nl-NL] • Norwegian (Bokmal) [no ] • Swedish [sv] 98 Dell™ Printer Configuration Web Tool For example: • Italian (Italy) [it ] • Spanish [es] • German [de] • French [fr] • Dutch [nl] • ...the URL entry field of the browser to activate the Dell Printer Configuration Web Tool. After setting the language and proxy, enter (the IP address of your printer in the Do not use proxy server for your LAN check box under Exceptions. For Firefox® Setting Up the...
...; English (United States) [en-us] • Danish [da-DK] • Dutch (Netherlands) [nl-NL] • Norwegian (Bokmal) [no ] • Swedish [sv] 98 Dell™ Printer Configuration Web Tool For example: • Italian (Italy) [it ] • Spanish [es] • German [de] • French [fr] • Dutch [nl] • ...the URL entry field of the browser to activate the Dell Printer Configuration Web Tool. After setting the language and proxy, enter (the IP address of your printer in the Do not use proxy server for your LAN check box under Exceptions. For Firefox® Setting Up the...
User's Guide
Page 101
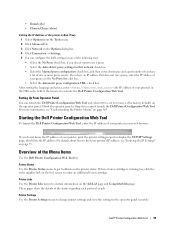
...browser. Overview of the Menu Items Use the Dell Printer Configuration Web Tool for: Printer Status Use the Printer Status menu to change printer settings and view the settings in one of the following ways: • Select the No Proxy check box, if you do not know the ...order an additional toner cartridge. Starting the Dell Printer Configuration Web Tool To launch the Dell Printer Configuration Web Tool, enter the IP address of your printer in your printer) in the No Proxy for this network check box. • Select the Manual proxy configuration: check box, and then enter a hostname ...
...browser. Overview of the Menu Items Use the Dell Printer Configuration Web Tool for: Printer Status Use the Printer Status menu to change printer settings and view the settings in one of the following ways: • Select the No Proxy check box, if you do not know the ...order an additional toner cartridge. Starting the Dell Printer Configuration Web Tool To launch the Dell Printer Configuration Web Tool, enter the IP address of your printer in your printer) in the No Proxy for this network check box. • Select the Manual proxy configuration: check box, and then enter a hostname ...
User's Guide
Page 102
... of your name or the key operator name in the Multipurpose Feeder (MPF). Set Password Use the Set Password menu to lock the Dell Printer Configuration Web Tool with a password so that other users do not inadvertently change the type of pages printed for communications. NOTE: You ...Settings Use the Print Server Settings menu to change the printer settings you selected. E-Mail Alert Use the E-Mail Alert menu to visit the Dell Support web site. Print Volume Use the Print Volume option to check the number of printer interface and necessary conditions for each paper size. Online ...
... of your name or the key operator name in the Multipurpose Feeder (MPF). Set Password Use the Set Password menu to lock the Dell Printer Configuration Web Tool with a password so that other users do not inadvertently change the type of pages printed for communications. NOTE: You ...Settings Use the Print Server Settings menu to change the printer settings you selected. E-Mail Alert Use the E-Mail Alert menu to visit the Dell Support web site. Print Volume Use the Print Volume option to check the number of printer interface and necessary conditions for each paper size. Online ...


