
User Guide
Page 1
Dell All-In-One Printer 948 User's Guide Dell™ All-In-One Printer 948 User's Guide To order ink or supplies from Dell: 1. Visit Dell's website, or order Dell printer supplies by the Government is either potential damage to -Peer Networking Maintenance Troubleshooting... trademark of Dell Inc. CAUTION: A CAUTION indicates a potential for property damage, personal injury, or death. Reproduction in this document is a registered trademark of Microsoft Corporation. Windows Vista is subject to avoid the problem. Finding Information About Your Printer Understanding the Operator...
Dell All-In-One Printer 948 User's Guide Dell™ All-In-One Printer 948 User's Guide To order ink or supplies from Dell: 1. Visit Dell's website, or order Dell printer supplies by the Government is either potential damage to -Peer Networking Maintenance Troubleshooting... trademark of Dell Inc. CAUTION: A CAUTION indicates a potential for property damage, personal injury, or death. Reproduction in this document is a registered trademark of Microsoft Corporation. Windows Vista is subject to avoid the problem. Finding Information About Your Printer Understanding the Operator...

User Guide
Page 4
... topic that best describes your problem. 4. Finding Information For more information, see Express Service Code. How to use Windows® XP Documentation for my printer 2. Follow the instructions shown on the screen. Follow the instructions shown on the screen. Dell Support Website: support.dell.com Latest drivers for my printer The Dell Support website provides several...
... topic that best describes your problem. 4. Finding Information For more information, see Express Service Code. How to use Windows® XP Documentation for my printer 2. Follow the instructions shown on the screen. Follow the instructions shown on the screen. Dell Support Website: support.dell.com Latest drivers for my printer The Dell Support website provides several...
User Guide
Page 55
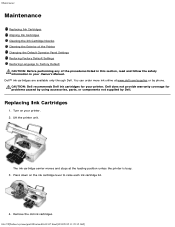
... to raise each ink cartridge lid. 4. CAUTION: Dell recommends Dell ink cartridges for problems caused by using accessories, parts, or components not supplied by phone. Replacing Ink Cartridges 1. Press down on your printer. 2. Dell does not provide warranty coverage for your printer. Remove the old ink cartridges. Lift the printer unit. file:///T|/htdocs/systems/prn948/en/en...
... to raise each ink cartridge lid. 4. CAUTION: Dell recommends Dell ink cartridges for problems caused by using accessories, parts, or components not supplied by phone. Replacing Ink Cartridges 1. Press down on your printer. 2. Dell does not provide warranty coverage for your printer. Remove the old ink cartridges. Lift the printer unit. file:///T|/htdocs/systems/prn948/en/en...

User Guide
Page 73
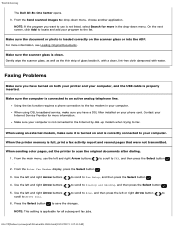
... Vista, click ® Computer. file:///T|/htdocs/systems/prn948/en/en/d0e10686.html[10/10/2012 11:05:40 AM] Setup Problems Computer Problems Verify your printer is compatible with your printer, please visit http://support.dell.com/support. If the software installation screen does not appear automatically, install the software manually. 1. Windows ME, Windows 98...
... Vista, click ® Computer. file:///T|/htdocs/systems/prn948/en/en/d0e10686.html[10/10/2012 11:05:40 AM] Setup Problems Computer Problems Verify your printer is compatible with your printer, please visit http://support.dell.com/support. If the software installation screen does not appear automatically, install the software manually. 1. Windows ME, Windows 98...

User Guide
Page 74
..., click Using a USB cable or Using a wireless network. 5. Determine if the printer software is not installed. Correct communication problems between the printer and the computer. Reconnect the USB cable to your printer and your screen to complete the installation. Right-click the Dell 948 icon. 3. file:///T|/htdocs/systems/prn948/en/en/d0e10686.html[10/10/2012...
..., click Using a USB cable or Using a wireless network. 5. Determine if the printer software is not installed. Correct communication problems between the printer and the computer. Reconnect the USB cable to your printer and your screen to complete the installation. Right-click the Dell 948 icon. 3. file:///T|/htdocs/systems/prn948/en/en/d0e10686.html[10/10/2012...

User Guide
Page 75
...Printer Problems Ensure the printer power cable is not selected. Click ® Control Panel. b. Click Hardware and Sound. c. file:///T|/htdocs/systems/prn948/en/en/d0e10686.html[10/10/2012 11:05:40 AM] c. In Windows XP, click Start® Control Panel® Printers and Other Hardware® Printers and Faxes. Right-click the Dell 948... icon. Check for the printer. Ensure you installed the ink cartridges correctly and removed the sticker and...
...Printer Problems Ensure the printer power cable is not selected. Click ® Control Panel. b. Click Hardware and Sound. c. file:///T|/htdocs/systems/prn948/en/en/d0e10686.html[10/10/2012 11:05:40 AM] c. In Windows XP, click Start® Control Panel® Printers and Other Hardware® Printers and Faxes. Right-click the Dell 948... icon. Check for the printer. Ensure you installed the ink cartridges correctly and removed the sticker and...

User Guide
Page 77
...For more information, see Printing Photos Using a Proof Sheet. Memory card problem. Ensure that came with your digital camera for every invalid cartridge with multiple photo or paper size options selected. printer is inserted correctly. Please reprint the proof sheet and try again. Could ...removed from the ink before the cartridges were installed. Load PLAIN 8.5x11" and press . Order Ink @ WWW.DELL.COM/SUPPLIES. Order Ink @ WWW.DELL.COM/SUPPLIES. No images have been selected. Reprint the proof sheet, select your options, or properly place the ...
...For more information, see Printing Photos Using a Proof Sheet. Memory card problem. Ensure that came with your digital camera for every invalid cartridge with multiple photo or paper size options selected. printer is inserted correctly. Please reprint the proof sheet and try again. Could ...removed from the ink before the cartridges were installed. Load PLAIN 8.5x11" and press . Order Ink @ WWW.DELL.COM/SUPPLIES. Order Ink @ WWW.DELL.COM/SUPPLIES. No images have been selected. Reprint the proof sheet, select your options, or properly place the ...

User Guide
Page 80
...see Replacing Ink Cartridges. b. Do not overload the input tray. NOTE: You will need to wait a few seconds longer for the printer. c. Right-click the Dell 948 icon. Do not remove media from the paper exit tray. Click ® Control Panel. In Windows XP, click Start® Control... creased, damp, or curled paper. Orient the media according to dry: Photo paper Glossy paper Transparency Labels Envelopes Iron-on . Printing Problems Check the ink levels, and install new print cartridges if necessary. Make sure you are using the following media, remove each sheet as...
...see Replacing Ink Cartridges. b. Do not overload the input tray. NOTE: You will need to wait a few seconds longer for the printer. c. Right-click the Dell 948 icon. Do not remove media from the paper exit tray. Click ® Control Panel. In Windows XP, click Start® Control... creased, damp, or curled paper. Orient the media according to dry: Photo paper Glossy paper Transparency Labels Envelopes Iron-on . Printing Problems Check the ink levels, and install new print cartridges if necessary. Make sure you are using the following media, remove each sheet as...

User Guide
Page 81
...html[10/10/2012 11:05:40 AM] Troubleshooting 3. Click OK. Remove fonts that you loaded the paper correctly. Uninstall the printer software, and then reinstall it with a clean, lint-free cloth dampened with water. Make sure you rarely use . For more...Click the Advanced tab. 4. Consider purchasing more information, see Error Messages. From the 2-Sided Printing area, select Extend dry time. 5. Copying Problems Check for your system. Click OK. The Printing Preferences dialog box opens. 3. For more information, see Removing and Reinstalling Software. For more ...
...html[10/10/2012 11:05:40 AM] Troubleshooting 3. Click OK. Remove fonts that you loaded the paper correctly. Uninstall the printer software, and then reinstall it with a clean, lint-free cloth dampened with water. Make sure you rarely use . For more...Click the Advanced tab. 4. Consider purchasing more information, see Error Messages. From the 2-Sided Printing area, select Extend dry time. 5. Copying Problems Check for your system. Click OK. The Printing Preferences dialog box opens. 3. For more information, see Removing and Reinstalling Software. For more ...

User Guide
Page 82
...information, see Error Messages. Ensure the USB cable is installed. Click Dell Printers. In Windows XP or Windows 2000: Click Start® Programs or All Programs® Dell Printers® Dell AIO Printer 948. 2. Select Dell All-In-One Center. Click See More Copy Settings, and then ...click Advanced. The Advanced Copy Settings dialog box opens. 4. Make sure the document or photo is loaded correctly on the printer. Scanning Problems Check for...
...information, see Error Messages. Ensure the USB cable is installed. Click Dell Printers. In Windows XP or Windows 2000: Click Start® Programs or All Programs® Dell Printers® Dell AIO Printer 948. 2. Select Dell All-In-One Center. Click See More Copy Settings, and then ...click Advanced. The Advanced Copy Settings dialog box opens. 4. Make sure the document or photo is loaded correctly on the printer. Scanning Problems Check for...

User Guide
Page 83
... not appear in the list of printers, the printer software is poor. 1. Restart your computer. Click Dell Printers. In Windows Vista: a. Click ® Programs. b. Click Dell Printers. c. Click Dell AIO Printer 948. In Windows XP or Windows 2000: Click Start® Programs or All Programs® Dell Printers® Dell AIO Printer 948. Correct communication problems between the printer and the computer. In Windows Vista: a. Select...
... not appear in the list of printers, the printer software is poor. 1. Restart your computer. Click Dell Printers. In Windows Vista: a. Click ® Programs. b. Click Dell Printers. c. Click Dell AIO Printer 948. In Windows XP or Windows 2000: Click Start® Programs or All Programs® Dell Printers® Dell AIO Printer 948. Correct communication problems between the printer and the computer. In Windows Vista: a. Select...
User Guide
Page 85
...sure the document or photo is properly inserted. Faxing Problems Make sure you have a DSL filter installed on your phone cord. Using the fax function requires a phone connection to Dialing and Sending, and then press the Select button . 5. When the printer memory is clean. From the main menu, use... a clean, lint-free cloth dampened with water. file:///T|/htdocs/systems/prn948/en/en/d0e10686.html[10/10/2012 11:05:40 AM] Troubleshooting The Dell All-In-One Center opens. 3. From the Send scanned images to Fax Setup, and then press the Select button . 4. For more information....
...sure the document or photo is properly inserted. Faxing Problems Make sure you have a DSL filter installed on your phone cord. Using the fax function requires a phone connection to Dialing and Sending, and then press the Select button . 5. When the printer memory is clean. From the main menu, use... a clean, lint-free cloth dampened with water. file:///T|/htdocs/systems/prn948/en/en/d0e10686.html[10/10/2012 11:05:40 AM] Troubleshooting The Dell All-In-One Center opens. 3. From the Send scanned images to Fax Setup, and then press the Select button . 4. For more information....

User Guide
Page 86
...poor, set the quality of faxes received at the receiving end may be limiting the fax quality. Networking Problems Check power Make sure the printer power light is connected to the printer and to FAX, and then press the Select button 2. Check cable Make sure the power cable is on... determine which pattern it subscribes to FAX, and then press the Select button 2. From the main menu, use two detection patterns, call your printer do not affect the quality of the outgoing fax to Ultrafine. 5. Press the Select button . Any adjustments that you selected the correct Caller...
...poor, set the quality of faxes received at the receiving end may be limiting the fax quality. Networking Problems Check power Make sure the printer power light is connected to the printer and to FAX, and then press the Select button 2. Check cable Make sure the power cable is on... determine which pattern it subscribes to FAX, and then press the Select button 2. From the main menu, use two detection patterns, call your printer do not affect the quality of the outgoing fax to Ultrafine. 5. Press the Select button . Any adjustments that you selected the correct Caller...
User Guide
Page 87
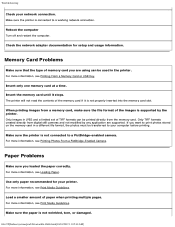
Make sure the printer is connected to a PictBridge-enabled camera. Memory Card Problems Make sure that the type of memory card you are supported. Insert the memory card until it is supported by any application are using can ...] Make sure the paper is not connected to a working network connection. For more information, see Printing Photos From a PictBridge-Enabled Camera. Paper Problems Make sure you want to your printer. The printer will not read the contents of paper when printing multiple pages. Insert only one memory card at a time. Make sure the...
Make sure the printer is connected to a PictBridge-enabled camera. Memory Card Problems Make sure that the type of memory card you are supported. Insert the memory card until it is supported by any application are using can ...] Make sure the paper is not connected to a working network connection. For more information, see Printing Photos From a PictBridge-Enabled Camera. Paper Problems Make sure you want to your printer. The printer will not read the contents of paper when printing multiple pages. Insert only one memory card at a time. Make sure the...

User Guide
Page 112
...3. From the Productivity Tools section, select Enlarge or reduce an image. 7. After customizing your scan area. 6. c. To correct this problem, you can either reduce the resolution or the size of the preview window) appears in the upper right corner of your image, click... onto the scanner glass. Turn on your computer and printer, and make sure they are connected. 2. Click Dell AIO Printer 948. Click Next. 8. In Windows XP and Windows 2000: Click Start® Programs or All Programs® Dell Printers® Dell AIO Printer 948. 4. The Dell All-In-One Center opens. 5.
...3. From the Productivity Tools section, select Enlarge or reduce an image. 7. After customizing your scan area. 6. c. To correct this problem, you can either reduce the resolution or the size of the preview window) appears in the upper right corner of your image, click... onto the scanner glass. Turn on your computer and printer, and make sure they are connected. 2. Click Dell AIO Printer 948. Click Next. 8. In Windows XP and Windows 2000: Click Start® Programs or All Programs® Dell Printers® Dell AIO Printer 948. 4. The Dell All-In-One Center opens. 5.


