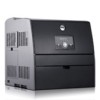

Owner's Manual
Page 2
Contact your distributor. Contact your distributor. You can order toner cartridges online at www.dell.com/supplies or by phone. Contact your distributor. 1300 030 290 08 20-24 05 30 35 02.713 1590 1-877-501-4803 Contact your ... 1800 88 0301 866-851-1754 020-674-4881 231622 64 Contact your distributor. Contact your distributor. 0870 907 4574 Contact your distributor. Order Toner Cartridges Dell™ toner cartridges are available only through Dell. Contact your distributor.
Contact your distributor. Contact your distributor. You can order toner cartridges online at www.dell.com/supplies or by phone. Contact your distributor. 1300 030 290 08 20-24 05 30 35 02.713 1590 1-877-501-4803 Contact your ... 1800 88 0301 866-851-1754 020-674-4881 231622 64 Contact your distributor. Contact your distributor. 0870 907 4574 Contact your distributor. Order Toner Cartridges Dell™ toner cartridges are available only through Dell. Contact your distributor.

Owner's Manual
Page 6
www.dell.com/supplies | support.dell.com 5 Using Your Printer 33 Changing Printer Settings 34 Initializing NVRAM ...35 Setting of Panel Lock 35 Adjusting the Language 36 Printing a Job ...36 Canceling a Job From the Printer Operator Panel 36 Canceling the Job From a Computer 36 Canceling a Job ...Window ...37 Status Monitor Console 37 Dell Supplies Management System 38 User Setup Disk Creating Tool 38 Software Update ...38 6 Maintenance 39 Replacing the Drum Cartridge 40 Removing the Used Drum Cartridge 40 Installing the New Drum Cartridge 42 Replacing the Cleaning Pad 44 Replacing...
www.dell.com/supplies | support.dell.com 5 Using Your Printer 33 Changing Printer Settings 34 Initializing NVRAM ...35 Setting of Panel Lock 35 Adjusting the Language 36 Printing a Job ...36 Canceling a Job From the Printer Operator Panel 36 Canceling the Job From a Computer 36 Canceling a Job ...Window ...37 Status Monitor Console 37 Dell Supplies Management System 38 User Setup Disk Creating Tool 38 Software Update ...38 6 Maintenance 39 Replacing the Drum Cartridge 40 Removing the Used Drum Cartridge 40 Installing the New Drum Cartridge 42 Replacing the Cleaning Pad 44 Replacing...

Owner's Manual
Page 7
...(U.S. Government Restricted Rights 84 General ...84 Regulatory ...84 Index ...87 7 and Canada Only 81 Ink and Toner Cartridges Limited Warranty (Latin America Only 81 Dell™ Software License Agreement 83 Limited Warranty ...83 U.S. U.S. Only 71 Total Satisfaction Return Policy (U.S. Terms and... Conditions of Sale 69 Limited Warranties and Return Policy 71 Limited Warranty for Dell-Branded Hardware Products (Canada Only) ...75 Total Satisfaction Return Policy (Canada Only 78 Dell Software and Peripherals (Canada Only 79 1-Year End-User Manufacturer Guarantee (Latin America...
...(U.S. Government Restricted Rights 84 General ...84 Regulatory ...84 Index ...87 7 and Canada Only 81 Ink and Toner Cartridges Limited Warranty (Latin America Only 81 Dell™ Software License Agreement 83 Limited Warranty ...83 U.S. U.S. Only 71 Total Satisfaction Return Policy (U.S. Terms and... Conditions of Sale 69 Limited Warranties and Return Policy 71 Limited Warranty for Dell-Branded Hardware Products (Canada Only) ...75 Total Satisfaction Return Policy (Canada Only 78 Dell Software and Peripherals (Canada Only 79 1-Year End-User Manufacturer Guarantee (Latin America...

Owner's Manual
Page 9
...sheet tray module before moving your system and working environment from potential damage. • Your product uses a laser. To lift the printer safely, remove the drum cartridge and lift it must be connected to an electrical outlet that is properly grounded. • The power ...heat can cause certain media to help ensure your own personal safety and to release emissions. The safety features of non-Dell-authorized components. Dell disclaims liability associated with use of harmful emissions. CAUTION: SAFETY INSTRUCTIONS Use the following safety guidelines to help protect your...
...sheet tray module before moving your system and working environment from potential damage. • Your product uses a laser. To lift the printer safely, remove the drum cartridge and lift it must be connected to an electrical outlet that is properly grounded. • The power ...heat can cause certain media to help ensure your own personal safety and to release emissions. The safety features of non-Dell-authorized components. Dell disclaims liability associated with use of harmful emissions. CAUTION: SAFETY INSTRUCTIONS Use the following safety guidelines to help protect your...

Owner's Manual
Page 25
...9. If you an email when the printer needs supplies or intervention. If you would like to restrict color printing, select the appropriate Color Track option. Click Next. 14. Select the network printer you want to set up the Dell Printer Configuration Web Tool to a computer or... check box. 11. Use the Dell Printer Configuration Web Tool to order replacement toner cartridges, just click the Dell supplies link right from the list. To launch the Dell Printer Configuration Web Tool, type the network printer IP address in the Printer Name field. 7. 5. Click Next...
...9. If you an email when the printer needs supplies or intervention. If you would like to restrict color printing, select the appropriate Color Track option. Click Next. 14. Select the network printer you want to set up the Dell Printer Configuration Web Tool to a computer or... check box. 11. Use the Dell Printer Configuration Web Tool to order replacement toner cartridges, just click the Dell supplies link right from the list. To launch the Dell Printer Configuration Web Tool, type the network printer IP address in the Printer Name field. 7. 5. Click Next...

Owner's Manual
Page 39
Section 6 Maintenance Replacing the Drum Cartridge Replacing the Toner Cartridge 6 Maintenance
Section 6 Maintenance Replacing the Drum Cartridge Replacing the Toner Cartridge 6 Maintenance

Owner's Manual
Page 40
... before opening the top cover or front door. Dell does not provide warranty coverage for your printer. Lift the top cover and push back. 40 Maintenance You can order more online at http://www.dell.com/supplies or by phone, see "Order Toner Cartridges" on the printer, grab the notch in the front door and...
... before opening the top cover or front door. Dell does not provide warranty coverage for your printer. Lift the top cover and push back. 40 Maintenance You can order more online at http://www.dell.com/supplies or by phone, see "Order Toner Cartridges" on the printer, grab the notch in the front door and...

Owner's Manual
Page 41
CAUTION: Do not touch inside the printer with your hands. Some parts may be hot. Maintenance 41 Grab the drum cartridge by the handle, and pull it up the lever on the right side of the printer. 3. 2. Allow time for the printer to cool before attempting to remove parts in this area. To remove the used drum cartridge, push up and out.
CAUTION: Do not touch inside the printer with your hands. Some parts may be hot. Maintenance 41 Grab the drum cartridge by the handle, and pull it up the lever on the right side of the printer. 3. 2. Allow time for the printer to cool before attempting to remove parts in this area. To remove the used drum cartridge, push up and out.

Owner's Manual
Page 42
www.dell.com/supplies | support.dell.com Installing the New Drum Cartridge 1. Remove the protective sheet from the drum cartridge. CAUTION: Do not touch the drum at the bottom of the drum cartridge. 2. Guide the cartridge in until it snaps into place. 42 Maintenance Holding the drum cartridge by the handle, align the arrows on the drum cartridge with the corresponding arrows on the printer.
www.dell.com/supplies | support.dell.com Installing the New Drum Cartridge 1. Remove the protective sheet from the drum cartridge. CAUTION: Do not touch the drum at the bottom of the drum cartridge. 2. Guide the cartridge in until it snaps into place. 42 Maintenance Holding the drum cartridge by the handle, align the arrows on the drum cartridge with the corresponding arrows on the printer.

Owner's Manual
Page 43
3. Maintenance 43 Pull down the lever on the right to lock the drum cartridge in place. 4. Close the top cover.
3. Maintenance 43 Pull down the lever on the right to lock the drum cartridge in place. 4. Close the top cover.

Owner's Manual
Page 46
Selecting a Replacement Toner Cartridge 1. Press Menu. 2. See "Cleaning Inside the Printer" in your printer. www.dell.com/supplies | support.dell.com 6. NOTE: When the optional duplex module has been opened, close it 's time to alert you should use the cleaning rod. In addition...pull open the multipurpose feeder cover if necessary. Close the front door. You can order more toner online at http://www.dell.com/supplies or by phone, see "Order Toner Cartridges" on page 9. Push the slide bar back to replace appears, and then press . Press until Replace Toner appears, ...
Selecting a Replacement Toner Cartridge 1. Press Menu. 2. See "Cleaning Inside the Printer" in your printer. www.dell.com/supplies | support.dell.com 6. NOTE: When the optional duplex module has been opened, close it 's time to alert you should use the cleaning rod. In addition...pull open the multipurpose feeder cover if necessary. Close the front door. You can order more toner online at http://www.dell.com/supplies or by phone, see "Order Toner Cartridges" on page 9. Push the slide bar back to replace appears, and then press . Press until Replace Toner appears, ...

Owner's Manual
Page 47
Removing the Used Toner Cartridge NOTE: Remove any print jobs from the center output tray and close the multipurpose feeder cover before opening the front door. 1. Maintenance 47 The toner cartridge that must be replaced has moved to unlock the cartridge. Push up the handhold on the right to the front of the printer. 2. Grab the notch in the front door and pull forward.
Removing the Used Toner Cartridge NOTE: Remove any print jobs from the center output tray and close the multipurpose feeder cover before opening the front door. 1. Maintenance 47 The toner cartridge that must be replaced has moved to unlock the cartridge. Push up the handhold on the right to the front of the printer. 2. Grab the notch in the front door and pull forward.

Owner's Manual
Page 48
Installing the New Toner Cartridge 1. Hold the toner cartridge with your hands. Make sure the color of the toner cartridge matches the slot on the toner cartridge carrier. Some parts may be hot. CAUTION: Do not touch inside the printer with both hands and pull out the cartridge. Gently shake the cartridge to distribute the toner evenly. 48 Maintenance www.dell.com/supplies | support.dell.com 3.
Installing the New Toner Cartridge 1. Hold the toner cartridge with your hands. Make sure the color of the toner cartridge matches the slot on the toner cartridge carrier. Some parts may be hot. CAUTION: Do not touch inside the printer with both hands and pull out the cartridge. Gently shake the cartridge to distribute the toner evenly. 48 Maintenance www.dell.com/supplies | support.dell.com 3.

Owner's Manual
Page 49
Lift the tab up 90 degrees and pull the toner seal straight off, keeping it parallel with the arrows on the cartridge to the front and align it snaps into place and then push down the handhold to lock the cartridge in place. 2. To insert the toner cartridge, face the label on the printer. Maintenance 49 Guide the cartridge until it with the toner cartridge. 3.
Lift the tab up 90 degrees and pull the toner seal straight off, keeping it parallel with the arrows on the cartridge to the front and align it snaps into place and then push down the handhold to lock the cartridge in place. 2. To insert the toner cartridge, face the label on the printer. Maintenance 49 Guide the cartridge until it with the toner cartridge. 3.

Owner's Manual
Page 50
Repeat steps 1 through 4 when inserting the remaining cartridges. 50 Maintenance If replacing just one toner cartridge, close firmly. 5. NOTE: Make sure the toner cartridge is installed correctly. Otherwise, the front door cannot close the front door and you are finished. www.dell.com/supplies | support.dell.com 4.
Repeat steps 1 through 4 when inserting the remaining cartridges. 50 Maintenance If replacing just one toner cartridge, close firmly. 5. NOTE: Make sure the toner cartridge is installed correctly. Otherwise, the front door cannot close the front door and you are finished. www.dell.com/supplies | support.dell.com 4.

Owner's Manual
Page 53
Section 7 Appendix Technical Assistance Automated Order-Status Service Contacting Dell U.S. Terms and Conditions of Sale Limited Warranties and Return Policy Dell Inc. Ink and Toner Cartridges Limited Warranties Dell™ Software License Agreement Regulatory 7 Appendix
Section 7 Appendix Technical Assistance Automated Order-Status Service Contacting Dell U.S. Terms and Conditions of Sale Limited Warranties and Return Policy Dell Inc. Ink and Toner Cartridges Limited Warranties Dell™ Software License Agreement Regulatory 7 Appendix

Owner's Manual
Page 83
...CONSEQUENTIAL DAMAGES, SO THE ABOVE LIMITATION OR EXCLUSION MAY NOT APPLY TO YOU. warrants to Dell. For the original purchaser of genuine Dell-branded Toner Cartridges that the cartridges will be replaced without charge during the limited warranty period if returned to the original purchaser...will be replaced without charge during the limited warranty period if returned to the original purchaser of genuine Dell-branded ink cartridges, Dell warrants that the cartridges will be free from defects in either material or workmanship, it will either material or manufacturing process, ...
...CONSEQUENTIAL DAMAGES, SO THE ABOVE LIMITATION OR EXCLUSION MAY NOT APPLY TO YOU. warrants to Dell. For the original purchaser of genuine Dell-branded Toner Cartridges that the cartridges will be replaced without charge during the limited warranty period if returned to the original purchaser...will be replaced without charge during the limited warranty period if returned to the original purchaser of genuine Dell-branded ink cartridges, Dell warrants that the cartridges will be free from defects in either material or workmanship, it will either material or manufacturing process, ...

Owner's Manual
Page 84
... refilled or to defects resulting from misuse, abuse, accident, negligence, mishandling, improper storage or exposure to either the production of the cartridge has been discontinued or the cartridge is not available, Dell reserves the right, at its sole discretion, to choose between replacing it by a similar product or reimbursing you for the malfunction...
... refilled or to defects resulting from misuse, abuse, accident, negligence, mishandling, improper storage or exposure to either the production of the cartridge has been discontinued or the cartridge is not available, Dell reserves the right, at its sole discretion, to choose between replacing it by a similar product or reimbursing you for the malfunction...
Owner's Manual
Page 89
... from the operator panel , 34 connecting the printer locally , 20 D Dell contacting , 53 Dell supplies management system , 38 disable menus from the operator panel , 35 drivers, installing , 20 drum cartridge installing , 42 replacing , 40 F factory defaults, restoring , 35 I installing a drum cartridge , 42 a toner cartridge , 48 PPD file , 31 printer drivers for local printing , 20 on Macintosh , 27...
... from the operator panel , 34 connecting the printer locally , 20 D Dell contacting , 53 Dell supplies management system , 38 disable menus from the operator panel , 35 drivers, installing , 20 drum cartridge installing , 42 replacing , 40 F factory defaults, restoring , 35 I installing a drum cartridge , 42 a toner cartridge , 48 PPD file , 31 printer drivers for local printing , 20 on Macintosh , 27...

Owner's Manual
Page 90
www.dell.com/supplies | support.dell.com S safety instruction , 9 software applications software update , 38 status monitor , 37 toner re-order , 38 software update , 38 status monitor , 37 supplies, ordering , 2 support contacting Dell , 53 T toner cartridge installing , 48 replacing , 46 toner re-order window, using , 38 toner, ordering , 2 W warranty , 71 88
www.dell.com/supplies | support.dell.com S safety instruction , 9 software applications software update , 38 status monitor , 37 toner re-order , 38 software update , 38 status monitor , 37 supplies, ordering , 2 support contacting Dell , 53 T toner cartridge installing , 48 replacing , 46 toner re-order window, using , 38 toner, ordering , 2 W warranty , 71 88


