
Product Manual
Page 2
Contents Package Contents 3 Introduction 4 Wireless Basics 6 Getting Started 9 Using the Configuration Menu 11 Installing the Print Server Software 39 Configuring the Print Server Software 41 Networking Basics 43 Troubleshooting 72 Technical Specifications 78 Contacting Technical Support 81 Warranty 82 2
Contents Package Contents 3 Introduction 4 Wireless Basics 6 Getting Started 9 Using the Configuration Menu 11 Installing the Print Server Software 39 Configuring the Print Server Software 41 Networking Basics 43 Troubleshooting 72 Technical Specifications 78 Contacting Technical Support 81 Warranty 82 2
Product Manual
Page 10
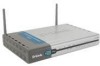
...drivers for loading the print server software. 10 For a typical wireless setup at home (as shown above), please do the following sections of this manual for the DI-714P+, using the web- Please refer to the quick installation guide for the wireless cardbus adapter (e.g., D-Link AirPlus DWL-650+) into ... Connect the Cable or DSL modem to the DI-714P+ wireless broadband router (see the Quick Installation Guide included with the DI-714P+.) If you are connecting a desktop computer to your network, you can install the D-Link AirPlus DWL-520+ wireless PCI adapter into a laptop computer.(See the...
...drivers for loading the print server software. 10 For a typical wireless setup at home (as shown above), please do the following sections of this manual for the DI-714P+, using the web- Please refer to the quick installation guide for the wireless cardbus adapter (e.g., D-Link AirPlus DWL-650+) into ... Connect the Cable or DSL modem to the DI-714P+ wireless broadband router (see the Quick Installation Guide included with the DI-714P+.) If you are connecting a desktop computer to your network, you can install the D-Link AirPlus DWL-520+ wireless PCI adapter into a laptop computer.(See the...
Product Manual
Page 40
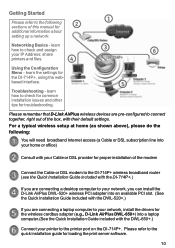
Using the Configuration Menu Help This screen displays the complete Help menu. Installing the Print Server Software Insert the installation CD-ROM into the CD-ROM drive. ROM. Click Install Windows Printer Software Select your Windows operating system 40 The following window will be shown automatically. For help at anytime, click the Help tab in the Configuration menu. If it is not, please run "autorun.exe" on the CD-
Using the Configuration Menu Help This screen displays the complete Help menu. Installing the Print Server Software Insert the installation CD-ROM into the CD-ROM drive. ROM. Click Install Windows Printer Software Select your Windows operating system 40 The following window will be shown automatically. For help at anytime, click the Help tab in the Configuration menu. If it is not, please run "autorun.exe" on the CD-

Product Manual
Page 41
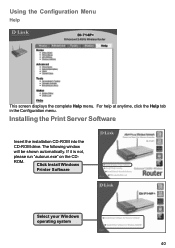
Click Next Then, the setup program will begin to install the programs into the destination folder. Click Finish Click OK After rebooting your computer, the software installation procedure is displayed. When the following Welcome dialog appears. Click Next Select the destination folder. Installing the Print Server Software (continued) Wait until the following window is finished. 41
Click Next Then, the setup program will begin to install the programs into the destination folder. Click Finish Click OK After rebooting your computer, the software installation procedure is displayed. When the following Welcome dialog appears. Click Next Select the destination folder. Installing the Print Server Software (continued) Wait until the following window is finished. 41
Product Manual
Page 42
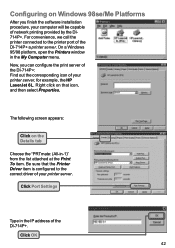
... list attached at the Print To item. Right click on that the Printer Driver item is configured to the printer port of the DI-714P+ a printer server. The following screen appears: Click on Windows 98se/Me Platforms After you can configure the print server of the DI-714P+: Find out the corresponding... icon of your printer server. Click OK 42 Be sure that icon, and ...
... list attached at the Print To item. Right click on that the Printer Driver item is configured to the printer port of the DI-714P+ a printer server. The following screen appears: Click on Windows 98se/Me Platforms After you can configure the print server of the DI-714P+: Find out the corresponding... icon of your printer server. Click OK 42 Be sure that icon, and ...
Product Manual
Page 59
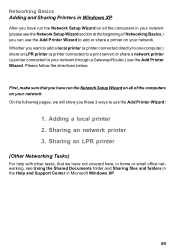
... show you want to add a local printer (a printer connected directly to one computer,) share an LPR printer (a printer connected to a print server) or share a network printer (a printer connected to your network through a Gateway/Router,) use the Add Printer Wizard: 1. Adding a local printer 2. Sharing an network printer 3. Networking Basics Adding and Sharing Printers in...
... show you want to add a local printer (a printer connected directly to one computer,) share an LPR printer (a printer connected to a print server) or share a network printer (a printer connected to your network through a Gateway/Router,) use the Add Printer Wizard: 1. Adding a local printer 2. Sharing an network printer 3. Networking Basics Adding and Sharing Printers in...
Product Manual
Page 68
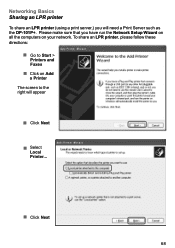
Networking Basics Sharing an LPR printer To share an LPR printer (using a print server,) you have run the Network Setup Wizard on all the computers on Add a Printer The screen to the right will need a Print Server such as the DP-101P+. Please make sure that you will appear Click Next Select Local Printer... Click Next 68 To share an LPR printer, please follow these directions: Go to Start > Printers and Faxes Click on your network.
Networking Basics Sharing an LPR printer To share an LPR printer (using a print server,) you have run the Network Setup Wizard on all the computers on Add a Printer The screen to the right will need a Print Server such as the DP-101P+. Please make sure that you will appear Click Next Select Local Printer... Click Next 68 To share an LPR printer, please follow these directions: Go to Start > Printers and Faxes Click on your network.

Product Manual
Page 70
Networking Basics Sharing an LPR printer In this screen, select Custom Click Settings Enter the Port Name and the Printer Name or IP Address. Select LPR Enter a Queue Name (if your Print-Server/ Gateway has more than one port, you will need a Queue name.) Click OK 70
Networking Basics Sharing an LPR printer In this screen, select Custom Click Settings Enter the Port Name and the Printer Name or IP Address. Select LPR Enter a Queue Name (if your Print-Server/ Gateway has more than one port, you will need a Queue name.) Click OK 70


