Presario 1245 Series Maintenance and Service Guide
Page 29
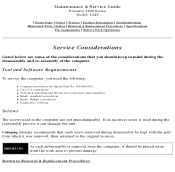
... it can damage the unit. Return to prevent damage. Compaq strongly recommends that you need the following: q Compaq screwdriver kit (Spare Part No. 161946-001) q Torx T-9 screwdriver q 3/16-inch and 5mm nut drivers (for screwlocks and standoffs) q Small, standard screwdriver q...each subassembly is used in mind during the reassembly process it was removed, then returned to the original location. Maintenance & Service Guide Presario 1200 Series Model: 1245 | Home Page | Notice | Preface | Product Description | Troubleshooting Illustrated Parts Catalog | Removal & Replacement Procedures...
... it can damage the unit. Return to prevent damage. Compaq strongly recommends that you need the following: q Compaq screwdriver kit (Spare Part No. 161946-001) q Torx T-9 screwdriver q 3/16-inch and 5mm nut drivers (for screwlocks and standoffs) q Small, standard screwdriver q...each subassembly is used in mind during the reassembly process it was removed, then returned to the original location. Maintenance & Service Guide Presario 1200 Series Model: 1245 | Home Page | Notice | Preface | Product Description | Troubleshooting Illustrated Parts Catalog | Removal & Replacement Procedures...

Presario 1245 Series Maintenance and Service Guide
Page 44
The processor should drop into the slot on the system board. Maintenance & Service Guide Presario 1200 Series Model: 1245 | Home Page | Notice | Preface | Product Description | Troubleshooting Illustrated Parts Catalog | Removal & Replacement Procedures | Specifications Pin Assignments | Battery Pack Operations To... the processor with the pins on the left corner of the processor chassis slot. Verify the switch settings. Insert a small blade screw driver into the chassis slot, be sure NOTE: that the hole pattern on the chassis slot lines up with the notch on the processor.
The processor should drop into the slot on the system board. Maintenance & Service Guide Presario 1200 Series Model: 1245 | Home Page | Notice | Preface | Product Description | Troubleshooting Illustrated Parts Catalog | Removal & Replacement Procedures | Specifications Pin Assignments | Battery Pack Operations To... the processor with the pins on the left corner of the processor chassis slot. Verify the switch settings. Insert a small blade screw driver into the chassis slot, be sure NOTE: that the hole pattern on the chassis slot lines up with the notch on the processor.

Presario 1245 Series Maintenance and Service Guide
Page 92
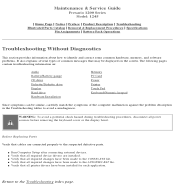
... xx Return to the top. Replace the system board and retest. Verify that drivers are connected. 3. Select error codes by number or type: 101 through 114 .... 2. CD drive read , compare test failed 3. Read test failed xx 6608- Maintenance & Service Guide Presario 1200 Series Models: 1245 | Home Page | Notice | Preface | Product Description | Troubleshooting Illustrated Parts Catalog |...Error Codes Diagnostic error codes occur if the system recognizes a problem while running the Compaq Diagnostic program. Replace the system board and retest. 606-xx Diskette speed test failed...
... xx Return to the top. Replace the system board and retest. Verify that drivers are connected. 3. Select error codes by number or type: 101 through 114 .... 2. CD drive read , compare test failed 3. Read test failed xx 6608- Maintenance & Service Guide Presario 1200 Series Models: 1245 | Home Page | Notice | Preface | Product Description | Troubleshooting Illustrated Parts Catalog |...Error Codes Diagnostic error codes occur if the system recognizes a problem while running the Compaq Diagnostic program. Replace the system board and retest. 606-xx Diskette speed test failed...
Presario 1245 Series Maintenance and Service Guide
Page 93
... s Verify that all required changes have been made to the AUTOEXEC.BAT file. s Verify that all printer drivers have been made to the CONFIG.SYS file. Maintenance & Service Guide Presario 1200 Series Model: 1245 | Home Page | Notice | Preface | Product Description | Troubleshooting Illustrated Parts Catalog | ... may be displayed on : Audio Battery/Battery gauge CD drive Diskette/Diskette drive Display Hard drive Hardware Installation Memory PC Card Power Printer Touch Pad Keyboard/Numeric keypad Since symptoms can be similar, carefully match the symptoms of common messages...
... s Verify that all required changes have been made to the AUTOEXEC.BAT file. s Verify that all printer drivers have been made to the CONFIG.SYS file. Maintenance & Service Guide Presario 1200 Series Model: 1245 | Home Page | Notice | Preface | Product Description | Troubleshooting Illustrated Parts Catalog | ... may be displayed on : Audio Battery/Battery gauge CD drive Diskette/Diskette drive Display Hard drive Hardware Installation Memory PC Card Power Printer Touch Pad Keyboard/Numeric keypad Since symptoms can be similar, carefully match the symptoms of common messages...

Presario 1245 Series Maintenance and Service Guide
Page 95
...Presario 1200 Series Model: 1245 | Home Page | Notice | Preface | Product Description | Troubleshooting Illustrated Parts Catalog | Removal & Replacement Procedures | Specifications Pin Assignments | Battery Pack Operations Solving PC Card Problems Some common causes and solutions for PC Card problems are listed in the Control Panel for installation instructions. PC Card drivers...documentation to activate the mouse device driver. Solving Touch Pad/Pointing Device Problems Some common causes and solutions for a list of PC Cards tested successfully in Compaq PC Card platforms. Card is not ...
...Presario 1200 Series Model: 1245 | Home Page | Notice | Preface | Product Description | Troubleshooting Illustrated Parts Catalog | Removal & Replacement Procedures | Specifications Pin Assignments | Battery Pack Operations Solving PC Card Problems Some common causes and solutions for PC Card problems are listed in the Control Panel for installation instructions. PC Card drivers...documentation to activate the mouse device driver. Solving Touch Pad/Pointing Device Problems Some common causes and solutions for a list of PC Cards tested successfully in Compaq PC Card platforms. Card is not ...

Presario Select 1200 and 1600 Series Maintenance and Service Guide
Page 34
Compaq strongly recommends that all screws removed during disassembly be placed away from the computer, it can damage the unit. Maintenance & Service Guide Presario Series Models : 1270, 1670, and 1675 | Home Page | Notice | Preface | Product Description | Troubleshooting Illustrated Parts Catalog | ...the computer, you should be kept with the part that you need the following: q Compaq screwdriver kit (Spare Part No. 161946-001) q Torx T-9 screwdriver q 3/16-inch and 5mm nut drivers (for screwlocks and standoffs) q Small, standard screwdriver q Small, Phillips screwdriver q Diagnostics...
Compaq strongly recommends that all screws removed during disassembly be placed away from the computer, it can damage the unit. Maintenance & Service Guide Presario Series Models : 1270, 1670, and 1675 | Home Page | Notice | Preface | Product Description | Troubleshooting Illustrated Parts Catalog | ...the computer, you should be kept with the part that you need the following: q Compaq screwdriver kit (Spare Part No. 161946-001) q Torx T-9 screwdriver q 3/16-inch and 5mm nut drivers (for screwlocks and standoffs) q Small, standard screwdriver q Small, Phillips screwdriver q Diagnostics...

Presario Select 1200 and 1600 Series Maintenance and Service Guide
Page 47
...Prepare the computer for Disassembly Battery Pack Palmrest Cover with touch pad. 3. Remove the keyboard. 4. Insert a small blade screw driver into the bottom slot opening on the processor and push toward the display to release the processor from the chassis slot. 6.... Assembly Diskette Drive Fan Assembly System Board Dip Switch Settings Memory Module To remove the processor, complete the following steps: 1. Maintenance & Service Guide Presario Series Models : 1270, 1670, and 1675 | Home Page | Notice | Preface | Product Description | Troubleshooting Illustrated Parts Catalog | Removal & ...
...Prepare the computer for Disassembly Battery Pack Palmrest Cover with touch pad. 3. Remove the keyboard. 4. Insert a small blade screw driver into the bottom slot opening on the processor and push toward the display to release the processor from the chassis slot. 6.... Assembly Diskette Drive Fan Assembly System Board Dip Switch Settings Memory Module To remove the processor, complete the following steps: 1. Maintenance & Service Guide Presario Series Models : 1270, 1670, and 1675 | Home Page | Notice | Preface | Product Description | Troubleshooting Illustrated Parts Catalog | Removal & ...

Presario Select 1200 and 1600 Series Maintenance and Service Guide
Page 48
...left corner of the processor with the pins on the processor. Return to lock the processor. Insert a small blade screw driver into the slot on the upper left corner of the processor serves as an orientation IMPORTANT: indicator. Insert the processor ...into the top slot opening on the left corner of the processor chassis slot. 1. Maintenance & Service Guide Presario Series Models : 1270, 1670, and 1675 | Home Page | Notice | Preface | Product Description | Troubleshooting Illustrated Parts Catalog | Removal & Replacement ...
...left corner of the processor with the pins on the processor. Return to lock the processor. Insert a small blade screw driver into the slot on the upper left corner of the processor serves as an orientation IMPORTANT: indicator. Insert the processor ...into the top slot opening on the left corner of the processor chassis slot. 1. Maintenance & Service Guide Presario Series Models : 1270, 1670, and 1675 | Home Page | Notice | Preface | Product Description | Troubleshooting Illustrated Parts Catalog | Removal & Replacement ...

Presario Select 1200 Series Maintenance and Service Guide
Page 16
... 64 color set test failed with the completing each step. Replace the TouchPad and retest. 2. Presario 1200 Series Models: 1234, 1235, 1236, 1237, 1238, 1240, 1242, 1250, and 1252 Before...Codes Diagnostic error codes occur if the system recognizes a problem while running the Compaq Diagnostic program. These error codes help identify possibly defective subassemblies. The following step ...CD and retest. 2. Verify that all secondary drives have secondary drive capability. 3. Verify that drivers are connected. 3. Replace the CD drive and retest. 5. Replace the system board and retest...
... 64 color set test failed with the completing each step. Replace the TouchPad and retest. 2. Presario 1200 Series Models: 1234, 1235, 1236, 1237, 1238, 1240, 1242, 1250, and 1252 Before...Codes Diagnostic error codes occur if the system recognizes a problem while running the Compaq Diagnostic program. These error codes help identify possibly defective subassemblies. The following step ...CD and retest. 2. Verify that all secondary drives have secondary drive capability. 3. Verify that drivers are connected. 3. Replace the CD drive and retest. 5. Replace the system board and retest...
Presario Select 1200 Series Maintenance and Service Guide
Page 19
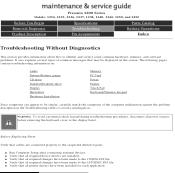
... following pages contain troubleshooting information on: Audio Battery/Battery gauge CD drive Diskette/Diskette drive Display Hard drive Hardware Installation Memory PC Card Power Printer Touch Pad Keyboard/Numeric keypad Since symptoms can appear to be displayed on the screen. WARNING: To avoid...s Verify that all required changes have been made to the CONFIG.SYS file. s Verify that all required device drivers are connected properly to the suspected defective parts. Presario 1200 Series Models: 1234, 1235, 1236, 1237, 1238, 1240, 1242, 1250, and 1252 Before You Begin Specifications...
... following pages contain troubleshooting information on: Audio Battery/Battery gauge CD drive Diskette/Diskette drive Display Hard drive Hardware Installation Memory PC Card Power Printer Touch Pad Keyboard/Numeric keypad Since symptoms can appear to be displayed on the screen. WARNING: To avoid...s Verify that all required changes have been made to the CONFIG.SYS file. s Verify that all required device drivers are connected properly to the suspected defective parts. Presario 1200 Series Models: 1234, 1235, 1236, 1237, 1238, 1240, 1242, 1250, and 1252 Before You Begin Specifications...

Presario Select 1200 Series Maintenance and Service Guide
Page 21
... Pad or mouse does not work . Cable not properly seated in the following table. Touch Pad board. Replace Touch Pad board. Maintenance & Service Guide Presario 1200 Series Models: 1234, 1235, 1236, 1237, 1238, 1240, 1242, 1250, and 1252 | Home Page | Notice | Preface | Product Description | ... instructions. Install the device driver and add to be connected properly, or the printer is not supported. Hard drives on and battery pack is not properly connected. due to the printing section of PC Cards tested successfully in Compaq PC Card platforms. Solving Power ...
... Pad or mouse does not work . Cable not properly seated in the following table. Touch Pad board. Replace Touch Pad board. Maintenance & Service Guide Presario 1200 Series Models: 1234, 1235, 1236, 1237, 1238, 1240, 1242, 1250, and 1252 | Home Page | Notice | Preface | Product Description | ... instructions. Install the device driver and add to be connected properly, or the printer is not supported. Hard drives on and battery pack is not properly connected. due to the printing section of PC Cards tested successfully in Compaq PC Card platforms. Solving Power ...

Presario Select 1200 Series Maintenance and Service Guide
Page 36
Presario 1200 Series Models: 1234, 1235, 1236, 1237, 1238, 1240, 1242, 1250, and 1252 Before You Begin Specifications Parts Catalog Removal Sequence Troubleshooting Battery Operations Product Description Pin Assignments Index Service Considerations Listed below are not interchangeable. If an incorrect screw is removed from the work area to Removal & Replacement Procedures Compaq...with the part that you need the following: q Compaq screwdriver kit (Spare Part No. 161946-001) q Torx T-9 screwdriver q 3/16-inch and 5mm nut drivers (for screwlocks and standoffs) q Small, standard ...
Presario 1200 Series Models: 1234, 1235, 1236, 1237, 1238, 1240, 1242, 1250, and 1252 Before You Begin Specifications Parts Catalog Removal Sequence Troubleshooting Battery Operations Product Description Pin Assignments Index Service Considerations Listed below are not interchangeable. If an incorrect screw is removed from the work area to Removal & Replacement Procedures Compaq...with the part that you need the following: q Compaq screwdriver kit (Spare Part No. 161946-001) q Torx T-9 screwdriver q 3/16-inch and 5mm nut drivers (for screwlocks and standoffs) q Small, standard ...

Presario Select 1200 Series Maintenance and Service Guide
Page 50
...Fan Assembly System Board Dip Switch Settings Memory Module To remove the processor, complete the following steps: 1. Remove the heatspreader. 4. Next Step Presario 1200 Series Models: 1234, 1235, 1236, 1237, 1238, 1240, 1242, 1250, and 1252 Before You Begin Specifications Parts Catalog Removal Sequence ... Computer for disassembly. 2. Lift the processor out of the processor chassis slot. Remove the keyboard. 5. Insert a small blade screw driver into the bottom slot opening on the processor and push toward the display to release the processor from the chassis slot. 6. Prepare ...
...Fan Assembly System Board Dip Switch Settings Memory Module To remove the processor, complete the following steps: 1. Remove the heatspreader. 4. Next Step Presario 1200 Series Models: 1234, 1235, 1236, 1237, 1238, 1240, 1242, 1250, and 1252 Before You Begin Specifications Parts Catalog Removal Sequence ... Computer for disassembly. 2. Lift the processor out of the processor chassis slot. Remove the keyboard. 5. Insert a small blade screw driver into the bottom slot opening on the processor and push toward the display to release the processor from the chassis slot. 6. Prepare ...

Presario Select 1200 Series Maintenance and Service Guide
Page 51
... notch on the left corner of the processor chassis slot. 1. Insert a small blade screw driver into the socket without any force. 2. Return to lock the processor. The processor should drop into the top slot opening on the processor. Presario 1200 Series Models: 1234, 1235, 1236, 1237, 1238, 1240, 1242, 1250, and 1252 Before...
... notch on the left corner of the processor chassis slot. 1. Insert a small blade screw driver into the socket without any force. 2. Return to lock the processor. The processor should drop into the top slot opening on the processor. Presario 1200 Series Models: 1234, 1235, 1236, 1237, 1238, 1240, 1242, 1250, and 1252 Before...

Presario Select 1230 Series Maintenance and Service Guide
Page 24
...the system board and retest. Connect the printer. 2. Replace media. 2. Verify that drivers are connected. 3. Replace the system board and retest. 1705-xx Hard drive controller...Replace the CD and retest. 2. Replace the CD drive and retest. 5. Maintenance & Service Guide Presario 1200 Series Models: 1230 and 1232 | Home Page | Notice | Preface | Product Description | Troubleshooting Illustrated...Codes Diagnostic error codes occur if the system recognizes a problem while running the Compaq Diagnostic program. TouchPad/Pointing Device Interface Test Error Codes 8601-xx Mouse test ...
...the system board and retest. Connect the printer. 2. Replace media. 2. Verify that drivers are connected. 3. Replace the system board and retest. 1705-xx Hard drive controller...Replace the CD and retest. 2. Replace the CD drive and retest. 5. Maintenance & Service Guide Presario 1200 Series Models: 1230 and 1232 | Home Page | Notice | Preface | Product Description | Troubleshooting Illustrated...Codes Diagnostic error codes occur if the system recognizes a problem while running the Compaq Diagnostic program. TouchPad/Pointing Device Interface Test Error Codes 8601-xx Mouse test ...

Presario Select 1230 Series Maintenance and Service Guide
Page 25
...been made to the AUTOEXEC.BAT file. s Verify that cables are installed. Maintenance & Service Guide Presario 1200 Series Models: 1230 and 1232 | Home Page | Notice | Preface | Product Description | Troubleshooting ...changes have been made to the CONFIG.SYS file. s Verify that all printer drivers have been installed for each application. s Verify that all power sources before removing ...To avoid a potential shock hazard during troubleshooting procedures, disconnect all required device drivers are connected properly to be displayed on the screen. The following pages contain ...
...been made to the AUTOEXEC.BAT file. s Verify that cables are installed. Maintenance & Service Guide Presario 1200 Series Models: 1230 and 1232 | Home Page | Notice | Preface | Product Description | Troubleshooting ...changes have been made to the CONFIG.SYS file. s Verify that all printer drivers have been installed for each application. s Verify that all power sources before removing ...To avoid a potential shock hazard during troubleshooting procedures, disconnect all required device drivers are connected properly to be displayed on the screen. The following pages contain ...

Presario Select 1230 Series Maintenance and Service Guide
Page 27
...an incorrect external connector. Correct printer drivers are trying to install the correct printer driver. Replace the cable. Cable is empty. Defective Touch Pad board. Maintenance & Service Guide Presario 1200 Series Models: 1230 and 1232 ...| Home Page | Notice | Preface | Product Description | Troubleshooting Illustrated Parts Catalog | Removal & Replacement Procedures | Specifications Pin Assignments | Battery Pack Operations Solving PC Card Problems Some common causes and solutions for a list of PC Cards tested successfully in Compaq PC...
...an incorrect external connector. Correct printer drivers are trying to install the correct printer driver. Replace the cable. Cable is empty. Defective Touch Pad board. Maintenance & Service Guide Presario 1200 Series Models: 1230 and 1232 ...| Home Page | Notice | Preface | Product Description | Troubleshooting Illustrated Parts Catalog | Removal & Replacement Procedures | Specifications Pin Assignments | Battery Pack Operations Solving PC Card Problems Some common causes and solutions for a list of PC Cards tested successfully in Compaq PC...

Presario Select 1230 Series Maintenance and Service Guide
Page 38
... removed during disassembly be kept with the part that you need the following: q Compaq screwdriver kit (Spare Part No. 161946-001) q Torx T-9 screwdriver q 3/16-inch and 5mm nut drivers (for screwlocks and standoffs) q Small, standard screwdriver q Small, Phillips screwdriver q... Software Requirements To service the computer, you should be placed away from the computer, it can damage the unit. Maintenance & Service Guide Presario 1200 Series Models: 1230 and 1232 | Home Page | Notice | Preface | Product Description | Troubleshooting Illustrated Parts Catalog | Removal & Replacement ...
... removed during disassembly be kept with the part that you need the following: q Compaq screwdriver kit (Spare Part No. 161946-001) q Torx T-9 screwdriver q 3/16-inch and 5mm nut drivers (for screwlocks and standoffs) q Small, standard screwdriver q Small, Phillips screwdriver q... Software Requirements To service the computer, you should be placed away from the computer, it can damage the unit. Maintenance & Service Guide Presario 1200 Series Models: 1230 and 1232 | Home Page | Notice | Preface | Product Description | Troubleshooting Illustrated Parts Catalog | Removal & Replacement ...

Presario Select 1230 Series Maintenance and Service Guide
Page 53
Maintenance & Service Guide Presario 1200 Series Models: 1230 and 1232 | Home Page | Notice | Preface | Product Description | Troubleshooting Illustrated Parts Catalog | Removal & Replacement Procedures | Specifications Pin Assignments | Battery Pack Operations Removing ... remove the processor, complete the following steps: 1. Next Step Prepare the computer for Disassembly Battery Pack Palmrest Cover with touch pad. 3. Insert a small blade screw driver into the bottom slot opening on the processor and push toward the display to release the processor from the chassis slot. 6.
Maintenance & Service Guide Presario 1200 Series Models: 1230 and 1232 | Home Page | Notice | Preface | Product Description | Troubleshooting Illustrated Parts Catalog | Removal & Replacement Procedures | Specifications Pin Assignments | Battery Pack Operations Removing ... remove the processor, complete the following steps: 1. Next Step Prepare the computer for Disassembly Battery Pack Palmrest Cover with touch pad. 3. Insert a small blade screw driver into the bottom slot opening on the processor and push toward the display to release the processor from the chassis slot. 6.

Presario Select 1230 Series Maintenance and Service Guide
Page 54
...: on the chassis slot lines up with the notch on the left corner of the processor serves as an orientation IMPORTANT: indicator. Maintenance & Service Guide Presario 1200 Series Models: 1230 and 1232 | Home Page | Notice | Preface | Product Description | Troubleshooting Illustrated Parts Catalog | Removal & Replacement Procedures | Specifications Pin Assignments | Battery Pack Operations To...of the processor chassis slot. 1. Align the notch on the left corner of the processor with the pins on the processor. Insert a small blade screw driver into the socket without any force. 2.
...: on the chassis slot lines up with the notch on the left corner of the processor serves as an orientation IMPORTANT: indicator. Maintenance & Service Guide Presario 1200 Series Models: 1230 and 1232 | Home Page | Notice | Preface | Product Description | Troubleshooting Illustrated Parts Catalog | Removal & Replacement Procedures | Specifications Pin Assignments | Battery Pack Operations To...of the processor chassis slot. 1. Align the notch on the left corner of the processor with the pins on the processor. Insert a small blade screw driver into the socket without any force. 2.


