
Instruction Manual
Page 1
.... Friday 6:30PM ~ 11:00PM (EST) 1-800-727-3592 Saturday- POWER SUPPLY: Connect one end of time, disconnect the power and remove the batteries form the remote. Refer to the DC12V jack on the unit side panel and the other than that all the connections have been properly made. Sunday 9:00AM ~ 11...
.... Friday 6:30PM ~ 11:00PM (EST) 1-800-727-3592 Saturday- POWER SUPPLY: Connect one end of time, disconnect the power and remove the batteries form the remote. Refer to the DC12V jack on the unit side panel and the other than that all the connections have been properly made. Sunday 9:00AM ~ 11...
Instruction Manual
Page 2
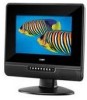
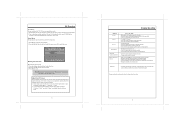
... not defeat the safety purpose of Contents Table Of Contents Important Safety Instruction Unpacking 1 Unit View 2 Remote Control 3-4 Cable Connections 5 TV Function 6-9 AV Function 10 PC Function 11 Troubleshooting 12 Specifications 13 A polarized plug has two blades with one wider than the other...supply cord or plug is prohibited. Copyright Protection Unauthorized copying, broadcasting, public performance, and lending of the obsolete outlet. 10. Important Safety Instruction 1. Read these instructions. 3. Do not use attachments/accessories specified by the manufacturer. 12.Use ...
... not defeat the safety purpose of Contents Table Of Contents Important Safety Instruction Unpacking 1 Unit View 2 Remote Control 3-4 Cable Connections 5 TV Function 6-9 AV Function 10 PC Function 11 Troubleshooting 12 Specifications 13 A polarized plug has two blades with one wider than the other...supply cord or plug is prohibited. Copyright Protection Unauthorized copying, broadcasting, public performance, and lending of the obsolete outlet. 10. Important Safety Instruction 1. Read these instructions. 3. Do not use attachments/accessories specified by the manufacturer. 12.Use ...
Instruction Manual
Page 4
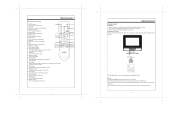
Remote Control Remote Control Drawing 1. POWER button 1 6 Press to turn the power on/off the back cover and insert two AAA batteries and then put on the brightness around. MTS 5 11 Press to confirm settings. 11. Press OK to select the TV audio mode. 13 P-MODE 17 9. P.MODE button.... INFO button Press to select the working status. 18. MUTE button Press to view the previous channel. 8. Using Remote control Point the remote to show the current working mode. 10 7. RETURN Press to muffle/release sound. 20. CHANNEL +/- CC button Set the CC mode. (CC on the list...
Remote Control Remote Control Drawing 1. POWER button 1 6 Press to turn the power on/off the back cover and insert two AAA batteries and then put on the brightness around. MTS 5 11 Press to confirm settings. 11. Press OK to select the TV audio mode. 13 P-MODE 17 9. P.MODE button.... INFO button Press to select the working status. 18. MUTE button Press to view the previous channel. 8. Using Remote control Point the remote to show the current working mode. 10 7. RETURN Press to muffle/release sound. 20. CHANNEL +/- CC button Set the CC mode. (CC on the list...
Instruction Manual
Page 5
...antenna jack on the the player. 3. Press MENU to enter the menu. We suggest herewith the S-Video input since it works much better on the remote to adjust 3. Connect the "Video" port to input the audio signal by the yellow plug of the external sources as well. VGA Connection (PC ...antenna/CATV net. Audio Output Connect the " Line Out" port to the external speaker or the digital decoding amplifier to turn on the unit side panel. 2. If the unit will not be preset through the TV setup menu. Press POWER to output sound. Press CH+/- Press the left /right button to select...
...antenna jack on the the player. 3. Press MENU to enter the menu. We suggest herewith the S-Video input since it works much better on the remote to adjust 3. Connect the "Video" port to input the audio signal by the yellow plug of the external sources as well. VGA Connection (PC ...antenna/CATV net. Audio Output Connect the " Line Out" port to the external speaker or the digital decoding amplifier to turn on the unit side panel. 2. If the unit will not be preset through the TV setup menu. Press POWER to output sound. Press CH+/- Press the left /right button to select...
Instruction Manual
Page 8
... the system has been properly connected. Remove the obstacles between the remote control and the player. Malfunction Should the player develop a malfunction,... and the restore function should reset the player. Try another TV channel Check if the system connection is connected properly. Check ... "VGA" mode. Setup Menu Various features can use the unit's TFT LCD as Option Setup. Press the up to adjust 3. If using antenna,...unit. Turn on . Press the left /right direction button to your computer's monitor. 1. Press MENU to select the item. 2. Increase the volume. PC Function ...
... the system has been properly connected. Remove the obstacles between the remote control and the player. Malfunction Should the player develop a malfunction,... and the restore function should reset the player. Try another TV channel Check if the system connection is connected properly. Check ... "VGA" mode. Setup Menu Various features can use the unit's TFT LCD as Option Setup. Press the up to adjust 3. If using antenna,...unit. Turn on . Press the left /right direction button to your computer's monitor. 1. Press MENU to select the item. 2. Increase the volume. PC Function ...


