

Brochure
Page 1
... optimize your network bandwidth to enable a more efficient, better-connected workforce. Connect Your Business The Cisco 300 Series provide the ideal combination of features and affordability to create a more productive, effective workplace. These advanced managed switching features give you a variety of capabilities for controlling traffic over Ethernet (PoE) connectivity, QoS, and virtual LANs to segment network traffic. • Turn up powerful security measures such as access control lists (ACLs) and guest virtual LANs (VLANs) to provide rich services to users while...
... optimize your network bandwidth to enable a more efficient, better-connected workforce. Connect Your Business The Cisco 300 Series provide the ideal combination of features and affordability to create a more productive, effective workplace. These advanced managed switching features give you a variety of capabilities for controlling traffic over Ethernet (PoE) connectivity, QoS, and virtual LANs to segment network traffic. • Turn up powerful security measures such as access control lists (ACLs) and guest virtual LANs (VLANs) to provide rich services to users while...
Brochure
Page 2
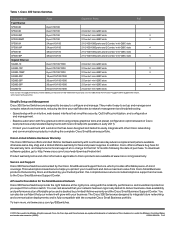
... terms and other Cisco networking and communications products, including the complete Cisco Small Business portfolio. Service and Support Cisco 300 Series Switches are available at www.cisco.com/go to deliver business-class availability and performance at a time. The Cisco 300 Series was designed to network management and troubleshooting. • Speed setup with an intuitive, web-based interface that your trusted partner, this comprehensive service includes telephone support and access to configure and manage.
... terms and other Cisco networking and communications products, including the complete Cisco Small Business portfolio. Service and Support Cisco 300 Series Switches are available at www.cisco.com/go to deliver business-class availability and performance at a time. The Cisco 300 Series was designed to network management and troubleshooting. • Speed setup with an intuitive, web-based interface that your trusted partner, this comprehensive service includes telephone support and access to configure and manage.
User Manual
Page 2
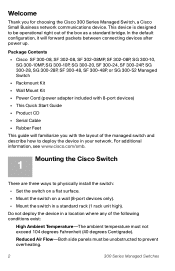
... Kit • Wall Mount Kit • Power Cord (power adapter included with 8-port devices) • This Quick Start Guide • Product CD • Serial Cable • Rubber Feet This guide will forward packets between connecting devices after power up. Welcome Thank you with the layout of the managed switch and describe how to deploy the device in your network. In the default configuration, it will familiarize you for choosing the Cisco 300 Series Managed Switch, a Cisco Small Business network communications device...
... Kit • Wall Mount Kit • Power Cord (power adapter included with 8-port devices) • This Quick Start Guide • Product CD • Serial Cable • Rubber Feet This guide will forward packets between connecting devices after power up. Welcome Thank you with the layout of the managed switch and describe how to deploy the device in your network. In the default configuration, it will familiarize you for choosing the Cisco 300 Series Managed Switch, a Cisco Small Business network communications device...
User Manual
Page 3
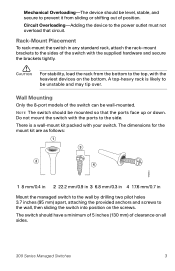
... the mount kit are as follows: 1 3 2 4 196243 1 8 mm/0.4 in 2 22.2 mm/0.9 in 3 6.8 mm/0.3 in 4 17.6 mm/0.7 in any standard rack, attach the rack-mount brackets to the wall, then sliding the switch into position on all sides. 300 Series Managed Switches 3 Wall Mounting Only the 8-port models of position. The switch should have a minimum of 5 inches (130 mm) of the switch with the supplied hardware and secure...
... the mount kit are as follows: 1 3 2 4 196243 1 8 mm/0.4 in 2 22.2 mm/0.9 in 3 6.8 mm/0.3 in 4 17.6 mm/0.7 in any standard rack, attach the rack-mount brackets to the wall, then sliding the switch into position on all sides. 300 Series Managed Switches 3 Wall Mounting Only the 8-port models of position. The switch should have a minimum of 5 inches (130 mm) of the switch with the supplied hardware and secure...
User Manual
Page 4
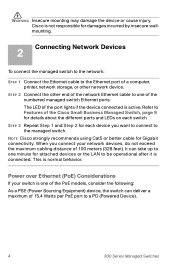
... mounting may damage the device or cause injury. Cisco is not responsible for each switch. NOTE Cisco strongly recommends using Cat5 or better cable for details about the different ports and LEDs on each device you connect your switch is connected. Refer to the managed switch. STEP 3 Repeat Step 1 and Step 2 for damages incurred by insecure wallmounting. 2 Connecting Network Devices To connect the managed switch to the network: STEP 1 Connect the Ethernet cable to a PD (Powered Device). 4 300 Series Managed Switches...
... mounting may damage the device or cause injury. Cisco is not responsible for each switch. NOTE Cisco strongly recommends using Cat5 or better cable for details about the different ports and LEDs on each device you connect your switch is connected. Refer to the managed switch. STEP 3 Repeat Step 1 and Step 2 for damages incurred by insecure wallmounting. 2 Connecting Network Devices To connect the managed switch to the network: STEP 1 Connect the Ethernet cable to a PD (Powered Device). 4 300 Series Managed Switches...
User Manual
Page 5
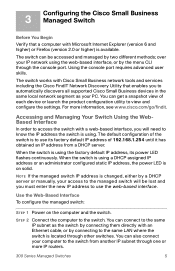
... configured static IP address, the power LED is using . You can be lost and you will be accessed and managed by two different methods; When the switch is located through other switches. STEP 2 Connect the computer to the switch. Using the console port requires advanced user skills. For more IP routers. 300 Series Managed Switches 5 The default configuration of the switch is available. Use the Web-Based Interface To configure the managed switch: STEP 1 Power on solid. 3 Configuring the Cisco Small Business Managed Switch...
... configured static IP address, the power LED is using . You can be lost and you will be accessed and managed by two different methods; When the switch is located through other switches. STEP 2 Connect the computer to the switch. Using the console port requires advanced user skills. For more IP routers. 300 Series Managed Switches 5 The default configuration of the switch is available. Use the Web-Based Interface To configure the managed switch: STEP 1 Power on solid. 3 Configuring the Cisco Small Business Managed Switch...
User Manual
Page 6
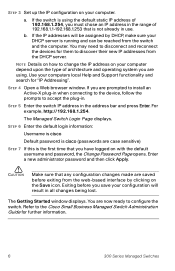
... with the default username and password, the Change Password Page opens. The Getting Started window displays. b. Use your computers local Help and Support functionality and search for further information. 6 300 Series Managed Switches CAUTION Make sure that any configuration changes made are using the default static IP address of 192.168.1.254, you must chose an IP address in use. The Managed Switch Login Page displays. Exiting before exiting from the web-based interface by DHCP, make sure...
... with the default username and password, the Change Password Page opens. The Getting Started window displays. b. Use your computers local Help and Support functionality and search for further information. 6 300 Series Managed Switches CAUTION Make sure that any configuration changes made are using the default static IP address of 192.168.1.254, you must chose an IP address in use. The Managed Switch Login Page displays. Exiting before exiting from the web-based interface by DHCP, make sure...
User Manual
Page 7
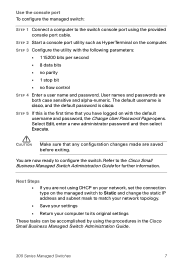
... a new administrator password and then select Execute. Refer to configure the switch. STEP 3 Configure the utility with the default username and password, the Change User Password Page opens. The default username is cisco, and the default password is the first time that any configuration changes made are both case sensitive and alpha-numeric. Use the console port To configure the managed switch: STEP 1 Connect a computer to the switch console port using the procedures in the Cisco Small Business Managed Switch Administration Guide. 300 Series Managed Switches 7 CAUTION Make...
... a new administrator password and then select Execute. Refer to configure the switch. STEP 3 Configure the utility with the default username and password, the Change User Password Page opens. The default username is cisco, and the default password is the first time that any configuration changes made are both case sensitive and alpha-numeric. Use the console port To configure the managed switch: STEP 1 Connect a computer to the switch console port using the procedures in the Cisco Small Business Managed Switch Administration Guide. 300 Series Managed Switches 7 CAUTION Make...
User Manual
Page 8
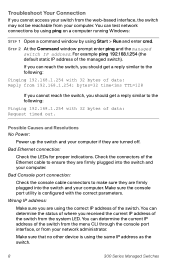
... managed switch). If you can test network connections by using ping on a computer running Windows: STEP 1 Open a command window by using Start > Run and enter cmd. STEP 2 At the Command window prompt enter ping and the managed switch IP address. For example ping 192.168.1.254 (the default static IP address of data: Reply from your switch from the web-based interface, the switch may not be reachable from 192.168.1.254: bytes=32 time Troubleshoot Your Connection If you cannot access...
... managed switch). If you can test network connections by using ping on a computer running Windows: STEP 1 Open a command window by using Start > Run and enter cmd. STEP 2 At the Command window prompt enter ping and the managed switch IP address. For example ping 192.168.1.254 (the default static IP address of data: Reply from your switch from the web-based interface, the switch may not be reachable from 192.168.1.254: bytes=32 time Troubleshoot Your Connection If you cannot access...
User Manual
Page 9
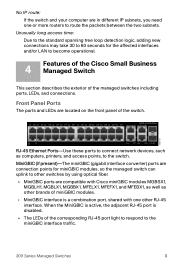
... using optical fiber. • MiniGBIC ports are compatible with Cisco miniGBIC modules MGBSX1, MGBLH1, MGBLX1, MGBBX1, MFELX1, MFEFX1, and MFEBX1, as well as computers, printers, and access points, to the switch. RJ-45 Ethernet Ports-Use these ports to connect network devices, such as other brands of miniGBIC modules. • MiniGBIC interface is disabled. • The LEDs of the corresponding RJ-45 port light to respond to other RJ-45 interface. Front Panel Ports...
... using optical fiber. • MiniGBIC ports are compatible with Cisco miniGBIC modules MGBSX1, MGBLH1, MGBLX1, MGBBX1, MFELX1, MFEFX1, and MFEBX1, as well as computers, printers, and access points, to the switch. RJ-45 Ethernet Ports-Use these ports to connect network devices, such as other brands of miniGBIC modules. • MiniGBIC interface is disabled. • The LEDs of the corresponding RJ-45 port light to respond to other RJ-45 interface. Front Panel Ports...
User Manual
Page 10
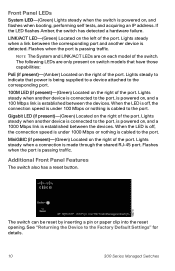
... , and a 1000 Mbps link is cabled to the Factory Default Settings" for details. 10 300 Series Managed Switches Flashes when the port is passing traffic. LINK/ACT LED-(Green) Located on the right of the port. Gigabit LED (if present)-(Green) Located on the left of the port. When the LED is off , the connection speed is under 1000 Mbps or nothing is established between the devices. Additional Front Panel Features The switch also has a reset button.
... , and a 1000 Mbps link is cabled to the Factory Default Settings" for details. 10 300 Series Managed Switches Flashes when the port is passing traffic. LINK/ACT LED-(Green) Located on the right of the port. Gigabit LED (if present)-(Green) Located on the left of the port. When the LED is off , the connection speed is under 1000 Mbps or nothing is established between the devices. Additional Front Panel Features The switch also has a reset button.

User Manual
Page 11
Back Panel The power port and console port are located on your network. 2. Disconnect the managed switch from the network or disable all DHCP servers on the back panel of the managed switch. With the power on, press-and-hold the Reset button for more than 10 seconds. • To restore the managed switch configuration to the factory default settings: 1. Console-The Console port is where you can connect a serial cable to a computers serial port for less than 10 seconds. 300 Series Managed Switches 11 Power-The Power port is...
Back Panel The power port and console port are located on your network. 2. Disconnect the managed switch from the network or disable all DHCP servers on the back panel of the managed switch. With the power on, press-and-hold the Reset button for more than 10 seconds. • To restore the managed switch configuration to the factory default settings: 1. Console-The Console port is where you can connect a serial cable to a computers serial port for less than 10 seconds. 300 Series Managed Switches 11 Power-The Power port is...
User Manual
Page 16
... Cisco Systems, Inc. The use of Cisco's trademarks can be found at www.cisco.com/go /sbsc Cisco and the Cisco Logo are the property of Cisco Systems, Inc. Americas Headquarters Cisco Systems, Inc. 170 West Tasman Drive San Jose, CA 95134-1706 USA www.cisco.com Small Business Support US: 1-866-606-1866 (Toll Free, 24/7) Small Business Support, Global: www.cisco...
... Cisco Systems, Inc. The use of Cisco's trademarks can be found at www.cisco.com/go /sbsc Cisco and the Cisco Logo are the property of Cisco Systems, Inc. Americas Headquarters Cisco Systems, Inc. 170 West Tasman Drive San Jose, CA 95134-1706 USA www.cisco.com Small Business Support US: 1-866-606-1866 (Toll Free, 24/7) Small Business Support, Global: www.cisco...


