

Getting Started Guide
Page 5
... Network 2-3 Auto-Registering Your Phone Using TAPS 2-6 Using the Cisco IP Phone 7910 Series 3-1 How to Use the Handset and Speaker 3-2 Using the Handset 3-2 Using the Speaker 3-2 Adjusting the Handset Volume 3-3 Adjusting the Speaker Volume 3-3 Customizing Phone Settings 3-4 Adjusting the Ringer Volume 3-4 Changing the Ringer Sound 3-4 Changing the LCD Contrast 3-5 Making Telephone Calls 3-5 Placing a Call 3-6 Answering a Call 3-6 Ending a Call 3-6 Muting a Call 3-7 Placing a Call on Hold 3-7 Transferring a Call 3-7 Redialing the Last Number Dialed 3-8 Getting Started with the Cisco IP Phone...
... Network 2-3 Auto-Registering Your Phone Using TAPS 2-6 Using the Cisco IP Phone 7910 Series 3-1 How to Use the Handset and Speaker 3-2 Using the Handset 3-2 Using the Speaker 3-2 Adjusting the Handset Volume 3-3 Adjusting the Speaker Volume 3-3 Customizing Phone Settings 3-4 Adjusting the Ringer Volume 3-4 Changing the Ringer Sound 3-4 Changing the LCD Contrast 3-5 Making Telephone Calls 3-5 Placing a Call 3-6 Answering a Call 3-6 Ending a Call 3-6 Muting a Call 3-7 Placing a Call on Hold 3-7 Transferring a Call 3-7 Redialing the Last Number Dialed 3-8 Getting Started with the Cisco IP Phone...

Getting Started Guide
Page 6
Contents INDEX Parking a Call 3-8 Making Conference Calls 3-9 Placing a Conference Call 3-9 Establishing Meet-Me Conference Calls 3-10 Using Call Pickup 3-10 Picking Up Calls in Your Group 3-11 Picking Up Calls Outside of Your Group 3-11 Using Call Forwarding 3-12 Forwarding All Calls 3-12 Forwarding All Calls When Not at Your Phone 3-13 Using Voice Mail 3-14 Configuring Speed Dial Buttons 3-14 Getting Started with the Cisco IP Phone 7910 Series vi 78-11443-02
Contents INDEX Parking a Call 3-8 Making Conference Calls 3-9 Placing a Conference Call 3-9 Establishing Meet-Me Conference Calls 3-10 Using Call Pickup 3-10 Picking Up Calls in Your Group 3-11 Picking Up Calls Outside of Your Group 3-11 Using Call Forwarding 3-12 Forwarding All Calls 3-12 Forwarding All Calls When Not at Your Phone 3-13 Using Voice Mail 3-14 Configuring Speed Dial Buttons 3-14 Getting Started with the Cisco IP Phone 7910 Series vi 78-11443-02
Getting Started Guide
Page 8
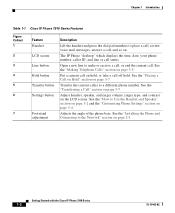
... Chapter 1 Introduction Table 1-1 Cisco IP Phone 7910 Series Features Figure Callout 1 2 3 4 5 6 7 Feature Handset LCD screen Line button Hold button Transfer button Settings button Footstand adjustment Description Lift the handset and press the dial pad numbers to place a call, review voice mail messages, answer a call off hold , or take a call , and so on page 3-4. The IP Phone "desktop" which displays the time, date, your phone number, caller ID, and line or call . Open a new line to a different phone number. Getting Started with the Cisco IP Phone 7910 Series 1-2 78-11443-02
... Chapter 1 Introduction Table 1-1 Cisco IP Phone 7910 Series Features Figure Callout 1 2 3 4 5 6 7 Feature Handset LCD screen Line button Hold button Transfer button Settings button Footstand adjustment Description Lift the handset and press the dial pad numbers to place a call, review voice mail messages, answer a call off hold , or take a call , and so on page 3-4. The IP Phone "desktop" which displays the time, date, your phone number, caller ID, and line or call . Open a new line to a different phone number. Getting Started with the Cisco IP Phone 7910 Series 1-2 78-11443-02
Getting Started Guide
Page 9
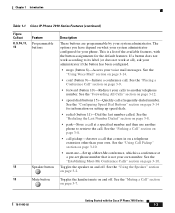
... on page 3-8. • call pickup-Answer a call that comes in on setting up a Meet-Me conference, which is a conference at a pre-set phone number that is a list of the available features, with the Cisco IP Phone 7910 Series 1-3 Toggles the speaker on and off . See the "Using the Speaker" section on page 3-2. 13 Mute button Toggles the handset mute on and off . See the "Using Voice Mail" section on page 3-7. 78-11443-02 Getting Started with the button assignments for your voice mail messages...
... on page 3-8. • call pickup-Answer a call that comes in on setting up a Meet-Me conference, which is a conference at a pre-set phone number that is a list of the available features, with the Cisco IP Phone 7910 Series 1-3 Toggles the speaker on and off . See the "Using the Speaker" section on page 3-2. 13 Mute button Toggles the handset mute on and off . See the "Using Voice Mail" section on page 3-7. 78-11443-02 Getting Started with the button assignments for your voice mail messages...
Getting Started Guide
Page 10
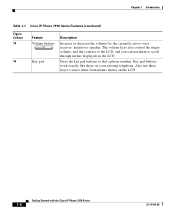
... decrease the volume for the currently active voice receiver: handset or speaker. Press the key pad buttons to select items from menus shown on the LCD Getting Started with the Cisco IP Phone 7910 Series 1-4 78-11443-02 Also use them to scroll through menus displayed on your existing telephone. The volume keys also control the ringer volume, and the contrast of the LCD, and you can use these keys to dial a phone number.
... decrease the volume for the currently active voice receiver: handset or speaker. Press the key pad buttons to select items from menus shown on the LCD Getting Started with the Cisco IP Phone 7910 Series 1-4 78-11443-02 Also use them to scroll through menus displayed on your existing telephone. The volume keys also control the ringer volume, and the contrast of the LCD, and you can use these keys to dial a phone number.
Getting Started Guide
Page 14
... Cisco IP Phone 7910 Series 2-4 78-11443-02 After the telephone has power connected to do not have an access port, you . Once completed, the main LCD screen appears, displaying the phone's extension (or directory number) and the current date and time. There is not available on the wall using the display and buttons most comfortable for help. However, this . contact your system administrator. Push in a public location; Installing the Phone and Connecting to the Network Chapter 2 Installing the Cisco IP Phone 7910 Series...
... Cisco IP Phone 7910 Series 2-4 78-11443-02 After the telephone has power connected to do not have an access port, you . Once completed, the main LCD screen appears, displaying the phone's extension (or directory number) and the current date and time. There is not available on the wall using the display and buttons most comfortable for help. However, this . contact your system administrator. Push in a public location; Installing the Phone and Connecting to the Network Chapter 2 Installing the Cisco IP Phone 7910 Series...

Getting Started Guide
Page 15
... Cisco IP Phone 7910 Series Installing the Phone and Connecting to the Network Figure 2-2 Using the Handset Rest 1 2 3 77354 1 Set the handset aside and use your thumb and finger to grasp and pull out the square plastic tab in the handset rest. 2 Rotate the tab 180 degrees. 3 Slide the tab back into a slot in the rest. Step 7 If your telephone, see the "Auto-Registering Your Phone Using TAPS" section on page...
... Cisco IP Phone 7910 Series Installing the Phone and Connecting to the Network Figure 2-2 Using the Handset Rest 1 2 3 77354 1 Set the handset aside and use your thumb and finger to grasp and pull out the square plastic tab in the handset rest. 2 Rotate the tab 180 degrees. 3 Slide the tab back into a slot in the rest. Step 7 If your telephone, see the "Auto-Registering Your Phone Using TAPS" section on page...
Getting Started Guide
Page 16
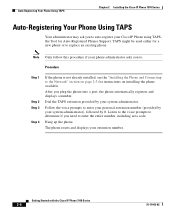
Auto-Registering Your Phone Using TAPS Chapter 2 Installing the Cisco IP Phone 7910 Series Auto-Registering Your Phone Using TAPS Your administrator may ask you to. TAPS might be used either for a new phone or to the Network" section on page 2-3 for Auto-Registered Phones Support. Dial the TAPS extension provided by your extension number. The phone resets and displays your system administrator. Follow the voice prompts to auto-register your system administrator), followed by your Cisco IP Phone using TAPS, the Tool for instructions on installing the phone available. ...
Auto-Registering Your Phone Using TAPS Chapter 2 Installing the Cisco IP Phone 7910 Series Auto-Registering Your Phone Using TAPS Your administrator may ask you to. TAPS might be used either for a new phone or to the Network" section on page 2-3 for Auto-Registered Phones Support. Dial the TAPS extension provided by your extension number. The phone resets and displays your system administrator. Follow the voice prompts to auto-register your system administrator), followed by your Cisco IP Phone using TAPS, the Tool for instructions on installing the phone available. ...
Getting Started Guide
Page 17
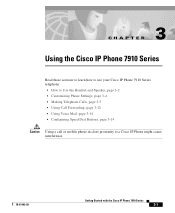
CH A P T E R 3 Using the Cisco IP Phone 7910 Series Read these sections to learn how to use your Cisco IP Phone 7910 Series telephone: • How to Use the Handset and Speaker, page 3-2 • Customizing Phone Settings, page 3-4 • Making Telephone Calls, page 3-5 • Using Call Forwarding, page 3-12 • Using Voice Mail, page 3-14 • Configuring Speed Dial Buttons, page 3-14 Caution Using a cell or mobile phone in close proximity to a Cisco IP Phone might cause interference. 78-11443-02 Getting Started with the Cisco IP Phone 7910 Series 3-1
CH A P T E R 3 Using the Cisco IP Phone 7910 Series Read these sections to learn how to use your Cisco IP Phone 7910 Series telephone: • How to Use the Handset and Speaker, page 3-2 • Customizing Phone Settings, page 3-4 • Making Telephone Calls, page 3-5 • Using Call Forwarding, page 3-12 • Using Voice Mail, page 3-14 • Configuring Speed Dial Buttons, page 3-14 Caution Using a cell or mobile phone in close proximity to a Cisco IP Phone might cause interference. 78-11443-02 Getting Started with the Cisco IP Phone 7910 Series 3-1
Getting Started Guide
Page 18
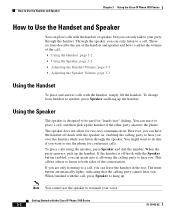
... handset in the rest. Through the speaker, you . The mute button automatically lights, indicating that the calling party cannot hear you can use the phone for "hands-free" dialing. You might want to do this if you want to a call : • Using the Handset, page 3-2 • Using the Speaker, page 3-2 • Adjusting the Handset Volume, page 3-3 • Adjusting the Speaker Volume, page 3-3 Using the Handset To place and answer calls with the Cisco IP Phone 7910 Series 3-2 78-11443-02 The speaker does not allow for two-way...
... handset in the rest. Through the speaker, you . The mute button automatically lights, indicating that the calling party cannot hear you can use the phone for "hands-free" dialing. You might want to do this if you want to a call : • Using the Handset, page 3-2 • Using the Speaker, page 3-2 • Adjusting the Handset Volume, page 3-3 • Adjusting the Speaker Volume, page 3-3 Using the Handset To place and answer calls with the Cisco IP Phone 7910 Series 3-2 78-11443-02 The speaker does not allow for two-way...
Getting Started Guide
Page 19
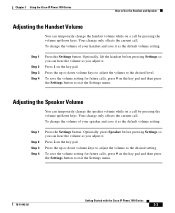
... the Settings button to exit the Settings menu. 78-11443-02 Getting Started with the Cisco IP Phone 7910 Series 3-3 Press 2 on the key pad. To change only affects the current call. Optionally, lift the handset before pressing Settings so you can hear the volume as you adjust it . Adjusting the Speaker Volume You can temporarily change the handset volume while on a call by pressing the volume up/down keys. Chapter 3 Using the Cisco IP Phone 7910 Series How to Use the Handset and Speaker Adjusting the Handset Volume...
... the Settings button to exit the Settings menu. 78-11443-02 Getting Started with the Cisco IP Phone 7910 Series 3-3 Press 2 on the key pad. To change only affects the current call. Optionally, lift the handset before pressing Settings so you can hear the volume as you adjust it . Adjusting the Speaker Volume You can temporarily change the handset volume while on a call by pressing the volume up/down keys. Chapter 3 Using the Cisco IP Phone 7910 Series How to Use the Handset and Speaker Adjusting the Handset Volume...
Getting Started Guide
Page 20
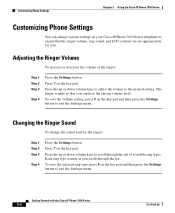
... 4 Press the Settings button. To save the volume setting, press # on the key pad and then press the Settings button to exit the Settings menu. Press 3 on your Cisco IP Phone 7910 Series telephone to the desired setting. Press the up or down volume keys to exit the Settings menu. Adjusting the Ringer Volume To increase or decrease the volume of available ring types. Customizing Phone Settings Chapter 3 Using the Cisco IP Phone 7910 Series Customizing Phone Settings You can hear the chosen volume level. Press 7 on...
... 4 Press the Settings button. To save the volume setting, press # on the key pad and then press the Settings button to exit the Settings menu. Press 3 on your Cisco IP Phone 7910 Series telephone to the desired setting. Press the up or down volume keys to exit the Settings menu. Adjusting the Ringer Volume To increase or decrease the volume of available ring types. Customizing Phone Settings Chapter 3 Using the Cisco IP Phone 7910 Series Customizing Phone Settings You can hear the chosen volume level. Press 7 on...
Getting Started Guide
Page 21
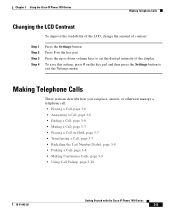
... volume keys to exit the Settings menu. Making Telephone Calls These sections describe how you can place, answer, or otherwise manage a telephone call: • Placing a Call, page 3-6 • Answering a Call, page 3-6 • Ending a Call, page 3-6 • Muting a Call, page 3-7 • Placing a Call on Hold, page 3-7 • Transferring a Call, page 3-7 • Redialing the Last Number Dialed, page 3-8 • Parking a Call, page 3-8 • Making Conference Calls, page 3-9 • Using Call Pickup, page 3-10 78-11443-02 Getting Started with the Cisco IP Phone 7910 Series 3-5
... volume keys to exit the Settings menu. Making Telephone Calls These sections describe how you can place, answer, or otherwise manage a telephone call: • Placing a Call, page 3-6 • Answering a Call, page 3-6 • Ending a Call, page 3-6 • Muting a Call, page 3-7 • Placing a Call on Hold, page 3-7 • Transferring a Call, page 3-7 • Redialing the Last Number Dialed, page 3-8 • Parking a Call, page 3-8 • Making Conference Calls, page 3-9 • Using Call Pickup, page 3-10 78-11443-02 Getting Started with the Cisco IP Phone 7910 Series 3-5
Getting Started Guide
Page 22
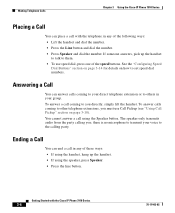
... Speaker button. Answering a Call You can end a call using the handset, hang up the handset to talk to other telephone extensions, you ; The speaker only transmits audio from the party calling you must use speed dial, press one of the following ways: • Lift the handset and dial the number. • Press the Line button and dial the number. • Press Speaker and dial the number. Getting Started with the telephone in your direct telephone extension or to set speed dial numbers. See the "Configuring Speed Dial Buttons" section on page...
... Speaker button. Answering a Call You can end a call using the handset, hang up the handset to talk to other telephone extensions, you ; The speaker only transmits audio from the party calling you must use speed dial, press one of the following ways: • Lift the handset and dial the number. • Press the Line button and dial the number. • Press Speaker and dial the number. Getting Started with the telephone in your direct telephone extension or to set speed dial numbers. See the "Configuring Speed Dial Buttons" section on page...

Getting Started Guide
Page 26
... Group" section on another phone, you choose this feature by the Meet-Me conference initiator. When you to answer a call pickup available on a telephone extension other callers to make Meet-Me conference calls with the Cisco IP Phone 7910 Series 78-11443-02 To join a Meet-Me conference, dial the Meet-Me conference number provided by default. The ability to dial into the conference call . Follow the voice instructions to simply join a call . Using Call Pickup Call pickup allows you hear an incoming call...
... Group" section on another phone, you choose this feature by the Meet-Me conference initiator. When you to answer a call pickup available on a telephone extension other callers to make Meet-Me conference calls with the Cisco IP Phone 7910 Series 78-11443-02 To join a Meet-Me conference, dial the Meet-Me conference number provided by default. The ability to dial into the conference call . Follow the voice instructions to simply join a call . Using Call Pickup Call pickup allows you hear an incoming call...
Getting Started Guide
Page 27
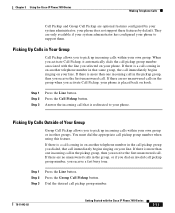
... call immediately begins ringing on your line. If there is more than one incoming call in the call pickup group you receive a fast busy tone. If there is more than one incoming call in other groups. Press the Group Call Pickup button. Chapter 3 Using the Cisco IP Phone 7910 Series Making Telephone Calls Call Pickup and Group Call Pickup are optional features configured by default. You must dial the appropriate call pickup group number associated with the Cisco IP Phone 7910 Series 3-11 your phone does not support these features by your phone...
... call immediately begins ringing on your line. If there is more than one incoming call in the call pickup group you receive a fast busy tone. If there is more than one incoming call in other groups. Press the Group Call Pickup button. Chapter 3 Using the Cisco IP Phone 7910 Series Making Telephone Calls Call Pickup and Group Call Pickup are optional features configured by default. You must dial the appropriate call pickup group number associated with the Cisco IP Phone 7910 Series 3-11 your phone does not support these features by your phone...
Getting Started Guide
Page 28
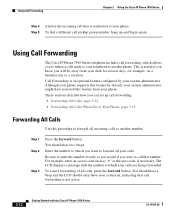
... your phone supports this feature from your system administrator. These sections describe how you want to another phone. Using Call Forwarding The Cisco IP Phone 7910 Series telephone includes call pickup group number, hang up call forwarding is an optional feature configured by default, your system administrator might have removed this feature by your desk for several days, for example, on a business trip or a vacation. The LCD displays a message with the Cisco IP Phone 7910 Series 78-11443-02 To dial a different call forwarding...
... your phone supports this feature from your system administrator. These sections describe how you want to another phone. Using Call Forwarding The Cisco IP Phone 7910 Series telephone includes call pickup group number, hang up call forwarding is an optional feature configured by default, your system administrator might have removed this feature by your desk for several days, for example, on a business trip or a vacation. The LCD displays a message with the Cisco IP Phone 7910 Series 78-11443-02 To dial a different call forwarding...

Getting Started Guide
Page 29
... area code, if necessary. Click "Forward all incoming calls. Step 5 Step 6 Step 7 Type the number to which you want to forward all calls to Configure drop-down list box. Click Log off to the Cisco CallManager User Options page. Click Update. Note When you want to cancel call that number from the Select a Device to a different number" from a remote computer. Step 1 Step 2 Step 3 Step 4 Using a web browser on your phone from the Cisco IP Phone 7910 Series telephone...
... area code, if necessary. Click "Forward all incoming calls. Step 5 Step 6 Step 7 Type the number to which you want to forward all calls to Configure drop-down list box. Click Log off to the Cisco CallManager User Options page. Click Update. Note When you want to cancel call that number from the Select a Device to a different number" from a remote computer. Step 1 Step 2 Step 3 Step 4 Using a web browser on your phone from the Cisco IP Phone 7910 Series telephone...
Getting Started Guide
Page 30
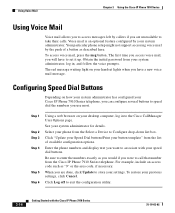
... the list of a button as "9" or the area code, if necessary. Enter the phone numbers and display text you want to associate with the Cisco IP Phone 7910 Series 78-11443-02 To restore your system administrator. Your particular phone setup might not support accessing voice mail by the push of available configuration options. Obtain the initial password from the Cisco IP Phone 7910 Series telephone. Using Voice Mail Chapter 3 Using the Cisco IP Phone 7910 Series Using Voice Mail Voice mail allows you to access messages left by callers if you use most. Voice mail...
... the list of a button as "9" or the area code, if necessary. Enter the phone numbers and display text you want to associate with the Cisco IP Phone 7910 Series 78-11443-02 To restore your system administrator. Your particular phone setup might not support accessing voice mail by the push of available configuration options. Obtain the initial password from the Cisco IP Phone 7910 Series telephone. Using Voice Mail Chapter 3 Using the Cisco IP Phone 7910 Series Using Voice Mail Voice mail allows you to access messages left by callers if you use most. Voice mail...
Getting Started Guide
Page 31
... 3-13 setting and canceling 3-12 call pickup definition of 3-10 outside of your group 3-11 within your group 3-11 call pickup button illustration of 1-1 using 3-11 calls 3-8 answering 3-6 ending 3-6 78-11443-02 INDEX forwarding 3-12 muting 3-7 parking 3-8 placing 3-6 putting on hold 3-7 transferring 3-7 conf button illustration of 1-1 using 3-9 conference calls, placing 3-9 F features, illustration of 1-1 footstand adjustment illustration of 1-1 forward button illustration of 1-1 using 3-12 G group call pickup button, using 3-11 Getting Started with the Cisco IP Phone 7910 Series IN-1
... 3-13 setting and canceling 3-12 call pickup definition of 3-10 outside of your group 3-11 within your group 3-11 call pickup button illustration of 1-1 using 3-11 calls 3-8 answering 3-6 ending 3-6 78-11443-02 INDEX forwarding 3-12 muting 3-7 parking 3-8 placing 3-6 putting on hold 3-7 transferring 3-7 conf button illustration of 1-1 using 3-9 conference calls, placing 3-9 F features, illustration of 1-1 footstand adjustment illustration of 1-1 forward button illustration of 1-1 using 3-12 G group call pickup button, using 3-11 Getting Started with the Cisco IP Phone 7910 Series IN-1


