
Owners Manual
Page 2
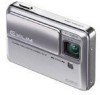
Special AC Adaptor (AD-C52G)/AC Power Cord * Strap USB Cable AV Cable CD-ROMs (2) 2 Basic Reference UNPACKING To attach the strap to country or geographic area. UNPACKING As you unpack your original retailer. Attach strap here. Digital Camera Rechargeable Lithium Ion Battery (NP-50) USB Cradle (CA-35) * The shape of the AC power cord plug varies according to the camera. If anything is missing, contact your camera, check to make sure that all items shown below are included.
Special AC Adaptor (AD-C52G)/AC Power Cord * Strap USB Cable AV Cable CD-ROMs (2) 2 Basic Reference UNPACKING To attach the strap to country or geographic area. UNPACKING As you unpack your original retailer. Attach strap here. Digital Camera Rechargeable Lithium Ion Battery (NP-50) USB Cradle (CA-35) * The shape of the AC power cord plug varies according to the camera. If anything is missing, contact your camera, check to make sure that all items shown below are included.

Owners Manual
Page 10
■ Using the USB Cradle to achieve a full charge. 10 QUICK START BASICS AC adaptor AC power cord 2. Plug the USB cradle into a household power outlet. Place the camera onto the USB cradle. [CHARGE] lamp Red: Charging Green: Charged (Full) • It takes about 150 minutes to Charge 1.
■ Using the USB Cradle to achieve a full charge. 10 QUICK START BASICS AC adaptor AC power cord 2. Plug the USB cradle into a household power outlet. Place the camera onto the USB cradle. [CHARGE] lamp Red: Charging Green: Charged (Full) • It takes about 150 minutes to Charge 1.

Owners Manual
Page 32
...the AC adaptor power cord. This is normal and does not indicate malfunction. INTRODUCTION 32 Make sure you always remove the camera from the USB cradle before leaving the camera unattended for long periods, such as it will go. - • Never touch the AC adaptor while your hands are... wet. When unplugging from the wall outlet before connecting or disconnecting the AC adaptor. • Charging, USB data communication, the Photo ...
...the AC adaptor power cord. This is normal and does not indicate malfunction. INTRODUCTION 32 Make sure you always remove the camera from the USB cradle before leaving the camera unattended for long periods, such as it will go. - • Never touch the AC adaptor while your hands are... wet. When unplugging from the wall outlet before connecting or disconnecting the AC adaptor. • Charging, USB data communication, the Photo ...

Owners Manual
Page 33
...and data corruption. ■ Data Error Precautions • Your digital camera is flashing green after turning off due to low battery power. While the operation lamp is manufactured using it from the camera, or placing the camera onto or removing it . • The low battery warning...amount of time spent in storage, etc. • Leaving the camera on can cause an error message to appear. Disconnecting the USB cable, removing the camera from the USB cradle, or disconnecting the AC adaptor from the USB cradle - Other abnormal operations Any of the above conditions can run ...
...and data corruption. ■ Data Error Precautions • Your digital camera is flashing green after turning off due to low battery power. While the operation lamp is manufactured using it from the camera, or placing the camera onto or removing it . • The low battery warning...amount of time spent in storage, etc. • Leaving the camera on can cause an error message to appear. Disconnecting the USB cable, removing the camera from the USB cradle, or disconnecting the AC adaptor from the USB cradle - Other abnormal operations Any of the above conditions can run ...

Owners Manual
Page 34
...Wait until the air in any other areas subjected to the characteristics of lens, and does not indicate malfunction of the camera. The date and time settings of the camera are cleared about 12 hours after power is restored (page 198). ■ Lens • Never apply too much ... moisture or dust - B INTRODUCTION 34 This is due to extreme temperature or humidity - To avoid condensation, place the camera into a warm room, can cause water droplets called "condensation" to direct sunlight, or large amounts of images, such as when the camera is moved from both the battery and USB cradle).
...Wait until the air in any other areas subjected to the characteristics of lens, and does not indicate malfunction of the camera. The date and time settings of the camera are cleared about 12 hours after power is restored (page 198). ■ Lens • Never apply too much ... moisture or dust - B INTRODUCTION 34 This is due to extreme temperature or humidity - To avoid condensation, place the camera into a warm room, can cause water droplets called "condensation" to direct sunlight, or large amounts of images, such as when the camera is moved from both the battery and USB cradle).

Owners Manual
Page 37
Plug the USB cradle into place as you use the camera for the first time after purchasing it. The battery is not fully charged when you press it off . Use the following procedure to charge it securely into a household power outlet. GETTING READY 37 3. To charge the battery 1. Close the battery cover. Make sure the camera is on, turn it against the camera. If the camera is turned off by closing the lens cover. Swing the battery cover closed, and then slide it . USB Cradle AC Adaptor [DC IN 5.3V] AC power cord 2.
Plug the USB cradle into place as you use the camera for the first time after purchasing it. The battery is not fully charged when you press it off . Use the following procedure to charge it securely into a household power outlet. GETTING READY 37 3. To charge the battery 1. Close the battery cover. Make sure the camera is on, turn it against the camera. If the camera is turned off by closing the lens cover. Swing the battery cover closed, and then slide it . USB Cradle AC Adaptor [DC IN 5.3V] AC power cord 2.

Owners Manual
Page 38
...a temperature where charging can be performed because you as it onto the USB cradle. If the [CHARGE] lamp flashes green This indicates that charging cannot be performed, the [CHARGE] lamp will go. [CHARGE] lamp Camera contact When charging is facing towards you have just finished using the... camera, or because the temperature in the illustration, place it will light red. Remove the camera from the USB cradle and unplug the AC power cord from the power ...
...a temperature where charging can be performed because you as it onto the USB cradle. If the [CHARGE] lamp flashes green This indicates that charging cannot be performed, the [CHARGE] lamp will go. [CHARGE] lamp Camera contact When charging is facing towards you have just finished using the... camera, or because the temperature in the illustration, place it will light red. Remove the camera from the USB cradle and unplug the AC power cord from the power ...

Owners Manual
Page 39
... separately available AD-C30, AD-C40, AD-C620, or AD-C630 is plugged into the camera. Contact your nearest CASIO authorized service center. IMPORTANT! • Use only the bundled USB cradle to use any other type of AC adaptor. GETTING READY 39 Never use a different charger can... result in the camera incorrectly. If they are dirty. If an error still continues to occur after...
... separately available AD-C30, AD-C40, AD-C620, or AD-C630 is plugged into the camera. Contact your nearest CASIO authorized service center. IMPORTANT! • Use only the bundled USB cradle to use any other type of AC adaptor. GETTING READY 39 Never use a different charger can... result in the camera incorrectly. If they are dirty. If an error still continues to occur after...

Owners Manual
Page 45
The Auto Power Off trigger time is a connection between the camera and computer or other device via the USB cradle - Use [W] and [X] to configure ("Sleep" or "Auto Power Off") and then press [X]. 4. During movie recording and playback GETTING READY 45 Settings 30 sec... battery power. Power truns off if no operation is performed for the sleep setting disables the sleep feature. ■ Battery Power Conservation Features This camera is equipped with a sleep function and auto power off function to turn the monitor screen back on. Press [MENU]. 2. Use [S] and [T]...
The Auto Power Off trigger time is a connection between the camera and computer or other device via the USB cradle - Use [W] and [X] to configure ("Sleep" or "Auto Power Off") and then press [X]. 4. During movie recording and playback GETTING READY 45 Settings 30 sec... battery power. Power truns off if no operation is performed for the sleep setting disables the sleep feature. ■ Battery Power Conservation Features This camera is equipped with a sleep function and auto power off function to turn the monitor screen back on. Press [MENU]. 2. Use [S] and [T]...

Owners Manual
Page 67
... then press [SET]. • See the following sections for full details about each setting. - Use [S] and [T] to other images stored in memory, malfunction of the camera, etc. • If unneeded light is flashing green, never open the battery cover or place the camera onto or remove it from the USB cradle.
... then press [SET]. • See the following sections for full details about each setting. - Use [S] and [T] to other images stored in memory, malfunction of the camera, etc. • If unneeded light is flashing green, never open the battery cover or place the camera onto or remove it from the USB cradle.

Owners Manual
Page 153
■ Playing a Slideshow on the USB Cradle (Photo Stand) You can play a slideshow on the camera while it is mounted on the camera and place it into a power outlet. 1. Turn on the USB cradle. After configuring the settings, press [MENU] again to restart the slideshow. &#...slideshow setting by pressing [T] and then using [S] and [T]. 153 VIEWING SNAPSHOTS AND MOVIES Press the USB cradle's [PHOTO] button to the USB cradle, and plug it onto the USB cradle. 2. The camera will turn off [PHOTO] automatically after the time you configured with the "Time" setting elapses....
■ Playing a Slideshow on the USB Cradle (Photo Stand) You can play a slideshow on the camera while it is mounted on the camera and place it into a power outlet. 1. Turn on the USB cradle. After configuring the settings, press [MENU] again to restart the slideshow. &#...slideshow setting by pressing [T] and then using [S] and [T]. 153 VIEWING SNAPSHOTS AND MOVIES Press the USB cradle's [PHOTO] button to the USB cradle, and plug it onto the USB cradle. 2. The camera will turn off [PHOTO] automatically after the time you configured with the "Time" setting elapses....

Owners Manual
Page 154
...Use the procedure below to a TV. Turn off the camera. Doing so can also connect to a TV and enjoy the slideshow on a TV screen. 1. IMPORTANT! • The battery does not charge while a slideshow is in progress. Connect the USB cradle to view snapshots and movies on a big screen. ... White AV Cable Red [AV OUT] (AV output port) 2. To stop the slideshow. • Do not remove the camera from the cradle while a slideshow is in progress. NOTE • You can connect the USB cradle to a video recording device and record a slideshow (page 154). This will turn off the...
...Use the procedure below to a TV. Turn off the camera. Doing so can also connect to a TV and enjoy the slideshow on a TV screen. 1. IMPORTANT! • The battery does not charge while a slideshow is in progress. Connect the USB cradle to view snapshots and movies on a big screen. ... White AV Cable Red [AV OUT] (AV output port) 2. To stop the slideshow. • Do not remove the camera from the cradle while a slideshow is in progress. NOTE • You can connect the USB cradle to a video recording device and record a slideshow (page 154). This will turn off the...

Owners Manual
Page 155
... on in the PLAY mode, an image will appear on the camera and enter the PLAY mode. If the TV has more than one video input, select the one where the USB cradle is "Power On" or "Hold: On" page 204. • All icons and indicators that appear on ...adjust it as required. When you could press the USB cradle's [PHOTO] button to display images, be sure that the camera's " Power On" setting is connected. 4. Turn on the camera for the type of the following. • Press the camera's [ ] button. • Press the USB cradle's [USB] button. You can perform the applicable operation on ...
... on in the PLAY mode, an image will appear on the camera and enter the PLAY mode. If the TV has more than one video input, select the one where the USB cradle is "Power On" or "Hold: On" page 204. • All icons and indicators that appear on ...adjust it as required. When you could press the USB cradle's [PHOTO] button to display images, be sure that the camera's " Power On" setting is connected. 4. Turn on the camera for the type of the following. • Press the camera's [ ] button. • Press the USB cradle's [USB] button. You can perform the applicable operation on ...

Owners Manual
Page 156
... PAL 4:3 PAL 16:9 156 VIEWING SNAPSHOTS AND MOVIES When recording to DVD recorder or video deck, you want and then press [SET]. Camera: Place onto the cradle You can play a slideshow of 4:3 or 16:9. 1. To view the image that is being recorded, connect a TV or other monitor ...PAL TV (Europe and other information is connected to a DVD recorder or video deck and record images from the camera. Use [S] and [T] to select the setting you can use the camera's USB cradle to connect to the camera. On the "Set Up" tab, select "Video Out" and then press [X]. 3. Press [MENU]. 2....
... PAL 4:3 PAL 16:9 156 VIEWING SNAPSHOTS AND MOVIES When recording to DVD recorder or video deck, you want and then press [SET]. Camera: Place onto the cradle You can play a slideshow of 4:3 or 16:9. 1. To view the image that is being recorded, connect a TV or other monitor ...PAL TV (Europe and other information is connected to a DVD recorder or video deck and record images from the camera. Use [S] and [T] to select the setting you can use the camera's USB cradle to connect to the camera. On the "Set Up" tab, select "Video Out" and then press [X]. 3. Press [MENU]. 2....

Owners Manual
Page 189
...; You can be copied from the camera's built-in memory to a memory card, or from the camera. 2. Perform the required operations on the date that it possible, for example, to perform the following steps to view FAVORITE folder contents on the USB cradle (which is displayed on your computer ...to navigate to the computer). 3. Place the camera on your computer. 1. Remove the memory card from a memory card to built-in memory. Perform...
...; You can be copied from the camera's built-in memory to a memory card, or from the camera. 2. Perform the required operations on the date that it possible, for example, to perform the following steps to view FAVORITE folder contents on the USB cradle (which is displayed on your computer ...to navigate to the computer). 3. Place the camera on your computer. 1. Remove the memory card from a memory card to built-in memory. Perform...

Owners Manual
Page 207
...which images you want printed, the number of your printer for new printer versions, etc. • Never disconnect cables or perform any camera or USB cradle operation while printing is in a memory card, you can cause a printer error. ■ Printing Precautions • See the documentation that... contains the images you want to print to find out if it supports PictBridge or USB DIRECT-PRINT, for information about print quality and...
...which images you want printed, the number of your printer for new printer versions, etc. • Never disconnect cables or perform any camera or USB cradle operation while printing is in a memory card, you can cause a printer error. ■ Printing Precautions • See the documentation that... contains the images you want to print to find out if it supports PictBridge or USB DIRECT-PRINT, for information about print quality and...

Owners Manual
Page 208
...printer you are using, it to print without going through a computer. • The camera's USB cradle also allows easy connection to a printer. Use [S] and [T] to select the setting that Supports PictBridge or USB DIRECT-PRINT You can use it also may be able to read the settings (images... to be sure to a printer via the USB cradle, be printed, number of memory card you configure with the camera's DPOF settings (page 211). Printer that support PictBridge or USB DIRECT-PRINT ■ Printing on a Printer that suits your printer. ■ ...
...printer you are using, it to print without going through a computer. • The camera's USB cradle also allows easy connection to a printer. Use [S] and [T] to select the setting that Supports PictBridge or USB DIRECT-PRINT You can use it also may be able to read the settings (images... to be sure to a printer via the USB cradle, be printed, number of memory card you configure with the camera's DPOF settings (page 211). Printer that support PictBridge or USB DIRECT-PRINT ■ Printing on a Printer that suits your printer. ■ ...

Owners Manual
Page 209
.... B 209 PRINTING Connect the USB cable that the camera's battery is fully charged. • Nothing appears on the camera's monitor screen if the camera is on the USB cradle while the bundled AV cable is connected to view images. 5. Turn off the camera and place it onto the USB cradle. 6. USB Cable (Bundled) Connector Mini-B Connector A USB USB Port [ ] (USB) Connector • Also...
.... B 209 PRINTING Connect the USB cable that the camera's battery is fully charged. • Nothing appears on the camera's monitor screen if the camera is on the USB cradle while the bundled AV cable is connected to view images. 5. Turn off the camera and place it onto the USB cradle. 6. USB Cable (Bundled) Connector Mini-B Connector A USB USB Port [ ] (USB) Connector • Also...

Owners Manual
Page 211
...supports DPOF or take the memory card to re-appear. In this case, you are finished printing, press the USB cradle's [USB] button. This will appear on or off the camera. Printing will re-appear when printing is still being performed. After configuring settings you want to select "Print"...etc. The print menu screen will start and the message "Busy... 12. Use [S] and [T] to print, the number of Copies DPOF (Digital Print Order Format) lets you specify which images you configure are recorded on a home printer that comes with the instructions provided by the print ...
...supports DPOF or take the memory card to re-appear. In this case, you are finished printing, press the USB cradle's [USB] button. This will appear on or off the camera. Printing will re-appear when printing is still being performed. After configuring settings you want to select "Print"...etc. The print menu screen will start and the message "Busy... 12. Use [S] and [T] to print, the number of Copies DPOF (Digital Print Order Format) lets you specify which images you configure are recorded on a home printer that comes with the instructions provided by the print ...
Owners Manual
Page 221
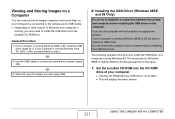
...3) View and copy the images you want (page 226). ■ Installing the USB Driver (Windows 98SE and 98 Only) Do not try to establish a connection between the camera and computer before installing the USB driver on its USB cradle. • Depending on a computer running Windows 98. If your computer is the... same. 1. If you may need to install the USB driver from the bundled CD-ROM first. Set...
...3) View and copy the images you want (page 226). ■ Installing the USB Driver (Windows 98SE and 98 Only) Do not try to establish a connection between the camera and computer before installing the USB driver on its USB cradle. • Depending on a computer running Windows 98. If your computer is the... same. 1. If you may need to install the USB driver from the bundled CD-ROM first. Set...

