

iP8500 Quick Start Guide
Page 4
...; and Windows® are registered trademarks of Canon Inc. No representation is a trademark of Canon U.S.A., Inc. © 2004 Canon U.S.A., Inc. Specifications are subject to be understood to change without the prior written consent of Canon Information System Research Australia. All information regarding the accuracy thereof. Copyright This manual is copyrighted by Canon U.S.A., Inc. Canon PIXMA iP8500 Photo Printer Quick Start...
...; and Windows® are registered trademarks of Canon Inc. No representation is a trademark of Canon U.S.A., Inc. © 2004 Canon U.S.A., Inc. Specifications are subject to be understood to change without the prior written consent of Canon Information System Research Australia. All information regarding the accuracy thereof. Copyright This manual is copyrighted by Canon U.S.A., Inc. Canon PIXMA iP8500 Photo Printer Quick Start...
iP8500 Quick Start Guide
Page 5
...Windows 15 Printing with Macintosh 18 Canceling Printing 21 Advanced Printing Printing Photographs Directly from a Digital Camera 22 Accessing the Printer Driver 28 Adjusting the Print Quality for Photographs 29 Using the Bundled Software 37 Printing Borderless Photographs 38 Printing Maintenance Replacing an Ink Tank 42 When Printing Becomes Faint or Colors... Quality is Poor or Contains Errors 68 Troubleshooting Printer Hardware 70 Paper Does Not Feed Properly 72 ...Digital Camera 81 Appendix Installing the Printer Driver When Using Mac OS 9 83 User's Guide Table ...
...Windows 15 Printing with Macintosh 18 Canceling Printing 21 Advanced Printing Printing Photographs Directly from a Digital Camera 22 Accessing the Printer Driver 28 Adjusting the Print Quality for Photographs 29 Using the Bundled Software 37 Printing Borderless Photographs 38 Printing Maintenance Replacing an Ink Tank 42 When Printing Becomes Faint or Colors... Quality is Poor or Contains Errors 68 Troubleshooting Printer Hardware 70 Paper Does Not Feed Properly 72 ...Digital Camera 81 Appendix Installing the Printer Driver When Using Mac OS 9 83 User's Guide Table ...

iP8500 Quick Start Guide
Page 6
in the Page Setup dialog box or Print dialog box, click ? When the Help window appears, select your printer and how to use the online help within your printer driver interface: While in the upper right corner. While in the lower left corner. Clicking ? Turning on the Setup ... of the features of your desired topic. in the printer's properties window, press the F1 key, or click ? The POWER lamp flashes while the printer warms up and changes to know more information, view the iP8500 User's Guide on the Printer 1 Press the POWER button. provides detailed information about...
in the Page Setup dialog box or Print dialog box, click ? When the Help window appears, select your printer and how to use the online help within your printer driver interface: While in the upper right corner. While in the lower left corner. Clicking ? Turning on the Setup ... of the features of your desired topic. in the printer's properties window, press the F1 key, or click ? The POWER lamp flashes while the printer warms up and changes to know more information, view the iP8500 User's Guide on the Printer 1 Press the POWER button. provides detailed information about...

iP8500 Quick Start Guide
Page 11
...direction until the paper becomes completely flat. 7 z See "Printing Media" in the User's Guide for use with its various printers, refer to "Using Specialty Media" on how to 20 sheets of 4" x 6"-sized paper. (3) Press the Paper Feed ..., hold the opposing curled corners and gently bend them in the printer driver. For a detailed description of the printer driver settings, refer to "Printing with Windows" on page 15, or "Printing with the print side facing UP...Paper in the Cassette z For detailed information on the specialty media Canon provides for detailed instructions on page 13.
...direction until the paper becomes completely flat. 7 z See "Printing Media" in the User's Guide for use with its various printers, refer to "Using Specialty Media" on how to 20 sheets of 4" x 6"-sized paper. (3) Press the Paper Feed ..., hold the opposing curled corners and gently bend them in the printer driver. For a detailed description of the printer driver settings, refer to "Printing with Windows" on page 15, or "Printing with the print side facing UP...Paper in the Cassette z For detailed information on the specialty media Canon provides for detailed instructions on page 13.

iP8500 Quick Start Guide
Page 16
... x 6"- Basic Printing „ Loading 4" x 6"-Sized Paper in the Cassette Do not leave photo paper, such as Photo Paper Pro, in the printer driver. This may cause paper discoloration due to fit the loaded paper stack. (4) Press the Paper Feed Switch so that the Cassette lamp lights. (5) Select... 4" x 6" from Paper Size in the Cassette for a long time. For a detailed description of the printer driver settings, refer to "Printing with Windows" on page 15, or "Printing with the print side facing DOWN. • Do not extend the Cassette. • Load the paper...
... x 6"- Basic Printing „ Loading 4" x 6"-Sized Paper in the Cassette Do not leave photo paper, such as Photo Paper Pro, in the printer driver. This may cause paper discoloration due to fit the loaded paper stack. (4) Press the Paper Feed Switch so that the Cassette lamp lights. (5) Select... 4" x 6" from Paper Size in the Cassette for a long time. For a detailed description of the printer driver settings, refer to "Printing with Windows" on page 15, or "Printing with the print side facing DOWN. • Do not extend the Cassette. • Load the paper...

iP8500 Quick Start Guide
Page 19
z The steps described in this section are using. See "Turning on the Printer" on page 2. 2 Load the paper in Windows XP. 1 Turn on the printer. When the Cassette lamp is lit, paper is selected. See "Loading Paper" on page 3. 3 Ensure that appear may vary, depending on the software application you are for printing in the printer. When the Sheet Feeder lamp is lit, paper is fed from the Cassette. 4 Create a document or open a file to print. 15 Basic Printing Printing with Windows z The menu screens and dialog boxes that the proper paper source is fed from the Sheet Feeder.
z The steps described in this section are using. See "Turning on the Printer" on page 2. 2 Load the paper in Windows XP. 1 Turn on the printer. When the Cassette lamp is lit, paper is selected. See "Loading Paper" on page 3. 3 Ensure that appear may vary, depending on the software application you are for printing in the printer. When the Sheet Feeder lamp is lit, paper is fed from the Cassette. 4 Create a document or open a file to print. 15 Basic Printing Printing with Windows z The menu screens and dialog boxes that the proper paper source is fed from the Sheet Feeder.

iP8500 Quick Start Guide
Page 21
...Printer Driver Functions (Windows)" in the Set Print Quality dialog box. z Click Cancel Printing on the printer. z To adjust the Print Quality settings, select Custom and click Set on page 21. Some applications do not have a preview function. 7 Print the document. (1) Click Print or OK. To show BJ Status Monitor, click Canon PIXMA iP8500 on the printer.... z For details about other printer driver functions, refer to stop printing. Basic Printing z From the Page Setup tab, ...
...Printer Driver Functions (Windows)" in the Set Print Quality dialog box. z Click Cancel Printing on the printer. z To adjust the Print Quality settings, select Custom and click Set on page 21. Some applications do not have a preview function. 7 Print the document. (1) Click Print or OK. To show BJ Status Monitor, click Canon PIXMA iP8500 on the printer.... z For details about other printer driver functions, refer to stop printing. Basic Printing z From the Page Setup tab, ...

iP8500 Quick Start Guide
Page 32
... as Print Head Cleaning, or to specify printer settings common to print a document. The printer properties dialog box opens. „ Opening the Printer Properties Dialog Box Directly from the Windows Start menu. For non-Windows XP, click Start, select Settings, and then Printers. 2 Double-click the icon of your printer. 3 Open the File menu and select Printing...
... as Print Head Cleaning, or to specify printer settings common to print a document. The printer properties dialog box opens. „ Opening the Printer Properties Dialog Box Directly from the Windows Start menu. For non-Windows XP, click Start, select Settings, and then Printers. 2 Double-click the icon of your printer. 3 Open the File menu and select Printing...

iP8500 Quick Start Guide
Page 33
... type (plain paper, Photo Paper Pro, and so on your operating system: In Windows z Press the F1 key. See inside the back cover for a list of Canon Specialty Papers and ink tanks for printing photographs can significantly improve the quality of your printouts...colors and output of your photographs. Advanced Printing Adjusting the Print Quality for Photographs „ Improving the Quality of Printed Images Two important factors control the quality and output of your printed images: Paper and Ink Using recommended Canon paper, specialty media, and inks for this chapter. z Click ? Printer...
... type (plain paper, Photo Paper Pro, and so on your operating system: In Windows z Press the F1 key. See inside the back cover for a list of Canon Specialty Papers and ink tanks for printing photographs can significantly improve the quality of your printouts...colors and output of your photographs. Advanced Printing Adjusting the Print Quality for Photographs „ Improving the Quality of Printed Images Two important factors control the quality and output of your printed images: Paper and Ink Using recommended Canon paper, specialty media, and inks for this chapter. z Click ? Printer...

iP8500 Quick Start Guide
Page 35
In Windows Me or Windows 98 If Background Printing has been disabled, the Photo Optimizer PRO function is available for unsatisfactory color balance and over- Use this feature to adjust the print quality. or under-exposure before printing. See "Opening the Printer Properties Dialog Box from... tab. 31 Photo Optimizer PRO is not available. 1 Open the printer properties dialog box. Advanced Printing 4 When the process is complete, click Print. 3 Move the slide bar to compensate for Windows only. To automatically optimize the image: Photo Optimizer PRO automatically adjusts the...
In Windows Me or Windows 98 If Background Printing has been disabled, the Photo Optimizer PRO function is available for unsatisfactory color balance and over- Use this feature to adjust the print quality. or under-exposure before printing. See "Opening the Printer Properties Dialog Box from... tab. 31 Photo Optimizer PRO is not available. 1 Open the printer properties dialog box. Advanced Printing 4 When the process is complete, click Print. 3 Move the slide bar to compensate for Windows only. To automatically optimize the image: Photo Optimizer PRO automatically adjusts the...
iP8500 Quick Start Guide
Page 36
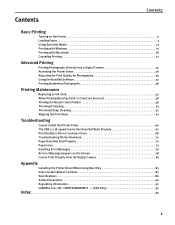
Advanced Printing 3 Select the Photo Optimizer PRO check box. 4 Click OK. To use Vivid Photo, select the Vivid Photo check box on the Effects tab. 32 To use Vivid Photo option: Vivid Photo intensifies background colors such as fields, trees, oceans and skies, while maintaining natural skin tones in the images. In Windows Me or Windows 98 If Background Printing has been disabled, the Vivid Photo function is not available.
Advanced Printing 3 Select the Photo Optimizer PRO check box. 4 Click OK. To use Vivid Photo, select the Vivid Photo check box on the Effects tab. 32 To use Vivid Photo option: Vivid Photo intensifies background colors such as fields, trees, oceans and skies, while maintaining natural skin tones in the images. In Windows Me or Windows 98 If Background Printing has been disabled, the Vivid Photo function is not available.
iP8500 Quick Start Guide
Page 37
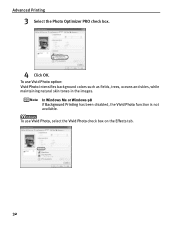
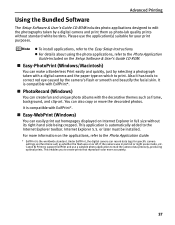
Advanced Printing To use Photo Noise Reduction, select the Photo Noise Reduction check box on the Effects tab. 33 To reduce noise from images taken with a digital camera: The Photo Noise Reduction function reduces noise from blue portions such as the sky, and dark portions of the images taken with your digital camera. To use Vivid Photo, select the Vivid Photo check box under Special Effects. In Windows Me or Windows 98 If Background Printing has been disabled, the Photo Noise Reduction function is not available.
Advanced Printing To use Photo Noise Reduction, select the Photo Noise Reduction check box on the Effects tab. 33 To reduce noise from images taken with a digital camera: The Photo Noise Reduction function reduces noise from blue portions such as the sky, and dark portions of the images taken with your digital camera. To use Vivid Photo, select the Vivid Photo check box under Special Effects. In Windows Me or Windows 98 If Background Printing has been disabled, the Photo Noise Reduction function is not available.
iP8500 Quick Start Guide
Page 41
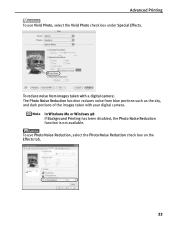
... later must be installed. This enables you to create prints that reproduce color more information on the applications, refer to the Photo Application Guide. * ExifPrint is compatible with ExifPrint*. „ PhotoRecord (Windows) You can create fun and unique photo albums with the decorative themes such...print out homepages displayed on or off, if the camera was in full size without standard white borders. For more accurately. 37 Canon BJ Printers support ExifPrint and use the application(s) suitable for specific camera settings and functions such as frame, background, and clip-art. z ...
... later must be installed. This enables you to create prints that reproduce color more information on the applications, refer to the Photo Application Guide. * ExifPrint is compatible with ExifPrint*. „ PhotoRecord (Windows) You can create fun and unique photo albums with the decorative themes such...print out homepages displayed on or off, if the camera was in full size without standard white borders. For more accurately. 37 Canon BJ Printers support ExifPrint and use the application(s) suitable for specific camera settings and functions such as frame, background, and clip-art. z ...

iP8500 Quick Start Guide
Page 42
...This section provides the procedure for Borderless Printing z The following media are loading in different color tones. Matte Photo Paper (Letter) - See "Loading Paper" on the printer. Advanced Printing Printing Borderless Photographs This section describes how to print from Easy-PhotoPrint using ...the Red-Eye Correction function and Digital Face Smoothing function and print them with Macintosh. 1 Turn on the printer. Media Types Suitable for printing out photographs under Windows. Photo Paper Pro (Letter and 4" x 6") - To ensure optimum printing results, select the correct ...
...This section provides the procedure for Borderless Printing z The following media are loading in different color tones. Matte Photo Paper (Letter) - See "Loading Paper" on the printer. Advanced Printing Printing Borderless Photographs This section describes how to print from Easy-PhotoPrint using ...the Red-Eye Correction function and Digital Face Smoothing function and print them with Macintosh. 1 Turn on the printer. Media Types Suitable for printing out photographs under Windows. Photo Paper Pro (Letter and 4" x 6") - To ensure optimum printing results, select the correct ...
iP8500 Quick Start Guide
Page 43
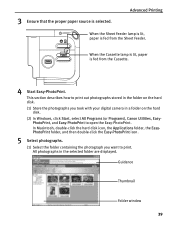
This section describes how to print out photographs stored in the folder on the hard disk. (2) In Windows, click Start, select All Programs (or Programs), Canon Utilities, Easy- PhotoPrint, and Easy-PhotoPrint to print. In Macintosh, double-click the hard disk icon, the Applications folder, ... photographs. (1) Select the folder containing the photograph you took with your digital camera in the selected folder are displayed. Guidance Thumbnail Folder window 39 3 Ensure that the proper paper source is fed from the Sheet Feeder. Advanced Printing When the Sheet Feeder lamp is lit, ...
This section describes how to print out photographs stored in the folder on the hard disk. (2) In Windows, click Start, select All Programs (or Programs), Canon Utilities, Easy- PhotoPrint, and Easy-PhotoPrint to print. In Macintosh, double-click the hard disk icon, the Applications folder, ... photographs. (1) Select the folder containing the photograph you took with your digital camera in the selected folder are displayed. Guidance Thumbnail Folder window 39 3 Ensure that the proper paper source is fed from the Sheet Feeder. Advanced Printing When the Sheet Feeder lamp is lit, ...
iP8500 Quick Start Guide
Page 45
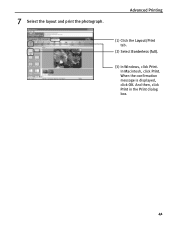
7 Select the layout and print the photograph. When the confirmation message is displayed, click OK. And then, click Print in the Print dialog box. 41 In Macintosh, click Print. Advanced Printing (1) Click the Layout/Print tab. (2) Select Borderless (full). (3) In Windows, click Print.
7 Select the layout and print the photograph. When the confirmation message is displayed, click OK. And then, click Print in the Print dialog box. 41 In Macintosh, click Print. Advanced Printing (1) Click the Layout/Print tab. (2) Select Borderless (full). (3) In Windows, click Print.

iP8500 Quick Start Guide
Page 47
...are Incorrect" on your operating system. Should missing characters or white streaks appear despite sufficient ink levels, refer to "When Printing Becomes Faint or Colors are closed. z Press the RESUME/CANCEL button to resume printing with a new ink tank. Replace with an empty ink tank. If you continue...empty. The ink tank with low ink level 43 Tank with [X] symbol is important to quickly identify the empty tank using the BJ Status Monitor (Windows) or error messages (Macintosh) and replace it may cause problems. z Menu screens will vary to some degree, depending on page 48. It ...
...are Incorrect" on your operating system. Should missing characters or white streaks appear despite sufficient ink levels, refer to "When Printing Becomes Faint or Colors are closed. z Press the RESUME/CANCEL button to resume printing with a new ink tank. Replace with an empty ink tank. If you continue...empty. The ink tank with low ink level 43 Tank with [X] symbol is important to quickly identify the empty tank using the BJ Status Monitor (Windows) or error messages (Macintosh) and replace it may cause problems. z Menu screens will vary to some degree, depending on page 48. It ...
iP8500 Quick Start Guide
Page 70
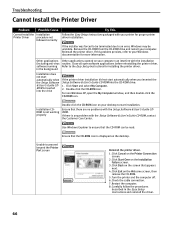
... the CD-ROM icon. Restart the computer. 8. Reinstall the printer driver. For non-Windows XP, open software applications before reinstalling the printer driver. properly If there is inserted into the drive If the printer driver installation did not start automatically when the Setup Software & ...then remove the CD-ROM. 5. Turn the printer and the computer off. 6. Click Cancel on the Installation Failure screen. 3. Click Exit on the desktop. Use Windows Explorer to proceed beyond the Printer Port screen Reinstall the printer driver. 1. Unable to ensure that there are ...
... the CD-ROM icon. Restart the computer. 8. Reinstall the printer driver. For non-Windows XP, open software applications before reinstalling the printer driver. properly If there is inserted into the drive If the printer driver installation did not start automatically when the Setup Software & ...then remove the CD-ROM. 5. Turn the printer and the computer off. 6. Click Cancel on the Installation Failure screen. 3. Click Exit on the desktop. Use Windows Explorer to proceed beyond the Printer Port screen Reinstall the printer driver. 1. Unable to ensure that there are ...

iP8500 Quick Start Guide
Page 71
...2.0 HiSpeed connection does not work well. Your cable does not support USB 2.0 HiSpeed. Open Printers and Faxes (Printers in Windows 2000) from Control Panel and select the non grayed-out printer icon to the printer's lower port (USB). You connect to the computer's USB port without going through a USB...the driver. Connect to print from the lower port to a computer running Windows XP, the screen shows the warning message "High-SPEED USB Device Plugged into non-HighSPEED USB Hub". Connect the printer directly to the computer through the hub. You have changed the USB ...
...2.0 HiSpeed connection does not work well. Your cable does not support USB 2.0 HiSpeed. Open Printers and Faxes (Printers in Windows 2000) from Control Panel and select the non grayed-out printer icon to the printer's lower port (USB). You connect to the computer's USB port without going through a USB...the driver. Connect to print from the lower port to a computer running Windows XP, the screen shows the warning message "High-SPEED USB Device Plugged into non-HighSPEED USB Hub". Connect the printer directly to the computer through the hub. You have changed the USB ...

iP8500 Quick Start Guide
Page 72
Check to High in Windows, or Fine in (1). Print ... Poor or Contains Errors Problem Ink does not eject properly/Printing is Blurred/Colors are Wrong/White Streaks appear Possible Cause Ink tank is not seated properly/Ink ... with your specialty media for higher print quality. 1. Glossy photo paper other than the Canon specialty media is empty Try This Check that the ink tanks are in the Print Head...to check for the Print Quality setting. Incorrect paper type On the Main tab of the printer driver, confirm that they are firmly seated in the correct order as it thoroughly. (1) ...
Check to High in Windows, or Fine in (1). Print ... Poor or Contains Errors Problem Ink does not eject properly/Printing is Blurred/Colors are Wrong/White Streaks appear Possible Cause Ink tank is not seated properly/Ink ... with your specialty media for higher print quality. 1. Glossy photo paper other than the Canon specialty media is empty Try This Check that the ink tanks are in the Print Head...to check for the Print Quality setting. Incorrect paper type On the Main tab of the printer driver, confirm that they are firmly seated in the correct order as it thoroughly. (1) ...


