Quick Start Guide
Page 4
...the ENERGY STAR® guidelines for 5 years after production has stopped. and other countries. and other countries. About Consumables Consumables (ink tanks / FINE Cartridges) are not intended to be, nor should they be understood to the instruction manual of Microsoft Corporation. ... z "Microsoft" is a trademark of Microsoft Corporation. © CANON INC.2008 All rights reserved. No part of Apple Inc., registered in Windows Vista™ operating system Ultimate Edition (hereafter referred to your Canon PIXMA iP2600 series Photo Printer. As an ENERGY STAR® Partner...
...the ENERGY STAR® guidelines for 5 years after production has stopped. and other countries. and other countries. About Consumables Consumables (ink tanks / FINE Cartridges) are not intended to be, nor should they be understood to the instruction manual of Microsoft Corporation. ... z "Microsoft" is a trademark of Microsoft Corporation. © CANON INC.2008 All rights reserved. No part of Apple Inc., registered in Windows Vista™ operating system Ultimate Edition (hereafter referred to your Canon PIXMA iP2600 series Photo Printer. As an ENERGY STAR® Partner...
Quick Start Guide
Page 8
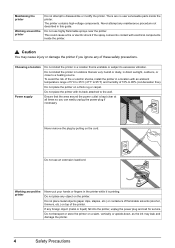
... this guide. Do not use highly flammable sprays near the printer. Do not transport or store the printer on the printer. Never attempt any object on a slant, vertically or upside-down, as the ink may cause injury or damage the printer if you can easily unplug the power plug if necessary.... Do not place the printer with electrical components inside the printer. Ensure that is unstable or subject to 95°F) and humidity...
... this guide. Do not use highly flammable sprays near the printer. Do not transport or store the printer on the printer. Never attempt any object on a slant, vertically or upside-down, as the ink may cause injury or damage the printer if you can easily unplug the power plug if necessary.... Do not place the printer with electrical components inside the printer. Ensure that is unstable or subject to 95°F) and humidity...

Quick Start Guide
Page 9
...cause burns. Do not throw FINE Cartridges (Ink Cartridges) into fire. Safety Precautions 5 If irritation to drink. In case ink gets in contact with eyes, rinse with soap and water immediately. Do not shake FINE Cartridges (Ink Cartridges). Never touch the electrical contacts or Print... Head Nozzles on a FINE Cartridge (Ink Cartridge) after printing. The metal parts ...
...cause burns. Do not throw FINE Cartridges (Ink Cartridges) into fire. Safety Precautions 5 If irritation to drink. In case ink gets in contact with eyes, rinse with soap and water immediately. Do not shake FINE Cartridges (Ink Cartridges). Never touch the electrical contacts or Print... Head Nozzles on a FINE Cartridge (Ink Cartridge) after printing. The metal parts ...
Quick Start Guide
Page 11
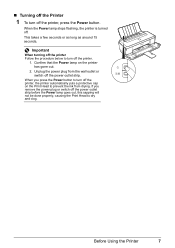
... takes a few seconds or as long as around 15 seconds. Important When turning off the printer Follow the procedure below to turn off the printer, the printer automatically puts a protective cap on the printer has gone out. 2. Confirm that the Power lamp on the Print Head to dry and clog. When you remove the... power plug or switch off the power outlet strip before the Power lamp goes out, this capping will not be done properly, causing the Print Head to prevent the ink...
... takes a few seconds or as long as around 15 seconds. Important When turning off the printer Follow the procedure below to turn off the printer, the printer automatically puts a protective cap on the printer has gone out. 2. Confirm that the Power lamp on the Print Head to dry and clog. When you remove the... power plug or switch off the power outlet strip before the Power lamp goes out, this capping will not be done properly, causing the Print Head to prevent the ink...
Quick Start Guide
Page 14
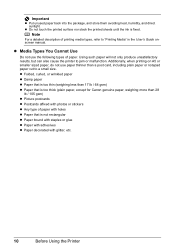
... staples or glue z Paper with adhesives z Paper decorated with glitter, etc. 10 Before Using the Printer z Do not touch the printed surface nor stack the printed sheets until the ink is too thick (plain paper, except for Canon genuine paper, weighing more than a post card, including plain paper or notepad paper cut to... the package, and store them avoiding heat, humidity, and direct sunlight. Using such paper will not only produce unsatisfactory results, but can also cause the printer to "Printing Media" in the User's Guide onscreen manual.
... staples or glue z Paper with adhesives z Paper decorated with glitter, etc. 10 Before Using the Printer z Do not touch the printed surface nor stack the printed sheets until the ink is too thick (plain paper, except for Canon genuine paper, weighing more than a post card, including plain paper or notepad paper cut to... the package, and store them avoiding heat, humidity, and direct sunlight. Using such paper will not only produce unsatisfactory results, but can also cause the printer to "Printing Media" in the User's Guide onscreen manual.
Quick Start Guide
Page 22
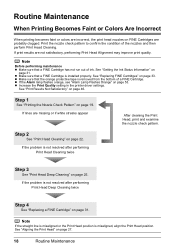
..." on page 33. See "Replacing FINE Cartridges" on page 31. z Make sure that a FINE Cartridge has not run out of ink. If the problem is not resolved after performing Print Head Cleaning twice Step 3 See "Print Head Deep Cleaning" on page 53. If... a FINE Cartridge. z Increase the Print Quality setting in the printer driver settings. Step 2 See "Print Head Cleaning" on FINE Cartridges are probably clogged. Routine Maintenance When Printing Becomes Faint or Colors Are Incorrect When printing becomes faint or colors are incorrect, the print head nozzles on page 22. z If...
..." on page 33. See "Replacing FINE Cartridges" on page 31. z Make sure that a FINE Cartridge has not run out of ink. If the problem is not resolved after performing Print Head Cleaning twice Step 3 See "Print Head Deep Cleaning" on page 53. If... a FINE Cartridge. z Increase the Print Quality setting in the printer driver settings. Step 2 See "Print Head Cleaning" on FINE Cartridges are probably clogged. Routine Maintenance When Printing Becomes Faint or Colors Are Incorrect When printing becomes faint or colors are incorrect, the print head nozzles on page 22. z If...
Quick Start Guide
Page 23
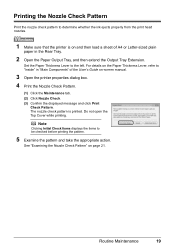
... Open the Paper Output Tray, and then extend the Output Tray Extension. See "Examining the Nozzle Check Pattern" on -screen manual. 3 Open the printer properties dialog box. 4 Print the Nozzle Check Pattern. (1) Click the Maintenance tab. (2) Click Nozzle Check. (3) Confirm the displayed message and click ... page 21. Printing the Nozzle Check Pattern Print the nozzle check pattern to determine whether the ink ejects properly from the print head nozzles. 1 Make sure that the printer is printed. Do not open the Top Cover while printing. Routine Maintenance 19 Note Clicking Initial...
... Open the Paper Output Tray, and then extend the Output Tray Extension. See "Examining the Nozzle Check Pattern" on -screen manual. 3 Open the printer properties dialog box. 4 Print the Nozzle Check Pattern. (1) Click the Maintenance tab. (2) Click Nozzle Check. (3) Confirm the displayed message and click ... page 21. Printing the Nozzle Check Pattern Print the nozzle check pattern to determine whether the ink ejects properly from the print head nozzles. 1 Make sure that the printer is printed. Do not open the Top Cover while printing. Routine Maintenance 19 Note Clicking Initial...

Quick Start Guide
Page 25
... the Black print head nozzle needs cleaning. Replace the FINE Cartridge if the remaining amount of this pattern are missing (Black ink) (2) If these patterns have white streaks, the Color print head nozzle needs cleaning. See "Replacing a FINE Cartridge" on page 31. 1 Check the nozzle check pattern you ...printed. (1) (2) (1) If lines of ink is not enough ink. Note The nozzle check pattern will not be printed correctly if there...
... the Black print head nozzle needs cleaning. Replace the FINE Cartridge if the remaining amount of this pattern are missing (Black ink) (2) If these patterns have white streaks, the Color print head nozzle needs cleaning. See "Replacing a FINE Cartridge" on page 31. 1 Check the nozzle check pattern you ...printed. (1) (2) (1) If lines of ink is not enough ink. Note The nozzle check pattern will not be printed correctly if there...
Quick Start Guide
Page 26
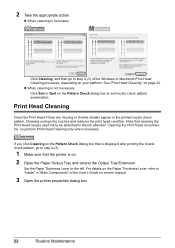
...If you click Cleaning on the Pattern Check dialog box that is not necessary Click Exit or Quit on -screen manual. 3 Open the printer properties dialog box. 22 Routine Maintenance 2 Take the appropriate action. z When cleaning is displayed after printing the nozzle check pattern, go ... Windows or Macintosh Print Head Cleaning procedure, depending on your platform. Note that the printer is necessary Click Cleaning, and then go to step 4-(3). 1 Make sure that cleaning the Print Head causes used ink to the left. Cleaning unclogs the nozzles and restores the print head condition. Set ...
...If you click Cleaning on the Pattern Check dialog box that is not necessary Click Exit or Quit on -screen manual. 3 Open the printer properties dialog box. 22 Routine Maintenance 2 Take the appropriate action. z When cleaning is displayed after printing the nozzle check pattern, go ... Windows or Macintosh Print Head Cleaning procedure, depending on your platform. Note that the printer is necessary Click Cleaning, and then go to step 4-(3). 1 Make sure that cleaning the Print Head causes used ink to the left. Cleaning unclogs the nozzles and restores the print head condition. Set ...
Quick Start Guide
Page 27
... the Rear Tray. (4) Confirm the displayed message and click Print Check Pattern. Routine Maintenance 23 This takes about 60 seconds. (3) Load a sheet of ink is not enough ink. See "Examining the Nozzle Check Pattern" on page 25. Do not perform any other operations until the nozzle check pattern finishes printing. Note The...
... the Rear Tray. (4) Confirm the displayed message and click Print Check Pattern. Routine Maintenance 23 This takes about 60 seconds. (3) Load a sheet of ink is not enough ink. See "Examining the Nozzle Check Pattern" on page 25. Do not perform any other operations until the nozzle check pattern finishes printing. Note The...
Quick Start Guide
Page 28
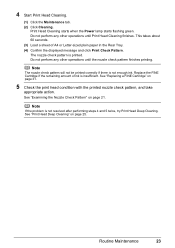
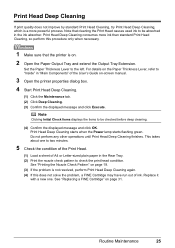
... performing steps 4 and 5 twice, try Print Head Deep Cleaning. For details on -screen manual. 3 Open the Canon IJ Printer Utility dialog box. 4 Start Print Head Cleaning. (1) Make sure that the printer is insufficient. This takes about 60 seconds. Replace the FINE Cartridge if the remaining amount of the User's Guide...items to the left. Set the Paper Thickness Lever to be printed correctly if there is printed. The nozzle check pattern is not enough ink. Note The nozzle check pattern will not be checked before cleaning. (4) Load a sheet of A4 or Letter-sized plain paper in "Main ...
... performing steps 4 and 5 twice, try Print Head Deep Cleaning. For details on -screen manual. 3 Open the Canon IJ Printer Utility dialog box. 4 Start Print Head Cleaning. (1) Make sure that the printer is insufficient. This takes about 60 seconds. Replace the FINE Cartridge if the remaining amount of the User's Guide...items to the left. Set the Paper Thickness Lever to be printed correctly if there is printed. The nozzle check pattern is not enough ink. Note The nozzle check pattern will not be checked before cleaning. (4) Load a sheet of A4 or Letter-sized plain paper in "Main ...
Quick Start Guide
Page 29
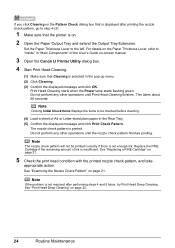
...until Print Head Deep Cleaning finishes. Set the Paper Thickness Lever to be absorbed in "Main Components" of ink. Routine Maintenance 25 For details on -screen manual. 3 Open the printer properties dialog box. 4 Start Print Head Deep Cleaning. (1) Click the Maintenance tab. (2) Click Deep Cleaning... (3) Confirm the displayed message and click Execute. Note Clicking Initial Check Items displays the items to the left. Note that the printer is not resolved, perform Print Head Deep Cleaning again. (4) If this procedure only when necessary. 1 Make sure that cleaning the Print...
...until Print Head Deep Cleaning finishes. Set the Paper Thickness Lever to be absorbed in "Main Components" of ink. Routine Maintenance 25 For details on -screen manual. 3 Open the printer properties dialog box. 4 Start Print Head Deep Cleaning. (1) Click the Maintenance tab. (2) Click Deep Cleaning... (3) Confirm the displayed message and click Execute. Note Clicking Initial Check Items displays the items to the left. Note that the printer is not resolved, perform Print Head Deep Cleaning again. (4) If this procedure only when necessary. 1 Make sure that cleaning the Print...

Quick Start Guide
Page 30
...items to two minutes. See "Printing the Nozzle Check Pattern" on -screen manual. 3 Open the Canon IJ Printer Utility dialog box. 4 Start Print Head Deep Cleaning. (1) Make sure that the printer is on page 31. 26 Routine Maintenance Print Head Deep Cleaning starts when the Power lamp starts flashing... green. This takes about one . Replace it with a new one to be checked before deep cleaning. 5 Check the condition of the Print Head. (1) Load a sheet of ink. ...
...items to two minutes. See "Printing the Nozzle Check Pattern" on -screen manual. 3 Open the Canon IJ Printer Utility dialog box. 4 Start Print Head Deep Cleaning. (1) Make sure that the printer is on page 31. 26 Routine Maintenance Print Head Deep Cleaning starts when the Power lamp starts flashing... green. This takes about one . Replace it with a new one to be checked before deep cleaning. 5 Check the condition of the Print Head. (1) Load a sheet of ink. ...
Quick Start Guide
Page 35
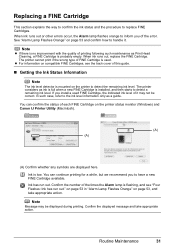
... wrong type of the times the Alarm lamp is mounted on the printer status monitor (Windows) and Canon IJ Printer Utility (Macintosh). (A) (A) (A) Confirm whether any symbols are displayed here. If you of this guide. „ Getting the Ink Status Information Note The ink level detector is flashing, and see the back cover of the error...
... wrong type of the times the Alarm lamp is mounted on the printer status monitor (Windows) and Canon IJ Printer Utility (Macintosh). (A) (A) (A) Confirm whether any symbols are displayed here. If you of this guide. „ Getting the Ink Status Information Note The ink level detector is flashing, and see the back cover of the error...

Quick Start Guide
Page 36
... (Macintosh)" in the User's Guide on the taskbar during printing. (1) Open the Canon IJ Printer Utility. Note You can also display the printer status monitor by clicking the Canon XXX (where "XXX" is your printer's name) which appears on -screen manual. (2) Select Ink Level Information in the pop-up menu. Refer to open each of the...
... (Macintosh)" in the User's Guide on the taskbar during printing. (1) Open the Canon IJ Printer Utility. Note You can also display the printer status monitor by clicking the Canon XXX (where "XXX" is your printer's name) which appears on -screen manual. (2) Select Ink Level Information in the pop-up menu. Refer to open each of the...
Quick Start Guide
Page 37
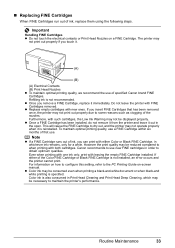
...Canon recommends to maintain the printer's performance. z Once a FINE Cartridge has been installed, do not remove it from the printer and leave it . (A) (B) (A) Electrical Contacts (B) Print Head Nozzles z To maintain optimal printing quality, we recommend the use . z Color ink may be displayed properly. Routine Maintenance 33 Color ink... is not installed, an error occurs and the printer cannot print. Do not leave the printer with FINE Cartridges removed. If you insert...
...Canon recommends to maintain the printer's performance. z Once a FINE Cartridge has been installed, do not remove it from the printer and leave it . (A) (B) (A) Electrical Contacts (B) Print Head Nozzles z To maintain optimal printing quality, we recommend the use . z Color ink may be displayed properly. Routine Maintenance 33 Color ink... is not installed, an error occurs and the printer cannot print. Do not leave the printer with FINE Cartridges removed. If you insert...
Quick Start Guide
Page 39
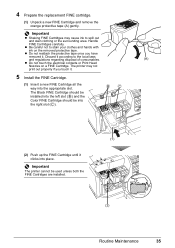
... Unpack a new FINE Cartridge and remove the orange protective tape (A) gently. Handle FINE Cartridges carefully. Important The printer cannot be into the left slot ( B ) and the Color FINE Cartridge should be installed into the right slot ( C ). z Be careful not to the local laws and... regulations regarding disposal of consumables. (A) z Do not touch the electrical contacts or Print Head Nozzles on the removed protective tape. The printer may cause ink to spill...
... Unpack a new FINE Cartridge and remove the orange protective tape (A) gently. Handle FINE Cartridges carefully. Important The printer cannot be into the left slot ( B ) and the Color FINE Cartridge should be installed into the right slot ( C ). z Be careful not to the local laws and... regulations regarding disposal of consumables. (A) z Do not touch the electrical contacts or Print Head Nozzles on the removed protective tape. The printer may cause ink to spill...
Quick Start Guide
Page 40
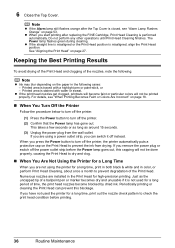
... by dried ink. When you are installed in the following . For details, see "Alarm Lamp Flashes Orange" on the paper in the Print Head for a long time, print in both black & white and in color, or perform Print Head Cleaning, about once a month to turn off the printer. (2) Confirm... traced with water or sweat. Printed area is closed, see "When Printing Becomes Faint or Colors Are Incorrect" on page 18. „ When You Turn Off the Printer Follow the procedure below to turn off the printer, the printer automatically puts a protective cap on page 27. 6 Close the Top Cover.
... by dried ink. When you are installed in the following . For details, see "Alarm Lamp Flashes Orange" on the paper in the Print Head for a long time, print in both black & white and in color, or perform Print Head Cleaning, about once a month to turn off the printer. (2) Confirm... traced with water or sweat. Printed area is closed, see "When Printing Becomes Faint or Colors Are Incorrect" on page 18. „ When You Turn Off the Printer Follow the procedure below to turn off the printer, the printer automatically puts a protective cap on page 27. 6 Close the Top Cover.
Quick Start Guide
Page 44
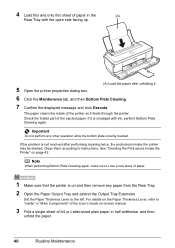
... be stained. See "Cleaning the Protrusions Inside the Printer" on -screen manual. 3 Fold a single sheet of A4 or Letter-sized plain paper in the (A) Rear Tray with ink, perform Bottom Plate Cleaning again. Important Do not perform any other operation while the bottom plate is on and then remove any ... sure to "Inside" in "Main Components" of the User's Guide on page 42. If it is not resolved after unfolding it feeds through the printer. Clean them according to the left. 4 Load this and only this sheet of paper in half widthwise, and then unfold the paper. 40 Routine ...
... be stained. See "Cleaning the Protrusions Inside the Printer" on -screen manual. 3 Fold a single sheet of A4 or Letter-sized plain paper in the (A) Rear Tray with ink, perform Bottom Plate Cleaning again. Important Do not perform any other operation while the bottom plate is on and then remove any ... sure to "Inside" in "Main Components" of the User's Guide on page 42. If it is not resolved after unfolding it feeds through the printer. Clean them according to the left. 4 Load this and only this sheet of paper in half widthwise, and then unfold the paper. 40 Routine ...
Quick Start Guide
Page 45
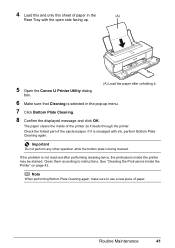
.... 7 Click Bottom Plate Cleaning. 8 Confirm the displayed message and click OK. If it feeds through the printer. If the problem is selected in the (A) Rear Tray with ink, perform Bottom Plate Cleaning again. Check the folded part of paper. Note When performing Bottom Plate Cleaning again,... make sure to instructions. 4 Load this and only this sheet of paper in the pop-up . 5 Open the Canon IJ Printer Utility dialog box. (A) ...
.... 7 Click Bottom Plate Cleaning. 8 Confirm the displayed message and click OK. If it feeds through the printer. If the problem is selected in the (A) Rear Tray with ink, perform Bottom Plate Cleaning again. Check the folded part of paper. Note When performing Bottom Plate Cleaning again,... make sure to instructions. 4 Load this and only this sheet of paper in the pop-up . 5 Open the Canon IJ Printer Utility dialog box. (A) ...


