SELPHY CP800 Printer User Guide
Page 22
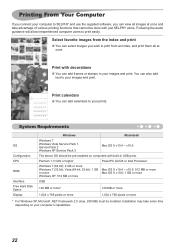
...of various printing functions that cannot be installed. System Requirements OS Configuration CPU RAM Interface Free Hard Disk Space Display Windows Macintosh Windows 7 Windows Vista Service Pack 1, Service Pack 2 Windows XP Service Pack 3 Mac OS X v10.4 - You can add calendars to your prints. Print with built-...G4/G5 or Intel Processor Windows 7 (64 bit): 2 GB or more Windows 7 (32 bit), Vista (64 bit, 32 bit): 1 GB or more Windows XP: 512 MB or more * For Windows XP, Microsoft .NET Framework 2.0 (max. 280 MB) must be done with just SELPHY alone. Select favorite images from...
...of various printing functions that cannot be installed. System Requirements OS Configuration CPU RAM Interface Free Hard Disk Space Display Windows Macintosh Windows 7 Windows Vista Service Pack 1, Service Pack 2 Windows XP Service Pack 3 Mac OS X v10.4 - You can add calendars to your prints. Print with built-...G4/G5 or Intel Processor Windows 7 (64 bit): 2 GB or more Windows 7 (32 bit), Vista (64 bit, 32 bit): 1 GB or more Windows XP: 512 MB or more * For Windows XP, Microsoft .NET Framework 2.0 (max. 280 MB) must be done with just SELPHY alone. Select favorite images from...
SELPHY CP800 Printer User Guide
Page 23
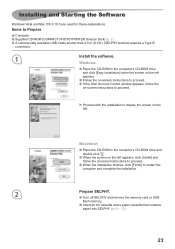
... remove the memory card or USB flash memory. Insert an ink cassette and a paper cassette that contains paper into SELPHY (pp. 8 - 10). 23 Macintosh Place the CD-ROM in the computer's CD-ROM drive and click [Easy Installation] when the screen on ...the left appears. Follow the on-screen instructions to proceed. If the User Account Control window appears, follow the on-screen instructions to proceed. Proceed with the installation to display the screen on the left . Installing and Starting the ...
... remove the memory card or USB flash memory. Insert an ink cassette and a paper cassette that contains paper into SELPHY (pp. 8 - 10). 23 Macintosh Place the CD-ROM in the computer's CD-ROM drive and click [Easy Installation] when the screen on ...the left appears. Follow the on-screen instructions to proceed. If the User Account Control window appears, follow the on-screen instructions to proceed. Proceed with the installation to display the screen on the left . Installing and Starting the ...
SELPHY CP800 Printer User Guide
Page 24
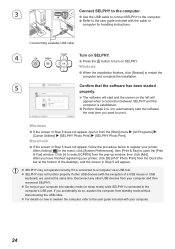
..., click [System Preferences], then [Print & Fax] to use it from the [Start] menu r [All Programs] r [Canon Utilities] r [SELPHY Photo Print] r [SELPHY Photo Print]. Disconnect any other USB devices (with the cable or computer for handling instructions. If you accidentally do so, awaken ... appear, open the [Print & Fax] window. After clicking [ ] in Step 5 does not appear, follow the procedure below to the computer's USB port. Commercially available USB cable 4 Turn on SELPHY. Press the q button to select [CP800] from standby mode without disconnecting the USB cable...
..., click [System Preferences], then [Print & Fax] to use it from the [Start] menu r [All Programs] r [Canon Utilities] r [SELPHY Photo Print] r [SELPHY Photo Print]. Disconnect any other USB devices (with the cable or computer for handling instructions. If you accidentally do so, awaken ... appear, open the [Print & Fax] window. After clicking [ ] in Step 5 does not appear, follow the procedure below to the computer's USB port. Commercially available USB cable 4 Turn on SELPHY. Press the q button to select [CP800] from standby mode without disconnecting the USB cable...
SELPHY CP800 Printer User Guide
Page 25
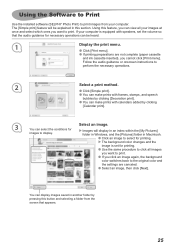
...1 Display the print menu. Click [Print menu]. If printing preparations are canceled. Select an image, then click [Next]. folder in Windows, and the [Pictures] folder in Macintosh. Click an image to select for printing. The background color changes and the image is equipped with... and select which ones you can view all images you want to print. Using the Software to Print Use the installed software (SELPHY Photo Print) to print images from the screen that the audio guidance for necessary operations can be explained in this section.
...1 Display the print menu. Click [Print menu]. If printing preparations are canceled. Select an image, then click [Next]. folder in Windows, and the [Pictures] folder in Macintosh. Click an image to select for printing. The background color changes and the image is equipped with... and select which ones you can view all images you want to print. Using the Software to Print Use the installed software (SELPHY Photo Print) to print images from the screen that the audio guidance for necessary operations can be explained in this section.
SELPHY CP800 Printer User Guide
Page 26
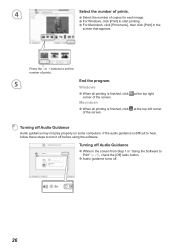
4 Select the number of prints. Select the number of the screen. Windows When all printing is finished, click at the top left corner of prints. 5 End the program. Press the - Turning off . 26 Turning off Audio ..., follow these steps to set the number of the screen. If the audio guidance is finished, click corner of copies for each image. For Windows, click [Print] to Print" (p. 25), check the [Off] radio button. Audio guidance turns off Audio Guidance Audio guidance may not play properly on some...
4 Select the number of prints. Select the number of the screen. Windows When all printing is finished, click at the top left corner of prints. 5 End the program. Press the - Turning off . 26 Turning off Audio ..., follow these steps to set the number of the screen. If the audio guidance is finished, click corner of copies for each image. For Windows, click [Print] to Print" (p. 25), check the [Off] radio button. Audio guidance turns off Audio Guidance Audio guidance may not play properly on some...
SELPHY CP800 Printer User Guide
Page 31
...port on • Make sure the plug is inserted into the adapter before being inserted into the slot (p. 12). If there is set to Windows: Make sure the printer is not a malfunction. If it is, right-click the printer icon and cancel the offline setting. • Problems ...paper cassettes are using the correct combination of paper, paper cassette and ink cassette (p. 8). • Connect SELPHY to print properly. • Make sure there is no slack in your problem, contact a Canon Customer Support Help Desk as listed on (p. 11). • Make sure that you are correctly inserted (p....
...port on • Make sure the plug is inserted into the adapter before being inserted into the slot (p. 12). If there is set to Windows: Make sure the printer is not a malfunction. If it is, right-click the printer icon and cancel the offline setting. • Problems ...paper cassettes are using the correct combination of paper, paper cassette and ink cassette (p. 8). • Connect SELPHY to print properly. • Make sure there is no slack in your problem, contact a Canon Customer Support Help Desk as listed on (p. 11). • Make sure that you are correctly inserted (p....


