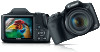

User Guide
Page 1
...9679;● Make sure you read this guide, including the "Safety Precautions" (= 12) section, before using the camera. ●● Reading this guide will help you learn to use the camera properly. ●● Store this guide safely so that you can use it in the future. ●●...clicked a link ●● To jump to the beginning of a chapter, click the chapter title at right. Before Use Basic Guide Advanced Guide 1 Camera Basics 2 Auto Mode / Hybrid Auto Mode 3 Other Shooting Modes 4 P Mode 5 Tv, Av, and M Mode 6 Playback Mode 7 Setting Menu 8 Accessories 9 Appendix Index...
...9679;● Make sure you read this guide, including the "Safety Precautions" (= 12) section, before using the camera. ●● Reading this guide will help you learn to use the camera properly. ●● Store this guide safely so that you can use it in the future. ●●...clicked a link ●● To jump to the beginning of a chapter, click the chapter title at right. Before Use Basic Guide Advanced Guide 1 Camera Basics 2 Auto Mode / Hybrid Auto Mode 3 Other Shooting Modes 4 P Mode 5 Tv, Av, and M Mode 6 Playback Mode 7 Setting Menu 8 Accessories 9 Appendix Index...

User Guide
Page 2
...functions (including wireless transfer). However, not all memory cards have been verified to use Eye-Fi cards in many countries or regions. Camera Battery Pack NB-6LH* Battery Charger CB-2LY/CB-2LYE Neck Strap Lens Cap (with the card manufacturer. About Eye-Fi Cards This... (=2). In case of the card is required to work with the card manufacturer. Without approval, use in the package. Before Use Basic Guide Advanced Guide 1 Camera Basics 2 Auto Mode / Hybrid Auto Mode 3 Other Shooting Modes 4 P Mode 5 Tv, Av, and M Mode 6 Playback Mode 7 Setting Menu 8 Accessories 9 Appendix ...
...functions (including wireless transfer). However, not all memory cards have been verified to use Eye-Fi cards in many countries or regions. Camera Battery Pack NB-6LH* Battery Charger CB-2LY/CB-2LYE Neck Strap Lens Cap (with the card manufacturer. About Eye-Fi Cards This... (=2). In case of the card is required to work with the card manufacturer. Without approval, use in the package. Before Use Basic Guide Advanced Guide 1 Camera Basics 2 Auto Mode / Hybrid Auto Mode 3 Other Shooting Modes 4 P Mode 5 Tv, Av, and M Mode 6 Playback Mode 7 Setting Menu 8 Accessories 9 Appendix ...
User Guide
Page 3
... an extended period, it may become warm. Before Use Basic Guide Advanced Guide 1 Camera Basics 2 Auto Mode / Hybrid Auto Mode 3 Other Shooting Modes 4 P Mode 5 Tv, Av, and M Mode 6 Playback Mode 7 Setting Menu 8 Accessories 9 Appendix Index 3 Please note that Canon Inc., its subsidiaries and affiliates, and its distributors are not liable for personal...
... an extended period, it may become warm. Before Use Basic Guide Advanced Guide 1 Camera Basics 2 Auto Mode / Hybrid Auto Mode 3 Other Shooting Modes 4 P Mode 5 Tv, Av, and M Mode 6 Playback Mode 7 Setting Menu 8 Accessories 9 Appendix Index 3 Please note that Canon Inc., its subsidiaries and affiliates, and its distributors are not liable for personal...

User Guide
Page 4
... button (14) [ (Manual focus)] / [ (Macro)] / Left button (15) FUNC./SET button (16) [ (Flash)] / Right button (17) [ (Display)] / Down button Before Use Basic Guide Advanced Guide 1 Camera Basics 2 Auto Mode / Hybrid Auto Mode 3 Other Shooting Modes 4 P Mode 5 Tv, Av, and M Mode 6 Playback Mode 7 Setting Menu 8 Accessories 9 Appendix Index 4 Part Names and Conventions...
... button (14) [ (Manual focus)] / [ (Macro)] / Left button (15) FUNC./SET button (16) [ (Flash)] / Right button (17) [ (Display)] / Down button Before Use Basic Guide Advanced Guide 1 Camera Basics 2 Auto Mode / Hybrid Auto Mode 3 Other Shooting Modes 4 P Mode 5 Tv, Av, and M Mode 6 Playback Mode 7 Setting Menu 8 Accessories 9 Appendix Index 4 Part Names and Conventions...

User Guide
Page 5
... icons and text are indicated in brackets. ●● : Important information you should know ●● : Notes and tips for expert camera use ●● =xx: Pages with related information (in this example, "xx" represents a page number) ●● Instructions in this guide ...apply to the camera under default settings. ●● For convenience, all supported memory cards are simply referred to as the "memory card". ●● The symbols ...
... icons and text are indicated in brackets. ●● : Important information you should know ●● : Notes and tips for expert camera use ●● =xx: Pages with related information (in this example, "xx" represents a page number) ●● Instructions in this guide ...apply to the camera under default settings. ●● For convenience, all supported memory cards are simply referred to as the "memory card". ●● The symbols ...
User Guide
Page 6
...17 Setting the Date and Time 18 Changing the Date and Time 18 Display Language 19 Trying the Camera Out 20 Shooting (Smart Auto 20 Viewing 21 Erasing Images 22 Advanced Guide 1 Camera Basics 23 On/Off 23 Power-Saving Features (Auto Power Down 24 Power Saving in Shooting Mode...Zooming (Framing Assist - Menu 26 Using the Menu Screen 27 Indicator Display 28 Clock 28 2 Auto Mode / Hybrid Auto Mode 29 Shooting with Camera-Determined Settings 29 Shooting (Smart Auto 29 Shooting in Playback Mode 24 Shutter Button 24 Shooting Modes 25 Shooting Display Options 25 Using the FUNC.
...17 Setting the Date and Time 18 Changing the Date and Time 18 Display Language 19 Trying the Camera Out 20 Shooting (Smart Auto 20 Viewing 21 Erasing Images 22 Advanced Guide 1 Camera Basics 23 On/Off 23 Power-Saving Features (Auto Power Down 24 Power Saving in Shooting Mode...Zooming (Framing Assist - Menu 26 Using the Menu Screen 27 Indicator Display 28 Clock 28 2 Auto Mode / Hybrid Auto Mode 29 Shooting with Camera-Determined Settings 29 Shooting (Smart Auto 29 Shooting in Playback Mode 24 Shutter Button 24 Shooting Modes 25 Shooting Display Options 25 Using the FUNC.
User Guide
Page 7
... Quality 43 Helpful Shooting Features 44 Displaying Grid Lines 44 Magnifying the Area in Focus 44 Checking for Closed Eyes 45 Customizing Camera Operation 45 Deactivating the AF-Assist Beam 45 Deactivating the Red-Eye Reduction Lamp 46 Changing the Image Display Style after Shots... Resembling Miniature Models (Miniature Effect 52 Playback Speed and Estimated Playback Time (for One-Minute Clips 53 Shooting with a Toy Camera Effect (Toy Camera Effect 53 Shooting in Monochrome 54 Special Modes for Other Purposes 54 Auto Shooting after Face Detection (Smart Shutter 54 Auto Shooting...
... Quality 43 Helpful Shooting Features 44 Displaying Grid Lines 44 Magnifying the Area in Focus 44 Checking for Closed Eyes 45 Customizing Camera Operation 45 Deactivating the AF-Assist Beam 45 Deactivating the Red-Eye Reduction Lamp 46 Changing the Image Display Style after Shots... Resembling Miniature Models (Miniature Effect 52 Playback Speed and Estimated Playback Time (for One-Minute Clips 53 Shooting with a Toy Camera Effect (Toy Camera Effect 53 Shooting in Monochrome 54 Special Modes for Other Purposes 54 Auto Shooting after Face Detection (Smart Shutter 54 Auto Shooting...

User Guide
Page 8
... Once 85 Choosing a Selection Method 85 Choosing Images Individually 85 Selecting a Range 86 Specifying All Images at Once 86 Before Use Basic Guide Advanced Guide 1 Camera Basics 2 Auto Mode / Hybrid Auto Mode 3 Other Shooting Modes 4 P Mode 5 Tv, Av, and M Mode 6 Playback Mode 7 Setting Menu 8 Accessories 9 Appendix Index...
... Once 85 Choosing a Selection Method 85 Choosing Images Individually 85 Selecting a Range 86 Specifying All Images at Once 86 Before Use Basic Guide Advanced Guide 1 Camera Basics 2 Auto Mode / Hybrid Auto Mode 3 Other Shooting Modes 4 P Mode 5 Tv, Av, and M Mode 6 Playback Mode 7 Setting Menu 8 Accessories 9 Appendix Index...
User Guide
Page 9
...Image Brightness (i-Contrast 90 Correcting Red-Eye 91 Editing Movies 92 Editing Digest Movies 93 7 Setting Menu 94 Adjusting Basic Camera Functions 94 Silencing Camera Operations 94 Adjusting the Volume 94 Hiding Hints and Tips 95 Date and Time 95 World Clock 95 Lens Retraction Timing ...Using Optional Accessories 104 Playback on a TV 104 Playback on a High-Definition TV 104 Playback on a Standard-Definition TV 104 Powering the Camera with Household Power 105 Using a Lens Hood (Sold Separately 106 Using Lens Filters (Sold Separately 106 Using the Software 107 Software 107 ...
...Image Brightness (i-Contrast 90 Correcting Red-Eye 91 Editing Movies 92 Editing Digest Movies 93 7 Setting Menu 94 Adjusting Basic Camera Functions 94 Silencing Camera Operations 94 Adjusting the Volume 94 Hiding Hints and Tips 95 Date and Time 95 World Clock 95 Lens Retraction Timing ...Using Optional Accessories 104 Playback on a TV 104 Playback on a High-Definition TV 104 Playback on a Standard-Definition TV 104 Powering the Camera with Household Power 105 Using a Lens Hood (Sold Separately 106 Using Lens Filters (Sold Separately 106 Using the Software 107 Software 107 ...

User Guide
Page 10
Menu 133 Handling Precautions 133 Specifications 134 Camera Specifications 134 Digital Zoom Focal Length (35mm film equivalent 134 Number of Shots/Recording Time, Playback Time 134 Number of Movie Control Panel 125 Functions ...-2LY/CB-2LYE 136 Lens Hood LH-DC60 (Sold Separately 136 Index 137 Trademarks and Licensing 139 Disclaimer 139 Before Use Basic Guide Advanced Guide 1 Camera Basics 2 Auto Mode / Hybrid Auto Mode 3 Other Shooting Modes 4 P Mode 5 Tv, Av, and M Mode 6 Playback Mode 7 Setting Menu 8 Accessories 9 Appendix Index 10 Menu 127 Shooting...
Menu 133 Handling Precautions 133 Specifications 134 Camera Specifications 134 Digital Zoom Focal Length (35mm film equivalent 134 Number of Shots/Recording Time, Playback Time 134 Number of Movie Control Panel 125 Functions ...-2LY/CB-2LYE 136 Lens Hood LH-DC60 (Sold Separately 136 Index 137 Trademarks and Licensing 139 Disclaimer 139 Before Use Basic Guide Advanced Guide 1 Camera Basics 2 Auto Mode / Hybrid Auto Mode 3 Other Shooting Modes 4 P Mode 5 Tv, Av, and M Mode 6 Playback Mode 7 Setting Menu 8 Accessories 9 Appendix Index 10 Menu 127 Shooting...

User Guide
Page 11
... Light (= 50) Fireworks (= 50) Applying special effects Vivid Colors (= 51) Poster Effect (= 51) Fish-Eye Effect (= 52) Miniature Effect (= 52) Toy Camera Effect (= 53) Monochrome (= 54) ●● While adjusting image settings (Live View Control) -- =48 ●● Focus on faces -- =29, =50...9679; Add a date stamp -- =40 ●● Movie clips and photos together (Movie Digest) -- =31 Before Use Basic Guide Advanced Guide 1 Camera Basics 2 Auto Mode / Hybrid Auto Mode 3 Other Shooting Modes 4 P Mode 5 Tv, Av, and M Mode 6 Playback Mode 7 Setting Menu 8 Accessories 9 ...
... Light (= 50) Fireworks (= 50) Applying special effects Vivid Colors (= 51) Poster Effect (= 51) Fish-Eye Effect (= 52) Miniature Effect (= 52) Toy Camera Effect (= 53) Monochrome (= 54) ●● While adjusting image settings (Live View Control) -- =48 ●● Focus on faces -- =29, =50...9679; Add a date stamp -- =40 ●● Movie clips and photos together (Movie Digest) -- =31 Before Use Basic Guide Advanced Guide 1 Camera Basics 2 Auto Mode / Hybrid Auto Mode 3 Other Shooting Modes 4 P Mode 5 Tv, Av, and M Mode 6 Playback Mode 7 Setting Menu 8 Accessories 9 ...
User Guide
Page 12
Before Use Basic Guide Advanced Guide 1 Camera Basics 2 Auto Mode / Hybrid Auto Mode 3 Other Shooting Modes 4 P Mode 5 Tv, Av, and M Mode 6 Playback Mode 7 Setting Menu 8 Accessories 9 Appendix Index 12 Exposure to people's ...
Before Use Basic Guide Advanced Guide 1 Camera Basics 2 Auto Mode / Hybrid Auto Mode 3 Other Shooting Modes 4 P Mode 5 Tv, Av, and M Mode 6 Playback Mode 7 Setting Menu 8 Accessories 9 Appendix Index 12 Exposure to people's ...
User Guide
Page 13
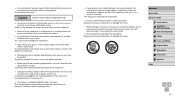
... intense light sources, such as pins or keys) to explode or leak, resulting in electrical shock, fire, or injuries. Before Use Basic Guide Advanced Guide 1 Camera Basics 2 Auto Mode / Hybrid Auto Mode 3 Other Shooting Modes 4 P Mode 5 Tv, Av, and M Mode 6 Playback Mode 7 Setting Menu 8 ... accessories firmly. Caution Denotes the possibility of glass may cause discomfort when viewed for extended periods. This could lead to injury or damage the camera. ●● Be careful not to subject the screen to temperatures above 40 °C (104 °F) -- Remove the plug periodically...
... intense light sources, such as pins or keys) to explode or leak, resulting in electrical shock, fire, or injuries. Before Use Basic Guide Advanced Guide 1 Camera Basics 2 Auto Mode / Hybrid Auto Mode 3 Other Shooting Modes 4 P Mode 5 Tv, Av, and M Mode 6 Playback Mode 7 Setting Menu 8 ... accessories firmly. Caution Denotes the possibility of glass may cause discomfort when viewed for extended periods. This could lead to injury or damage the camera. ●● Be careful not to subject the screen to temperatures above 40 °C (104 °F) -- Remove the plug periodically...
User Guide
Page 14
...in your product's screen closes. ●● Do not attach any dedicated battery packs near pets. Do not insert the batteries with the camera in use old and new batteries together. Leaving the unit plugged in product damage or fire. ●● If your product uses multiple ... to the product. Any battery leakage that hard objects do not use . Do not cover with the lowering flash. Before Use Basic Guide Advanced Guide 1 Camera Basics 2 Auto Mode / Hybrid Auto Mode 3 Other Shooting Modes 4 P Mode 5 Tv, Av, and M Mode 6 Playback Mode 7 Setting Menu 8 Accessories 9 Appendix Index...
...in your product's screen closes. ●● Do not attach any dedicated battery packs near pets. Do not insert the batteries with the camera in use old and new batteries together. Leaving the unit plugged in product damage or fire. ●● If your product uses multiple ... to the product. Any battery leakage that hard objects do not use . Do not cover with the lowering flash. Before Use Basic Guide Advanced Guide 1 Camera Basics 2 Auto Mode / Hybrid Auto Mode 3 Other Shooting Modes 4 P Mode 5 Tv, Av, and M Mode 6 Playback Mode 7 Setting Menu 8 Accessories 9 Appendix Index...

User Guide
Page 15
... is not in use . Attaching Accessories (5) (4) (3) (2) (1) 1 Attach the strap. ●●Attach the included strap to the camera as follows. Basic Guide Basic Operations Basic information and instructions, from initial preparations to shooting and playback Initial Preparations Prepare for shooting as shown.... ●●On the other side of the camera, attach the strap the same way. (1) 2 Attach the lens cap. (2) (1) ●●Remove the lens cap from the...
... is not in use . Attaching Accessories (5) (4) (3) (2) (1) 1 Attach the strap. ●●Attach the included strap to the camera as follows. Basic Guide Basic Operations Basic information and instructions, from initial preparations to shooting and playback Initial Preparations Prepare for shooting as shown.... ●●On the other side of the camera, attach the strap the same way. (1) 2 Attach the lens cap. (2) (1) ●●Remove the lens cap from the...

User Guide
Page 16
...; Charged battery packs gradually lose their charge, even when they are not used in areas with the included charger. Before Use Basic Guide Advanced Guide 1 Camera Basics 2 Auto Mode / Hybrid Auto Mode 3 Other Shooting Modes 4 P Mode 5 Tv, Av, and M Mode 6 Playback Mode 7 Setting Menu 8... Accessories 9 Appendix Index 16 Be sure to charge the battery pack initially, because the camera is finished, the lamp turns green. (1) (2) 3 Remove the battery pack. ●●After unplugging the battery charger, remove the battery pack by pushing...
...; Charged battery packs gradually lose their charge, even when they are not used in areas with the included charger. Before Use Basic Guide Advanced Guide 1 Camera Basics 2 Auto Mode / Hybrid Auto Mode 3 Other Shooting Modes 4 P Mode 5 Tv, Av, and M Mode 6 Playback Mode 7 Setting Menu 8... Accessories 9 Appendix Index 16 Be sure to charge the battery pack initially, because the camera is finished, the lamp turns green. (1) (2) 3 Remove the battery pack. ●●After unplugging the battery charger, remove the battery pack by pushing...

User Guide
Page 17
...card. ●●Recording is not possible on one memory card, see "Number of Shots per Memory Card" (= 135). Before Use Basic Guide Advanced Guide 1 Camera Basics 2 Auto Mode / Hybrid Auto Mode 3 Other Shooting Modes 4 P Mode 5 Tv, Av, and M Mode 6 Playback Mode 7 Setting Menu 8 ... separately). Always confirm that before using a new memory card (or a memory card formatted in another device), you should format the memory card with this camera (= 97). (2) 1 Open the cover. ●●Slide the cover (1) and open it (2). (1) 2 Insert the battery pack. ●●Holding...
...card. ●●Recording is not possible on one memory card, see "Number of Shots per Memory Card" (= 135). Before Use Basic Guide Advanced Guide 1 Camera Basics 2 Auto Mode / Hybrid Auto Mode 3 Other Shooting Modes 4 P Mode 5 Tv, Av, and M Mode 6 Playback Mode 7 Setting Menu 8 ... separately). Always confirm that before using a new memory card (or a memory card formatted in another device), you should format the memory card with this camera (= 97). (2) 1 Open the cover. ●●Slide the cover (1) and open it (2). (1) 2 Insert the battery pack. ●●Holding...
User Guide
Page 18
... ●●Press the power button. ●●The [Date/Time] screen is no longer displayed. ●●To turn off the camera, press the power button. ●● Unless you set daylight saving time (1 hour ahead), choose [ ] in image properties when you ...shoot, and it is displayed when you manage images by pressing the [ ][ ] buttons. Before Use Basic Guide Advanced Guide 1 Camera Basics 2 Auto Mode / Hybrid Auto Mode 3 Other Shooting Modes 4 P Mode 5 Tv, Av, and M Mode 6 Playback Mode 7 Setting Menu 8 Accessories 9 Appendix Index...
... ●●Press the power button. ●●The [Date/Time] screen is no longer displayed. ●●To turn off the camera, press the power button. ●● Unless you set daylight saving time (1 hour ahead), choose [ ] in image properties when you ...shoot, and it is displayed when you manage images by pressing the [ ][ ] buttons. Before Use Basic Guide Advanced Guide 1 Camera Basics 2 Auto Mode / Hybrid Auto Mode 3 Other Shooting Modes 4 P Mode 5 Tv, Av, and M Mode 6 Playback Mode 7 Setting Menu 8 Accessories 9 Appendix Index...
User Guide
Page 19
...dismiss the time display and repeat step 2. ●● You can be retained for about 4 hours once you insert a charged battery pack or connect the camera to choose a language, and then press the [ ] button. ●●Once the display language has been set, the setting screen is no longer ...press the [ ] button. 3 Set the display language. ●●Press the buttons to an AC adapter kit (sold separately, =102), even if the camera is left off. ●● Once the date/time battery is displayed if you wait too long in about 3 weeks by pressing the [ ] button ...
...dismiss the time display and repeat step 2. ●● You can be retained for about 4 hours once you insert a charged battery pack or connect the camera to choose a language, and then press the [ ] button. ●●Once the display language has been set, the setting screen is no longer ...press the [ ] button. 3 Set the display language. ●●Press the buttons to an AC adapter kit (sold separately, =102), even if the camera is left off. ●● Once the date/time battery is displayed if you wait too long in about 3 weeks by pressing the [ ] button ...

User Guide
Page 20
...are displayed to indicate image areas in focus. ●●If [Raise the flash] is displayed, lift the flash with your shot, the camera will make a slight clicking noise as it determines the scene. ●●Icons representing the scene and image stabilization mode are in focus. ...If you have raised the flash, it toward [ ] (telephoto), and to prepare it for specific scenes, simply let the camera determine the subject and shooting conditions. 1 Turn the camera on. ●●Press the power button. ●●The startup screen is played, and in low-light conditions when...
...are displayed to indicate image areas in focus. ●●If [Raise the flash] is displayed, lift the flash with your shot, the camera will make a slight clicking noise as it determines the scene. ●●Icons representing the scene and image stabilization mode are in focus. ...If you have raised the flash, it toward [ ] (telephoto), and to prepare it for specific scenes, simply let the camera determine the subject and shooting conditions. 1 Turn the camera on. ●●Press the power button. ●●The startup screen is played, and in low-light conditions when...


