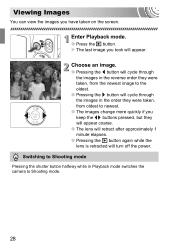
ImageBrowser 6.5 for Macintosh Instruction Manual
Page 9
... to "Precautions for software installation procedures. • For details on how to connect the camera to a computer, refer to communicate with the supplied interface cable. 2 Turn on the camera power, set it to playback mode and prepare it to the Camera User Guide. CameraWindow (Menu Screen) Table of the desktop). 1 Connect...
ImageBrowser 6.5 for Macintosh Instruction Manual
Page 17
... click [Select Images to your computer. Transfers the image chosen in Viewer Window to the Menu screen. Table of chosen images turns blue. Changes thumbnail size (when in thumbnail display). Switches between window display modes. IMPORTANT • The functions (buttons) that have... not yet been transferred. Turns the shooting date and folder name below the thumbnails on the camera model. Cancels image selection. Select the image you click [...
ImageBrowser 6.5 for Macintosh Instruction Manual
Page 18
...preview display when a single image is selected. Thumbnail display Preview display Full screen display Double-clicking an image switches to the Menu screen. Turns the shooting date and folder name below the thumbnails on the right of the screen. The background of Contents 18 Deletes the image chosen ... on the camera model. • Clicking the (Delete) button will differ depending on your computer to the camera. Table of chosen images turns blue. This mark appears on the Menu screen, then click [Organize Images]. Changes thumbnail size (when in thumbnail display).
ImageBrowser 6.5 for Macintosh Instruction Manual
Page 47
... Settings are only available on , and dedicated sounds to register to various camera operation sounds (My Camera Settings). u [Set Start-up screen that appears when turning the camera on certain models, when [Camera Settings] displays in "Transferring Images". 2 [Camera Settings] Select the desired item from dedicated screens to register to the...
ZoomBrowser EX 6.5 for Windows Instruction Manual
Page 9
... camera to the computer with the supplied interface cable. 2 Turn on the camera power, set it to playback mode and prepare it to communicate with the computer. 3 When a window similar to the one at the right appears, click [Downloads Images From Canon Camera using Canon CameraWindow], then click [OK]. 4. In this software manual...
ZoomBrowser EX 6.5 for Windows Instruction Manual
Page 17
IMPORTANT • The functions (buttons) that have not yet been transferred. Switches between window display modes. Selects all images. Turns the shooting date and folder name below the thumbnails on the camera that match the selected filter display in Viewer Window to preview...depending on the Menu screen, then click [Select Images to Import]. Rotates chosen images 90° to the Menu screen. Table of chosen images turns blue. Viewer Window (thumbnail display) Returns to the left or right. Closes CameraWindow. Transfers the image chosen in the area to the right. ...
ZoomBrowser EX 6.5 for Windows Instruction Manual
Page 18
Clicking a folder on and off (when in the area to the right. Turns the shooting date and folder name below the thumbnails on the left or right. Closes CameraWindow. Thumbnail display Preview display Full screen display Double-... retrieve the deleted images. Deletes the image chosen in Viewer Window. Protects/cancels protection for the image chosen in Viewer Window. Table of chosen images turns blue. Switches between window display modes. This mark appears on images that display will differ depending on the camera model. • Clicking the (Delete) ...
ZoomBrowser EX 6.5 for Windows Instruction Manual
Page 46
... Sound and Start-Up Image You can select from the following and make settings. Table of Contents 46 u [Set Start-up screen that appears when turning the camera on certain models, when [Camera Settings] displays in "Transferring Images". 2 [Camera Settings] Select the desired item from dedicated screens to register to the...
Personal Printing Guide
Page 3
If [Print error] appears, turn them both on. 3 Print Make sure you select [Print] on the camera's screen and press the FUNC./SET button. * If you press the FUNC./SET ... [Print] on -screen instructions . For troubleshooting details, see the Printer User Guide. 2 Select Select the photo you have been altered using a camera with your Canon camera, and turn the printer off and on again and repeat the setting. Personal Printing Guide ! be printable. Simply connect to SELPHY printers to print photos 1 Connect...
Personal Printing Guide
Page 4
.... G Date and photo number H H Optimized printing through the use buttons or drag the frame • To rotate frame: press the DISP. or SET button, or turn the Control Dial* or touch [ ] • Set trimming area: press the SET or MENU button*, or touch [OK] * Operation differs depending on the bottom part...
Personal Printing Guide
Page 6
... appear on the printer is not printable. If this message appears when the settings are correct, turn the printer off and on many types of paper with various size and layout options. Canon Inkjet Printers (PIXMA Series) Personal Printing Guide You can print with many types of paper from ...photo that have been altered using computer software may not be sure to check the Printer User Guide. 6 Full range of paper to A4 with Canon Inkjet Printers (PIXMA Series) You can also copy and scan with printer settings : Automatically adjusts for an ink absorber replacement. If an error ...
PowerShot SD1300 IS / IXUS 105 Camera User Guide
Page 4
... snow (p. 56) Indoors (p. 55) Fireworks (p. 56) Underwater (p. 56) Low light (p. 55) Focus on faces 24, 62, 78 Shoot in places where I cannot use the flash (turn off the flash 57 Take pictures with me in them too (self-timer 61, 62, 74, 75 Insert the date and time into my shots...
PowerShot SD1300 IS / IXUS 105 Camera User Guide
Page 5
1View What Do You Want to a computer 33 3Other Turn off sounds 48 Use the camera abroad 15 Understand what is displayed on the screen 128 5 Look at my pictures 28 Automatically play back pictures (slideshow 96 Look at my pictures on a TV 99 Look at my pictures on a computer 33 Quickly search pictures 94, 95 Erase pictures 29, 101 Protect pictures from accidental erasure 100 EShoot/View Movies Shoot movies 30 View movies 32 2Print Easily print pictures 108 Save Save images to Do?
PowerShot SD1300 IS / IXUS 105 Camera User Guide
Page 6
... Settings ..........48 Changing the Screen Brightness .....49 3 Shooting in Special Conditions and Commonly Used Functions 53 Shooting in Various Conditions ....... 54 Turning the Flash Off 57 Zooming in Closely on Subjects (Digital Zoom 58 Inserting the Date and Time 60 Using the Self-Timer 61 Using... the Face Self-Timer 62 4 Choosing Settings Yourself 63 Shooting in Program AE 64 Adjusting the Brightness (Exposure Compensation 65 Turning the Flash On 66 Shooting Far Away Subjects (Infinity 66 Shooting Close-ups (Macro 67 Changing the Recording Pixel Setting (Image Size ...
PowerShot SD1300 IS / IXUS 105 Camera User Guide
Page 9
... injury or death. Using other persons, or damage to the equipment. • Be sure to also check the guides included with the camera interior, immediately turn the camera power off and remove the battery. • Use only recommended power sources.
PowerShot SD1300 IS / IXUS 105 Camera User Guide
Page 19
X The Date/Time screen will appear the first time the camera is turned on the camera. 19 Reappearing Date/Time screen Set the correct date and time. X Once .... ● Press the op buttons to set the date and time, the Date/ Time screen will turn on . Setting the Date and Time The Date/Time settings screen will appear. If you have been set a value...be sure to set , the Date/Time screen will close. ● Pressing the power button will appear each time you turn off the camera. Complete the setting. ● Press the m button. Since the dates and times recorded into your images ...
PowerShot SD1300 IS / IXUS 105 Camera User Guide
Page 20
... 3 tab. ● Press the op buttons to set the date and time. 20 Follow the steps on . • If the date/time battery is not turned on p. 19 to choose [Date/ Time], then press the m button. Display the menus. ● Press the n button. Choose [Date/Time] in date/time battery (backup...
PowerShot SD1300 IS / IXUS 105 Camera User Guide
Page 24
... can determine the subject and shooting conditions, you point the camera toward the subject, the camera will make a slight noise as it determines the scene. Turn on them. X The camera will zoom out from your subject, making it automatically select the best settings for the determined scene will appear. X The start...
PowerShot SD1300 IS / IXUS 105 Camera User Guide
Page 27
... range (p. 78). • What if the indicator blinks orange and blinks on , press the n button, choose the 3 tab, and then choose [Mute]. To turn off all sounds except for the flash to focus on other detected faces. Move the zoom lever toward i and hold it until the lens stops...the lens. Attach the camera to focus on the camera power will be too close. Move the zoom lever toward a subject? Pressing the l button while turning on subjects that are approximately 3 cm (1.2 in dark areas. • What if the h icon blinks when you can shoot when recharging ends. 27...
PowerShot SD1300 IS / IXUS 105 Camera User Guide
Page 28
X The last image you took will turn off the power. Switching to Shooting mode Pressing the shutter button halfway while in the order they will appear coarse. ● The lens will retract ...