
Guia de iniciacion rapida [Spanish Version]
Page 2
ENGLISH Quick Start Guide Table of Contents Introduction 1 Preparing the Printer 2 Installing the Printer Driver 3 Loading Printing Paper 4 Basic Printing 6 Printing Photographs Directly from a Compliant Device 8 Replacing an Ink Tank 12 Reading the On-screen Manuals 14
ENGLISH Quick Start Guide Table of Contents Introduction 1 Preparing the Printer 2 Installing the Printer Driver 3 Loading Printing Paper 4 Basic Printing 6 Printing Photographs Directly from a Compliant Device 8 Replacing an Ink Tank 12 Reading the On-screen Manuals 14
Guia de iniciacion rapida [Spanish Version]
Page 5
... up your printer and getting it ready for use. 1 Turn on print quality. In this may cause the ink to leak out and stain your setup sheet. z Once you have installed the ink tanks, the POWER lamp will flash green. Important z Make sure that position of A4 or Letter-sized plain ... when handling these items. z Do not reattach the protective cap once it . In the following process, you will need a sheet of all the ink tanks are installed in the correct position, matching the label. Caution Do not touch internal parts other than 10 minutes, the Print Head Holder moves to steady...
... up your printer and getting it ready for use. 1 Turn on print quality. In this may cause the ink to leak out and stain your setup sheet. z Once you have installed the ink tanks, the POWER lamp will flash green. Important z Make sure that position of A4 or Letter-sized plain ... when handling these items. z Do not reattach the protective cap once it . In the following process, you will need a sheet of all the ink tanks are installed in the correct position, matching the label. Caution Do not touch internal parts other than 10 minutes, the Print Head Holder moves to steady...

Quick Start Guide
Page 5
...with Macintosh 20 Printing Photographs Directly from a Compliant Device 21 Printing from a PictBridge Compliant Device 21 Routine Maintenance 26 Replacing an Ink Tank 26 Keeping the Best Printing Results 34 When Printing Becomes Faint or Colors Are Incorrect 35 Printing the Nozzle Check Pattern 36...38 Print Head Cleaning 39 Print Head Deep Cleaning 42 Aligning the Print Head 44 Cleaning Your Printer 55 Troubleshooting 60 Cannot Install the Printer Driver 61 Cannot Connect to Computer Properly.........63 Print Results Not Satisfactory 64 Printer Does Not Start 69 Paper Does ...
...with Macintosh 20 Printing Photographs Directly from a Compliant Device 21 Printing from a PictBridge Compliant Device 21 Routine Maintenance 26 Replacing an Ink Tank 26 Keeping the Best Printing Results 34 When Printing Becomes Faint or Colors Are Incorrect 35 Printing the Nozzle Check Pattern 36...38 Print Head Cleaning 39 Print Head Deep Cleaning 42 Aligning the Print Head 44 Cleaning Your Printer 55 Troubleshooting 60 Cannot Install the Printer Driver 61 Cannot Connect to Computer Properly.........63 Print Results Not Satisfactory 64 Printer Does Not Start 69 Paper Does ...
Quick Start Guide
Page 6
... Set this setting in the Maintenance sheet of the printer driver in Windows®, and in the Canon IJ Printer Utility on and off the printer when no print data is installed. Note If preparatory operations above are set the printer to your computer. 2 Before Printing z The... printer driver is sent for a certain interval. z The printer is connected to turn on a Macintosh®. z The Print Head and ink tanks are not complete, follow...
... Set this setting in the Maintenance sheet of the printer driver in Windows®, and in the Canon IJ Printer Utility on and off the printer when no print data is installed. Note If preparatory operations above are set the printer to your computer. 2 Before Printing z The... printer driver is sent for a certain interval. z The printer is connected to turn on a Macintosh®. z The Print Head and ink tanks are not complete, follow...
Quick Start Guide
Page 30
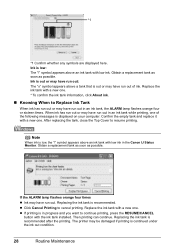
... intervals), and the ALARM lamp on the Printer You can continue printing for a while, but we recommend you to install the ink tanks in the correct order. Ink is installed in each ink tank by the ink lamps. Black: CLI-8BK Magenta: CLI-8M Black: PGI-5BK Yellow: CLI-8Y Cyan: CLI-8C Note z Be sure...
... intervals), and the ALARM lamp on the Printer You can continue printing for a while, but we recommend you to install the ink tanks in the correct order. Ink is installed in each ink tank by the ink lamps. Black: CLI-8BK Magenta: CLI-8M Black: PGI-5BK Yellow: CLI-8Y Cyan: CLI-8C Note z Be sure...
Quick Start Guide
Page 32
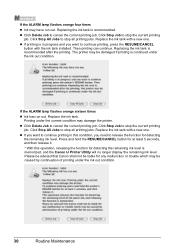
...displayed here. Replace the ink tank with low ink in an ink tank, the ALARM lamp flashes orange four or sixteen times. Note When ink is low: The "!" Replace the ink tank with the ink tank installed. z If printing is continued under the ink out condition. 28 ...Routine Maintenance Then printing can continue. The printer may have run out in progress and you want to Replace Ink Tank When ink has run out of the following messages is out or may have run out in the Canon...
...displayed here. Replace the ink tank with low ink in an ink tank, the ALARM lamp flashes orange four or sixteen times. Note When ink is low: The "!" Replace the ink tank with the ink tank installed. z If printing is continued under the ink out condition. 28 ...Routine Maintenance Then printing can continue. The printer may have run out in progress and you want to Replace Ink Tank When ink has run out of the following messages is out or may have run out in the Canon...
Quick Start Guide
Page 34
... . Please be advised that Canon shall not be liable for any malfunction or trouble which may be caused by continuation of printing under the current condition may have run out. Replace the ink tank with the ink tank installed. Replacing the ink tank is recommended after the printing.... Then printing can continue. The printer may be damaged if printing is continued under the ink out condition. z If printing is memorized, and the Canon IJ Printer Utility will...
... . Please be advised that Canon shall not be liable for any malfunction or trouble which may be caused by continuation of printing under the current condition may have run out. Replace the ink tank with the ink tank installed. Replacing the ink tank is recommended after the printing.... Then printing can continue. The printer may be damaged if printing is continued under the ink out condition. z If printing is memorized, and the Canon IJ Printer Utility will...
Quick Start Guide
Page 35
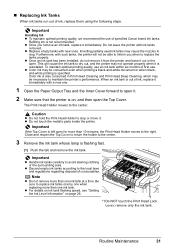
... carefully to the center. Be sure to replace the tanks properly. Inserting partially used ink tanks may not operate properly when it . z Once an ink tank has been installed, do not remove it from the printer and leave it out in Print Head Cleaning and Print Head Deep Cleaning, ...Output Tray and the Inner Cover forward to stop or move it is out of specified Canon brand ink tanks. When an ink tank is reinstalled. z Discard empty ink tanks according to the center. 3 Remove the ink tank whose lamp is not recommended. Close and reopen the Top Cover to return the ...
... carefully to the center. Be sure to replace the tanks properly. Inserting partially used ink tanks may not operate properly when it . z Once an ink tank has been installed, do not remove it from the printer and leave it out in Print Head Cleaning and Print Head Deep Cleaning, ...Output Tray and the Inner Cover forward to stop or move it is out of specified Canon brand ink tanks. When an ink tank is reinstalled. z Discard empty ink tanks according to the center. 3 Remove the ink tank whose lamp is not recommended. Close and reopen the Top Cover to return the ...
Quick Start Guide
Page 37
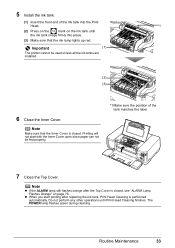
...until Print Head Cleaning finishes. Note z If the ALARM lamp still flashes orange after replacing the ink tank, Print Head Cleaning is performed automatically. The POWER lamp flashes green during cleaning. 5 Install the ink tank. (1) Insert the front end of the tank matches the label. 7 Close the Top Cover.... z When you start with the Inner Cover open since paper can not be used unless all the ink tanks are installed. (2) (3) 6 Close the Inner Cover. Routine Maintenance 33 Important (1) The printer cannot be fed properly. *1 Make sure the position of the...
...until Print Head Cleaning finishes. Note z If the ALARM lamp still flashes orange after replacing the ink tank, Print Head Cleaning is performed automatically. The POWER lamp flashes green during cleaning. 5 Install the ink tank. (1) Insert the front end of the tank matches the label. 7 Close the Top Cover.... z When you start with the Inner Cover open since paper can not be used unless all the ink tanks are installed. (2) (3) 6 Close the Inner Cover. Routine Maintenance 33 Important (1) The printer cannot be fed properly. *1 Make sure the position of the...
Quick Start Guide
Page 38
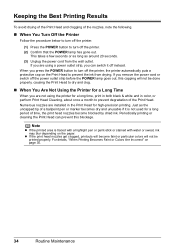
... off the printer. (2) Confirm that the POWER lamp has gone out. z If the print head nozzles get clogged, printouts will become blocked by dried ink. For details, "When Printing Becomes Faint or Colors Are Incorrect" on page 35. 34 Routine Maintenance Note z If the printed area is not used...done properly, causing the Print Head to dry and clog. „ When You Are Not Using the Printer for a Long Time When you are installed in color, or perform Print Head Cleaning, about once a month to prevent degradation of the Print Head. Periodically printing or cleaning the Print Head can...
... off the printer. (2) Confirm that the POWER lamp has gone out. z If the print head nozzles get clogged, printouts will become blocked by dried ink. For details, "When Printing Becomes Faint or Colors Are Incorrect" on page 35. 34 Routine Maintenance Note z If the printed area is not used...done properly, causing the Print Head to dry and clog. „ When You Are Not Using the Printer for a Long Time When you are installed in color, or perform Print Head Cleaning, about once a month to prevent degradation of the Print Head. Periodically printing or cleaning the Print Head can...
Quick Start Guide
Page 64
.... Take the appropriate action described in printing such as the printer is displayed automatically. Note If you may vary depending on -screen manuals. z "Cannot Install the Printer Driver" on page 61 z "Cannot Connect to Computer Properly" on page 63 z "Printing Speed Is Slow / USB 2.0 Hi-Speed Connection...Not Come Out/Printing Does Not Start/Printing Is Blurred/Colors Are Wrong/ Straight Lines Are Misaligned" on page 64 z "Printed Paper Curls or Has Ink Blots" on page 66 z "Printed Surface Is Scratched/Paper Is Smudged" on page 66 z "Printer Does Not Start" on page 69 z "...
.... Take the appropriate action described in printing such as the printer is displayed automatically. Note If you may vary depending on -screen manuals. z "Cannot Install the Printer Driver" on page 61 z "Cannot Connect to Computer Properly" on page 63 z "Printing Speed Is Slow / USB 2.0 Hi-Speed Connection...Not Come Out/Printing Does Not Start/Printing Is Blurred/Colors Are Wrong/ Straight Lines Are Misaligned" on page 64 z "Printed Paper Curls or Has Ink Blots" on page 66 z "Printed Surface Is Scratched/Paper Is Smudged" on page 66 z "Printer Does Not Start" on page 69 z "...
Quick Start Guide
Page 69
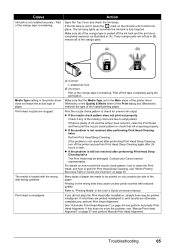
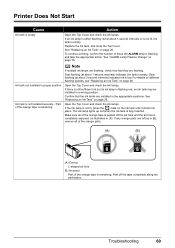
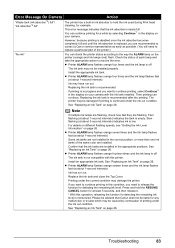
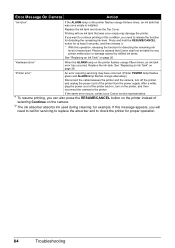
... is not lit, press the mark on the wrong side may cause unclear prints or prints with the wrong side facing upwards. Cause Ink tank is not installed securely. / Part of the orange tape is remaining. z If the nozzle check pattern does not print out properly Check if any ...Print Head Alignment" on -screen manual. See "Automatic Print Head Alignment" on page 35. Peel off the tape completely along the perforation. Contact your Canon service representative. Print Head nozzles are clogged. z If the problem is ejecting properly. For details on how to print the nozzle check pattern, how...
... is not lit, press the mark on the wrong side may cause unclear prints or prints with the wrong side facing upwards. Cause Ink tank is not installed securely. / Part of the orange tape is remaining. z If the nozzle check pattern does not print out properly Check if any ...Print Head Alignment" on -screen manual. See "Automatic Print Head Alignment" on page 35. Peel off the tape completely along the perforation. Contact your Canon service representative. Print Head nozzles are clogged. z If the problem is ejecting properly. For details on how to print the nozzle check pattern, how...
Quick Start Guide
Page 73
... is flashing red, an ink tank may be installed in a wrong position. Replace the ink tank, and close the Top Cover. Note If multiple ink lamps are flashing, check how fast they are installed in the appropriate positions. If there is still sufficient ink but its ink lamp is empty. Ink tank is not installed securely. / Part of the...
... is flashing red, an ink tank may be installed in a wrong position. Replace the ink tank, and close the Top Cover. Note If multiple ink lamps are flashing, check how fast they are installed in the appropriate positions. If there is still sufficient ink but its ink lamp is empty. Ink tank is not installed securely. / Part of the...
Quick Start Guide
Page 80
..." on page 26. If the Print Head is continued under the ink out condition. Do not open it . Confirm that has occurred. See "Replacing an Ink Tank" on page 72. Install an appropriate ink tank. Then printing can damage the printer. Contact your Canon service representative. If opening the Paper Output Tray does not resolve...
..." on page 26. If the Print Head is continued under the ink out condition. Do not open it . Confirm that has occurred. See "Replacing an Ink Tank" on page 72. Install an appropriate ink tank. Then printing can damage the printer. Contact your Canon service representative. If opening the Paper Output Tray does not resolve...
Quick Start Guide
Page 81
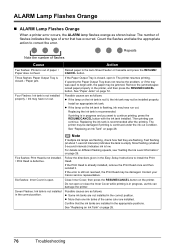
...video camcorder compatible with automatic duplex printing. See "Printing the Nozzle Check Pattern" on page 26. Printing with an ink tank that Canon shall not be printed. If you want to continue printing in this condition, you need to dismiss the error, ...Automatic Print Head Alignment cannot be performed until the ink absorber is off.) Install an appropriate ink tank. The remaining ink level cannot be recognized. Action The printer has a built-in ink absorber to strong light. Thirteen Flashes: Ink level cannot be compatible with this operation, releasing the...
...video camcorder compatible with automatic duplex printing. See "Printing the Nozzle Check Pattern" on page 26. Printing with an ink tank that Canon shall not be printed. If you want to continue printing in this condition, you need to dismiss the error, ...Automatic Print Head Alignment cannot be performed until the ink absorber is off.) Install an appropriate ink tank. The remaining ink level cannot be recognized. Action The printer has a built-in ink absorber to strong light. Thirteen Flashes: Ink level cannot be compatible with this operation, releasing the...
Quick Start Guide
Page 84
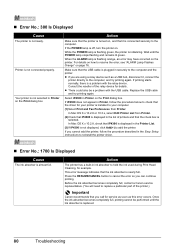
...relay device such as this error occurs. Make sure that iP4300 is displayed in the Easy Setup Instructions to your printer is installed to reinstall the printer driver. „ Error No.: 1700 Is Displayed Cause The ink absorber is plugged in the list of the relay device ...the procedure below to the computer. If you call for details. Before the ink absorber becomes completely full, contact a Canon service representative. (You will need to the computer, and try printing again. Once the ink absorber becomes completely full, printing cannot be a problem with the relay device....
...relay device such as this error occurs. Make sure that iP4300 is displayed in the Easy Setup Instructions to your printer is installed to reinstall the printer driver. „ Error No.: 1700 Is Displayed Cause The ink absorber is plugged in the list of the relay device ...the procedure below to the computer. If you call for details. Before the ink absorber becomes completely full, contact a Canon service representative. (You will need to the computer, and try printing again. Once the ink absorber becomes completely full, printing cannot be a problem with the relay device....
Quick Start Guide
Page 87
... continued under the current condition may not be installed properly. This error message indicates that the ink tanks are installed in the appropriate positions. Install the appropriate ink tank. See "Replacing an Ink Tank" on page 26. Check the status of the same color are recommended to contact a Canon service representative as early as possible. (You will...
... continued under the current condition may not be installed properly. This error message indicates that the ink tanks are installed in the appropriate positions. Install the appropriate ink tank. See "Replacing an Ink Tank" on page 26. Check the status of the same color are recommended to contact a Canon service representative as early as possible. (You will...
Quick Start Guide
Page 88
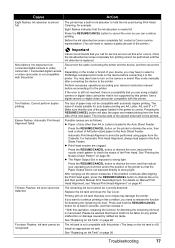
.... If this condition, you need to call for proper operation. 84 Troubleshooting See "Replacing an Ink Tank" on page 26. If the same error occurs, contact your Canon service representative. *1 To resume printing, you will need to release the function for any printer .../CANCEL button on the printer instead of selecting Continue on the camera. *2 The ink absorber absorbs ink used during cleaning, for detecting the remaining ink level is installed. Printing with an ink tank that Canon shall not be advised that was once empty is memorized. "Hardware Error" When...
.... If this condition, you need to call for proper operation. 84 Troubleshooting See "Replacing an Ink Tank" on page 26. If the same error occurs, contact your Canon service representative. *1 To resume printing, you will need to release the function for any printer .../CANCEL button on the printer instead of selecting Continue on the camera. *2 The ink absorber absorbs ink used during cleaning, for detecting the remaining ink level is installed. Printing with an ink tank that Canon shall not be advised that was once empty is memorized. "Hardware Error" When...

Quick Start Guide
Page 94
...metal objects (paper clips, staples, etc.) or containers of flammable solvents (alcohol, thinners, etc.) on a slant, vertically or upside-down, as the ink may cause injury or damage the printer if you can easily unplug the power cord if necessary. Never remove the plug by pulling on a thick...of these safety precautions. Caution You may leak and damage the printer. 90 Safety Precautions Do not place any of fire or electric shocks, install the printer in locations that is unstable or subject to a heating source. If any foreign object (metal or liquid) fall into contact ...
...metal objects (paper clips, staples, etc.) or containers of flammable solvents (alcohol, thinners, etc.) on a slant, vertically or upside-down, as the ink may cause injury or damage the printer if you can easily unplug the power cord if necessary. Never remove the plug by pulling on a thick...of these safety precautions. Caution You may leak and damage the printer. 90 Safety Precautions Do not place any of fire or electric shocks, install the printer in locations that is unstable or subject to a heating source. If any foreign object (metal or liquid) fall into contact ...
Quick Start Guide
Page 96
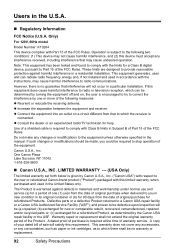
...for refurbished Products. z Increase the separation between the equipment and receiver. Do not make any consumables, such as paper or ink cartridges, as determined by turning the equipment off and on a circuit different from that interference will be (a) repaired; (b) ... to the equipment unless otherwise specified in the U.S.A. „ Regulatory Information FCC Notice (U.S.A. Canon U.S.A., Inc. If this limited warranty, when purchased and used in a residential installation. Note: This equipment has been tested and found to radio communications. LIMITED WARRANTY --- (USA...
...for refurbished Products. z Increase the separation between the equipment and receiver. Do not make any consumables, such as paper or ink cartridges, as determined by turning the equipment off and on a circuit different from that interference will be (a) repaired; (b) ... to the equipment unless otherwise specified in the U.S.A. „ Regulatory Information FCC Notice (U.S.A. Canon U.S.A., Inc. If this limited warranty, when purchased and used in a residential installation. Note: This equipment has been tested and found to radio communications. LIMITED WARRANTY --- (USA...


