PIXMA MX870 Not Printing From Rear Tray - Canon
PIXMA MX870 Not Printing From Rear Tray

Related Manual Pages
Similar Questions


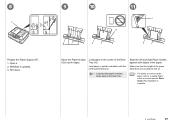
How To Load Paper In The Rear Tray Of Canon Mx870
(Posted by yhasstylo 10 years ago)

Rear Tray
How do I load paper in the rear tray and where is the rear tray? Thank you. Shirley
How do I load paper in the rear tray and where is the rear tray? Thank you. Shirley
(Posted by rochestersmr 11 years ago)

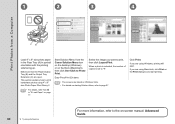
What Is The Largest Size Paper That Can Be Fed Into Rear Tray?
Canon Pixma Mx87
(Posted by swsolovy 12 years ago)