Get support for Canon PIXMA Pro9000 Mark II

Canon PIXMA Pro9000 Mark II Support Question

Canon PIXMA Pro9000 Mark II Support Question

Find answers below for this question about Canon PIXMA Pro9000 Mark II.
Need a Canon PIXMA Pro9000 Mark II manual? We have 1 online manual for this item!
Question posted by rochestersmr on August 16th, 2012

Rear Tray

How do I load paper in the rear tray and where is the rear tray?  Thank you.  Shirley

Current Answers

Answer #1: Posted by mukhan92 on August 16th, 2012 11:13 PM
This answer was accepted by the poster of the original question.
mukhan92

Member since:
August 5th, 2012

Points: 11,210
1,100
points
Paper Sources to Load Paper The machine has two paper sources to feed paper; cassette and rear tray.
You can load paper in either one of the paper sources, depending on the page size and media type of paper. Paper is fed from the cassette or rear tray depending on the selection of the page size or media type.
-> [ Media Types You Can Use ]

REFERENCE

When printing, select the correct page size and media type. If you select the wrong page size or media type, the machine may feed paper from the wrong paper source or may not print with the proper print quality.
For details on how to load paper in each paper source, see below.
-> Refer to [ Loading Plain Paper in the Cassette ] within this webpage.
-> Refer to [ Loading Photo Paper in the Rear Tray ] within this webpage.
-> [ Loading Envelopes in the Rear Tray ]

- Loading Plain Paper in the cassette
When you use A4, B5, A5, or Letter-sized plain paper, load it in the cassette.
The machine feeds paper from the cassette automatically by selecting plain paper (A4, B5, A5, or Letter size) in the print settings with the operation panel or the printer driver when printing.

- Loading Photo Paper / Envelopes in the rear tray
When you use photo paper, load it in the rear tray.
The machine feeds paper from the rear tray automatically by selecting the media types other than plain paper, such as photo paper, in the print settings with the operation panel or the printer driver when printing.
When you use plain paper other than A4, B5, A5, or Letter size, also load it in the rear tray.


Loading Plain Paper in the Cassette You can load only A4, B5, A5, or Letter-sized plain paper in the cassette.
Load other sizes or types of paper in the rear tray.


REFERENCE

Advice for printing on plain paper
  • We recommend Canon genuine photo paper for printing photos. For details on the Canon genuine paper, see [ Media Types You Can Use ]
  • You can use general copy paper. For the page size and paper weight you can use for this machine, see [ Media Types You Can Use ]

1. Prepare paper.
Align the edges of paper. If paper is curled, flatten it.


REFERENCE

  • Align the edges of paper neatly before loading. Loading paper without aligning the edges may cause paper jams.
  • If paper is curled, hold the curled corners and gently bend them in the opposite direction until the paper becomes completely flat. For details on how to flatten curled paper, see [ Load the paper after correcting its curl ]

2. Load paper.
(1) Pull out the cassette from the machine.


(2) Slide the paper guide (A) to align with the mark of page size.
The paper guide (A) will stop when it aligns with the corresponding page size mark.
(3) Load the paper stack WITH THE PRINT SIDE FACING DOWN and THE LEADING EDGE TO THE FAR SIDE, and align it against the right side of the cassette.


REFERENCE

  • There may be a little space between the paper guide (A) and the paper stack.

(4) Slide the paper guide (B) on the left to align completely with the side of the paper stack.


REFERENCE

  • Do not load sheets of paper higher than the load limit mark (C).


(5) Insert the cassette into the machine.
Push the cassette all the way into the machine.

3. Open the paper output tray gently, and open the output tray extension.


REFERENCE

After loading paper
  • Select the size and type of the loaded paper on the print settings screen of the operation panel or printer driver.


Loading Photo Paper in the Rear Tray
IMPORTANT

  • If you cut plain paper into small size such as 4" x 6" (10 x 15 cm), 4" x 8" (101.6 x 203.2 mm), 5" x 7" (13 x 18 cm), or 2.16" x 3.58" (55.0 x 91.0 mm) (Card size) to perform trial print, it can cause paper jams.

1. Prepare paper.
Align the edges of paper. If paper is curled, flatten it.


REFERENCE

  • Align the edges of paper neatly before loading. Loading paper without aligning the edges may cause paper jams.
  • If paper is curled, hold the curled corners and gently bend them in the opposite direction until the paper becomes completely flat. For details on how to flatten curled paper, see [ Load the paper after correcting its curl ]
  • When using Photo Paper Plus Semi-gloss SG-201, even if the sheet is curled, load one sheet at a time as it is. If you roll up this paper to flatten, this may cause cracks on the surface of the paper and reduce the print quality.

2. Load paper.
(1) Open the paper support, raise it, then tip it back.
(2) Open the paper output tray gently, and open the output tray extension.


(3) Slide the paper guides (A) to open them, and load the paper in the center of the rear tray WITH THE PRINT SIDE FACING YOU.
(4) Slide the paper guides (A) to align them with both sides of the paper stack.
Do not slide the paper guides too hard against the paper. The paper may not be fed properly.


IMPORTANT

  • Always load paper in the portrait orientation (B). Loading paper in the landscape orientation (C) can cause paper jams.


REFERENCE

  • Do not load sheets of paper higher than the load limit mark (D).


REFERENCE

After loading paper
  • Select the size and type of the loaded paper on the print settings screen of the operation panel or printer driver.


Muhammad Usman Khan

Related Canon PIXMA Pro9000 Mark II Manual Pages

Getting Started - Page 1

Photo Printer series Getting Started Read Me First Make sure to read this manual before using the printer. Please keep it in hand for future reference.
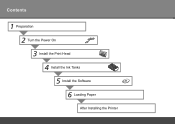
Getting Started - Page 2

Contents 1 Preparation 2 Turn the Power On 3 Install the Print Head 4 Install the Ink Tanks 5 Install the Software 6 Loading Paper After Installing the Printer
Getting Started - Page 3

... that , if ignored, could result in the U.S. and/or other countries. • Macintosh and Mac are trademarks of Microsoft Corporation in the U.S. Model Number: K10335 (Pro9000 Mark II)  Additional explanations. and other countries. • Windows Vista is a trademark or registered trademark of Adobe Systems Incorporated in the U.S. Descriptions for safe operation. Caution...
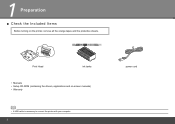
Getting Started - Page 4

Print Head ink tanks • Manuals • Setup CD-ROM (containing the drivers, applications and on the printer, remove all the orange tapes and the protective sheets. 1 Preparation ■ Check the Included Items Before turning on -screen manuals) • Warranty • A USB cable is necessary to connect the printer with your computer.  power cord
Getting Started - Page 5

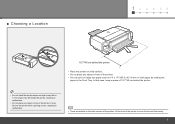
... in front of the printer. • You can print on large size paper such as 14" x 17"/355.6 x 431.8 mm or thick paper by loading the paper in malfunction. • There are wheels on top of the printer. ■ Choosing a Location 12 3 4 5 6 15.7"/40 cm behind the printer. • Do not install the printer where an object may...
Getting Started - Page 6

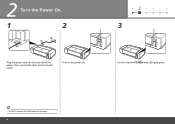
2 Turn the Power On 1 2 2 1 123 4 5 6 3 A B Plug the power cord into the back left of the printer, then connect the other end to the wall outlet. Confirm that the POWER lamp (B) lights green. • Do NOT connect the USB cable at this stage.  Turn on the printer (A).
Getting Started - Page 7

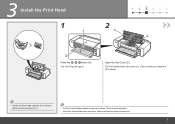
... excessive pressure to it. • The Print Head Holder makes a noise as it moves. The Front Tray (B) opens. This is normal operation. • If the Print Head Holder does not move, make sure that the printer is where you install the Print Head.) • Handle the Print Head carefully. The Print Head...
Getting Started - Page 13

... remove the Setup CD-ROM during restarting. The screens below are not supported. 1 2 3 456 Windows (P.12) Macintosh (P.21) 11 5 Install the Software To use the printer by connecting it left off when your computer during the installation process.
Getting Started - Page 14

...; Make sure that the POWER lamp (B) has stopped flashing and is off. • It takes about 1 minute until the printer turns off. The setup program should start automatically, double-click the CD-ROM icon on the computer, then insert the Setup CDROM into the CD-...
Getting Started - Page 16

.... Drivers, application software, and on -screen instructions to proceed with the installation. • You can install the XPS Printer Driver from Custom Install. (Windows Vista SP1 or later.) • The XPS Printer Driver is a printer driver suitable for printing High Dynamic Range images (full 16-bit workflow) using Easy-PhotoPrint Pro. • When...
Getting Started - Page 18

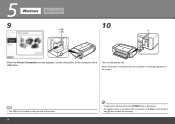
... • It takes about 30 seconds for the POWER lamp to the computer with a USB cable. 5 Windows Macintosh 9 10 A When the Printer Connection screen appears, connect the printer to light green. • If installation does not continue after 10 minutes, click Help on the screen in step , then confirm the message. When...
Getting Started - Page 19

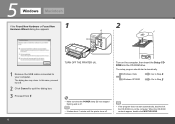
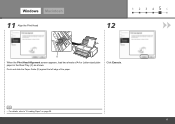
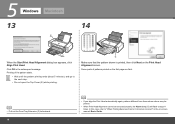
Windows Macintosh 11 Align the Print Head 12 1 2 3 456 C D When the Print Head Alignment screen appears, load two sheets of the paper. Pinch and slide the Paper Guide (D) against the left edge of A4 or Letter-sized plain paper in the Rear Tray (C) as shown. Click Execute. • For details, refer to "6 Loading Paper" on page 28. 17
Getting Started - Page 20

... Print Head Alignment dialog box appears, click Align Print Head. Click OK in the on the first page are faint. • Pull out the Front Tray Extension (F) beforehand. 18 • If you align the Print Head automatically again, patterns different from those shown above may be printed. • When Print Head...
Getting Started - Page 22

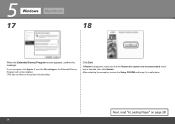
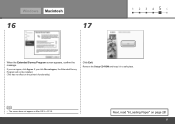
... (recommended) check box is selected, then click Restart. 5 Windows Macintosh 17 18 When the Extended Survey Program screen appears, confirm the message. Next, read "6 Loading Paper" on the printer's functionality.) Click Exit. If you click Do not agree, the Extended Survey Program will not be installed. (This has no effect on page 28...
Getting Started - Page 26

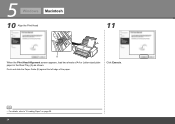
Click Execute. • For details, refer to "6 Loading Paper" on page 28. 24 5 Windows Macintosh 10 Align the Print Head 11 A B When the Print Head Alignment screen appears, load two sheets of the paper. Pinch and slide the Paper Guide (B) against the left edge of A4 or Letter-sized plain paper in the Rear Tray (A) as shown.
Getting Started - Page 27

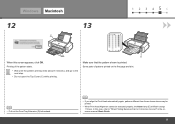
..., click OK. Make sure that the pattern shown is printed. Printing of patterns printed on the first page are faint. • Pull out the Front Tray Extension (D) beforehand. • If you align the Print Head automatically again, patterns different from those shown above may be printed. • When Print Head Alignment...
Getting Started - Page 29

If you can agree, click Agree. Next, read "6 Loading Paper" on the printer's functionality.) Click Exit. Remove the Setup CD-ROM and keep it in a safe place. • The screen does not appear on Mac OS X v.10.3.9. Windows ...
Getting Started - Page 30

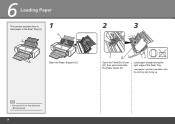
Load paper straight along the right edge of the Rear Tray. Load paper in the Rear Tray (A). A 1 C B Open the Paper Support (C). 2 3 E D Open the Feed Slot Cover (D), then pinch and slide the Paper Guide (E). 6 Loading Paper This section explains how to load paper in portrait orientation with the printing side facing up. • Pull out the Front Tray Extension (B) beforehand. ...
Getting Started - Page 31

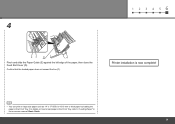
... edge of the paper, then close the Feed Slot Cover (D). Printer installation is now complete! • You can print on large size paper such as 14" x 17"/355.6 x 431.8 mm or thick paper by loading the paper in the on how to load paper in the Front Tray, refer to "Loading Paper" in the Front Tray. Confirm that the loaded paper does not exceed...
Getting Started - Page 35

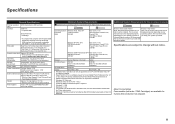
... used at USB 1.1. Print width Rear Tray: 12.7 inches max. (322.2 mm) (for Borderless Printing: 13 inches/329 mm) Front Tray: 13.7 inches max. (348.8 mm) (for the on-screen manuals Browser: Easy Guide Viewer Browser: Help Viewer Note: Microsoft Internet Explorer 6.0 or Note: The on Photo Paper Plus Glossy II. Windows: XP, Vista only...

Similar Questions

Ask a New Question
Use the box below to post a new question about this Canon product .
Points & Prizes
  • You can earn points for nearly everything you do on HelpOwl.com
  • You can trade in those points for gift cards at leading retailers such as Amazon.com and Walmart
  • It's that simple!
See How it Works
Create a Free Account

Canon Manuals

Find free Canon PIXMA Pro9000 Mark II manuals and user guides available at ManualOwl.com. Try out our unique manual viewer allowing you to interact with manuals from directly within your browser!

Canon Reviews

View thousands of Canon user reviews and customer ratings available at ReviewOwl.com.

Contact Information

Complete Canon customer service contact information including steps to reach representatives, hours of operation, customer support links and more from ContactHelp.com.

Scoreboard Ratings

See detailed Canon customer service rankings, employee comments and much more from our sister site.

Canon Recalls

Find comprehensive Canon recall information updated hourly on RecallOwl.com.