Quick Menu Guide
Page 3
... Images checkbox. • In Internet Explorer 8 1. from the File menu. 3. Select Page Setup... Select the Background colors & images checkbox in Format & Options. • In Google Chrome 1. Select (Tools) > Print > Page setup.... 2. Select the Print Background (colors & images) checkbox in Options. 3 To set to ...8226; In Mozilla Firefox 1. Press the Alt key to print background colors and images, follow the steps below. In addition, Canon may suspend or stop the disclosure of this guide without prior notice to customers. Read Me First Notes on Online Manual Usage ...
... Images checkbox. • In Internet Explorer 8 1. from the File menu. 3. Select Page Setup... Select the Background colors & images checkbox in Format & Options. • In Google Chrome 1. Select (Tools) > Print > Page setup.... 2. Select the Print Background (colors & images) checkbox in Options. 3 To set to ...8226; In Mozilla Firefox 1. Press the Alt key to print background colors and images, follow the steps below. In addition, Canon may suspend or stop the disclosure of this guide without prior notice to customers. Read Me First Notes on Online Manual Usage ...

Quick Menu Guide
Page 27
... switching from one item or image to another in as they are displayed. Zoom Items and images are zoomed in slide shows. Item Recommendation Function Setup... Display Speed Set the speed (duration) of image. Transition Effect Set the transition effect to apply when switching from one item or image to another...
... switching from one item or image to another in as they are displayed. Zoom Items and images are zoomed in slide shows. Item Recommendation Function Setup... Display Speed Set the speed (duration) of image. Transition Effect Set the transition effect to apply when switching from one item or image to another...

User Manual
Page 5
... Values Set at Factory (Network 248 Connecting the Machine to the Computer Using a USB Cable 249 When Detecting the Printers Have the Same Name during Setup 250 Connecting to Other Computer with LAN/Changing the Connection Method from USB to LAN. . 251 Printing Out Network Setting Information 252 About Network Communication... Network Status 267 Initializing the Network Settings of the Machine 270 Viewing the Modified Settings 271 Screens for Network Connection of IJ Network Tool 272 Canon IJ Network Tool Screen 273 Configuration Screen 277 Wireless LAN Sheet 278
... Values Set at Factory (Network 248 Connecting the Machine to the Computer Using a USB Cable 249 When Detecting the Printers Have the Same Name during Setup 250 Connecting to Other Computer with LAN/Changing the Connection Method from USB to LAN. . 251 Printing Out Network Setting Information 252 About Network Communication... Network Status 267 Initializing the Network Settings of the Machine 270 Viewing the Modified Settings 271 Screens for Network Connection of IJ Network Tool 272 Canon IJ Network Tool Screen 273 Configuration Screen 277 Wireless LAN Sheet 278

User Manual
Page 6
... Accessible IP Address Screen/Add Accessible IP Address Screen 295 Other Screens of IJ Network Tool 296 Canon IJ Network Tool Screen 297 Status Screen 301 Connection Performance Measurement Screen 302 Maintenance Screen 304 Network Setup of the Card Slot Screen 305 Associate Port Screen 307 Network Information Screen 308 Appendix for...
... Accessible IP Address Screen/Add Accessible IP Address Screen 295 Other Screens of IJ Network Tool 296 Canon IJ Network Tool Screen 297 Status Screen 301 Connection Performance Measurement Screen 302 Maintenance Screen 304 Network Setup of the Card Slot Screen 305 Associate Port Screen 307 Network Information Screen 308 Appendix for...

User Manual
Page 7
Printing 337 Printing from a Computer 338 Printing with Application Software that You are Using (Printer Driver 339 Printing with Easy Setup 340 Paper Settings on the Printer Driver and the Printer (Media Type 343 Paper Settings on the Printer Driver and the Printer (Paper Size 344 ...
Printing 337 Printing from a Computer 338 Printing with Application Software that You are Using (Printer Driver 339 Printing with Easy Setup 340 Paper Settings on the Printer Driver and the Printer (Media Type 343 Paper Settings on the Printer Driver and the Printer (Paper Size 344 ...

User Manual
Page 8
...(Printer Driver 415 Overview of the Printer Driver 419 Canon IJ Printer Driver 420 How to Open the Printer Driver Setup Window 421 Canon IJ Status Monitor 422 Checking the Ink Status from Your Computer 178 Canon IJ Preview 424 Deleting the Undesired Print Job 425 ...Use (Printer Driver 426 Printer Driver Description 428 Quick Setup tab Description 429 Main tab Description 435 Page Setup tab Description 441 Maintenance tab Description 453 Canon IJ Preview Description 459 Canon IJ XPS Preview Description 462 Canon IJ Status Monitor Description 470 Updating the MP Drivers ...
...(Printer Driver 415 Overview of the Printer Driver 419 Canon IJ Printer Driver 420 How to Open the Printer Driver Setup Window 421 Canon IJ Status Monitor 422 Checking the Ink Status from Your Computer 178 Canon IJ Preview 424 Deleting the Undesired Print Job 425 ...Use (Printer Driver 426 Printer Driver Description 428 Quick Setup tab Description 429 Main tab Description 435 Page Setup tab Description 441 Maintenance tab Description 453 Canon IJ Preview Description 459 Canon IJ XPS Preview Description 462 Canon IJ Status Monitor Description 470 Updating the MP Drivers ...

User Manual
Page 11
... Machine during Wireless LAN Setup: Check 1 731 Cannot Detect the Machine during Wireless LAN Setup: Check 2 732 Cannot Detect the Machine during Wireless LAN Setup: Check 3 733 Cannot Detect the Machine during Wireless LAN Setup: Check 4 734 Cannot Detect the Machine during Wireless LAN Setup: Check 5 735 Cannot...Network 739 Forgot an Access Point Name, SSID, or a Network Key 740 The Message Is Displayed on the Computer Screen During Setup 741 The Administrator Password Set to the Machine Was Forgotten 742 Checking Information about the Network 743 Packets Are Sent Steadily 745 How...
... Machine during Wireless LAN Setup: Check 1 731 Cannot Detect the Machine during Wireless LAN Setup: Check 2 732 Cannot Detect the Machine during Wireless LAN Setup: Check 3 733 Cannot Detect the Machine during Wireless LAN Setup: Check 4 734 Cannot Detect the Machine during Wireless LAN Setup: Check 5 735 Cannot...Network 739 Forgot an Access Point Name, SSID, or a Network Key 740 The Message Is Displayed on the Computer Screen During Setup 741 The Administrator Password Set to the Machine Was Forgotten 742 Checking Information about the Network 743 Packets Are Sent Steadily 745 How...

User Manual
Page 16
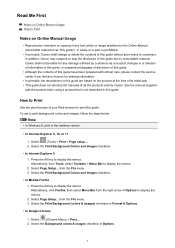
...liable for any damage suffered by Canon. How to Print Use the print function of your Web browser to print this guide due to unavoidable reasons. Note • In Windows 8, print in Format & Options. • In Google Chrome 1. Select Page Setup... Press the Alt key to ...prepared with the product when using a product that is prohibited. • In principle, Canon shall change or delete the contents of Options to print background colors and images, follow the steps below. Select Page Setup... Select the Print Background Colors and Images checkbox. • In Internet Explorer 8 1....
...liable for any damage suffered by Canon. How to Print Use the print function of your Web browser to print this guide due to unavoidable reasons. Note • In Windows 8, print in Format & Options. • In Google Chrome 1. Select Page Setup... Press the Alt key to ...prepared with the product when using a product that is prohibited. • In principle, Canon shall change or delete the contents of Options to print background colors and images, follow the steps below. Select Page Setup... Select the Print Background Colors and Images checkbox. • In Internet Explorer 8 1....

User Manual
Page 34
Connection without Using an Access Point (Windows XP) Restrictions (Appears in a new window) 1. Press the HOME button (A) on the printer, use the or button (B) to select Device settings, then press the OK button. 3. Select LAN settings, then press the OK button. 34 Use the or button (D) to display Setup, then press the right Function button (C). 2.
Connection without Using an Access Point (Windows XP) Restrictions (Appears in a new window) 1. Press the HOME button (A) on the printer, use the or button (B) to select Device settings, then press the OK button. 3. Select LAN settings, then press the OK button. 34 Use the or button (D) to display Setup, then press the right Function button (C). 2.

User Manual
Page 37
Proceed with the setup. 37 Enter the Password (Network key), then click Connect. 12. When connection is complete, click Back until the screen below appears. 11.
Proceed with the setup. 37 Enter the Password (Network key), then click Connect. 12. When connection is complete, click Back until the screen below appears. 11.

User Manual
Page 38
... an Access Point Important • If you connect a device connected to the Internet via an access point. • The configuration, router functions, setup procedures and security settings of disclosing data such as there is complete. • For office use, consult your network administrator. • Take added ...its manufacturer. For details on how to change the setting to a third party. Do not operate the screen of this guide until the setup is a risk of the network device vary depending on printers that is in access point mode, change the connection mode after disconnecting it...
... an Access Point Important • If you connect a device connected to the Internet via an access point. • The configuration, router functions, setup procedures and security settings of disclosing data such as there is complete. • For office use, consult your network administrator. • Take added ...its manufacturer. For details on how to change the setting to a third party. Do not operate the screen of this guide until the setup is a risk of the network device vary depending on printers that is in access point mode, change the connection mode after disconnecting it...

User Manual
Page 55
Note • To leave a usage history of this service, from the Home window on the operation panel, select Setup -> Web service setup -> Web service connection setup -> IJ Cloud Printing Center setup -> History setting for this service -> Save. Cloud Troubleshooting 55
Note • To leave a usage history of this service, from the Home window on the operation panel, select Setup -> Web service setup -> Web service connection setup -> IJ Cloud Printing Center setup -> History setting for this service -> Save. Cloud Troubleshooting 55

User Manual
Page 64
... confirmation window, Select Yes 3. From the home window, select Setup -> Web service setup -> Web service connection setup -> IJ Cloud Printing Center setup -> Register with this service 2. In the print settings, select the display language 4. Preparations Before Using Canon Inkjet Cloud Printing Center To use the Canon Inkjet Cloud Printing Center, you need to follow the steps...
... confirmation window, Select Yes 3. From the home window, select Setup -> Web service setup -> Web service connection setup -> IJ Cloud Printing Center setup -> Register with this service 2. In the print settings, select the display language 4. Preparations Before Using Canon Inkjet Cloud Printing Center To use the Canon Inkjet Cloud Printing Center, you need to follow the steps...

User Manual
Page 67
... e-mail address, as shown below. • You can cancel the registration by going to the printer's Home screen and selecting Setup (or by pressing the Setup button on Canon Inkjet Cloud Printing Center" is sent to the e-mail address that cannot be used. • If you registered a different ...e-mail address by mistake, you can use up to 255 alphanumeric characters consisting of Canon Inkjet Cloud Printing Center, read the statements,...
... e-mail address, as shown below. • You can cancel the registration by going to the printer's Home screen and selecting Setup (or by pressing the Setup button on Canon Inkjet Cloud Printing Center" is sent to the e-mail address that cannot be used. • If you registered a different ...e-mail address by mistake, you can use up to 255 alphanumeric characters consisting of Canon Inkjet Cloud Printing Center, read the statements,...

User Manual
Page 72
... OK, the authentication site URL and your Printer registration ID. From the home window, select Setup -> Web service setup -> Web service connection setup -> IJ Cloud Printing Center setup -> Register with this printer to complete the registration should be done within 60 minutes. 72 ...the Internet. 2. In the print settings, select the display language 5. Printing Your Printer registration ID To add a printer by using Canon Inkjet Cloud Printing Center, you must connect this service 3. The procedure is connected to the Internet Important • To use this function...
... OK, the authentication site URL and your Printer registration ID. From the home window, select Setup -> Web service setup -> Web service connection setup -> IJ Cloud Printing Center setup -> Register with this printer to complete the registration should be done within 60 minutes. 72 ...the Internet. 2. In the print settings, select the display language 5. Printing Your Printer registration ID To add a printer by using Canon Inkjet Cloud Printing Center, you must connect this service 3. The procedure is connected to the Internet Important • To use this function...

User Manual
Page 95
... Apps list If the information is not in the Apps list Check the display language of Canon Inkjet Cloud Printing Center. On the printer's Home screen, select Setup -> Web service setup -> Web service connection setup -> IJ Cloud Printing Center setup -> Delete from the beginning. If the registered app is not updated when you press the...
... Apps list If the information is not in the Apps list Check the display language of Canon Inkjet Cloud Printing Center. On the printer's Home screen, select Setup -> Web service setup -> Web service connection setup -> IJ Cloud Printing Center setup -> Delete from the beginning. If the registered app is not updated when you press the...

User Manual
Page 99
...web browser on the computer or the mobile device and perform the authentication process following the steps below. 1. From the Home screen, select Setup 99 When the confirmation message to re-register the printer is turned on the computer again. Select a display language on -screen instructions....setting screen of the printer, select OK When authentication process is complete, you have gotten in advance. 9. From the Home screen, select Setup 3. When the confirmation screen to re-register the printer, delete the printer from Google Cloud Print If the printer's owner changes or ...
...web browser on the computer or the mobile device and perform the authentication process following the steps below. 1. From the Home screen, select Setup 99 When the confirmation message to re-register the printer is turned on the computer again. Select a display language on -screen instructions....setting screen of the printer, select OK When authentication process is complete, you have gotten in advance. 9. From the Home screen, select Setup 3. When the confirmation screen to re-register the printer, delete the printer from Google Cloud Print If the printer's owner changes or ...

User Manual
Page 100
3. When the confirmation screen to delete the printer is displayed, select Yes 100 Select Web service setup -> Connection setup -> Google Cloud Print setup -> Delete from Google Cloud Print 4.
3. When the confirmation screen to delete the printer is displayed, select Yes 100 Select Web service setup -> Connection setup -> Google Cloud Print setup -> Delete from Google Cloud Print 4.

User Manual
Page 102
... function may not select the print settings when sending the print data with Google Cloud Print. Follow the steps below. From the Home screen, select Setup 3. Select Print from Google Cloud Print immediately When the printer cannot receive the print data, or you want to print from Google Cloud Print The...
... function may not select the print settings when sending the print data with Google Cloud Print. Follow the steps below. From the Home screen, select Setup 3. Select Print from Google Cloud Print immediately When the printer cannot receive the print data, or you want to print from Google Cloud Print The...

User Manual
Page 108
From the home window, select Setup -> Device settings -> LAN settings -> Confirm LAN settings -> WLAN setting list. From your computer, smartphone, or tablet device, open the Web browser, and enter the ... 2. Note • The Username display may differ depending on your smartphone, tablet, or computer to display printer information. 1. Then from apps such as Canon Inkjet Print Utility and PIXMA Printing Solutions. Username: ADMIN Password: See "About the Administrator Password." Entering Username and Administrator's Password From the authentication screen, enter the Username and...
From the home window, select Setup -> Device settings -> LAN settings -> Confirm LAN settings -> WLAN setting list. From your computer, smartphone, or tablet device, open the Web browser, and enter the ... 2. Note • The Username display may differ depending on your smartphone, tablet, or computer to display printer information. 1. Then from apps such as Canon Inkjet Print Utility and PIXMA Printing Solutions. Username: ADMIN Password: See "About the Administrator Password." Entering Username and Administrator's Password From the authentication screen, enter the Username and...


