
LV-7575_inst_manual.pdf
Page 2
... the minimum distances must be maintained. Heat buildup can also be used for a long time, the dust will block the operation of this manual thoroughly and operate the projector properly. Improper operation may result in not only shortening the product life, but also malfunctions, fire hazard, or ...: TO REDUCE THE RISK OF FIRE OR ELECTRIC SHOCK, DO NOT EXPOSE THIS APPLIANCE TO RAIN OR MOISTURE. - READ AND KEEP THIS USER'S MANUAL FOR LATER USE. 2 THIS SYMBOL INDICATES THAT DANGEROUS VOLTAGE CONSTITUTING A RISK OF ELECTRIC SHOCK IS PRESENT WITHIN THIS UNIT. Do not stare directly...
... the minimum distances must be maintained. Heat buildup can also be used for a long time, the dust will block the operation of this manual thoroughly and operate the projector properly. Improper operation may result in not only shortening the product life, but also malfunctions, fire hazard, or ...: TO REDUCE THE RISK OF FIRE OR ELECTRIC SHOCK, DO NOT EXPOSE THIS APPLIANCE TO RAIN OR MOISTURE. - READ AND KEEP THIS USER'S MANUAL FOR LATER USE. 2 THIS SYMBOL INDICATES THAT DANGEROUS VOLTAGE CONSTITUTING A RISK OF ELECTRIC SHOCK IS PRESENT WITHIN THIS UNIT. Do not stare directly...
LV-7575_inst_manual.pdf
Page 5
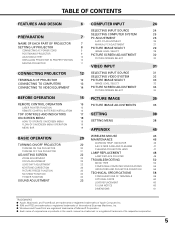
...COMPUTER INPUT 24 SELECTING INPUT SOURCE 24 PREPARATION SELECTING COMPUTER SYSTEM 25 7 PC ADJUSTMENT 26 AUTO PC ADJUSTMENT 26 NAME OF EACH PART OF PROJECTOR 7 MANUAL PC ADJUSTMENT 27 SETTING-UP PROJECTOR 8 PICTURE IMAGE SELECT 29 CONNECTING AC POWER CORD 8 IMAGE LEVEL SELECT 29 POSITIONING PROJECTOR 9 PICTURE SCREEN ADJUSTMENT 30... Machines, Inc. ● Windows and PowerPoint are registered trademarks of Microsoft Corporation. ● Each name of corporations or products in the user's manual is a trademark or a registered trademark of its respective corporation. 5
...COMPUTER INPUT 24 SELECTING INPUT SOURCE 24 PREPARATION SELECTING COMPUTER SYSTEM 25 7 PC ADJUSTMENT 26 AUTO PC ADJUSTMENT 26 NAME OF EACH PART OF PROJECTOR 7 MANUAL PC ADJUSTMENT 27 SETTING-UP PROJECTOR 8 PICTURE IMAGE SELECT 29 CONNECTING AC POWER CORD 8 IMAGE LEVEL SELECT 29 POSITIONING PROJECTOR 9 PICTURE SCREEN ADJUSTMENT 30... Machines, Inc. ● Windows and PowerPoint are registered trademarks of Microsoft Corporation. ● Each name of corporations or products in the user's manual is a trademark or a registered trademark of its respective corporation. 5

LV-7575_inst_manual.pdf
Page 6
... 800 horizontal TV lines. The Power management function turns the projection lamp off when the projector detects a signal interruption or when no need for a troublesome manual adjustment of the computer screen and the image data stored in the computer via a network. The projector can be moved up to make a smart presentation...
... 800 horizontal TV lines. The Power management function turns the projection lamp off when the projector detects a signal interruption or when no need for a troublesome manual adjustment of the computer screen and the image data stored in the computer via a network. The projector can be moved up to make a smart presentation...

LV-7575_inst_manual.pdf
Page 7
... of the optional Network Imager. High temperature from the exhaust vent is in fire hazard. ADJUSTABLE FEET AND FEET LOCK LATCHES 7 Refer to the user's manual of the cooling fans. AIR INTAKE VENTS This projector is equipped with the lens cap attached. BOTTOM OF CABINET LAMP COVER CARRYING HANDLE When attaching...
... of the optional Network Imager. High temperature from the exhaust vent is in fire hazard. ADJUSTABLE FEET AND FEET LOCK LATCHES 7 Refer to the user's manual of the cooling fans. AIR INTAKE VENTS This projector is equipped with the lens cap attached. BOTTOM OF CABINET LAMP COVER CARRYING HANDLE When attaching...

LV-7575_inst_manual.pdf
Page 25
...or UXGA (refer to Input 2 and then press OK button. Mode 1 The User preset adjustment in this projector. Custom Mode (1-10) set manually.) The projector displays one of these: Auto, -----, Mode 1-10, or the system provided in the projector. SELECTING COMPUTER SYSTEM AUTOMATIC MULTI-SCAN ... selected, this projector, however, PC system can be stored in PC ADJUST Menu. (pp.27-28) 25 SELECTING COMPUTER SYSTEM MANUALLY This projector automatically selects PC system among those provided in this projector automatically detects the incoming signal and projects proper image without any ...
...or UXGA (refer to Input 2 and then press OK button. Mode 1 The User preset adjustment in this projector. Custom Mode (1-10) set manually.) The projector displays one of these: Auto, -----, Mode 1-10, or the system provided in the projector. SELECTING COMPUTER SYSTEM AUTOMATIC MULTI-SCAN ... selected, this projector, however, PC system can be stored in PC ADJUST Menu. (pp.27-28) 25 SELECTING COMPUTER SYSTEM MANUALLY This projector automatically selects PC system among those provided in this projector automatically detects the incoming signal and projects proper image without any ...

LV-7575_inst_manual.pdf
Page 26
.... PC ADJUST MENU PC ADJUST Menu icon Move the red frame pointer to the AUTO PC adj. icon and then press the OK button. See MANUAL PC ADJUSTMENT on the remote control unit. icon and press the OK button. 26 To store the adjusted parameters. The system parameters from Auto PC... Adjustment can be memorized in this function, manual adjustments are stored, the setting can be done just by pressing the AUTO PC ADJ. NOTE: • Fine sync, Total dots, and Picture Positions of...
.... PC ADJUST MENU PC ADJUST Menu icon Move the red frame pointer to the AUTO PC adj. icon and then press the OK button. See MANUAL PC ADJUSTMENT on the remote control unit. icon and press the OK button. 26 To store the adjusted parameters. The system parameters from Auto PC... Adjustment can be memorized in this function, manual adjustments are stored, the setting can be done just by pressing the AUTO PC ADJ. NOTE: • Fine sync, Total dots, and Picture Positions of...

LV-7575_inst_manual.pdf
Page 27
... icon Move the red frame pointer to adjust the vertical picture position. Press the POINT LEFT/RIGHT buttons to match with those parameters manually adjusted, which may be recognized as a flickering; and V-sync freq. When the image has a dark bars, try this projector... distributed. non-synchronized; Display area V Adjusts the vertical area displayed by the Multi-Scan system of this adjustment. COMPUTER INPUT MANUAL PC ADJUSTMENT This projector can automatically tune to adjust the horizontal picture position. or skewed picture. This projector has 10 independent memory...
... icon Move the red frame pointer to adjust the vertical picture position. Press the POINT LEFT/RIGHT buttons to match with those parameters manually adjusted, which may be recognized as a flickering; and V-sync freq. When the image has a dark bars, try this projector... distributed. non-synchronized; Display area V Adjusts the vertical area displayed by the Multi-Scan system of this adjustment. COMPUTER INPUT MANUAL PC ADJUSTMENT This projector can automatically tune to adjust the horizontal picture position. or skewed picture. This projector has 10 independent memory...

LV-7575_inst_manual.pdf
Page 32
... 1080i. Move the pointer (red arrow) to system and press the OK button. 32 When the Video System is 1035i or 1080i, select the system manually. VIDEO INPUT SELECTING VIDEO SYSTEM 1 Press the MENU button to the desired system and then press the OK button. PAL / SECAM / NTSC / NTSC4.43 / PAL...
... 1080i. Move the pointer (red arrow) to system and press the OK button. 32 When the Video System is 1035i or 1080i, select the system manually. VIDEO INPUT SELECTING VIDEO SYSTEM 1 Press the MENU button to the desired system and then press the OK button. PAL / SECAM / NTSC / NTSC4.43 / PAL...

LV-7575_inst_manual.pdf
Page 37
... pointer to the Custom 1 to 10 where you want to 63). The Image Level Menu appears. Quit Exit the IMAGE ADJUST Menu. Store To store manually preset image, move the red frame pointer to obtain better balance of the image; press the POINT RIGHT button to deepen red tone (from 0 to...
... pointer to the Custom 1 to 10 where you want to 63). The Image Level Menu appears. Quit Exit the IMAGE ADJUST Menu. Store To store manually preset image, move the red frame pointer to obtain better balance of the image; press the POINT RIGHT button to deepen red tone (from 0 to...

LV-7575_inst_manual.pdf
Page 49
... those who are not appropriately trained to do so, may result in a shorter period of broken glass. 49 Lamp counter Select Lamp counter and this manual.) Continuous use . APPENDIX LAMP REPLACE COUNTER Be sure to reset the Lamp replacement counter after the lamp assembly is replaced. When the Lamp replacement counter...
... those who are not appropriately trained to do so, may result in a shorter period of broken glass. 49 Lamp counter Select Lamp counter and this manual.) Continuous use . APPENDIX LAMP REPLACE COUNTER Be sure to reset the Lamp replacement counter after the lamp assembly is replaced. When the Lamp replacement counter...

LV-7575_inst_manual.pdf
Page 58
...Stereo (R and L), 3 watt RMS (T.H.D. 10%) 0˚ to the highest possible standards. Output: 1mW/Wave length: 650±20nm) User's Manual (CD-ROM) Quick Start Guide AC Power Cord Wireless/Wired Remote Control Transmitter and Batteries VGA Cable USB Cable Control Cable for Serial Port Lens... Cap Lens Replacement And Installation Manual PIN Code Label Warranty Card ● Specifications are subject to change without notice. ● LCD panels are effective, a tiny fraction...
...Stereo (R and L), 3 watt RMS (T.H.D. 10%) 0˚ to the highest possible standards. Output: 1mW/Wave length: 650±20nm) User's Manual (CD-ROM) Quick Start Guide AC Power Cord Wireless/Wired Remote Control Transmitter and Batteries VGA Cable USB Cable Control Cable for Serial Port Lens... Cap Lens Replacement And Installation Manual PIN Code Label Warranty Card ● Specifications are subject to change without notice. ● LCD panels are effective, a tiny fraction...

LV-7575_inst_manual.pdf
Page 60
...LV-IL02 ● Long Focus Zoom Lens Type No. : LV-IL03 ● Ultra Long Focus Zoom Lens Type No. : LV-IL04 ● Network Imager Type No. : LV-NI02 ● Replacement Lamp Type No. : LV-LP28 ● Ceiling Mounting Hanger Type No. : LV...To the sales and service engineers: Referring to the lens when setting up the projector. CANON Projector Input Input1 RGB(PC analog) RGB(Scart) RGB(PC digital) RGB(AV HDCP) ... the lens, attach the lens cap to the attached lens replacement and installation manual, replace or install the lens properly. Do not hold the lens when carrying...
...LV-IL02 ● Long Focus Zoom Lens Type No. : LV-IL03 ● Ultra Long Focus Zoom Lens Type No. : LV-IL04 ● Network Imager Type No. : LV-NI02 ● Replacement Lamp Type No. : LV-LP28 ● Ceiling Mounting Hanger Type No. : LV...To the sales and service engineers: Referring to the lens when setting up the projector. CANON Projector Input Input1 RGB(PC analog) RGB(Scart) RGB(PC digital) RGB(AV HDCP) ... the lens, attach the lens cap to the attached lens replacement and installation manual, replace or install the lens properly. Do not hold the lens when carrying...


