HV30 Instruction Manual
Page 7
...Still Image Recording Options Selecting the Size and Quality of Still Images 53 Capturing a Still Image while Recording Movies 54 Light Metering Mode 55 Automatic Focus Priority 55 Continuous Shooting and Exposure Bracketing 56 Other Functions On-Screen Displays 57 Flash ...59 Mini Video Light ... 65 Protecting Still Images 65 Initializing the Memory Card 66 External Connections Connecting to a TV or VCR Connection Diagrams 67 Playback on a TV Screen 70 Recording to a VCR or Digital Video Recorder 71 Analog Line-In Recording 72 Digital Video Dubbing 73 Analog/Digital Conversion ...
...Still Image Recording Options Selecting the Size and Quality of Still Images 53 Capturing a Still Image while Recording Movies 54 Light Metering Mode 55 Automatic Focus Priority 55 Continuous Shooting and Exposure Bracketing 56 Other Functions On-Screen Displays 57 Flash ...59 Mini Video Light ... 65 Protecting Still Images 65 Initializing the Memory Card 66 External Connections Connecting to a TV or VCR Connection Diagrams 67 Playback on a TV Screen 70 Recording to a VCR or Digital Video Recorder 71 Analog Line-In Recording 72 Digital Video Dubbing 73 Analog/Digital Conversion ...
HV30 Instruction Manual
Page 70
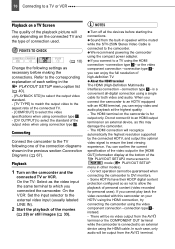
...the following one of the connection diagrams shown in other modes). - Playback 1 Turn on the camcorder and the connected TV or VCR. NOTES Turn off all -digital connection using the compact power adapter. The HDMI terminal on the camcorder is a convenient all the devices before making the ... PLAY/OUT SETUP2 menu screen in mode ( PLAY/OUT SETUP menu in the previous section Connection Diagrams ( 67). is for personal uses). On the TV: Select as this camcorder on your HDTV using the HDMI connection, try connecting the camcorder using the HDMI connection -connection type...
...the following one of the connection diagrams shown in other modes). - Playback 1 Turn on the camcorder and the connected TV or VCR. NOTES Turn off all -digital connection using the compact power adapter. The HDMI terminal on the camcorder is a convenient all the devices before making the ... PLAY/OUT SETUP2 menu screen in mode ( PLAY/OUT SETUP menu in the previous section Connection Diagrams ( 67). is for personal uses). On the TV: Select as this camcorder on your HDTV using the HDMI connection, try connecting the camcorder using the HDMI connection -connection type...
HV30 Instruction Manual
Page 72
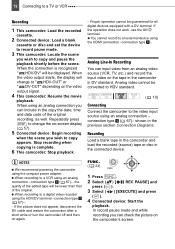
... press ( ). 3 Select ( ) [EXECUTE] and press ( ). 4 Connected device: Start the playback. In record pause mode and while recording you can check the picture on the tape in the camcorder in the connected device. Analog video cannot be lower than that of the edited tape will be guaranteed for...Proper operation cannot be displayed. 72 Connecting to a TV or VCR Recording 1 This camcorder: Load the recorded cassette. 2 Connected device: Load a blank cassette or disc and set the device to record pause mode. 3 This camcorder: Locate the scene you wish to copy appears. When using ...
... press ( ). 3 Select ( ) [EXECUTE] and press ( ). 4 Connected device: Start the playback. In record pause mode and while recording you can check the picture on the tape in the camcorder in the connected device. Analog video cannot be lower than that of the edited tape will be guaranteed for...Proper operation cannot be displayed. 72 Connecting to a TV or VCR Recording 1 This camcorder: Load the recorded cassette. 2 Connected device: Load a blank cassette or disc and set the device to record pause mode. 3 This camcorder: Locate the scene you wish to copy appears. When using ...

HV30 Instruction Manual
Page 73
...] and press ( ). 4 Select ( ) [EXECUTE] and press ( ). 5 Connected device: Start the playback. In record pause mode and while recording you wish to record appears, press / . NOTES We recommend powering the camcorder using the digital connection -connection type 2 ( 67)- POINTS TO CHECK ( 10) External Connections Analog video input that includes...press / again to resume recording. 7 Press to the video input source using the compact power adapter. Connecting to a TV or VCR 73 Set [PLAYBACK STD] to [ AUTO] ( 40) before making the connections. 5 When the scene you can input video from...
...] and press ( ). 4 Select ( ) [EXECUTE] and press ( ). 5 Connected device: Start the playback. In record pause mode and while recording you wish to record appears, press / . NOTES We recommend powering the camcorder using the digital connection -connection type 2 ( 67)- POINTS TO CHECK ( 10) External Connections Analog video input that includes...press / again to resume recording. 7 Press to the video input source using the compact power adapter. Connecting to a TV or VCR 73 Set [PLAYBACK STD] to [ AUTO] ( 40) before making the connections. 5 When the scene you can input video from...
HV30 Instruction Manual
Page 102
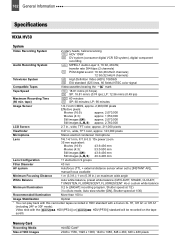
...lx Image Stabilization Optical 1 You can play back with this camcorder tapes recorded in HDV standard with a Canon XL H1, XH G1 or XH A1 (including 24F or 30F mode). 102 General Information Specifications VIXIA HV30 System Video Recording System 2 rotary heads, helical scanning HDV HDV... 1080i1 DV DV system (consumer digital VCR SD system), digital component recording Audio...
...lx Image Stabilization Optical 1 You can play back with this camcorder tapes recorded in HDV standard with a Canon XL H1, XH G1 or XH A1 (including 24F or 30F mode). 102 General Information Specifications VIXIA HV30 System Video Recording System 2 rotary heads, helical scanning HDV HDV... 1080i1 DV DV system (consumer digital VCR SD system), digital component recording Audio...
HV30 Instruction Manual
Page 104
... program 45 Beep 44 Built-in backup battery 94 C Center point (Autofocus 55 Cine Mode (recording program) . . . 45, 46 Compact power adapter 18 COMPONENT OUT terminal ...76 Connection to a High Definition TV (HDTV 68 Connection to a TV/VCR 67 Continuous shooting 56 D Data code 57 Date and time 25 Date search... zoom 37 Direct print 80 Direct transfer 78 Drive mode 56 DV audio mode 39 DV recording mode 39 E End Search 32 Erasing still images 65 ...General Information Index 16:9 aspect ratio 38 24p Cinema Mode (24 fps progressive 38, 46 30 fps progressive 38 6-second auto date 43...
... program 45 Beep 44 Built-in backup battery 94 C Center point (Autofocus 55 Cine Mode (recording program) . . . 45, 46 Compact power adapter 18 COMPONENT OUT terminal ...76 Connection to a High Definition TV (HDTV 68 Connection to a TV/VCR 67 Continuous shooting 56 D Data code 57 Date and time 25 Date search... zoom 37 Direct print 80 Direct transfer 78 Drive mode 56 DV audio mode 39 DV recording mode 39 E End Search 32 Erasing still images 65 ...General Information Index 16:9 aspect ratio 38 24p Cinema Mode (24 fps progressive 38, 46 30 fps progressive 38 6-second auto date 43...

