FAXPHONE L90 Reset - Canon
FAXPHONE L90 Reset
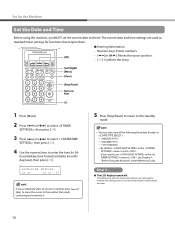
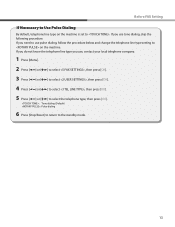
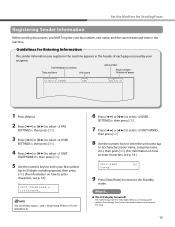
View Results Below
Free Canon FAXPHONE L90 manuals!
Problems with Canon FAXPHONE L90?
Ask a Question
Free Canon FAXPHONE L90 manuals!
Problems with Canon FAXPHONE L90?
Ask a Question
Related Manual Pages


Similar Questions


How Do I Reset The Password For My Secure Fax Machine
How do I reset the password for my secure fax machine?
How do I reset the password for my secure fax machine?
(Posted by schmidda 9 years ago)
