User Manual
Page 4
... Functions 35 Setting the Long Document Mode 35 Chapter 4 ISIS/TWAIN Driver Settings 37 1. Before Using the Scanner 37 2. Troubleshooting 72 2. Uninstalling Software 75 Uninstalling the ISIS/TWAIN Driver and Job Registration Tool 75 Uninstalling CapturePerfect 3.0 76 Chapter 8 Appendix 77 Specifications 77 Replacement Parts 78 External Dimensions 79 INDEX 81 4 DR-2010C / DR-2510C Starting the Job...
... Functions 35 Setting the Long Document Mode 35 Chapter 4 ISIS/TWAIN Driver Settings 37 1. Before Using the Scanner 37 2. Troubleshooting 72 2. Uninstalling Software 75 Uninstalling the ISIS/TWAIN Driver and Job Registration Tool 75 Uninstalling CapturePerfect 3.0 76 Chapter 8 Appendix 77 Specifications 77 Replacement Parts 78 External Dimensions 79 INDEX 81 4 DR-2010C / DR-2510C Starting the Job...

User Manual
Page 65
... (d). d c 65 DR-2010C / DR-2510C Using excessive force may occur more than 30,000 pages, a roller replacement message appears on p. 70.). • For information about the exchange roller kit (feeding roller, retard roller,) contact your local authorized Canon dealer or service representative. R.eRmeomvoinvginagnadndAtAttatcahcihnigngththeeRRoolllelerrssaannddDDooccuummeenntt HHoollddiinngg GGuuiiddee To clean or replace the feeding roller, retard roller, or document holding...
... (d). d c 65 DR-2010C / DR-2510C Using excessive force may occur more than 30,000 pages, a roller replacement message appears on p. 70.). • For information about the exchange roller kit (feeding roller, retard roller,) contact your local authorized Canon dealer or service representative. R.eRmeomvoinvginagnadndAtAttatcahcihnigngththeeRRoolllelerrssaannddDDooccuummeenntt HHoollddiinngg GGuuiiddee To clean or replace the feeding roller, retard roller, or document holding...
User Manual
Page 77
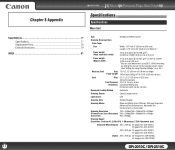
....(DR-2010C) 300 x 300 dpi 25 pages/min.(DR-2510C), 20 pages/min.(DR-2010C) Duplex 200 x 200 dpi 50 images/min.(DR-2510C), 40 images/min.(DR-2010C) DR-2010C / DR-2510C Chapter 8 Appendix Contents Back Previous Page Next Page SSppeeccifiifciactaiotnios ns Specifications Main Unit Specifications 77 Specifications 77 Replacement Parts 78 External Dimensions 79 INDEX 81 77 Type Desktop sheetfed scanner Scanning Document...
....(DR-2010C) 300 x 300 dpi 25 pages/min.(DR-2510C), 20 pages/min.(DR-2010C) Duplex 200 x 200 dpi 50 images/min.(DR-2510C), 40 images/min.(DR-2010C) DR-2010C / DR-2510C Chapter 8 Appendix Contents Back Previous Page Next Page SSppeeccifiifciactaiotnios ns Specifications Main Unit Specifications 77 Specifications 77 Replacement Parts 78 External Dimensions 79 INDEX 81 77 Type Desktop sheetfed scanner Scanning Document...

User Manual
Page 78
... p. 65. z For information on replacing the rollers, see "Removing/ Attaching the Document Holding Guide," on p. 67. 300 x 300 dpi 50 images/min.(DR-2510C), 40 images/min.(DR-2010C) Grayscale Simplex 200 x 200 dpi 25 pages/min.(DR-2510C), 20 pages/min.(DR-2010C) 300 x 300 dpi 25 pages/min.(DR-2510C), 20 pages/min.(DR-2010C) Duplex 200 x 200 dpi...
... p. 65. z For information on replacing the rollers, see "Removing/ Attaching the Document Holding Guide," on p. 67. 300 x 300 dpi 50 images/min.(DR-2510C), 40 images/min.(DR-2010C) Grayscale Simplex 200 x 200 dpi 25 pages/min.(DR-2510C), 20 pages/min.(DR-2010C) 300 x 300 dpi 25 pages/min.(DR-2510C), 20 pages/min.(DR-2010C) Duplex 200 x 200 dpi...
User Manual
Page 82
...connector 10 Power indicator 10 Power switch ...10 Practical examples 32 Preparing the scanner 20 Document eject tray 20 Document feed tray 20 Document stopper 20 R Recognizing the scanner by computer 16 Replacement parts 78 Retard roller Attaching 68 Removing 67 Roller, replacing Counter, resetting 70 Replacement cycle 65 S Scan Panel ...28 Scanning methods 25 Service ...72 Setup ...blank pages 30 Text orientation, correcting 31 Specifications 77 System requirements 11 T Troubleshooting 72 Typical Installation 13 U USB connector 10 USB Link switch 8 82 DR-2010C / DR-2510C
...connector 10 Power indicator 10 Power switch ...10 Practical examples 32 Preparing the scanner 20 Document eject tray 20 Document feed tray 20 Document stopper 20 R Recognizing the scanner by computer 16 Replacement parts 78 Retard roller Attaching 68 Removing 67 Roller, replacing Counter, resetting 70 Replacement cycle 65 S Scan Panel ...28 Scanning methods 25 Service ...72 Setup ...blank pages 30 Text orientation, correcting 31 Specifications 77 System requirements 11 T Troubleshooting 72 Typical Installation 13 U USB connector 10 USB Link switch 8 82 DR-2010C / DR-2510C

Reference Guide
Page 3
...DR-2010C/DR-2510C Document Scanner 4 3. Features of the Scanner 26 Cleaning the Sensor Glass and the Rollers 27 2. Placing Documents 12 Feeding in the Page Separation Mode 12 Feeding in This Manual i Chapter 1 Before Using the Scanner 1 1. Preparing the Scanner 11 Preparing the Document Feed Tray 11 Preparing the Document... Eject Tray 11 Preparing the Document Stopper 11 3. Removing and Attaching the Rollers and Document Holding Guide .......... 29 Roller Replacement ...
...DR-2010C/DR-2510C Document Scanner 4 3. Features of the Scanner 26 Cleaning the Sensor Glass and the Rollers 27 2. Placing Documents 12 Feeding in the Page Separation Mode 12 Feeding in This Manual i Chapter 1 Before Using the Scanner 1 1. Preparing the Scanner 11 Preparing the Document Feed Tray 11 Preparing the Document... Eject Tray 11 Preparing the Document Stopper 11 3. Removing and Attaching the Rollers and Document Holding Guide .......... 29 Roller Replacement ...

Reference Guide
Page 29
... Replacement Parts 39 External Dimensions 39 FCC REGULATIONS (For 120 V model 40 INDEX 41 CAUTION • When cleaning the scanner and the inside the scanner. - 26 - After finishing a large scanning job, turn OFF the scanner and then clean out any moisture. Regular Maintenance 26 Cleaning the Scanner ... described below, to wipe away any paper particles remaining inside of the scanner. Use compressed air to periodically clean dust and paper particles from the document feed opening and the inside the scanner may cause lines or smudges to appear on a regular basis, as the...
... Replacement Parts 39 External Dimensions 39 FCC REGULATIONS (For 120 V model 40 INDEX 41 CAUTION • When cleaning the scanner and the inside the scanner. - 26 - After finishing a large scanning job, turn OFF the scanner and then clean out any moisture. Regular Maintenance 26 Cleaning the Scanner ... described below, to wipe away any paper particles remaining inside of the scanner. Use compressed air to periodically clean dust and paper particles from the document feed opening and the inside the scanner may cause lines or smudges to appear on a regular basis, as the...

Reference Guide
Page 32
... parts. R.eRmeomvoinvginagnadndAtAttatcahcihnigngththeeRRoolllelerrssaannddDDooccuummeenntt HHoollddiinngg GGuuiiddee To clean or replace the feeding roller, retard roller, or document holding guide. Purchase an exchange roller kit and replace ...the feeding roller and the retard roller. Using excessive force may occur more than 30,000 pages, a roller replacement message appears on p. 34.). • For information about the exchange roller kit (feeding roller, retard roller,) contact your local authorized Canon...
... parts. R.eRmeomvoinvginagnadndAtAttatcahcihnigngththeeRRoolllelerrssaannddDDooccuummeenntt HHoollddiinngg GGuuiiddee To clean or replace the feeding roller, retard roller, or document holding guide. Purchase an exchange roller kit and replace ...the feeding roller and the retard roller. Using excessive force may occur more than 30,000 pages, a roller replacement message appears on p. 34.). • For information about the exchange roller kit (feeding roller, retard roller,) contact your local authorized Canon...

Reference Guide
Page 42
... the Retard Roller," on p. 31. • For information on replacing the document holding guide, see "Removing/ Attaching the Document Holding Guide," on p. 33. • Contact your local authorized Canon dealer or service representative for detailed information about the replacement parts. External Dimensions 11.7" (298mm) 6.3" (160mm) 9.8" (245mm) (With the document feed tray open) 6.3" (160mm) 19.5" (490mm) - 39 - Chapter...
... the Retard Roller," on p. 31. • For information on replacing the document holding guide, see "Removing/ Attaching the Document Holding Guide," on p. 33. • Contact your local authorized Canon dealer or service representative for detailed information about the replacement parts. External Dimensions 11.7" (298mm) 6.3" (160mm) 9.8" (245mm) (With the document feed tray open) 6.3" (160mm) 19.5" (490mm) - 39 - Chapter...

Reference Guide
Page 44
... limit mark 12 Long Document mode 24 M Maintenance ...26 Moving the scanner 2 N Name of parts ...6 O Open button ...6 Operating system 7 P Page Separation mode 12 Paper jam, clearing 22 Power connector 6 Power indicator 6 Power switch ...6 Practical examples 21 Preparing the scanner 11 Document eject tray 11 Document feed tray 11 Document stopper 11 R Replacement parts 39 Replacement parts Retard roller Attaching 32 Removing...
... limit mark 12 Long Document mode 24 M Maintenance ...26 Moving the scanner 2 N Name of parts ...6 O Open button ...6 Operating system 7 P Page Separation mode 12 Paper jam, clearing 22 Power connector 6 Power indicator 6 Power switch ...6 Practical examples 21 Preparing the scanner 11 Document eject tray 11 Document feed tray 11 Document stopper 11 R Replacement parts 39 Replacement parts Retard roller Attaching 32 Removing...

