
User Manual
Page 1
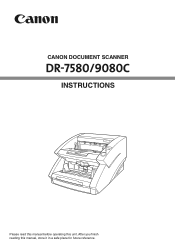
CANON DOCUMENT SCANNER INSTRUCTIONS ENGLISH Please read this manual before operating this manual, store it in a safe place for future reference. After you finish reading this unit.
CANON DOCUMENT SCANNER INSTRUCTIONS ENGLISH Please read this manual before operating this manual, store it in a safe place for future reference. After you finish reading this unit.

User Manual
Page 2
...a retrieval system, or translated into any errors or their respective companies. International ENERGY STAR® Office Equipment Program As an ENERGY STAR partner, Canon Electronics Inc. Operation of this manual are for any language or computer language in this product meets the ENERGY STAR guidelines for a Class A ...digital apparatus does not exceed the Class A limits for damage resulting from digital apparatus as computers, monitors, printers, fax machines, copiers and scanners. All rights reserved. However, Canon Electronics Inc. r We do not assume any form or by...
...a retrieval system, or translated into any errors or their respective companies. International ENERGY STAR® Office Equipment Program As an ENERGY STAR partner, Canon Electronics Inc. Operation of this manual are for any language or computer language in this product meets the ENERGY STAR guidelines for a Class A ...digital apparatus does not exceed the Class A limits for damage resulting from digital apparatus as computers, monitors, printers, fax machines, copiers and scanners. All rights reserved. However, Canon Electronics Inc. r We do not assume any form or by...
User Manual
Page 3
..., INCLUDING ANY WARRANTY OF MERCHANTABILITY OR FITNESS FOR A PARTICULAR PURPOSE, WITH RESPECT TO THE SOFTWARE OR ACCOMPANYING DOCUMENTATION. NEITHER CANON, CANON'S AFFILIATE, THEIR DISTRIBUTOR NOR DEALER IS LIABLE FOR ANY LOSS OR DAMAGE INCLUDING CONSEQUENTIAL OR INCIDENTAL LOSS OR DAMAGE SUCH AS...OF THIS AGREEMENT, DO NOT OPEN THE SEALED DISK PACKAGE AND PROMPTLY RETURN THE CANON SCANNER, THE DISK PACKAGE CONTAINING SCANNER DRIVER SOFTWARE PROGRAMS AND/OR SCANNER UTILITY SOFTWARE PROGRAM PROPRIETARY TO CANON OR ITS LICENSOR (THE "SOFTWARE") AND THE ACCOMPANYING DOCUMENTATION AND OTHER ITEMS ...
..., INCLUDING ANY WARRANTY OF MERCHANTABILITY OR FITNESS FOR A PARTICULAR PURPOSE, WITH RESPECT TO THE SOFTWARE OR ACCOMPANYING DOCUMENTATION. NEITHER CANON, CANON'S AFFILIATE, THEIR DISTRIBUTOR NOR DEALER IS LIABLE FOR ANY LOSS OR DAMAGE INCLUDING CONSEQUENTIAL OR INCIDENTAL LOSS OR DAMAGE SUCH AS...OF THIS AGREEMENT, DO NOT OPEN THE SEALED DISK PACKAGE AND PROMPTLY RETURN THE CANON SCANNER, THE DISK PACKAGE CONTAINING SCANNER DRIVER SOFTWARE PROGRAMS AND/OR SCANNER UTILITY SOFTWARE PROGRAM PROPRIETARY TO CANON OR ITS LICENSOR (THE "SOFTWARE") AND THE ACCOMPANYING DOCUMENTATION AND OTHER ITEMS ...

User Manual
Page 5
...your safety and contain extremely important information. Failure to observe the instructions provided in a caution notice could result in using the scanner. 1 Note Notes provide additional tips or advice that must be avoided. INTRODUCTION Thank you for future reference. Before you ...start reading this manual thoroughly before operating the machine in a safe place for purchasing the Canon Document Scanner DR-7580/9080C. Failure to observe the instructions provided in a warning could result in damage to the equipment. Important These...
...your safety and contain extremely important information. Failure to observe the instructions provided in a caution notice could result in using the scanner. 1 Note Notes provide additional tips or advice that must be avoided. INTRODUCTION Thank you for future reference. Before you ...start reading this manual thoroughly before operating the machine in a safe place for purchasing the Canon Document Scanner DR-7580/9080C. Failure to observe the instructions provided in a warning could result in damage to the equipment. Important These...
User Manual
Page 7
2.4 Turning ON/OFF the Power 27 Turning ON the Power 27 Recognizing the Scanner 28 Turning OFF the Power 30 Chapter 3 Software 3.1 About the Software 32 3.2 Installing the Software 33 Installing the ISIS/TWAIN Driver 33 Installing CapturePerfect 34 3.3 ...
2.4 Turning ON/OFF the Power 27 Turning ON the Power 27 Recognizing the Scanner 28 Turning OFF the Power 30 Chapter 3 Software 3.1 About the Software 32 3.2 Installing the Software 33 Installing the ISIS/TWAIN Driver 33 Installing CapturePerfect 34 3.3 ...
User Manual
Page 8
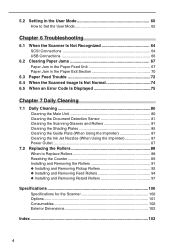
5.2 Setting in the User Mode 60 How to Set the User Mode 62 Chapter 6 Troubleshooting 6.1 When the Scanner Is Not Recognized 64 SCSI Connections 64 USB Connections 66 6.2 Clearing Paper Jams 67 Paper Jam in the Paper Feed Unit 67 Paper Jam in ...; Installing and Removing Pickup Rollers 92 ◆ Installing and Removing Feed Rollers 94 ◆ Installing and Removing Retard Rollers 97 Specifications 100 Specifications for the Scanner 100 Options ...101 Consumables 102 Exterior Dimensions 102 Index ...103 4
5.2 Setting in the User Mode 60 How to Set the User Mode 62 Chapter 6 Troubleshooting 6.1 When the Scanner Is Not Recognized 64 SCSI Connections 64 USB Connections 66 6.2 Clearing Paper Jams 67 Paper Jam in the Paper Feed Unit 67 Paper Jam in ...; Installing and Removing Pickup Rollers 92 ◆ Installing and Removing Feed Rollers 94 ◆ Installing and Removing Retard Rollers 97 Specifications 100 Specifications for the Scanner 100 Options ...101 Consumables 102 Exterior Dimensions 102 Index ...103 4
User Manual
Page 9
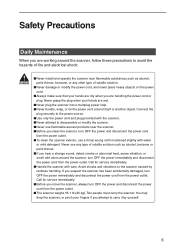
... solution such as alcohol, paint thinner, benzene, or any other type of fire and electrical shock: WARNING ■ Never install and operate the scanner near flammable substances such as alcohol, benzene or paint thinner. ■ If you hear a strange sound, detect smoke or abnormal heat, sense ...OFF the power immediately and disconnect the power cord from the power outlet. Safety Precautions Daily Maintenance When you are working around the scanner, follow these precautions to avoid the hazards of volatile solution. ■ Never damage or modify the power cord, and never place...
... solution such as alcohol, paint thinner, benzene, or any other type of fire and electrical shock: WARNING ■ Never install and operate the scanner near flammable substances such as alcohol, benzene or paint thinner. ■ If you hear a strange sound, detect smoke or abnormal heat, sense ...OFF the power immediately and disconnect the power cord from the power outlet. Safety Precautions Daily Maintenance When you are working around the scanner, follow these precautions to avoid the hazards of volatile solution. ■ Never damage or modify the power cord, and never place...
User Manual
Page 10
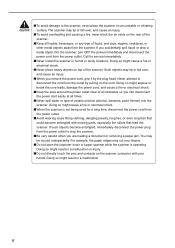
...obstacles so you are loading a document or removing a paper jam. Doing so might cause a fire or electrical shock. ■ When the scanner is operating. The scanner may cut your hands. For example, the paper edges may tip or fall over , and cause an injury. ■ To avoid overheating ... injury. ■ Do not directly touch the pins and contacts on the cord. CAUTION ■ To avoid damage to disconnect the cord from the scanner. Call for a long time, disconnect the power cord from the power outlet. ■ Avoid wearing loose fitting clothing, dangling jewelry, long ties,...
...obstacles so you are loading a document or removing a paper jam. Doing so might cause a fire or electrical shock. ■ When the scanner is operating. The scanner may cut your hands. For example, the paper edges may tip or fall over , and cause an injury. ■ To avoid overheating ... injury. ■ Do not directly touch the pins and contacts on the cord. CAUTION ■ To avoid damage to disconnect the cord from the scanner. Call for a long time, disconnect the power cord from the power outlet. ■ Avoid wearing loose fitting clothing, dangling jewelry, long ties,...
User Manual
Page 11
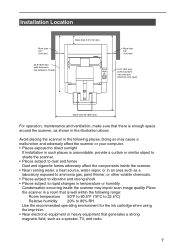
...your computer. • Places exposed to direct sunlight If installation in such places is enough space around the scanner, as shown in temperature or humidity Condensation occurring inside the scanner. • Near running water, a heat source, water vapor, or in an area such as a ... Places subject to vibration and strong shock • Places subject to dust and fumes Dust and cigarette fumes adversely affect the components inside the scanner may impair scan image quality. Installation Location More than 3.9" (100 mm) 24.8" (630 mm) (with document tray extension closed) More than...
...your computer. • Places exposed to direct sunlight If installation in such places is enough space around the scanner, as shown in temperature or humidity Condensation occurring inside the scanner. • Near running water, a heat source, water vapor, or in an area such as a ... Places subject to vibration and strong shock • Places subject to dust and fumes Dust and cigarette fumes adversely affect the components inside the scanner may impair scan image quality. Installation Location More than 3.9" (100 mm) 24.8" (630 mm) (with document tray extension closed) More than...
User Manual
Page 12
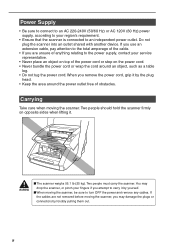
... around the power outlet free of the power cord or step on opposite sides when lifting it by yourself. ■ When moving the scanner. Two people must carry the scanner. Power Supply • Be sure to connect to an AC 220-240V (50/60 Hz) or AC 120V (60 Hz) power supply..., according to your fingers if you may drop the scanner, or pinch your region's requirement. • Ensure that the scanner is connected to an independent power outlet. You may damage the plugs or connectors by forcibly pulling them out. 8
... around the power outlet free of the power cord or step on opposite sides when lifting it by yourself. ■ When moving the scanner. Two people must carry the scanner. Power Supply • Be sure to connect to an AC 220-240V (50/60 Hz) or AC 120V (60 Hz) power supply..., according to your fingers if you may drop the scanner, or pinch your region's requirement. • Ensure that the scanner is connected to an independent power outlet. You may damage the plugs or connectors by forcibly pulling them out. 8
User Manual
Page 13
Chapter 1 DR-7580/9080C This chapter describes the features of the scanner, what's in the box, and the names and functions of parts on the scanner. 1.1 Features of the DR-7580/9080C ........ 10 1.2 Packaging: What Is in the Box? ........ 12 1.3 Part Names 13 Front View 13 Rear View 14 Connectors (Bottom View 14 Operation Panel 15 1.4 Optional Products 16
Chapter 1 DR-7580/9080C This chapter describes the features of the scanner, what's in the box, and the names and functions of parts on the scanner. 1.1 Features of the DR-7580/9080C ........ 10 1.2 Packaging: What Is in the Box? ........ 12 1.3 Part Names 13 Front View 13 Rear View 14 Connectors (Bottom View 14 Operation Panel 15 1.4 Optional Products 16
User Manual
Page 14
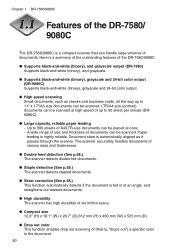
...Supports black-and-white (binary), grayscale and 24-bit color output. ● High speed scanning Small documents, such as it passes through the scanner. LTR/A4 size (portrait) documents can be scanned at high speed of documents can be placed at an angle, and straightens out skewed ...documents. ● High durability The scanner has high durability of six million scans. ● Compact size 12.3" (H) x 18.1" (W) x 20.7" (D)/312 mm (H) x 460 mm (W) x 525 mm (D) ●...
...Supports black-and-white (binary), grayscale and 24-bit color output. ● High speed scanning Small documents, such as it passes through the scanner. LTR/A4 size (portrait) documents can be scanned at high speed of documents can be placed at an angle, and straightens out skewed ...documents. ● High durability The scanner has high durability of six million scans. ● Compact size 12.3" (H) x 18.1" (W) x 20.7" (D)/312 mm (H) x 460 mm (W) x 525 mm (D) ●...

User Manual
Page 16
If any items are missing, contact your sales representative. Power Cord DR-7580/9080C Setup Disc Instructions (this package may change without notice. Warranty Card (U.S.A. and Canada only) 12 Check every item you have removed from the box. Chapter 1 DR-7580/9080C Packaging: What Is in this manual) QUICK REFERENCE TROUUSBSECLFEAUSNLHNFOIENOAGTTUINBRAGESSICS DOCUMENT SCANNER Quick Reference Guide USB Cable • The setup disc is in the Instructions. • Item included in the Box? Make sure that you have everything.
If any items are missing, contact your sales representative. Power Cord DR-7580/9080C Setup Disc Instructions (this package may change without notice. Warranty Card (U.S.A. and Canada only) 12 Check every item you have removed from the box. Chapter 1 DR-7580/9080C Packaging: What Is in this manual) QUICK REFERENCE TROUUSBSECLFEAUSNLHNFOIENOAGTTUINBRAGESSICS DOCUMENT SCANNER Quick Reference Guide USB Cable • The setup disc is in the Instructions. • Item included in the Box? Make sure that you have everything.
User Manual
Page 17
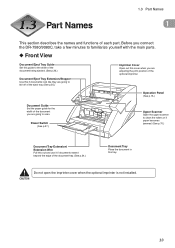
....) Document Tray Place the document in this out and use it if documents extend beyond the edge of each part. Power Switch (See p.27.) Upper Scanner Open the upper scanner to scan.
....) Document Tray Place the document in this out and use it if documents extend beyond the edge of each part. Power Switch (See p.27.) Upper Scanner Open the upper scanner to scan.
User Manual
Page 18
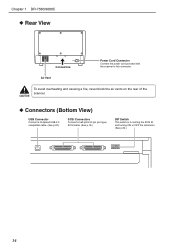
Chapter 1 DR-7580/9080C ◆ Rear View Connectors Power Cord Connector Connect the power cord provided with the scanner to this connector. CAUTION ◆ Connectors (Bottom View) USB Connector Connect a Hi-Speed USB 2.0 compatible cable. (See p.22.) SCSI Connectors Connect a half-pitch 50 pin (pin type) SCSI cable. (See p.19.) DIP Switch This switch is for setting the SCSI ID and turning ON or OFF the terminator. (See p.20.) 14 Air Vent To avoid overheating and causing a fire, never block the air vents on the rear of the scanner.
Chapter 1 DR-7580/9080C ◆ Rear View Connectors Power Cord Connector Connect the power cord provided with the scanner to this connector. CAUTION ◆ Connectors (Bottom View) USB Connector Connect a Hi-Speed USB 2.0 compatible cable. (See p.22.) SCSI Connectors Connect a half-pitch 50 pin (pin type) SCSI cable. (See p.19.) DIP Switch This switch is for setting the SCSI ID and turning ON or OFF the terminator. (See p.20.) 14 Air Vent To avoid overheating and causing a fire, never block the air vents on the rear of the scanner.

User Manual
Page 19
... when the Count Only mode is lit to a separate file or folder from that are bound at least two seconds. (2) Count Only key Sets the scanner to the Count Only mode for just counting the number of pages fed. (See p.52.) When you place the document and press the Start key... in this key to cancel the currently set in use this state, the document will be fed and the scanner will count the number of pages. (The document will light. This key lights when it will not be scanned.) (3) New File key Enabled when the...
... when the Count Only mode is lit to a separate file or folder from that are bound at least two seconds. (2) Count Only key Sets the scanner to the Count Only mode for just counting the number of pages fed. (See p.52.) When you place the document and press the Start key... in this key to cancel the currently set in use this state, the document will be fed and the scanner will count the number of pages. (The document will light. This key lights when it will not be scanned.) (3) New File key Enabled when the...

User Manual
Page 20
... are : C6602B (blue), C6602G (green), and C6602R (red). ◆ Endorser ED-600 The Endorser ED-600 unit is installed on top of the scanner, and prints a eight digit number on software that allows the ISIS/TWAIN driver to recognize bar codes. Chapter 1 DR-7580/9080C Optional Products The following...in order to match the printing speed of the endorser. ◆ Hard Counter The hard counter is a seven digit counter that is installed inside the scanner, and prints a text message on the front of the document being scanned. It keeps a tally of the document being scanned. See the "ISIS/...
... are : C6602B (blue), C6602G (green), and C6602R (red). ◆ Endorser ED-600 The Endorser ED-600 unit is installed on top of the scanner, and prints a eight digit number on software that allows the ISIS/TWAIN driver to recognize bar codes. Chapter 1 DR-7580/9080C Optional Products The following...in order to match the printing speed of the endorser. ◆ Hard Counter The hard counter is a seven digit counter that is installed inside the scanner, and prints a text message on the front of the document being scanned. It keeps a tally of the document being scanned. See the "ISIS/...
User Manual
Page 21
Chapter 2 Preparation Before Use This chapter describes the procedure from scanner connection through to turning ON the power. 2.1 Checking Your Operating Environment 18 2.2 Connecting to a Computer 19 SCSI Connections 19 USB Connections 22 Connecting the Power Cord 23 2.3 Preparing for Paper Feed and Eject 24 Preparing the Document Tray Extension 24 Preparing the Document Eject Tray Extension 25 2.4 Turning ON/OFF the Power 27 Turning ON the Power 27 Recognizing the Scanner 28 Turning OFF the Power 30
Chapter 2 Preparation Before Use This chapter describes the procedure from scanner connection through to turning ON the power. 2.1 Checking Your Operating Environment 18 2.2 Connecting to a Computer 19 SCSI Connections 19 USB Connections 22 Connecting the Power Cord 23 2.3 Preparing for Paper Feed and Eject 24 Preparing the Document Tray Extension 24 Preparing the Document Eject Tray Extension 25 2.4 Turning ON/OFF the Power 27 Turning ON the Power 27 Recognizing the Scanner 28 Turning OFF the Power 30

User Manual
Page 22
... DR-7580/9080C. ● IBM PC/AT or compatible machines that can display at a resolution of 1024 x 768 (XGA) or greater is compatible with this scanner or Hi-Speed USB 2.0 interface card (See "Connecting to transfer data may slow down or the time required to a Computer," on one of the operating...
... DR-7580/9080C. ● IBM PC/AT or compatible machines that can display at a resolution of 1024 x 768 (XGA) or greater is compatible with this scanner or Hi-Speed USB 2.0 interface card (See "Connecting to transfer data may slow down or the time required to a Computer," on one of the operating...
User Manual
Page 23
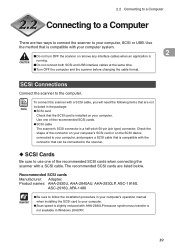
...'s SCSI card or on the SCSI device connected to the computer. Use the method that are listed below. SCSI Connections Connect the scanner to your computer, SCSI or USB. The recommended SCSI cards are not Note included in Windows 2000/XP. 19 Recommended SCSI cards Manufacturer...to your computer. ● Scan speed is slightly reduced with your computer. To connect the scanner with a SCSI cable. Check the shape of the recommended SCSI cards when connecting the scanner with a SCSI cable, you will need the following items that is compatible with AHA-2930LP because...
...'s SCSI card or on the SCSI device connected to the computer. Use the method that are listed below. SCSI Connections Connect the scanner to your computer, SCSI or USB. The recommended SCSI cards are not Note included in Windows 2000/XP. 19 Recommended SCSI cards Manufacturer...to your computer. ● Scan speed is slightly reduced with your computer. To connect the scanner with a SCSI cable. Check the shape of the recommended SCSI cards when connecting the scanner with a SCSI cable, you will need the following items that is compatible with AHA-2930LP because...


