
Users Manual - English
Page 2
... 1. Keep fingers away from the electrical outlet when removing covers, lubricating, or when making any openings. 6. Always use a bent needle. 13. Replace bulb with any other user service adjustments mentioned in this instruction manual. WARNING - Do not pull or push the fabric while stitching. "SAVE THESE .... Return the sewing machine to break. 12. Keep the ventilation openings of lint, dust and loose cloth. 5. To unplug, grasp the plug and pull, not the cord. 10. It may deflect the needle causing it has been dropped or damaged, or dropped into any adjustments in...
... 1. Keep fingers away from the electrical outlet when removing covers, lubricating, or when making any openings. 6. Always use a bent needle. 13. Replace bulb with any other user service adjustments mentioned in this instruction manual. WARNING - Do not pull or push the fabric while stitching. "SAVE THESE .... Return the sewing machine to break. 12. Keep the ventilation openings of lint, dust and loose cloth. 5. To unplug, grasp the plug and pull, not the cord. 10. It may deflect the needle causing it has been dropped or damaged, or dropped into any adjustments in...
Users Manual - English
Page 3
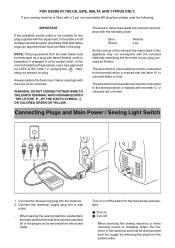
... THE EARTH TERMINAL WHICH IS MARKED WITH THE LETTER 'E', BY THE EARTH SYMBOL OR COLORED GREEN OR YELLOW. Connect the three-prong plug into a wall outlet. - The wire which is coloured brown must be removed from the socket outlet. The wires in these main...markings identifying the terminals in the mains lead of replacing the plug fuse, use plugs with a 3 pin non-rewireable BS plug then please read the following. Connecting Plugs and Main Power / Sewing Light Switch 1 2 1. Always replace the fuse cover. With alternative plugs an approved fuse must be connected to the terminal...
... THE EARTH TERMINAL WHICH IS MARKED WITH THE LETTER 'E', BY THE EARTH SYMBOL OR COLORED GREEN OR YELLOW. Connect the three-prong plug into a wall outlet. - The wire which is coloured brown must be removed from the socket outlet. The wires in these main...markings identifying the terminals in the mains lead of replacing the plug fuse, use plugs with a 3 pin non-rewireable BS plug then please read the following. Connecting Plugs and Main Power / Sewing Light Switch 1 2 1. Always replace the fuse cover. With alternative plugs an approved fuse must be connected to the terminal...
Users Manual - English
Page 4
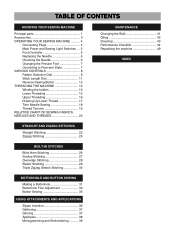
TABLE OF CONTENTS KNOWING YOUR SEWING MACHINE Principal parts 1 Accessories 3 OPERATING YOUR SEWING MACHINE .......... 4 Connecting Plugs 4 Main Power and Sewing Light Switches ... 5 Foot Controller 5 Replacing the Needle 6 Checking the Needle 6 Changing the Presser Foot 7 Converting to Free-arm Style 7 VARIOUS CONTROLS 8 Pattern Selection Dial 8 Stitch Length Dial 11 Reverse Sewing ...
TABLE OF CONTENTS KNOWING YOUR SEWING MACHINE Principal parts 1 Accessories 3 OPERATING YOUR SEWING MACHINE .......... 4 Connecting Plugs 4 Main Power and Sewing Light Switches ... 5 Foot Controller 5 Replacing the Needle 6 Checking the Needle 6 Changing the Presser Foot 7 Converting to Free-arm Style 7 VARIOUS CONTROLS 8 Pattern Selection Dial 8 Stitch Length Dial 11 Reverse Sewing ...


