
Users Manual - English
Page 5
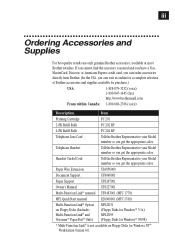
Handset Curled Cord Tell the Brother Representative your Model number so you get the appropriate color. Paper Wire Extension UL6856000 Document Support UF8048001 Paper Support UF8247001 Owner's Manual UF8227001 Multi-Function Link® manual UF8483001 (MFC 1770) MFL QuickStart manual LE0060001 (MFC 1780) Multi-Function Link® Option on Floppy Disks (Includes Multi-Function Link® and Visioneer® PaperPort® Only) MFL2D31 (Floppy Disks for Windows® 3.1x...
Handset Curled Cord Tell the Brother Representative your Model number so you get the appropriate color. Paper Wire Extension UL6856000 Document Support UF8048001 Paper Support UF8247001 Owner's Manual UF8227001 Multi-Function Link® manual UF8483001 (MFC 1770) MFL QuickStart manual LE0060001 (MFC 1780) Multi-Function Link® Option on Floppy Disks (Includes Multi-Function Link® and Visioneer® PaperPort® Only) MFL2D31 (Floppy Disks for Windows® 3.1x...
Users Manual - English
Page 6
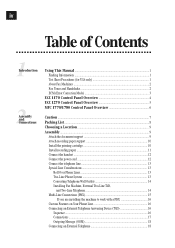
... Using This Manual ...1 Finding Information ...1 Test Sheet Procedures (for USA only 1 About Fax Machines ...2 Fax Tones and Handshake 2 ECM (Error Correction Mode 3 FAX 1170 Control Panel Overview 4 FAX 1270 Control Panel Overview 5 MFC 1770/1780 Control Panel Overview 6 Caution ...7 Packing List ...8 Choosing a Location 9 Assembly ...9 Attach the document support 9 Attach recording paper support 10 Install the printing cartridge 10 Install recording paper 11 Connect the handset ...12 Connect the power cord 12 Connect the telephone line 13 Special Line Considerations 13 Roll...
... Using This Manual ...1 Finding Information ...1 Test Sheet Procedures (for USA only 1 About Fax Machines ...2 Fax Tones and Handshake 2 ECM (Error Correction Mode 3 FAX 1170 Control Panel Overview 4 FAX 1270 Control Panel Overview 5 MFC 1770/1780 Control Panel Overview 6 Caution ...7 Packing List ...8 Choosing a Location 9 Assembly ...9 Attach the document support 9 Attach recording paper support 10 Install the printing cartridge 10 Install recording paper 11 Connect the handset ...12 Connect the power cord 12 Connect the telephone line 13 Special Line Considerations 13 Roll...
Users Manual - English
Page 7
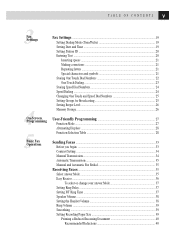
...: ...33 Contrast Setting ...34 Manual Transmission ...34 Automatic Transmission 35 Manual and Automatic Fax Redial 35 Receiving Faxes ...35 Select Answer Mode ...35 Easy Receive ...36 To select or change your Answer Mode 37 Setting Ring Delay ...37 Setting F/T Ring Time 37 Speaker Volume ...38 Setting the Handset Volume 38 Ring Volume ...39 Smoothing ...39 Setting Recording Paper Size 39 Printing a Reduced Incoming Document 40 Recommended Reductions...
...: ...33 Contrast Setting ...34 Manual Transmission ...34 Automatic Transmission 35 Manual and Automatic Fax Redial 35 Receiving Faxes ...35 Select Answer Mode ...35 Easy Receive ...36 To select or change your Answer Mode 37 Setting Ring Delay ...37 Setting F/T Ring Time 37 Speaker Volume ...38 Setting the Handset Volume 38 Ring Volume ...39 Smoothing ...39 Setting Recording Paper Size 39 Printing a Reduced Incoming Document 40 Recommended Reductions...
Users Manual - English
Page 11
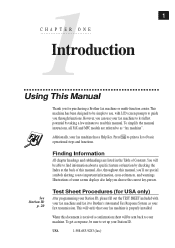
... of some screen displays also help you through functions. You will be sent back to your first transmission. USA 1-908-685-9283 (fax) 1 1C H A P T E R O N E Introduction Using This Manual Thank you to important information, cross-references, and warnings. Additionally, your fax machine is properly installed. When this manual. Press Help to print a list of this document is received a confirmation sheet will verify...
... of some screen displays also help you through functions. You will be sent back to your first transmission. USA 1-908-685-9283 (fax) 1 1C H A P T E R O N E Introduction Using This Manual Thank you to important information, cross-references, and warnings. Additionally, your fax machine is properly installed. When this manual. Press Help to print a list of this document is received a confirmation sheet will verify...

Users Manual - English
Page 34
... this is. The screen now prompts you to enter a location. OR - Use or to select the type you 're storing. #05 ENTER & SET 3 Enter the number (up the handset when the other party won't be lost. 1 Press Function , 4 , 2 . Model FAX 1170 has 26 Speed Dial locations, Models FAX 1270, MFC 1770 and MFC 1780 have 36. NAME: 5 Use the keypad to...
... this is. The screen now prompts you to enter a location. OR - Use or to select the type you 're storing. #05 ENTER & SET 3 Enter the number (up the handset when the other party won't be lost. 1 Press Function , 4 , 2 . Model FAX 1170 has 26 Speed Dial locations, Models FAX 1270, MFC 1770 and MFC 1780 have 36. NAME: 5 Use the keypad to...
Users Manual - English
Page 46
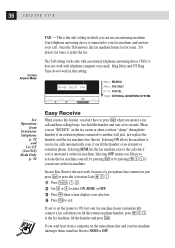
...or extension phone. Ring Delay and F/T Ring Time do not work , because of an extension phone connected to exit. If you've set the feature to ON, but your selection. 4 Press Stop to another wall jack, just replace the handset, and the fax machine does the... phone line connection, just press Start or press the Activation Code 5 1 . 1 Press Function , 7 , 6 . 2 Use or to receive fax calls automatically, even if you lift the extension phone handset, press 5 1 . 36 CHAPTER FIVE Current Answer Mode TAD - Selecting OFF means you'll have to press Start when you can use an ...
...or extension phone. Ring Delay and F/T Ring Time do not work , because of an extension phone connected to exit. If you've set the feature to ON, but your selection. 4 Press Stop to another wall jack, just replace the handset, and the fax machine does the... phone line connection, just press Start or press the Activation Code 5 1 . 1 Press Function , 7 , 6 . 2 Use or to receive fax calls automatically, even if you lift the extension phone handset, press 5 1 . 36 CHAPTER FIVE Current Answer Mode TAD - Selecting OFF means you'll have to press Start when you can use an ...
Users Manual - English
Page 82
...specifications and materials contained herein and shall not be the result of your use of their respective companies. Windows and Windows NT are registered trademarks of Microsoft in this manual are registered trademarks of this document. and other errors relating to make changes without notice. 72 C H A P T E R T E N Compilation and Publication Notice Under the supervision of Brother Industries, Ltd. Brother... of this manual and the specifications of this manual has been compiled and published, covering the latest product descriptions and specifications. Trademarks The Brother logo is...
...specifications and materials contained herein and shall not be the result of your use of their respective companies. Windows and Windows NT are registered trademarks of Microsoft in this manual are registered trademarks of this document. and other errors relating to make changes without notice. 72 C H A P T E R T E N Compilation and Publication Notice Under the supervision of Brother Industries, Ltd. Brother... of this manual and the specifications of this manual has been compiled and published, covering the latest product descriptions and specifications. Trademarks The Brother logo is...
Users Manual - English
Page 84
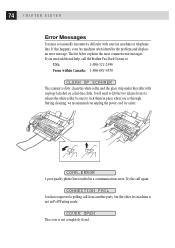
... this happens, your fax machine or telephone line. If you need to lift the two release levers to lock them in a communications error. clean the white roller and the glass strip under the roller with your fax machine often identifies the problem and displays an error message. CONNECTION FAIL You have requested a polling call the Brother Fax-Back System at USA: 1-800-521...
... this happens, your fax machine or telephone line. If you need to lift the two release levers to lock them in a communications error. clean the white roller and the glass strip under the roller with your fax machine often identifies the problem and displays an error message. CONNECTION FAIL You have requested a polling call the Brother Fax-Back System at USA: 1-800-521...
Users Manual - English
Page 89
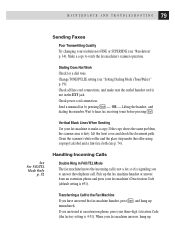
Check all line cord connections, and make a copy. Send a manual fax by pressing Hook - Lifting the handset, and dialing the number. Vertical Black Lines When Sending Use your fax machine's Deactivation Code (default setting is #51). Clean the scanner's white roller and the glass strip under the roller using isopropyl alcohol and a lint-free cloth (see "Resolution" p. 34). 79 M A I N T E N A N C E A N D T R O U B L E S H O O T I N G Sending Faxes Poor Transmitting Quality Try changing your resolution to FINE...
Check all line cord connections, and make a copy. Send a manual fax by pressing Hook - Lifting the handset, and dialing the number. Vertical Black Lines When Sending Use your fax machine's Deactivation Code (default setting is #51). Clean the scanner's white roller and the glass strip under the roller using isopropyl alcohol and a lint-free cloth (see "Resolution" p. 34). 79 M A I N T E N A N C E A N D T R O U B L E S H O O T I N G Sending Faxes Poor Transmitting Quality Try changing your resolution to FINE...
Users Manual - English
Page 91
... Canceling Job 47 Chain Dialing 23 CHECK PAPER 76 CLEAN UP SCANNER 74 CNG tones 2 Connect (External Telephone 18 Connect (Handset 12 Connect (Power Cord 12 Connect (TAD 16 Connect (Telephone Line 13 Contrast 34 Copy 58 Cover Page 48 Cover Page (Always Send 49 Cover Page (Message 49 Cover Page (Temporary 49 Cover Page (Printing 50 Credit Card Numbers (Using 23 D Daily Timer 45 Date and Time (Setting 19 Delayed Transmission 46 Distinctive Ring 53 Document 33 DOCUMENT JAM 75 E Error Correction Mode (ECM...
... Canceling Job 47 Chain Dialing 23 CHECK PAPER 76 CLEAN UP SCANNER 74 CNG tones 2 Connect (External Telephone 18 Connect (Handset 12 Connect (Power Cord 12 Connect (TAD 16 Connect (Telephone Line 13 Contrast 34 Copy 58 Cover Page 48 Cover Page (Always Send 49 Cover Page (Message 49 Cover Page (Temporary 49 Cover Page (Printing 50 Credit Card Numbers (Using 23 D Daily Timer 45 Date and Time (Setting 19 Delayed Transmission 46 Distinctive Ring 53 Document 33 DOCUMENT JAM 75 E Error Correction Mode (ECM...
Users Manual - English
Page 92
... One Touch Dialing 42 Outgoing Message (Recording 17 Overseas Mode 47 P Packing List 8 Paging 60 Paper (Install 11 Paper (Size 40 Pause 42 PBX 15 Polling Receive 56 Polling Transmit (Setting Up 57 Print a Report 65 Printing (a Fax in Memory 53 Printing (Reduced Incoming Document) ........ 40 Printing Cartridge 10 Q Quick Scan 45 R Reducing a Copy 58 Reductions 40 Remote Retrieval Access Code (Changing) ....... 61 Remote Retrieval Access Code (Using 62 Remote Commands 62 Remote...
... One Touch Dialing 42 Outgoing Message (Recording 17 Overseas Mode 47 P Packing List 8 Paging 60 Paper (Install 11 Paper (Size 40 Pause 42 PBX 15 Polling Receive 56 Polling Transmit (Setting Up 57 Print a Report 65 Printing (a Fax in Memory 53 Printing (Reduced Incoming Document) ........ 40 Printing Cartridge 10 Q Quick Scan 45 R Reducing a Copy 58 Reductions 40 Remote Retrieval Access Code (Changing) ....... 61 Remote Retrieval Access Code (Using 62 Remote Commands 62 Remote...
Users Manual - English
Page 95
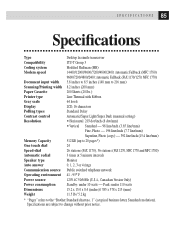
... to the "Brother Standard chart no. 1" (a typical business letter, Standard resolution). Peak: under 10 watts - Automatic Fallback (MFC 1780) 9600/7200/4800/2400; 85 S P E C I F I C A T I O N S Specifications Type Compatibility Coding system Modem speed Document input width Scanning/Printing width Paper Cassette Printer type Gray scale Display Polling types Contrast control Resolution Memory Capacity One touch dial Speed-dial Automatic redial Speaker type Auto answer Communication source Operating environment Power source Power consumption Dimensions...
... to the "Brother Standard chart no. 1" (a typical business letter, Standard resolution). Peak: under 10 watts - Automatic Fallback (MFC 1780) 9600/7200/4800/2400; 85 S P E C I F I C A T I O N S Specifications Type Compatibility Coding system Modem speed Document input width Scanning/Printing width Paper Cassette Printer type Gray scale Display Polling types Contrast control Resolution Memory Capacity One touch dial Speed-dial Automatic redial Speaker type Auto answer Communication source Operating environment Power source Power consumption Dimensions...

Quick Setup Guide - English
Page 3
... and Computer to Package Contents ...1 Work Together PC Configuration Requirements 2 Connecting the Brother Machine to PC 2 Available Options ...3 Install Multi-Function Link® Software 3 On-Line Documentation 3 Product Support ...3 Brother Web Link 3 Installing the Multi-Function Link® Software 4 Overview of Basic Steps 4 Accessing the Software Installation Window 4 Installing the Brother Software 4 Viewing On-Line Documentation 5 2Using the Multi-Function Link® Software Introduction ...7 Running the Brother Software 7 Multi-Function Link 8 Visioneer...
... and Computer to Package Contents ...1 Work Together PC Configuration Requirements 2 Connecting the Brother Machine to PC 2 Available Options ...3 Install Multi-Function Link® Software 3 On-Line Documentation 3 Product Support ...3 Brother Web Link 3 Installing the Multi-Function Link® Software 4 Overview of Basic Steps 4 Accessing the Software Installation Window 4 Installing the Brother Software 4 Viewing On-Line Documentation 5 2Using the Multi-Function Link® Software Introduction ...7 Running the Brother Software 7 Multi-Function Link 8 Visioneer...

Quick Setup Guide - English
Page 5
Package Contents Before you through each step of your package: s Brother CD-ROM s Multi-Function Link Cable and PC I/F Box s Warranty, Upgrade and Licensing Materials 11 Setting Up the Brother Machine and Computer to ensure a problem-free installation. Read it carefully to Work Together Before You Install Multi-Function Link® This chapter takes you begin the Multi-Function Link® installation, please check the contents of the installation process.
Package Contents Before you through each step of your package: s Brother CD-ROM s Multi-Function Link Cable and PC I/F Box s Warranty, Upgrade and Licensing Materials 11 Setting Up the Brother Machine and Computer to ensure a problem-free installation. Read it carefully to Work Together Before You Install Multi-Function Link® This chapter takes you begin the Multi-Function Link® installation, please check the contents of the installation process.

Quick Setup Guide - English
Page 7
3 Available Options Install Multi-Function Link® Software Click on the Install Acrobat Reader button. To view the On-Line Documentation, you must have service with an Internet service provider. You must first install the Acrobat Reader software from product specifications sheets to the previous window. On-Line Documentation On-Line Documentation includes all Brother support numbers. Brother Web Link Brother WEB Link visits the Internet Brother Home Page on the World Wide Web. Click...
3 Available Options Install Multi-Function Link® Software Click on the Install Acrobat Reader button. To view the On-Line Documentation, you must have service with an Internet service provider. You must first install the Acrobat Reader software from product specifications sheets to the previous window. On-Line Documentation On-Line Documentation includes all Brother support numbers. Brother Web Link Brother WEB Link visits the Internet Brother Home Page on the World Wide Web. Click...

Quick Setup Guide - English
Page 8
.... Accessing the Software Installation Window If you are using Windows® 95/98 or Windows NT® Workstation Version 4.0: s When you are plugged in and switched on. The Brother software will be displayed on the root directory of Windows®, if needed. 3 Select the option "Install Multi-Function Link Software". 4 Follow the installation instructions. 4 Installing the Multi-Function Link® Software Make sure your Brother machine is the drive letter for Windows®...
.... Accessing the Software Installation Window If you are using Windows® 95/98 or Windows NT® Workstation Version 4.0: s When you are plugged in and switched on. The Brother software will be displayed on the root directory of Windows®, if needed. 3 Select the option "Install Multi-Function Link Software". 4 Follow the installation instructions. 4 Installing the Multi-Function Link® Software Make sure your Brother machine is the drive letter for Windows®...

Quick Setup Guide - English
Page 9
The Software Installation screen automatically loads. The last step will appear. Viewing On-Line Documentation This manual explains only Quick Start procedures. Since the Multi-Function Link® manual is installed, click on the CD-ROM. 5 3 Click on the screen. Multi-Function Link® includes Visioneer® PaperPort® applications. 4 Follow the installation instructions: Follow the instructions on the "Install Multi-Function Link® Software" option. The Software Installation window will be...
The Software Installation screen automatically loads. The last step will appear. Viewing On-Line Documentation This manual explains only Quick Start procedures. Since the Multi-Function Link® manual is installed, click on the CD-ROM. 5 3 Click on the screen. Multi-Function Link® includes Visioneer® PaperPort® applications. 4 Follow the installation instructions: Follow the instructions on the "Install Multi-Function Link® Software" option. The Software Installation window will be...

Quick Setup Guide - English
Page 18
... image will appear: Brother Serial MFC Resolution Contrast 200 DPI STD 200 DPI FINE 400 DPI S.FINE Light Auto Dark Image Type Text Photo User Defaults Status: Ready Scan Cancel Set the following options based on your needs. However, the size of three resolutions, 200 DPI STD, 200 DPI FINE, or 400 DPI S.FINE. Try scanning at different resolutions to start scanning. Resolution You can choose one of the image file...
... image will appear: Brother Serial MFC Resolution Contrast 200 DPI STD 200 DPI FINE 400 DPI S.FINE Light Auto Dark Image Type Text Photo User Defaults Status: Ready Scan Cancel Set the following options based on your needs. However, the size of three resolutions, 200 DPI STD, 200 DPI FINE, or 400 DPI S.FINE. Try scanning at different resolutions to start scanning. Resolution You can choose one of the image file...

Quick Setup Guide - English
Page 19
... you 're scanning a photo or detailed picture with your Brother machine, run the PaperPort viewer program and then select the SCAN button on your Personal Computer while the document is printing. • To select Brother MFL II Printer as the image type. You can print a document from the File pull-down menu. Your MFC 1780 model prints at 200x400 dpi class printing. Windows® Printing Using Brother Machine as a Printer Your Brother machine can work on other...
... you 're scanning a photo or detailed picture with your Brother machine, run the PaperPort viewer program and then select the SCAN button on your Personal Computer while the document is printing. • To select Brother MFL II Printer as the image type. You can print a document from the File pull-down menu. Your MFC 1780 model prints at 200x400 dpi class printing. Windows® Printing Using Brother Machine as a Printer Your Brother machine can work on other...

Quick Setup Guide - English
Page 20
... you want to print. 2 Select Print File from the File menu to begin printing. Compilation and Publication Notice Under the supervision of this manual has been compiled and published, covering the latest product descriptions and specifications. Brother reserves the right to make changes without notice. Click on the Log Manager button, in the specifications and materials contained herein and shall not be displayed for any...
... you want to print. 2 Select Print File from the File menu to begin printing. Compilation and Publication Notice Under the supervision of this manual has been compiled and published, covering the latest product descriptions and specifications. Brother reserves the right to make changes without notice. Click on the Log Manager button, in the specifications and materials contained herein and shall not be displayed for any...

