Software Users Manual - English
Page 3
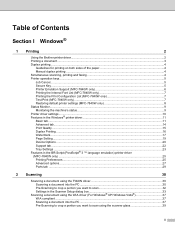
... Section I Windows® 1 Printing 2 Using the Brother printer driver...2 Printing a document...3 Duplex printing...4 Guidelines for printing on both sides of the paper 4 Manual duplex printing ...4 Simultaneous scanning, printing and faxing 4 Printer operation keys...5 Job Cancel...5 Secure Key ...5 Printer Emulation Support (MFC-7840W only 6 Printing the Internal Font List (MFC-7840W only 7 Printing the...
... Section I Windows® 1 Printing 2 Using the Brother printer driver...2 Printing a document...3 Duplex printing...4 Guidelines for printing on both sides of the paper 4 Manual duplex printing ...4 Simultaneous scanning, printing and faxing 4 Printer operation keys...5 Job Cancel...5 Secure Key ...5 Printer Emulation Support (MFC-7840W only 6 Printing the Internal Font List (MFC-7840W only 7 Printing the...
Software Users Manual - English
Page 4
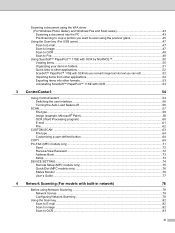
...Windows Photo Gallery and Windows Fax and Scan users 43 Scanning a document into the PC ...43 Pre-Scanning to crop a portion you want to scan using the scanner glass 45 Using the Scan key (For USB users)...47 Scan to E-mail ...47 Scan to Image ...47 Scan to OCR ...48 Scan to File...48 Using ScanSoft™...™ 11SE with OCR 53 3 ControlCenter3 54 Using ControlCenter3 ...54 Switching the user interface ...56 Turning the Auto Load feature off...56 SCAN...57 File type ...58 Image (example: Microsoft® Paint)...58 OCR (Word Processing program) ...60 E-mail ...61 File ...62 CUSTOM...
...Windows Photo Gallery and Windows Fax and Scan users 43 Scanning a document into the PC ...43 Pre-Scanning to crop a portion you want to scan using the scanner glass 45 Using the Scan key (For USB users)...47 Scan to E-mail ...47 Scan to Image ...47 Scan to OCR ...48 Scan to File...48 Using ScanSoft™...™ 11SE with OCR 53 3 ControlCenter3 54 Using ControlCenter3 ...54 Switching the user interface ...56 Turning the Auto Load feature off...56 SCAN...57 File type ...58 Image (example: Microsoft® Paint)...58 OCR (Word Processing program) ...60 E-mail ...61 File ...62 CUSTOM...
Software Users Manual - English
Page 5
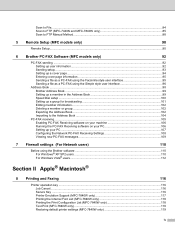
... FTP (MFC-7440N and MFC-7840W only 85 Scan to FTP Manual Method...88 5 Remote Setup (MFC models only) 90 Remote Setup...90 6 Brother PC-FAX Software (MFC models only) 92 PC-FAX sending ...92 Setting up user information...92 Sending setup...93 Setting up a cover page......; 8 Printing and Faxing 116 Printer operation key ...116 Job Cancel...116 Secure Key ...116 Printer Emulation Support (MFC-7840W only 117 Printing the Internal Font List (MFC-7840W only 118 Printing the Print Configuration List (MFC-7840W only 118 Test Print (MFC-7840W only)...118 Restoring default printer settings...
... FTP (MFC-7440N and MFC-7840W only 85 Scan to FTP Manual Method...88 5 Remote Setup (MFC models only) 90 Remote Setup...90 6 Brother PC-FAX Software (MFC models only) 92 PC-FAX sending ...92 Setting up user information...92 Sending setup...93 Setting up a cover page......; 8 Printing and Faxing 116 Printer operation key ...116 Job Cancel...116 Secure Key ...116 Printer Emulation Support (MFC-7840W only 117 Printing the Internal Font List (MFC-7840W only 118 Printing the Print Configuration List (MFC-7840W only 118 Test Print (MFC-7840W only)...118 Restoring default printer settings...
Software Users Manual - English
Page 6
... Addresses panel 147 9 Scanning 149 Scanning from a Macintosh® ...149 Scanning an image into your Macintosh 150 Pre-Scanning an image ...150 Settings in the Scanner window ...151 Using the Scan key (For USB cable users 154 Scan to E-mail ...154 Scan to Image ...155 Scan to OCR ...155 Scan to File...156 Using...Presto!® PageManager 157 NewSoft Technical Support ...157 10 ControlCenter2 160 Using ControlCenter2 ...160 Turning the AutoLoad feature off...161 SCAN...162 File types ...163 Image (example: Apple® Preview 163 OCR (word processing application 165 E-mail ...166 v
... Addresses panel 147 9 Scanning 149 Scanning from a Macintosh® ...149 Scanning an image into your Macintosh 150 Pre-Scanning an image ...150 Settings in the Scanner window ...151 Using the Scan key (For USB cable users 154 Scan to E-mail ...154 Scan to Image ...155 Scan to OCR ...155 Scan to File...156 Using...Presto!® PageManager 157 NewSoft Technical Support ...157 10 ControlCenter2 160 Using ControlCenter2 ...160 Turning the AutoLoad feature off...161 SCAN...162 File types ...163 Image (example: Apple® Preview 163 OCR (word processing application 165 E-mail ...166 v
Software Users Manual - English
Page 7
... models only)...178 Status Monitor ...178 11 Network Scanning 179 Before using Network Scanning ...179 Configuring network scanning ...179 Using the Scan key...181 Scan to E-mail ...181 Scan to Image ...181 Scan to OCR ...182 Scan to File...183 Scan to FTP (MFC-7440N and MFC-7840W only 183 Scan to FTP Manual Method...187 12 Remote Setup 189...
... models only)...178 Status Monitor ...178 11 Network Scanning 179 Before using Network Scanning ...179 Configuring network scanning ...179 Using the Scan key...181 Scan to E-mail ...181 Scan to Image ...181 Scan to OCR ...182 Scan to File...183 Scan to FTP (MFC-7440N and MFC-7840W only 183 Scan to FTP Manual Method...187 12 Remote Setup 189...
Software Users Manual - English
Page 8
Section I Windows® I Printing 2 Scanning 30 ControlCenter3 54 Network Scanning (For models with built-in network) 78 Remote Setup (MFC models only) 90 Brother PC-FAX Software (MFC models only) 92 Firewall settings (For Network users) 110
Section I Windows® I Printing 2 Scanning 30 ControlCenter3 54 Network Scanning (For models with built-in network) 78 Remote Setup (MFC models only) 90 Brother PC-FAX Software (MFC models only) 92 Firewall settings (For Network users) 110
Software Users Manual - English
Page 11
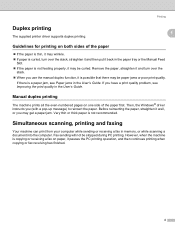
...not feeding properly, it pauses the PC printing operation, and then continues printing when copying or fax receiving has finished. 4 Guidelines for printing on one side of the paper 1 „ If the paper is thin, it may be curled. Very thin or thick paper is possible that there ... paper jams or poor print quality. Then, the Windows® driver instructs you have a print quality problem, see Paper jams in memory, or while scanning a document into the computer. Remove the paper, straighten it and turn over the stack. „ When you use the manual duplex function, it well...
...not feeding properly, it pauses the PC printing operation, and then continues printing when copying or fax receiving has finished. 4 Guidelines for printing on one side of the paper 1 „ If the paper is thin, it may be curled. Very thin or thick paper is possible that there ... paper jams or poor print quality. Then, the Windows® driver instructs you have a print quality problem, see Paper jams in memory, or while scanning a document into the computer. Remove the paper, straighten it and turn over the stack. „ When you use the manual duplex function, it well...
Software Users Manual - English
Page 37
... with OCR by NUANCE™ on page 30) and a Windows® Imaging Acquisition (WIA) driver (See Scanning a document using the TWAIN driver 2 The Brother MFL-Pro Suite software includes a TWAIN compliant scanner driver. You can either one of the two when you may vary when using other software applications that was installed during...
... with OCR by NUANCE™ on page 30) and a Windows® Imaging Acquisition (WIA) driver (See Scanning a document using the TWAIN driver 2 The Brother MFL-Pro Suite software includes a TWAIN compliant scanner driver. You can either one of the two when you may vary when using other software applications that was installed during...

Software Users Manual - English
Page 38
...; Document Size (6) 31 g Click Scan. The Scanner Setup dialog box appears:. Note • For Windows® XP/Windows Vista®: 2 Choose TW-Brother MFC-XXXX (TW-Brother DCP-XXXX) or TW-Brother MFC-XXXX LAN (TW-Brother DCP-XXXX LAN). • For other operating systems: Choose Brother MFC-XXXX (Brother DCP-XXXX) or Brother MFC-XXXX LAN (Brother DCP-XXXX LAN). (Where XXXX...
...; Document Size (6) 31 g Click Scan. The Scanner Setup dialog box appears:. Note • For Windows® XP/Windows Vista®: 2 Choose TW-Brother MFC-XXXX (TW-Brother DCP-XXXX) or TW-Brother MFC-XXXX LAN (TW-Brother DCP-XXXX LAN). • For other operating systems: Choose Brother MFC-XXXX (Brother DCP-XXXX) or Brother MFC-XXXX LAN (Brother DCP-XXXX LAN). (Where XXXX...

Software Users Manual - English
Page 39
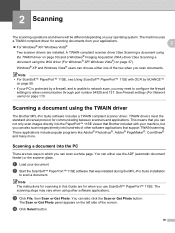
...the PaperPort™ 11SE window. This is finished, click Cancel to return to scan 2 You can adjust the scanning area further by using the PreScan button. a Follow the steps from a to scan the image. The whole image is scanned into the PC and appears in the Scanner Setup dialog box to g of ...the Scanner Setup dialog box. 1 32 When you can preview your image and crop unwanted portions before scanning by clicking the left mouse button 2 and dragging it. Note After you select a document size, you are satisfied with the preview, click the ...
...the PaperPort™ 11SE window. This is finished, click Cancel to return to scan 2 You can adjust the scanning area further by using the PreScan button. a Follow the steps from a to scan the image. The whole image is scanned into the PC and appears in the Scanner Setup dialog box to g of ...the Scanner Setup dialog box. 1 32 When you can preview your image and crop unwanted portions before scanning by clicking the left mouse button 2 and dragging it. Note After you select a document size, you are satisfied with the preview, click the ...
Software Users Manual - English
Page 40
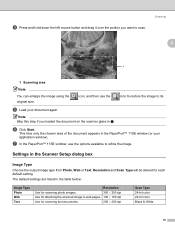
...in the Scanner Setup dialog box 2 Image Type 2 Choose the output image type from Photo, Web or Text. Resolution and Scan Type will be altered for scanning text documents. 200 × 200 dpi Scan Type 24-bit color 24-bit color Black & White 33 f Click Start. g In the PaperPort™ 11SE window, ... and hold down the left mouse button and drag it over the portion you loaded the document on the scanner glass in a. Scanning 2 1 1 Scanning area Note You can enlarge the image using the original size. icon, and then use the options available to web pages. 100 × 100 dpi...
...in the Scanner Setup dialog box 2 Image Type 2 Choose the output image type from Photo, Web or Text. Resolution and Scan Type will be altered for scanning text documents. 200 × 200 dpi Scan Type 24-bit color 24-bit color Black & White 33 f Click Start. g In the PaperPort™ 11SE window, ... and hold down the left mouse button and drag it over the portion you loaded the document on the scanner glass in a. Scanning 2 1 1 Scanning area Note You can enlarge the image using the original size. icon, and then use the options available to web pages. 100 × 100 dpi...

Software Users Manual - English
Page 41
...most accurate color, the image file will be about three times larger than a file created with 256 Color. Scanning Resolution 2 You can choose and the available colors. 2 Resolution 100 × 100 dpi 150 × 150... No No True Gray/24 bit color Yes Yes Yes Yes Yes Yes Yes Yes Yes Yes Yes Scan Type 2 „ Black & White Use for text or line art. „ Gray (Error Diffusion... photographic images or graphics. (Error Diffusion is more memory and transfer time, but produce a finer scanned image. Higher resolutions take more exact because it uses up to 256 shades of gray. „ 256...
...most accurate color, the image file will be about three times larger than a file created with 256 Color. Scanning Resolution 2 You can choose and the available colors. 2 Resolution 100 × 100 dpi 150 × 150... No No True Gray/24 bit color Yes Yes Yes Yes Yes Yes Yes Yes Yes Yes Yes Scan Type 2 „ Black & White Use for text or line art. „ Gray (Error Diffusion... photographic images or graphics. (Error Diffusion is more memory and transfer time, but produce a finer scanned image. Higher resolutions take more exact because it uses up to 256 shades of gray. „ 256...
Software Users Manual - English
Page 42
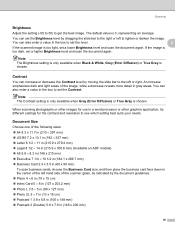
Scanning Brightness 2 Adjust the setting (-50 to 50) to see which setting best suits your needs. Document Size 2 Choose one of the following sizes: „ A4 8.3 x 11.7 in (210 × 297 mm) „ JIS B5 7.2 x 10.1 in (182 × 257 mm) „ Letter 8 1/2 × 11 ...a decrease reveals more detail in gray areas. You can set the Contrast. If the image is too dark, set a lower Brightness level and scan the document again. When scanning photographs or other images for use in (148 x 200 mm) 35 An increase emphasizes dark and light areas of the scanner glass, as...
Scanning Brightness 2 Adjust the setting (-50 to 50) to see which setting best suits your needs. Document Size 2 Choose one of the following sizes: „ A4 8.3 x 11.7 in (210 × 297 mm) „ JIS B5 7.2 x 10.1 in (182 × 257 mm) „ Letter 8 1/2 × 11 ...a decrease reveals more detail in gray areas. You can set the Contrast. If the image is too dark, set a lower Brightness level and scan the document again. When scanning photographs or other images for use in (148 x 200 mm) 35 An increase emphasizes dark and light areas of the scanner glass, as...

Software Users Manual - English
Page 43
... x 0.35 in to 8.5 x 14 in Bitmap format. „ Custom If you chose on the screen. • Width: shows the width of scanning area • Height: shows the height of scanning area • Data Size: shows the rough data size in or 8.9 x 8.9 mm to 215.9 x 355.6 mm 36 The size will be different...
... x 0.35 in to 8.5 x 14 in Bitmap format. „ Custom If you chose on the screen. • Width: shows the width of scanning area • Height: shows the height of scanning area • Data Size: shows the rough data size in or 8.9 x 8.9 mm to 215.9 x 355.6 mm 36 The size will be different...
Software Users Manual - English
Page 44
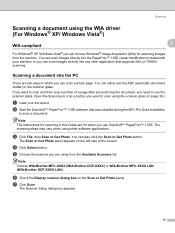
Note The instructions for scanning in which you can scan a whole page. d Click Select button. Scanning a document into any other software applications. You can either use the ADF (automatic document feeder) or the scanner glass. Note Choose WIA-Brother MFC-XXXX (WIA-Brother DCP-XXXX) or WIA-Brother MFC-XXXX LAN (WIA-Brother DCP-XXXX LAN). If you want to...
Note The instructions for scanning in which you can scan a whole page. d Click Select button. Scanning a document into any other software applications. You can either use the ADF (automatic document feeder) or the scanner glass. Note Choose WIA-Brother MFC-XXXX (WIA-Brother DCP-XXXX) or WIA-Brother MFC-XXXX LAN (WIA-Brother DCP-XXXX LAN). If you want to...

Software Users Manual - English
Page 45
k Choose the Paper size from the Paper source drop-down list (4). h Adjust the following settings, if needed, in the Scanner Setup dialog box: 1 Scanning 2 2 3 4 1 Paper source 2 Picture type 3 Adjust the quality of the scanned picture (3). j Choose the picture type (2). Click OK after you need advanced settings, click Adjust the quality of the scanned picture 4 Paper size i Choose Document Feeder from the drop-down list (1). l If you choose a setting. 38 You can choose Brightness, Contrast, Resolution and Picture type from Advanced Properties.
k Choose the Paper size from the Paper source drop-down list (4). h Adjust the following settings, if needed, in the Scanner Setup dialog box: 1 Scanning 2 2 3 4 1 Paper source 2 Picture type 3 Adjust the quality of the scanned picture (3). j Choose the picture type (2). Click OK after you need advanced settings, click Adjust the quality of the scanned picture 4 Paper size i Choose Document Feeder from the drop-down list (1). l If you choose a setting. 38 You can choose Brightness, Contrast, Resolution and Picture type from Advanced Properties.
Software Users Manual - English
Page 46
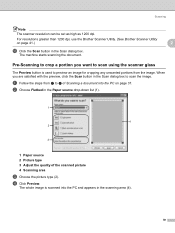
... crop a portion you are satisfied with the preview, click the Scan button in the Scan dialog box. For resolutions greater than 1200 dpi, use the Brother Scanner Utility. (See Brother Scanner Utility on page 37. When you want to g of the scanned picture 4 Scanning area c Choose the picture type (2). The whole image is used to preview...
... crop a portion you are satisfied with the preview, click the Scan button in the Scan dialog box. For resolutions greater than 1200 dpi, use the Brother Scanner Utility. (See Brother Scanner Utility on page 37. When you want to g of the scanned picture 4 Scanning area c Choose the picture type (2). The whole image is used to preview...

Software Users Manual - English
Page 47
Scanning 2 f If you need advanced settings, click Adjust the quality of the document appears in the Scan dialog box. You can choose Brightness, Contrast, Resolution and Picture type from Advanced Properties. e Press and hold down the left mouse button and drag it over the portion you choose a setting. Click OK after you want to scan. The machine starts scanning the document. This time only the chosen area of the scanned picture (3). g Click the Scan button in the PaperPort™ 11SE window (or your application window). 40
Scanning 2 f If you need advanced settings, click Adjust the quality of the document appears in the Scan dialog box. You can choose Brightness, Contrast, Resolution and Picture type from Advanced Properties. e Press and hold down the left mouse button and drag it over the portion you choose a setting. Click OK after you want to scan. The machine starts scanning the document. This time only the chosen area of the scanned picture (3). g Click the Scan button in the PaperPort™ 11SE window (or your application window). 40
Software Users Manual - English
Page 48
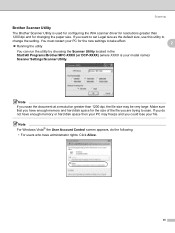
...take effect. 2 „ Running the utility You can run the utility by choosing the Scanner Utility located in the Start/All Programs/Brother/MFC-XXXX (or DCP-XXXX) (where XXXX is used for configuring the WIA scanner driver for resolutions greater than 1200 dpi, the file size may freeze and...Click Allow. 41 If you do the following. • For users who have enough memory and hard disk space for changing the paper size. Scanning Brother Scanner Utility 2 The Brother Scanner Utility is your model name)/ Scanner Settings/Scanner Utility. If you are trying to change the setting.
...take effect. 2 „ Running the utility You can run the utility by choosing the Scanner Utility located in the Start/All Programs/Brother/MFC-XXXX (or DCP-XXXX) (where XXXX is used for configuring the WIA scanner driver for resolutions greater than 1200 dpi, the file size may freeze and...Click Allow. 41 If you do the following. • For users who have enough memory and hard disk space for changing the paper size. Scanning Brother Scanner Utility 2 The Brother Scanner Utility is your model name)/ Scanner Settings/Scanner Utility. If you are trying to change the setting.

Software Users Manual - English
Page 49
Scanning • For users who do not have administrator rights: Enter the administrator password and click OK. 2 42
Scanning • For users who do not have administrator rights: Enter the administrator password and click OK. 2 42

