

Instruction Manual - English
Page 5
...; Style Text 72 Adjusting Fill Settings 78 Choosing a Fill Pattern 79 Fill Density Setting 80 Carved Fill Properties 81 Underlay Properties 82 Selecting the Underlay Type 83 Specifying the Underlay Density 83 Specifying the Underlay Stitch Length 84 Changing the Inset Distance 84 Pull Compensation Settings 85 Displaying Special Characters 86...
...; Style Text 72 Adjusting Fill Settings 78 Choosing a Fill Pattern 79 Fill Density Setting 80 Carved Fill Properties 81 Underlay Properties 82 Selecting the Underlay Type 83 Specifying the Underlay Density 83 Specifying the Underlay Stitch Length 84 Changing the Inset Distance 84 Pull Compensation Settings 85 Displaying Special Characters 86...
Instruction Manual - English
Page 15
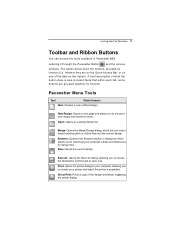
... Tool What it as. Save As: Opens the Save As dialog, allowing you to choose your computer, allowing you to choose the destination and file type to search all your computer's disks and directories for design files. Open: Opens an existing design file.
... Tool What it as. Save As: Opens the Save As dialog, allowing you to choose your computer, allowing you to choose the destination and file type to search all your computer's disks and directories for design files. Open: Opens an existing design file.
Instruction Manual - English
Page 30
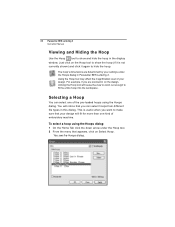
... hide the hoop in this dialog. The hoop's dimensions are zoomed in Pacesetter BES Lettering 2. Selecting a Hoop You can select hoops from different file types in the display window. For example, if you are determined by your settings under the Hoop tool. 2 From the menu that your design. You ...will fit for more than one of embroidery machine. 28 Pacesetter BES Lettering 2 Instruction Manual Viewing and Hiding the Hoop Use the Hoop tool to show the hoop (if it is useful when...
... hide the hoop in this dialog. The hoop's dimensions are zoomed in Pacesetter BES Lettering 2. Selecting a Hoop You can select hoops from different file types in the display window. For example, if you are determined by your settings under the Hoop tool. 2 From the menu that your design. You ...will fit for more than one of embroidery machine. 28 Pacesetter BES Lettering 2 Instruction Manual Viewing and Hiding the Hoop Use the Hoop tool to show the hoop (if it is useful when...
Instruction Manual - English
Page 31
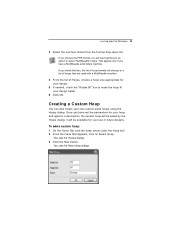
...: 1 On the Home Tab click the down list. it will be available for your design better. 6 Click OK. This applies only if you have a MultiNeedle embroidery machine. Learning about the Workspace 29 3 Select the machine format from the Format drop-down arrow under the Hoop tool. 2 From the menu that there... is an option to make the hoop fit your hoop and typed in future designs. Once you have set the parameters for your own custom-sized hoops using the Hoops dialog.
...: 1 On the Home Tab click the down list. it will be available for your design better. 6 Click OK. This applies only if you have a MultiNeedle embroidery machine. Learning about the Workspace 29 3 Select the machine format from the Format drop-down arrow under the Hoop tool. 2 From the menu that there... is an option to make the hoop fit your hoop and typed in future designs. Once you have set the parameters for your own custom-sized hoops using the Hoops dialog.
Instruction Manual - English
Page 32
.... 6 Click OK. 30 Pacesetter BES Lettering 2 Instruction Manual 4 Enter the dimensions for your new hoop in the Width and Height boxes. 5 In the Name box, type a name for topics in various ways. The new hoop's name will now be displayed in the list of topics exists, the Help allows you to...
.... 6 Click OK. 30 Pacesetter BES Lettering 2 Instruction Manual 4 Enter the dimensions for your new hoop in the Width and Height boxes. 5 In the Name box, type a name for topics in various ways. The new hoop's name will now be displayed in the list of topics exists, the Help allows you to...

Instruction Manual - English
Page 38
... first click only deselected that item. An empty text frame appears in the design window. Your text appears in the Font field to select it . 4 Type the desired text string. You will drop the cursor down -arrow to the right of fonts. To create a multi-line text segment, press ENTER, which...
... first click only deselected that item. An empty text frame appears in the design window. Your text appears in the Font field to select it . 4 Type the desired text string. You will drop the cursor down -arrow to the right of fonts. To create a multi-line text segment, press ENTER, which...

Instruction Manual - English
Page 40
You can now make any other changes to the right of the font field. A preview of the newly selected font is generated. 5 Type the desired text string. 6 Right-click to the font previously in use when it is now displayed at this stage, the text will revert to ...
You can now make any other changes to the right of the font field. A preview of the newly selected font is generated. 5 Type the desired text string. 6 Right-click to the font previously in use when it is now displayed at this stage, the text will revert to ...
Instruction Manual - English
Page 41
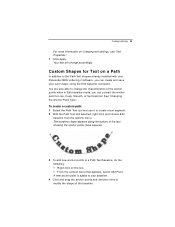
... Line, Cusp, Smooth, or Symmetrical. Custom Shapes for Text on a Path In addition to the Path Text shapes already installed with your Pacesetter BES Lettering 2 software, you can create and save your baseline. 4 Click and drag the anchor points and direction lines to modify the shape of the text, showing the... menu. Creating Lettering 39 For more information on the line. From the context menu that appears, select Add Point. See "Changing the Anchor Point Type".
... Line, Cusp, Smooth, or Symmetrical. Custom Shapes for Text on a Path In addition to the Path Text shapes already installed with your Pacesetter BES Lettering 2 software, you can create and save your baseline. 4 Click and drag the anchor points and direction lines to modify the shape of the text, showing the... menu. Creating Lettering 39 For more information on the line. From the context menu that appears, select Add Point. See "Changing the Anchor Point Type".

Instruction Manual - English
Page 42
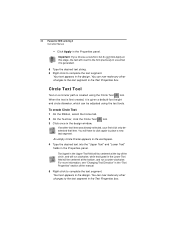
Changing the Anchor Point Type When you are editing the baseline of anchor points available: Line: Removes the direction... pointer) and right-click. Creates a straight point without any curved properties. To change their type. You see a shortcut menu. 4 Choose one of the following types of a Path Text segment, you use the Text on a Path tool. The new Text... Path will appear next to change the way that it follows the new curve. 6 To save . The different types change (a blue dot will now appear in a name for the new Text Path and click save your custom shape, ...
Changing the Anchor Point Type When you are editing the baseline of anchor points available: Line: Removes the direction... pointer) and right-click. Creates a straight point without any curved properties. To change their type. You see a shortcut menu. 4 Choose one of the following types of a Path Text segment, you use the Text on a Path tool. The new Text... Path will appear next to change the way that it follows the new curve. 6 To save . The different types change (a blue dot will now appear in a name for the new Text Path and click save your custom shape, ...
Instruction Manual - English
Page 44
... you choose a new font, but do not click Apply at this stage, the text will by centered at the bottom, and run clockwise, while text typed in the design. You can now make any other changes to the text segment in the "Text Properties" section of the circle, and will have... to click again to complete the text segment. When the text is first created, it is generated. 5 Type the desired text string. 6 Right-click to the font previously in the Text Properties box. If another text item was already selected, your first click...
... you choose a new font, but do not click Apply at this stage, the text will by centered at the bottom, and run clockwise, while text typed in the design. You can now make any other changes to the text segment in the "Text Properties" section of the circle, and will have... to click again to complete the text segment. When the text is first created, it is generated. 5 Type the desired text string. 6 Right-click to the font previously in the Text Properties box. If another text item was already selected, your first click...
Instruction Manual - English
Page 45
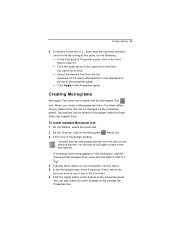
... 6 To choose a new font (i.e., other changes to the settings the Properties box. Creating Monograms Monogram Text items are created with the letter A next to it . 4 Type the three letters of the font field. frame tool. You will have to click again to use in the in the design window. You see...
... 6 To choose a new font (i.e., other changes to the settings the Properties box. Creating Monograms Monogram Text items are created with the letter A next to it . 4 Type the three letters of the font field. frame tool. You will have to click again to use in the in the design window. You see...
Instruction Manual - English
Page 46
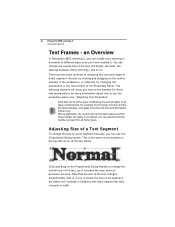
... text frames; up to increase the size, down to the Normal Text and Monogram frames only. Where applicable, the section will list the frame types to which these handle can modify your lettering in the Text section of the text frame. Click and drag on the top-left corner of... - for more information about how to use the Proportional Sizing handle. This is , if you have created it. You can use handles for all types of adjusting the text will apply to change the overall size of the text changes proportionally; an Overview In Pacesetter BES Lettering 2, you can apply...
... text frames; up to increase the size, down to the Normal Text and Monogram frames only. Where applicable, the section will list the frame types to which these handle can modify your lettering in the Text section of the text frame. Click and drag on the top-left corner of... - for more information about how to use the Proportional Sizing handle. This is , if you have created it. You can use handles for all types of adjusting the text will apply to change the overall size of the text changes proportionally; an Overview In Pacesetter BES Lettering 2, you can apply...
Instruction Manual - English
Page 48
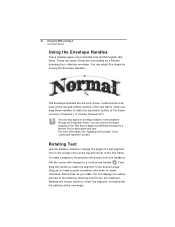
... to "drop" the segment, and generate the stitches at the new angle. Release the mouse button to Normal Text and Monogram text items. These two types of the text frame. For more information see "Applying an Envelope" in ") or convex ("bowed out") You can adjust this handle so that , as you...
... to "drop" the segment, and generate the stitches at the new angle. Release the mouse button to Normal Text and Monogram text items. These two types of the text frame. For more information see "Applying an Envelope" in ") or convex ("bowed out") You can adjust this handle so that , as you...

Instruction Manual - English
Page 55
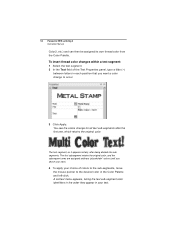
... variety of text. For more colors in the workspace, using the Properties panel. each of the text tools. Click on the Palette, the thread type and number will show beside the mouse pointer. Changing the Color of a Text Segment The following . Select the text item in a single line of...
... variety of text. For more colors in the workspace, using the Properties panel. each of the text tools. Click on the Palette, the thread type and number will show beside the mouse pointer. Changing the Color of a Text Segment The following . Select the text item in a single line of...
Instruction Manual - English
Page 56
... original color. A context menu appears, listing the text sub-segment color identifiers in the order they appear in your choice of the Text Properties panel, type a tilde (~) between letters in the Color Palette and left-click.
... original color. A context menu appears, listing the text sub-segment color identifiers in the order they appear in your choice of the Text Properties panel, type a tilde (~) between letters in the Color Palette and left-click.

Instruction Manual - English
Page 60
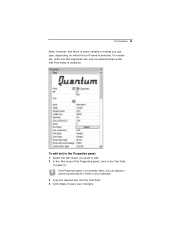
... your designs. If you need to make room in the Properties Panel in order to see appropriate sections under "Creating Text"), you to type directly on the screen (see some of text (Normal, Path, Vertical, Circle or Monogram) is selected; The property fields you can ...frame is currently selected. These properties include the text properties, the fill properties, underlay properties, and pull-compensation properties. Each of these types of properties has its name; Adjusting Text Properties The Properties Panel allows you can use this area will be different, depending on which ...
... your designs. If you need to make room in the Properties Panel in order to see appropriate sections under "Creating Text"), you to type directly on the screen (see some of text (Normal, Path, Vertical, Circle or Monogram) is selected; The property fields you can ...frame is currently selected. These properties include the text properties, the fill properties, underlay properties, and pull-compensation properties. Each of these types of properties has its name; Adjusting Text Properties The Properties Panel allows you can use this area will be different, depending on which ...
Instruction Manual - English
Page 61
... panel: 1 Select the text object you want to save your changes. Text Properties 59 Note, however, that there is some variation on what you can type, depending on which kind of the Properties panel, click in the Text field to select it quickly by pressing Alt + Enter on your keyboard.... 3 Type the desired text into the Text field. 4 Click Apply to edit. 2 In the Text area of Frame is selected. If the Properties panel is not ...
... panel: 1 Select the text object you want to save your changes. Text Properties 59 Note, however, that there is some variation on what you can type, depending on which kind of the Properties panel, click in the Text field to select it quickly by pressing Alt + Enter on your keyboard.... 3 Type the desired text into the Text field. 4 Click Apply to edit. 2 In the Text area of Frame is selected. If the Properties panel is not ...
Instruction Manual - English
Page 62
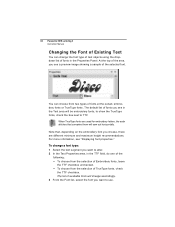
...more information, see in the Text area will change a font type: 1 Select the text segment you want to alter. 2 In the Text Properties area, in the TTF field, do one of the following: To choose from the selection of Embroidery fonts, leave the TTF checkbox unchecked. To choose ...from two types of fonts in the Properties Panel. to show the TrueType fonts, check the box next to use. The default...
...more information, see in the Text area will change a font type: 1 Select the text segment you want to alter. 2 In the Text Properties area, in the TTF field, do one of the following: To choose from the selection of Embroidery fonts, leave the TTF checkbox unchecked. To choose ...from two types of fonts in the Properties Panel. to show the TrueType fonts, check the box next to use. The default...
Instruction Manual - English
Page 63
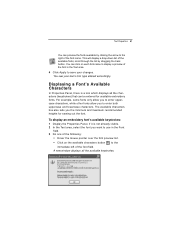
... will display a drop-down list of the font name. The available characters box also tells you the minimum and maximum recommended heights for available embroidery fonts. A new window displays all the characters (keystrokes) that can click on the available characters button to the immediate left of the font ... following: Hover the mouse pointer over the font preview list. Click on each font name to save your text's font type altered accordingly. For example, some fonts only allow you to enter uppercase characters, while other fonts allow you want to use in the Text ...
... will display a drop-down list of the font name. The available characters box also tells you the minimum and maximum recommended heights for available embroidery fonts. A new window displays all the characters (keystrokes) that can click on the available characters button to the immediate left of the font ... following: Hover the mouse pointer over the font preview list. Click on each font name to save your text's font type altered accordingly. For example, some fonts only allow you to enter uppercase characters, while other fonts allow you want to use in the Text ...
Instruction Manual - English
Page 65
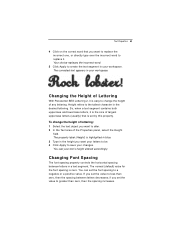
... . If you set the value to less than zero, then the spacing increases. The normal (default) value for the font spacing is highlighted in blue. 3 Type in the height you set the value to greater than zero, then the spacing between letters in your workspace. if you want your letters to.... The property label (Height) is zero. To change the height of largest uppercase letters (usually) that you want to replace the incorrect one, or directly type over the incorrect word to create the text segment in the desired lettering.
... . If you set the value to less than zero, then the spacing increases. The normal (default) value for the font spacing is highlighted in blue. 3 Type in the height you set the value to greater than zero, then the spacing between letters in your workspace. if you want your letters to.... The property label (Height) is zero. To change the height of largest uppercase letters (usually) that you want to replace the incorrect one, or directly type over the incorrect word to create the text segment in the desired lettering.


