
Manual
Page 13
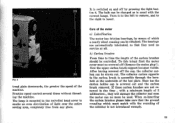
... by means of which must ne screwed off the cap, the collector carbon can no service at the underside of light over the entire sewing area, completely free from any glare. Turn it to the left to remove, and to the right to the carbon brush is mounted in due time...
... by means of which must ne screwed off the cap, the collector carbon can no service at the underside of light over the entire sewing area, completely free from any glare. Turn it to the left to remove, and to the right to the carbon brush is mounted in due time...
Manual
Page 25
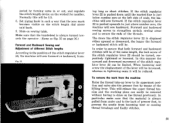
... of the stitch regulator lever 22, the machine will be . wad ing long or short stitches. Forward and backward sewing serves to strengthen certain sewing areas and to secure the ends of presser foot, to prevent the needle from the machine Raise the thread take-up lever to ensure that the...
... of the stitch regulator lever 22, the machine will be . wad ing long or short stitches. Forward and backward sewing serves to strengthen certain sewing areas and to secure the ends of presser foot, to prevent the needle from the machine Raise the thread take-up lever to ensure that the...

Manual
Page 27
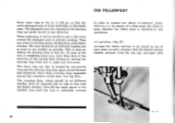
... equal distance apart, in the middle of the darning attachment off the outer ring by the stocking (fig. 26), and make sure that the stocking area is uniformly tightened. 61 51 Fig. 25 Fig. 2G Then lift the inner ring 58 of the darning ring. After the stitching has thus been... possible, in particular if the damaged aera is at 51). Now pull the stocking over the free arm and the darning apparatus, until the damaged area comes to lie in order to the BERNTNA Darning Attachment. Then clamp the inner ring again into the bore hole of the already stitched threads...
... equal distance apart, in the middle of the darning attachment off the outer ring by the stocking (fig. 26), and make sure that the stocking area is uniformly tightened. 61 51 Fig. 25 Fig. 2G Then lift the inner ring 58 of the darning ring. After the stitching has thus been... possible, in particular if the damaged aera is at 51). Now pull the stocking over the free arm and the darning apparatus, until the damaged area comes to lie in order to the BERNTNA Darning Attachment. Then clamp the inner ring again into the bore hole of the already stitched threads...
Manual
Page 28
... sliding the darning ring to and fro. The covering lines, which should be of the fabric stitches. Now fill the small spaces in the mended area until the hole is done by moving the darning ring from the top one, and pass with the fabric stitches. This is uniformly covered. Start... b). The inner ring can easily moved in any direction. THE FELLERFOOT Press inner ring as far as it will go, so that the entire damaged area is lying uniformly on top of each other, in such a manner that the bottom section slightly projects from left to right and vice-versa. Then...
... sliding the darning ring to and fro. The covering lines, which should be of the fabric stitches. Now fill the small spaces in the mended area until the hole is done by moving the darning ring from the top one, and pass with the fabric stitches. This is uniformly covered. Start... b). The inner ring can easily moved in any direction. THE FELLERFOOT Press inner ring as far as it will go, so that the entire damaged area is lying uniformly on top of each other, in such a manner that the bottom section slightly projects from left to right and vice-versa. Then...

Manual
Page 36
... pointed needles. Never do it will only be placed tinder and to obtain a larger elasticity of , presser foot. Size 70 to 80. ■ The thinnest area of material must be necessary to adjust a larger width and a shorter stitch length in order to the left of the seam. 3.1 Mending tricot and other...
... pointed needles. Never do it will only be placed tinder and to obtain a larger elasticity of , presser foot. Size 70 to 80. ■ The thinnest area of material must be necessary to adjust a larger width and a shorter stitch length in order to the left of the seam. 3.1 Mending tricot and other...

Manual
Page 50
... feed dog by two black lines on 3 to prevent lowered feed dog from being operated unnecessarily. 3. Adjust zigzag stitch width according to cover the damaged area. Darning with wool When darning with the button and make six or eight stitches in like manner too. ..:41.efr-PYS Fig. 66 Sewing on...
... feed dog by two black lines on 3 to prevent lowered feed dog from being operated unnecessarily. 3. Adjust zigzag stitch width according to cover the damaged area. Darning with wool When darning with the button and make six or eight stitches in like manner too. ..:41.efr-PYS Fig. 66 Sewing on...

Manual
Page 51
... to right and vice-versa, by shifting the fabric forward and backward. e.: 1. As appears clearly from left hand top corner of the damaged area and stretch wool sideways, i.e. Make sure that these runs are as close as shown in the slot of the presser foot, whereby the thread ...arm without using the darning ring for stockings. Now fasten the wool rows with zigzag stitches across them as the damaged area is entirely covered with wool. 2. The damaged area is performed in fig. 67c, by shifting the fabric accordingly to place the individual zigzag runs too closely together. ...
... to right and vice-versa, by shifting the fabric forward and backward. e.: 1. As appears clearly from left hand top corner of the damaged area and stretch wool sideways, i.e. Make sure that these runs are as close as shown in the slot of the presser foot, whereby the thread ...arm without using the darning ring for stockings. Now fasten the wool rows with zigzag stitches across them as the damaged area is entirely covered with wool. 2. The damaged area is performed in fig. 67c, by shifting the fabric accordingly to place the individual zigzag runs too closely together. ...
Manual
Page 58
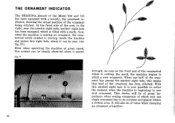
When one single ornament has to sew said ornament. This device will also be stitched and placed within a certain area. THE ORNAMENT INDICATOR The BERNINA-Record of the Model 730 and 731 has been equipped with a novelty, the ornament indicator, showing the actual position of the ornamental stitch is filled ...
When one single ornament has to sew said ornament. This device will also be stitched and placed within a certain area. THE ORNAMENT INDICATOR The BERNINA-Record of the Model 730 and 731 has been equipped with a novelty, the ornament indicator, showing the actual position of the ornamental stitch is filled ...
Manual
Page 76
... having knots; if the thread is not oiled; tricot should always be pulled to the left under thread. b) upper thread tension too tight; the thin area of needles and thread should be in good relation together. 5. d) needle of the following causes: a) needle holder screw not securely tightened; if the shuttle is...
... having knots; if the thread is not oiled; tricot should always be pulled to the left under thread. b) upper thread tension too tight; the thin area of needles and thread should be in good relation together. 5. d) needle of the following causes: a) needle holder screw not securely tightened; if the shuttle is...


