
Operation Manual
Page 1
NAV 101 Installation and Operation Manual 38
NAV 101 Installation and Operation Manual 38

Operation Manual
Page 2
... the instructions in this owner's manual clear and easy to technical change Introduction...40 Safety Information 43 Installation ...45 Wiring Diagramm 47 Getting Started ...48 Main Features ...49 Choosing and Finding Locations 52 Navigating ...61 Planning a Route 63 Managing your new Audiovox NAV101 navigation system for choosing a Audiovox product. If you take a few minutes to look through it, you'll learn how to use...
... the instructions in this owner's manual clear and easy to technical change Introduction...40 Safety Information 43 Installation ...45 Wiring Diagramm 47 Getting Started ...48 Main Features ...49 Choosing and Finding Locations 52 Navigating ...61 Planning a Route 63 Managing your new Audiovox NAV101 navigation system for choosing a Audiovox product. If you take a few minutes to look through it, you'll learn how to use...

Operation Manual
Page 3
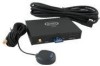
.... Received from Head Unit (11 ~ 16VDC, Negative Ground) 40 Subject to help you get the most out of your new Audiovox NAV101 navigation system. You can navigate and plan your route with an easy-to-use and intuitive interface, plan your trip to your trip. This manual is designed to technical change Internal SD Card Slot (2GB Card Included w/ Map Data pre installed...
.... Received from Head Unit (11 ~ 16VDC, Negative Ground) 40 Subject to help you get the most out of your new Audiovox NAV101 navigation system. You can navigate and plan your route with an easy-to-use and intuitive interface, plan your trip to your trip. This manual is designed to technical change Internal SD Card Slot (2GB Card Included w/ Map Data pre installed...
Operation Manual
Page 4
... SmartBus cable to the radio and NAV101) • DVD with backup software for map data and navigation About GPS and GNSS The NAV101 is a vehicle GPS (Global Positioning Satellite)-based navigation device which utilizes digital map data to guide you from your selected location A to location B, using location information obtained from the satellites and the time they were recorded, the receiver calculates how far away each satellite is displayed as...
... SmartBus cable to the radio and NAV101) • DVD with backup software for map data and navigation About GPS and GNSS The NAV101 is a vehicle GPS (Global Positioning Satellite)-based navigation device which utilizes digital map data to guide you from your selected location A to location B, using location information obtained from the satellites and the time they were recorded, the receiver calculates how far away each satellite is displayed as...
Operation Manual
Page 5
...update If you are in need of navigation satellites will pass through clouds, glass, plastic, and other lightweight materials, satellite-navigation receivers will not work underground or in future, then please contact: a) Your local dealer or b) Your distributor or c) Our technical service department: www.audiovox.de . 42 Subject to technical change..., Slovenia, Spain, Sweden, Switzerland, The Netherlands, Turkey, United Kingdom (incl. 7 PIN ZIP Code) , Vatican city state (holy see). Please keep in mind that although the radio signals of new or updated map data in some enclosed spaces.
...update If you are in need of navigation satellites will pass through clouds, glass, plastic, and other lightweight materials, satellite-navigation receivers will not work underground or in future, then please contact: a) Your local dealer or b) Your distributor or c) Our technical service department: www.audiovox.de . 42 Subject to technical change..., Slovenia, Spain, Sweden, Switzerland, The Netherlands, Turkey, United Kingdom (incl. 7 PIN ZIP Code) , Vatican city state (holy see). Please keep in mind that although the radio signals of new or updated map data in some enclosed spaces.
Operation Manual
Page 6
... others: • The driver should operate the device while the vehicle is not a substitute for attentiveness and good judgement. d. g. j. b. Special events; 43 Subject to technical change c. Population density; Pavement characteristics or conditions; Availability or proximity of law enforcement, emergency rescue, medical, or other limits; SAFETY INFORMATION When the Audiovox NAV101 is first turned on, the following message...
... others: • The driver should operate the device while the vehicle is not a substitute for attentiveness and good judgement. d. g. j. b. Special events; 43 Subject to technical change c. Population density; Pavement characteristics or conditions; Availability or proximity of law enforcement, emergency rescue, medical, or other limits; SAFETY INFORMATION When the Audiovox NAV101 is first turned on, the following message...

Operation Manual
Page 7
in an emergency. • Laws in some states prohibit wearing stereo headphones or may change Traffic congestion. • While every attempt is accurate, roadways, points of a navigation device while operating a motor vehicle. l. Please contact your state's Department of Motor Vehicles for information. 44 Subject to ensure that the database is made to technical change over time. • Do not use or placement of interest, and business and service locations may prohibit use the NAV101 to navigate to a police station, hospital, etc.
in an emergency. • Laws in some states prohibit wearing stereo headphones or may change Traffic congestion. • While every attempt is accurate, roadways, points of a navigation device while operating a motor vehicle. l. Please contact your state's Department of Motor Vehicles for information. 44 Subject to ensure that the database is made to technical change over time. • Do not use or placement of interest, and business and service locations may prohibit use the NAV101 to navigate to a police station, hospital, etc.
Operation Manual
Page 8
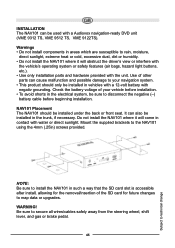
... not install the NAV101 where it will obstruct the driver's view or interfere with the vehicle's operating system or safety features (air bags, hazard light buttons, etc.). • Use only installation parts and hardware provided with water or direct sunlight. Do not install the NAV101 where it will come in areas which are susceptible to your vehicle before beginning installation. Be sure to secure all wires/cables...
... not install the NAV101 where it will obstruct the driver's view or interfere with the vehicle's operating system or safety features (air bags, hazard light buttons, etc.). • Use only installation parts and hardware provided with water or direct sunlight. Do not install the NAV101 where it will come in areas which are susceptible to your vehicle before beginning installation. Be sure to secure all wires/cables...
Operation Manual
Page 11
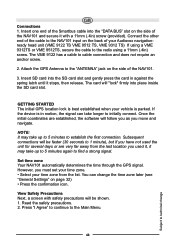
... to initially connect. Attach the GPS Antenna to the radio using a 11mm (.4in) screw. If the device is parked. View Safety Precautions Next, a screen with a 11mm (.4in) screw (provided). Insert one end of the NAV101 and secure it stops, then release. Set time zone Your NAV101 automatically determines the time through the GPS signal. The VME 9122 has a cable to technical change the time zone...
... to initially connect. Attach the GPS Antenna to the radio using a 11mm (.4in) screw. If the device is parked. View Safety Precautions Next, a screen with a 11mm (.4in) screw (provided). Insert one end of the NAV101 and secure it stops, then release. Set time zone Your NAV101 automatically determines the time through the GPS signal. The VME 9122 has a cable to technical change the time zone...
Operation Manual
Page 12
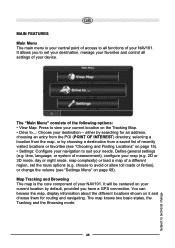
... access to all settings of your device. The "Main Menu" consists of your NAV101. time, language, or system of measurement), configure your map (e.g. 2D or 3D mode, day or night mode, map complexity) or load a map of a different region, set your destination, manage your favorites and control all functions of your NAV101. Define general settings (e.g. It allows you have a GPS connection. The map knows...
... access to all settings of your device. The "Main Menu" consists of your NAV101. time, language, or system of measurement), configure your map (e.g. 2D or 3D mode, day or night mode, map complexity) or load a map of a different region, set your destination, manage your favorites and control all functions of your NAV101. Define general settings (e.g. It allows you have a GPS connection. The map knows...

Operation Manual
Page 14
... 51. 51 Navigation Screen The navigation screen displays your route (in the bottom left hand corner) you may adjust the orientation. • If you will hear a voice command at the appropriate time. The red arrow will appear, enabling smooth zooming. • With the compass icon (in blue) and your current position. Next Maneuver Next Turn/Junction/Exit Number Distance to...
... 51. 51 Navigation Screen The navigation screen displays your route (in the bottom left hand corner) you may adjust the orientation. • If you will hear a voice command at the appropriate time. The red arrow will appear, enabling smooth zooming. • With the compass icon (in blue) and your current position. Next Maneuver Next Turn/Junction/Exit Number Distance to...

Operation Manual
Page 17
... to access the "Enter..." c. If the Number you entered. Street will automatically return to the "Find Address" screen. 6. Press the MENU button to view the following screen: • To navigate to the location, select Navigate. • To use the location for destination." Select a Street. Press the OK button to technical change a. screen. Press the "Street" data field to access the "Enter..." d. Press the "No." Press the...
... to access the "Enter..." c. If the Number you entered. Street will automatically return to the "Find Address" screen. 6. Press the MENU button to view the following screen: • To navigate to the location, select Navigate. • To use the location for destination." Select a Street. Press the OK button to technical change a. screen. Press the "Street" data field to access the "Enter..." d. Press the "No." Press the...

Operation Manual
Page 18
...button to set your current location, you to technical change Browse POIs 1. The "POI Search" window will be near your current position (the default) or at any other location. Although the text in a database of millions of POIs. Searching for the POI search. From the main menu, press POI Search. These places can be displayed...: 2. box shows your current location for the POI search or enter a new location. 55 Subject to quickly find points of interest, like gas stations and restaurants, in the...
...button to set your current location, you to technical change Browse POIs 1. The "POI Search" window will be near your current position (the default) or at any other location. Although the text in a database of millions of POIs. Searching for the POI search. From the main menu, press POI Search. These places can be displayed...: 2. box shows your current location for the POI search or enter a new location. 55 Subject to quickly find points of interest, like gas stations and restaurants, in the...

Operation Manual
Page 22
... "Recents" list. (Use the scroll bar on the right side of the screen to see all of the map area to view location information in the previous sections. 59 Subject to .... 2. From the "Main Menu", select Drive to technical change Continue navigation as instructed in a pop-up box. 3. menu, select Recents. Point the cursor at any part of the choices.) A screen with navigation options appears...
... "Recents" list. (Use the scroll bar on the right side of the screen to see all of the map area to view location information in the previous sections. 59 Subject to .... 2. From the "Main Menu", select Drive to technical change Continue navigation as instructed in a pop-up box. 3. menu, select Recents. Point the cursor at any part of the choices.) A screen with navigation options appears...

Operation Manual
Page 23
...of the list Recent addresses can not be displayed: 3. The "Home and Work", "Favorites" or "Trips" screen will be deleted manually. From the "Main Menu", select Drive to select it and display available navigation options. 5. Press a bookmarked location to .... 2. NOTE: The "Recents" ... following Address Book categories: Home and Work, Favorites, Trips. menu, select My Address Book. The "My Address Book" screen will appear, depending on your Address Book 1. Continue navigation as instructed in the previous sections. 60 Subject to ..." From the "Drive to technical change
...of the list Recent addresses can not be displayed: 3. The "Home and Work", "Favorites" or "Trips" screen will be deleted manually. From the "Main Menu", select Drive to select it and display available navigation options. 5. Press a bookmarked location to .... 2. NOTE: The "Recents" ... following Address Book categories: Home and Work, Favorites, Trips. menu, select My Address Book. The "My Address Book" screen will appear, depending on your Address Book 1. Continue navigation as instructed in the previous sections. 60 Subject to ..." From the "Drive to technical change
Operation Manual
Page 24
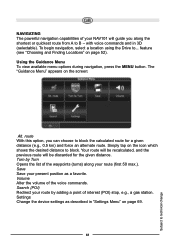
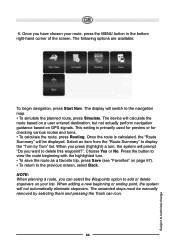
.... To begin navigation, select a location using the Drive to block. The "Guidance Menu" appears on page 52). route With this option, you along the shortest or quickest route from A to B - Volume Alter the volume of the voice commands. Settings Change the device settings as a favorite. NAVIGATING The powerful navigation capabilities of your route (first 50 max.). Using the Guidance Menu To view available menu options during navigation, press the MENU button. feature...
.... To begin navigation, select a location using the Drive to block. The "Guidance Menu" appears on page 52). route With this option, you along the shortest or quickest route from A to B - Volume Alter the volume of the voice commands. Settings Change the device settings as a favorite. NAVIGATING The powerful navigation capabilities of your route (first 50 max.). Using the Guidance Menu To view available menu options during navigation, press the MENU button. feature...
Operation Manual
Page 27
... Routing. The display will switch to view the route beginning with the highlighted turn , the system will calculate the route based on a user entered destination, but not actually perform navigation guidance based on your route, press the MENU button in the bottom right-hand corner of the screen. Select an item from the "Route Summary" to display the "Turn by selecting them and pressing...
... Routing. The display will switch to view the route beginning with the highlighted turn , the system will calculate the route based on a user entered destination, but not actually perform navigation guidance based on your route, press the MENU button in the bottom right-hand corner of the screen. Select an item from the "Route Summary" to display the "Turn by selecting them and pressing...

Operation Manual
Page 28
... Menu", and then select My Address Book. The "My Address Book" screen will be displayed: Home and Work To access the "Home and Work" screen, press the Home and Work button. After entering an address or searching for a POI, you can choose it by choosing a recently visited location. 65 Subject to technical change If no home address has been set, you are prompted to set...
... Menu", and then select My Address Book. The "My Address Book" screen will be displayed: Home and Work To access the "Home and Work" screen, press the Home and Work button. After entering an address or searching for a POI, you can choose it by choosing a recently visited location. 65 Subject to technical change If no home address has been set, you are prompted to set...

Operation Manual
Page 30
... the MENU button to choose from the following options: • To navigate to the location, select Navigate. • To use the location for planning a route, select Waypoint. • Press Sort to sort all entries into alphabetical order. • To view the location on the device. 67 Subject to the "Change bookmark name" screen and rename the selected bookmark. • To erase the current saved location, select Delete...
... the MENU button to choose from the following options: • To navigate to the location, select Navigate. • To use the location for planning a route, select Waypoint. • Press Sort to sort all entries into alphabetical order. • To view the location on the device. 67 Subject to the "Change bookmark name" screen and rename the selected bookmark. • To erase the current saved location, select Delete...
Operation Manual
Page 37
... parts of the NAV101 unit between the ANTENNA connection and the SD card slot . Some models also support an additional external active antenna. Subject to press the RE SET button located o n the si de of the addre ss about which you are being received on the main menu at the bottom left), please make sure that case, search for the address. If this does not help, reset...
... parts of the NAV101 unit between the ANTENNA connection and the SD card slot . Some models also support an additional external active antenna. Subject to press the RE SET button located o n the si de of the addre ss about which you are being received on the main menu at the bottom left), please make sure that case, search for the address. If this does not help, reset...


