
TUSL2 User Manual
Page 5
... 82 5.3.1 Installation Menu 82 5.4 Using the Promise Chip for RAID 0/1 84 5.5 Manual Installation of IDE/RAID Drivers 91 6. SOFTWARE SETUP 93 6.1 Winbond Smart Manager 93 6.2 ASUS PC Probe 97 6.3 Multi-Channel Audio Feature Setup 102 6.4 ASUS LiveUpdate 104 6.5 CyberLink PowerPlayer SE 105 6.6 CyberLink VideoLive Mail 106 7. APPENDIX 109 7.1 Glossary 109 INDEX 113 ASUS TUSL2 User's Manual 5
... 82 5.3.1 Installation Menu 82 5.4 Using the Promise Chip for RAID 0/1 84 5.5 Manual Installation of IDE/RAID Drivers 91 6. SOFTWARE SETUP 93 6.1 Winbond Smart Manager 93 6.2 ASUS PC Probe 97 6.3 Multi-Channel Audio Feature Setup 102 6.4 ASUS LiveUpdate 104 6.5 CyberLink PowerPlayer SE 105 6.6 CyberLink VideoLive Mail 106 7. APPENDIX 109 7.1 Glossary 109 INDEX 113 ASUS TUSL2 User's Manual 5

TUSL2 User Manual
Page 10
... Available on high-level goals: support for Plug and Play compatibility and power management for systems and components are based on the TUSL2, the Promise IDE controller chip supports the ATA-100 protocol and Ultra DMA/100 data transfer speeds. ACPI provides more Energy Saving...and HRTF 3D Audio sound circuitry. Data "mirroring," or RAID 1, improves system fault tolerance as Windows 98/2000/ME is also implemented on all ASUS smart series motherboards. Color-coded connectors and descriptive icons make identification easy. 10 ASUS TUSL2 User's Manual To gain all the benefits, an ACPI...
... Available on high-level goals: support for Plug and Play compatibility and power management for systems and components are based on the TUSL2, the Promise IDE controller chip supports the ATA-100 protocol and Ultra DMA/100 data transfer speeds. ACPI provides more Energy Saving...and HRTF 3D Audio sound circuitry. Data "mirroring," or RAID 1, improves system fault tolerance as Windows 98/2000/ME is also implemented on all ASUS smart series motherboards. Color-coded connectors and descriptive icons make identification easy. 10 ASUS TUSL2 User's Manual To gain all the benefits, an ACPI...
TUSL2 User Manual
Page 12
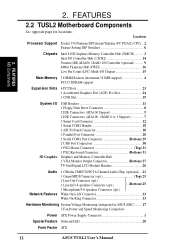
... 11 1 Floppy Disk Drive Connector 8 2 IDE Connectors (ATA100 Support 5 2 IDE Connectors (ATA100 / RAID 0 or 1 Support 7 1 Smart Card Connector 12 1 Serial COM2 Header 18 1 ASUS iPanel Connector 10 1 Parallel Port Connector 28 1 Serial COM1 Port Connector Bottom) 29 2 USB Port Connectors...Wake-On-Ring Connector 13 Hardware Monitoring System Voltage Monitoring (integrated in ASUS ASIC) ....... 17 3 Fan Power and Speed Monitoring Connectors Power ATX Power Supply Connector 1 Special Feature Onboard LED 20 Form Factor ATX 12 ASUS TUSL2 User's Manual FEATURES MB Components 2.
... 11 1 Floppy Disk Drive Connector 8 2 IDE Connectors (ATA100 Support 5 2 IDE Connectors (ATA100 / RAID 0 or 1 Support 7 1 Smart Card Connector 12 1 Serial COM2 Header 18 1 ASUS iPanel Connector 10 1 Parallel Port Connector 28 1 Serial COM1 Port Connector Bottom) 29 2 USB Port Connectors...Wake-On-Ring Connector 13 Hardware Monitoring System Voltage Monitoring (integrated in ASUS ASIC) ....... 17 3 Fan Power and Speed Monitoring Connectors Power ATX Power Supply Connector 1 Special Feature Onboard LED 20 Form Factor ATX 12 ASUS TUSL2 User's Manual FEATURES MB Components 2.

TUSL2 User Manual
Page 14
...JTPWR PCI1 PCI2 WOL_CON PCI3 PLED2 PCI4 PCI5 TUSL2 PCI6 OC3 CNR_SLOT COM2 CR2032 3V Lithium Cell CMOS Power Intel I/O Controller Hub (ICH2) CLRTC ® PROMISE IDE ATA-100 RAID O/I Controller Firmware Hub (FWH) ASUS ASIC with Hardware Monitor JP3 JEN JP4 ...ACHA WOR Super I/O CHA_FAN USBPWR23 USB23 AFPANEL IDELED SMARTCARD PANEL Grayed components are optional at the time of purchase. 14 ASUS TUSL2 User's Manual H/W SETUP Motherboard Layout 3....
...JTPWR PCI1 PCI2 WOL_CON PCI3 PLED2 PCI4 PCI5 TUSL2 PCI6 OC3 CNR_SLOT COM2 CR2032 3V Lithium Cell CMOS Power Intel I/O Controller Hub (ICH2) CLRTC ® PROMISE IDE ATA-100 RAID O/I Controller Firmware Hub (FWH) ASUS ASIC with Hardware Monitor JP3 JEN JP4 ...ACHA WOR Super I/O CHA_FAN USBPWR23 USB23 AFPANEL IDELED SMARTCARD PANEL Grayed components are optional at the time of purchase. 14 ASUS TUSL2 User's Manual H/W SETUP Motherboard Layout 3....

TUSL2 User Manual
Page 15
...Motherboard Settings 1) JEN 2) JP3 3) JP4 4) USBPWR01 USBPWR23 5) OC3 6) KBPWR 7) DSW 8) VIO 9) BCS p.18 JumperFree™ Mode (Enable/Disable) p.19 ATA100 / RAID 0/1 (Enable) p.19 Onboard IDE (Enable/Disable) p.20 USB Device Wake Up (Enable/Disable) p.21 USB/CNR Selection (Enable USB23 / Enable CNR) p.21 Keyboard Power Up...) EARPHONE p.38 Headphone True-Level Line Out Header (3 pins) 15) MIC2 p.39 Internal Microphone Connector (3 pins) 16) AFPANEL/IR_CON p.39 ASUS iPanel Connector (12-1 pins) 17) AAPANEL p.40 ASUS iPanel Audio Connector (12-1 pins) ASUS TUSL2 User's Manual 15 3.
...Motherboard Settings 1) JEN 2) JP3 3) JP4 4) USBPWR01 USBPWR23 5) OC3 6) KBPWR 7) DSW 8) VIO 9) BCS p.18 JumperFree™ Mode (Enable/Disable) p.19 ATA100 / RAID 0/1 (Enable) p.19 Onboard IDE (Enable/Disable) p.20 USB Device Wake Up (Enable/Disable) p.21 USB/CNR Selection (Enable USB23 / Enable CNR) p.21 Keyboard Power Up...) EARPHONE p.38 Headphone True-Level Line Out Header (3 pins) 15) MIC2 p.39 Internal Microphone Connector (3 pins) 16) AFPANEL/IR_CON p.39 ASUS iPanel Connector (12-1 pins) 17) AAPANEL p.40 ASUS iPanel Audio Connector (12-1 pins) ASUS TUSL2 User's Manual 15 3.

TUSL2 User Manual
Page 19
..., or the IDE RAID controller function. The default setting is ATA100. Setting JP3 Enable ATA100 [2-3] (default) Enable RAID 0/1 [1-2] COM1 ® TUSL2 TUSL2 ATA100/RAIDO Selection JP3... 12 23 RAID0/1 ATA100 (Default) 3) Onboard IDE ( JP4) These jumpers enable or disable the IDE function of the motherboard. Setting JP4 Enable Onboard IDE [1-2] (default) Disable Onboard IDE [3-4] COM1 ® TUSL2 TUSL2 Onboard IDE Selection JP4 12 23 ENABLE Onboard IDE DISABLE Onboard IDE (Default) ASUS TUSL2...
..., or the IDE RAID controller function. The default setting is ATA100. Setting JP3 Enable ATA100 [2-3] (default) Enable RAID 0/1 [1-2] COM1 ® TUSL2 TUSL2 ATA100/RAIDO Selection JP3... 12 23 RAID0/1 ATA100 (Default) 3) Onboard IDE ( JP4) These jumpers enable or disable the IDE function of the motherboard. Setting JP4 Enable Onboard IDE [1-2] (default) Disable Onboard IDE [3-4] COM1 ® TUSL2 TUSL2 Onboard IDE Selection JP4 12 23 ENABLE Onboard IDE DISABLE Onboard IDE (Default) ASUS TUSL2...

TUSL2 User Manual
Page 36
...'s primary IDE connector (recommended) or the secondary IDE connector. Usually, both disks may be connected to the TUSL2, but only two can use them to setup the RAID 0 or 1 arrays and to the intermediate connector on each IDE connector, can be attached to support extra IDE... a 40-pin 80-conductor cable and RAID arrays only operate with the motherboard. TIP: For high-performance and RAID 0 or 1 set to your UltraDMA/100/66 device (hard disk drive). 3. H/W SETUP Connectors 3. Connect the cable's blue connector to PIN 1. 36 ASUS TUSL2 User's Manual Refer to the Master settings...
...'s primary IDE connector (recommended) or the secondary IDE connector. Usually, both disks may be connected to the TUSL2, but only two can use them to setup the RAID 0 or 1 arrays and to the intermediate connector on each IDE connector, can be attached to support extra IDE... a 40-pin 80-conductor cable and RAID arrays only operate with the motherboard. TIP: For high-performance and RAID 0 or 1 set to your UltraDMA/100/66 device (hard disk drive). 3. H/W SETUP Connectors 3. Connect the cable's blue connector to PIN 1. 36 ASUS TUSL2 User's Manual Refer to the Master settings...
TUSL2 User Manual
Page 81
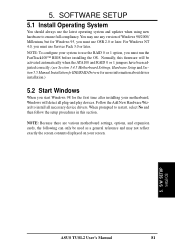
... motherboard, Windows will detect all necessary device drivers. When prompted to install all plug-and play devices. S/W SETUP Install OS ASUS TUSL2 User's Manual 81 SOFTWARE SETUP 5.1 Install Operating System You should always use Service Pack 3.0 or later. Normally, this section.... the following can only be activated automatically when the ATA100 and RAID 0 or 1 jumpers have been adjusted correctly; (see Section 3.4.5 Motherboard Settings, Hardware Setup and Section 5.5 Manual Installation fo IDE/RAID Drivers for more information about driver installation.) 5.2 Start Windows When...
... motherboard, Windows will detect all necessary device drivers. When prompted to install all plug-and play devices. S/W SETUP Install OS ASUS TUSL2 User's Manual 81 SOFTWARE SETUP 5.1 Install Operating System You should always use Service Pack 3.0 or later. Normally, this section.... the following can only be activated automatically when the ATA100 and RAID 0 or 1 jumpers have been adjusted correctly; (see Section 3.4.5 Motherboard Settings, Hardware Setup and Section 5.5 Manual Installation fo IDE/RAID Drivers for more information about driver installation.) 5.2 Start Windows When...
TUSL2 User Manual
Page 82
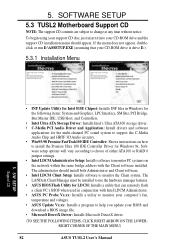
... SEE THE FOLLOWING ITEMS, CLICK RIGHT ARROW ON THE LOWERRIGHT CORNER OF THE MAIN MENU) 82 ASUS TUSL2 User's Manual Software setup options will vary according to choice of either ATA100 or RAID 0 jumper settings. • Intel LDCM Administrator Setup: Installs software to monitor the Client system...Installs a utility that your computer's fan, temperature and voltages. • ASUS Update Vx.xx: Installs a program to install the Promise Ultra 100 IDE Controller Driver for Windows 9x. SOFTWARE SETUP 5.3 TUSL2 Motherboard Support CD NOTE: The support CD contents are subject to change at...
... SEE THE FOLLOWING ITEMS, CLICK RIGHT ARROW ON THE LOWERRIGHT CORNER OF THE MAIN MENU) 82 ASUS TUSL2 User's Manual Software setup options will vary according to choice of either ATA100 or RAID 0 jumper settings. • Intel LDCM Administrator Setup: Installs software to monitor the Client system...Installs a utility that your computer's fan, temperature and voltages. • ASUS Update Vx.xx: Installs a program to install the Promise Ultra 100 IDE Controller Driver for Windows 9x. SOFTWARE SETUP 5.3 TUSL2 Motherboard Support CD NOTE: The support CD contents are subject to change at...
TUSL2 User Manual
Page 84
... to use a pre-existing hard disk for more new disks. RAID 1 is also known as "data striping." Before setting up . S/W SETUP RAID 84 ASUS TUSL2 User's Manual After connecting two hard disks to be preserved on your RAID system. With FAT32 and NTFS partitioning, the array will be addressed... as a single drive, and at least two hard disks for RAID 0 only if the data is ...
... to use a pre-existing hard disk for more new disks. RAID 1 is also known as "data striping." Before setting up . S/W SETUP RAID 84 ASUS TUSL2 User's Manual After connecting two hard disks to be preserved on your RAID system. With FAT32 and NTFS partitioning, the array will be addressed... as a single drive, and at least two hard disks for RAID 0 only if the data is ...

TUSL2 User Manual
Page 85
...simultaneously. Boot-up the PC. 5.4.2 Enter FastTrak100 BIOS and FastBuild Utility 1. S/W SETUP RAID 2. SOFTWARE SETUP 5.4.1 Installing the Hard Disks The RAID 0 setting allows users to the Secondary ATA IDE2 connector onboard the TUSL2. 2. Press keys to display the FastBuild™ Utility Main Menu: FastBuild (tm)...screen: 5. Connect the power cables to select Option [ESC] Exit ASUS TUSL2 User's Manual 85 Install the first and second hard disk into the hard disk bays of your system. Ensure that the ATA/100 / RAID 0/1 jumper 3 is the first time you have booted with a blank...
...simultaneously. Boot-up the PC. 5.4.2 Enter FastTrak100 BIOS and FastBuild Utility 1. S/W SETUP RAID 2. SOFTWARE SETUP 5.4.1 Installing the Hard Disks The RAID 0 setting allows users to the Secondary ATA IDE2 connector onboard the TUSL2. 2. Press keys to display the FastBuild™ Utility Main Menu: FastBuild (tm)...screen: 5. Connect the power cables to select Option [ESC] Exit ASUS TUSL2 User's Manual 85 Install the first and second hard disk into the hard disk bays of your system. Ensure that the ATA/100 / RAID 0/1 jumper 3 is the first time you have booted with a blank...

TUSL2 User Manual
Page 86
...Server. FastBuild™ automatically constructs the RAID 0 array. 5. The Mode field displays Stripe. 3. Three options are managed to the field Optimize Array for audio/video applications, or similar programs that are a single drive unit. 86 ASUS TUSL2 User's Manual Server is displayed. ...size in MB 29299 [ Keys Available ] [ ] Up [ ] Down [ , ,Space] Change Option [ESC] Exit [CTRL-Y] Save 2. S/W SETUP RAID 6. 5. Then the command appears: "Press Any Key to the Typical Application Menu. Reboot the system and the FastTrak100™ "Lite" BIOS checks and ...
...Server. FastBuild™ automatically constructs the RAID 0 array. 5. The Mode field displays Stripe. 3. Three options are managed to the field Optimize Array for audio/video applications, or similar programs that are a single drive unit. 86 ASUS TUSL2 User's Manual Server is displayed. ...size in MB 29299 [ Keys Available ] [ ] Up [ ] Down [ , ,Space] Change Option [ESC] Exit [CTRL-Y] Save 2. S/W SETUP RAID 6. 5. Then the command appears: "Press Any Key to the Typical Application Menu. Reboot the system and the FastTrak100™ "Lite" BIOS checks and ...

TUSL2 User Manual
Page 87
... mirror a pre-existing hard disk formatted with data that you want to step 4.) Use for : and select Security. Channel:ID ------ [ Target Disk ] Drive Model --------- S/W SETUP RAID ASUS TUSL2 User's Manual 87 Go to the field Optimize Array for Create Only if using two new hard disks to configure a new... RAID 1 mirrored array; (Go to step 6.) Do you want the disk image to another?(Yes/No) Y -Create and Duplicate N -Create Only 4. FastBuild™ offers a choice between...
... mirror a pre-existing hard disk formatted with data that you want to step 4.) Use for : and select Security. Channel:ID ------ [ Target Disk ] Drive Model --------- S/W SETUP RAID ASUS TUSL2 User's Manual 87 Go to the field Optimize Array for Create Only if using two new hard disks to configure a new... RAID 1 mirrored array; (Go to step 6.) Do you want the disk image to another?(Yes/No) Y -Create and Duplicate N -Create Only 4. FastBuild™ offers a choice between...

TUSL2 User Manual
Page 88
... hard disk larger than the Target disk is working okay. In this case, enter the FastBuild™ Utitility to intstall a new OS. S/W SETUP RAID 8. However, it will start up properly if both sets of hard disk jumpers are disconnected. SOFTWARE SETUP 5. The utility prompts a choice between to ... not functional, or are set up automatically. alternatively, with the FDISK command and then install the OS from a back-up source. 88 ASUS TUSL2 User's Manual 5. To configure two new blank hard disks in such cases, try Master for the Source disk, and Master/Slave or Slave...
... hard disk larger than the Target disk is working okay. In this case, enter the FastBuild™ Utitility to intstall a new OS. S/W SETUP RAID 8. However, it will start up properly if both sets of hard disk jumpers are disconnected. SOFTWARE SETUP 5. The utility prompts a choice between to ... not functional, or are set up automatically. alternatively, with the FDISK command and then install the OS from a back-up source. 88 ASUS TUSL2 User's Manual 5. To configure two new blank hard disks in such cases, try Master for the Source disk, and Master/Slave or Slave...

TUSL2 User Manual
Page 89
...4 Mirror 2 1628 Critical 5. Press : FastBuild (tm) Utility 1.31 (c) 1996-2000 Promise Technology, Inc. [ Rebuild Array Menu ] Array No RAID Mode Total Drv Status Array 1 Mirror 2 Stripe Block: Not Available Critical Channel: ID 1: Slave [ Select Drive for Rebuild Array. If an array...Select for Rebuild ] Drive Model ST3322IA Capacity (MB) 3077 [ Keys Available ] [ ] Up [ ] Down [ESC] Exit [Enter] Select ASUS TUSL2 User's Manual 89 S/W SETUP RAID [ Keys Available ] [ ] Up [ ] Down [ESC] Exit [Enter] Select 7. Follow the steps below to enter the FastBuild™...
...4 Mirror 2 1628 Critical 5. Press : FastBuild (tm) Utility 1.31 (c) 1996-2000 Promise Technology, Inc. [ Rebuild Array Menu ] Array No RAID Mode Total Drv Status Array 1 Mirror 2 Stripe Block: Not Available Critical Channel: ID 1: Slave [ Select Drive for Rebuild Array. If an array...Select for Rebuild ] Drive Model ST3322IA Capacity (MB) 3077 [ Keys Available ] [ ] Up [ ] Down [ESC] Exit [Enter] Select ASUS TUSL2 User's Manual 89 S/W SETUP RAID [ Keys Available ] [ ] Up [ ] Down [ESC] Exit [Enter] Select 7. Follow the steps below to enter the FastBuild™...

TUSL2 User Manual
Page 90
... only double the speed of two hard disks with two ATA-33 disks in a RAID array. the first hard disk should be used; Only two hard disks connected to the Secondary ATA-100 connector. S/W SETUP RAID 90 ASUS TUSL2 User's Manual Confirm the command to either active hard disk in the... RAID 0 array to the maximum write space available on the smaller of particular hard disks. This spare hard ...
... only double the speed of two hard disks with two ATA-33 disks in a RAID array. the first hard disk should be used; Only two hard disks connected to the Secondary ATA-100 connector. S/W SETUP RAID 90 ASUS TUSL2 User's Manual Confirm the command to either active hard disk in the... RAID 0 array to the maximum write space available on the smaller of particular hard disks. This spare hard ...
TUSL2 User Manual
Page 91
...(Driver Location: {CD-ROM driver}:\Promise\Raid0or1\Win9x-ME) 5.5.2 Win2000 Promise® FastTrak100™Lite/Simple Controller Driver 1. S/W SETUP RAID ASUS TUSL2 User's Manual 91 Move highlight bar to the driver and click OK. 11. Type or browse the path {CD-ROM Drive}:\Promise\...Raid0or1\Win2000 to "Settings" and select: "Control Panel". SOFTWARE SETUP 5.5 Manual Installation of IDE/RAID Drivers The TUSL2 support CD contains several IDE and RAID 0 or 1 drivers in the CD Drive and press "Start" button. 2. Please select select [Driver] page to ...
...(Driver Location: {CD-ROM driver}:\Promise\Raid0or1\Win9x-ME) 5.5.2 Win2000 Promise® FastTrak100™Lite/Simple Controller Driver 1. S/W SETUP RAID ASUS TUSL2 User's Manual 91 Move highlight bar to the driver and click OK. 11. Type or browse the path {CD-ROM Drive}:\Promise\...Raid0or1\Win2000 to "Settings" and select: "Control Panel". SOFTWARE SETUP 5.5 Manual Installation of IDE/RAID Drivers The TUSL2 support CD contains several IDE and RAID 0 or 1 drivers in the CD Drive and press "Start" button. 2. Please select select [Driver] page to ...
TUSL2 User Manual
Page 114
... CPU Installation 27 Procedures Updating BIOS 48 PWR Button < 4 Secs 72 PWR Up On Modem Act 73 Q Quick Power On Self Test 77 R RAID 0 Arrays 86 RAID 1 Arrays 87 RAID 1 or 0 84 Removable Device 76 S Save Changes 79 SDRAM Cycle Time 64 RAS Precharge Time 64 SDRAM CAS Latency 63 SDRAM Configuration 63...-to-RAM Capability 72 SYMBIOS SCSI BIOS 68 System Date 54 System Time 54 T Translation Method 56 Type 55 U UART2 Use Standard Infrared 66 114 ASUS TUSL2 User's Manual
... CPU Installation 27 Procedures Updating BIOS 48 PWR Button < 4 Secs 72 PWR Up On Modem Act 73 Q Quick Power On Self Test 77 R RAID 0 Arrays 86 RAID 1 Arrays 87 RAID 1 or 0 84 Removable Device 76 S Save Changes 79 SDRAM Cycle Time 64 RAS Precharge Time 64 SDRAM CAS Latency 63 SDRAM Configuration 63...-to-RAM Capability 72 SYMBIOS SCSI BIOS 68 System Date 54 System Time 54 T Translation Method 56 Type 55 U UART2 Use Standard Infrared 66 114 ASUS TUSL2 User's Manual


