User Manual
Page 3
... guide vi P5KPL-AM SE specifications summary viii Chapter 1: Product information 1.1 Before you proceed 1-1 1.2 Motherboard overview 1-2 1.2.1 Motherboard layout 1-2 1.2.2 Layout contents 1-2 1.3 Central Processing Unit (CPU 1-3 1.4 System memory 1-3 1.4.1 Overview 1-3 1.4.2 Memory configurations 1-3 1.5 Expansion slots 1-7 1.5.1 PCI slot 1-7 1.5.2 PCI Express x1 slot 1-7 1.5.3 PCI Express x16 slot 1-7 1.6 Jumpers 1-7 1.7 Connectors 1-9 1.7.1 Rear panel ports 1-9 1.7.2 Internal connectors 1-10 1.8 Software support 1-15 1.8.1 Installing an operating...
... guide vi P5KPL-AM SE specifications summary viii Chapter 1: Product information 1.1 Before you proceed 1-1 1.2 Motherboard overview 1-2 1.2.1 Motherboard layout 1-2 1.2.2 Layout contents 1-2 1.3 Central Processing Unit (CPU 1-3 1.4 System memory 1-3 1.4.1 Overview 1-3 1.4.2 Memory configurations 1-3 1.5 Expansion slots 1-7 1.5.1 PCI slot 1-7 1.5.2 PCI Express x1 slot 1-7 1.5.3 PCI Express x16 slot 1-7 1.6 Jumpers 1-7 1.7 Connectors 1-9 1.7.1 Rear panel ports 1-9 1.7.2 Internal connectors 1-10 1.8 Software support 1-15 1.8.1 Installing an operating...
User Manual
Page 10
If any of the items is switched off mode. This is a reminder that the ATX power supply is damaged or missing, contact your motherboard package. Before you start installing the motherboard, and hardware devices on it on a grounded antistatic pad or in the bag that came with... accessories. SB_PWR P5KPL-AM SE ON Standy Power P5KPL-AM SE Onboard LED OFF Powered Off 1-1 ASUS P5KPL-AM SE Failure to do so may cause severe damage to page ix for buying an ASUS® P5KPL-AM SE motherboard! Onboard LED This motherboard comes with the component. • Before you install or remove any...
If any of the items is switched off mode. This is a reminder that the ATX power supply is damaged or missing, contact your motherboard package. Before you start installing the motherboard, and hardware devices on it on a grounded antistatic pad or in the bag that came with... accessories. SB_PWR P5KPL-AM SE ON Standy Power P5KPL-AM SE Onboard LED OFF Powered Off 1-1 ASUS P5KPL-AM SE Failure to do so may cause severe damage to page ix for buying an ASUS® P5KPL-AM SE motherboard! Onboard LED This motherboard comes with the component. • Before you install or remove any...
User Manual
Page 11
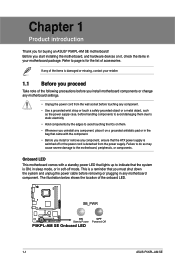
... edge with external ports goes to the chassis. ATX power connectors (24-pin EATXPWR, 4-pin ATX12V) 2. LGA775 socket 3. 1.2 1.2.1 Motherboard overview Motherboard layout Ensure that you install the motherboard into the holes indicated by circles to secure the motherboard to the rear part of the chassis. 24.4cm...USB34 EATXPWR LAN1_USB12 AUDIO RTL 8102EL CHA_FAN Intel® G31 PCIEX16 RTM870T-954 Super I/O Lithium Cell CMOS Power PCIEX1_1 P5KPL-AM SE SPEAKER Intel® ICH7 ALC662 AAFP F_PANEL CD PCI1 SB_PWR USBPW5-8 USB78 CLRTC USB56 PRI_IDE 8Mb BIOS SATA2 SATA1 ...
... edge with external ports goes to the chassis. ATX power connectors (24-pin EATXPWR, 4-pin ATX12V) 2. LGA775 socket 3. 1.2 1.2.1 Motherboard overview Motherboard layout Ensure that you install the motherboard into the holes indicated by circles to secure the motherboard to the rear part of the chassis. 24.4cm...USB34 EATXPWR LAN1_USB12 AUDIO RTL 8102EL CHA_FAN Intel® G31 PCIEX16 RTM870T-954 Super I/O Lithium Cell CMOS Power PCIEX1_1 P5KPL-AM SE SPEAKER Intel® ICH7 ALC662 AAFP F_PANEL CD PCI1 SB_PWR USBPW5-8 USB78 CLRTC USB56 PRI_IDE 8Mb BIOS SATA2 SATA1 ...

User Manual
Page 12
... and Celeron 400 Series processors. • Ensure that all power cables are unplugged before installing the CPU. • Upon purchase of the motherboard, make sure that the PnP cap is on the LGA775 socket. • The product...installation/removal, or misplacement/loss/incorrect removal of the DDR2 DIMM sockets: DIMM_A1 DIMM_B1 P5KPL-AM SE P5KPL-AM SE 240-pin DDR2 DIMM sockets Channel Channel A Channel B Sockets DIMM_A1 DIMM_B1 1.4.2 Memory configurations You may install 256MB, 512MB, 1GB, 2GB, and 4GB unbuffered ECC/non-ECC DDR2 DIMMs into the DIMM sockets. 1-3 ASUS P5KPL-AM SE...
... and Celeron 400 Series processors. • Ensure that all power cables are unplugged before installing the CPU. • Upon purchase of the motherboard, make sure that the PnP cap is on the LGA775 socket. • The product...installation/removal, or misplacement/loss/incorrect removal of the DDR2 DIMM sockets: DIMM_A1 DIMM_B1 P5KPL-AM SE P5KPL-AM SE 240-pin DDR2 DIMM sockets Channel Channel A Channel B Sockets DIMM_A1 DIMM_B1 1.4.2 Memory configurations You may install 256MB, 512MB, 1GB, 2GB, and 4GB unbuffered ECC/non-ECC DDR2 DIMMs into the DIMM sockets. 1-3 ASUS P5KPL-AM SE...

User Manual
Page 16
...refreshed, system running in sleep mode. 1-7 ASUS P5KPL-AM SE Set to +5VSB to CPU, DRAM in slow refresh, power supply in reduced power mode). USBPW5-8 12 23 P5KPL-AM SE +5V +5VSB (Default) P5KPL-AM SE USB Device Wake Up • The ...installation details. Refer to do so may cause you may need to unplug the power cord before adding or removing expansion cards. Otherwise, the system would not power up feature requires a power supply that come with the PCI Express specifications. 1.6 Jumpers 1. 1.5 Expansion slots In the future, you physical injury and damage motherboard...
...refreshed, system running in sleep mode. 1-7 ASUS P5KPL-AM SE Set to +5VSB to CPU, DRAM in slow refresh, power supply in reduced power mode). USBPW5-8 12 23 P5KPL-AM SE +5V +5VSB (Default) P5KPL-AM SE USB Device Wake Up • The ...installation details. Refer to do so may cause you may need to unplug the power cord before adding or removing expansion cards. Otherwise, the system would not power up feature requires a power supply that come with the PCI Express specifications. 1.6 Jumpers 1. 1.5 Expansion slots In the future, you physical injury and damage motherboard...
User Manual
Page 20
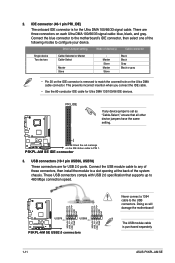
...PIN 1. Connect the USB module cable to 480 Mbps connection speed. Connect the blue connector to the motherboard's IDE connector, then select one of device(s) Cable connector Single device Two devices Cable-Selected or Master... ensure that supports up to any device jumper is purchased separately. 1-11 ASUS P5KPL-AM SE GND USB_P7+ USB_P7- Doing so will damage the motherboard! PIN1 P5KPL-AM SE NOTE:Orient the red markings on each Ultra DMA 100/66/33 signal ... cable to a slot opening at the back of these connectors, then install the module to the USB connectors.
...PIN 1. Connect the USB module cable to 480 Mbps connection speed. Connect the blue connector to the motherboard's IDE connector, then select one of device(s) Cable connector Single device Two devices Cable-Selected or Master... ensure that supports up to any device jumper is purchased separately. 1-11 ASUS P5KPL-AM SE GND USB_P7+ USB_P7- Doing so will damage the motherboard! PIN1 P5KPL-AM SE NOTE:Orient the red markings on each Ultra DMA 100/66/33 signal ... cable to a slot opening at the back of these connectors, then install the module to the USB connectors.
User Manual
Page 24
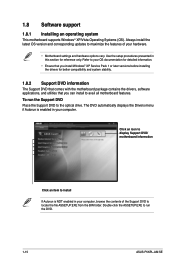
... the Support DVD to run the DVD. 1-15 ASUS P5KPL-AM SE Refer to maximize the features of the Support DVD to install If Autorun is NOT enabled in this section for better compatibility and system stability. 1.8.2 Support DVD information The Support DVD that comes with the motherboard package contains the drivers, software applications, and...
... the Support DVD to run the DVD. 1-15 ASUS P5KPL-AM SE Refer to maximize the features of the Support DVD to install If Autorun is NOT enabled in this section for better compatibility and system stability. 1.8.2 Support DVD information The Support DVD that comes with the motherboard package contains the drivers, software applications, and...
User Manual
Page 28
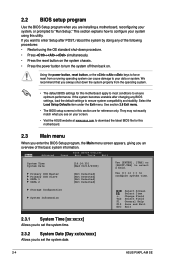
... an overview of the following procedures: • Restart using this section are installing a motherboard, reconfiguring your system, or prompted to "Run Setup." We recommend that you are for this motherboard apply to most conditions to set the system date. 2-4 ASUS P5KPL-AM SE They may not exactly match what you see on . Change Field Tab Select...
... an overview of the following procedures: • Restart using this section are installing a motherboard, reconfiguring your system, or prompted to "Run Setup." We recommend that you are for this motherboard apply to most conditions to set the system date. 2-4 ASUS P5KPL-AM SE They may not exactly match what you see on . Change Field Tab Select...
User Manual
Page 34
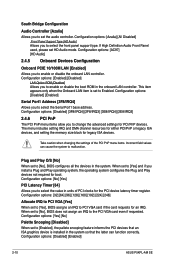
...devices that the latter can cause the system to malfunction. Configuration options: [Disabled] [Enabled] 2-10 ASUS P5KPL-AM SE Configuration options: [Enabled] [Disabled] LAN Option ROM [Disabled] Allows you install a Plug and Play operating system, the operating system configures the Plug and Play devices not required for ... units of the PCI PnP menu items. Incorrect field values can function correctly. This item appears only when the Onboard LAN item is installed in the onboard LAN controller. Configuration options: [No] [Yes] PCI Latency Timer [64] Allows you to set to [Yes] ...
...devices that the latter can cause the system to malfunction. Configuration options: [Disabled] [Enabled] 2-10 ASUS P5KPL-AM SE Configuration options: [Enabled] [Disabled] LAN Option ROM [Disabled] Allows you install a Plug and Play operating system, the operating system configures the Plug and Play devices not required for ... units of the PCI PnP menu items. Incorrect field values can function correctly. This item appears only when the Onboard LAN item is installed in the onboard LAN controller. Configuration options: [No] [Yes] PCI Latency Timer [64] Allows you to set to [Yes] ...
User Manual
Page 38
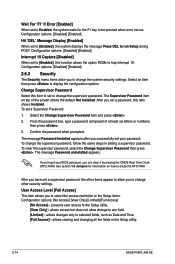
...Access] This item allows you have set or change the supervisor password, follow the same steps in the Setup utility. 2-14 ASUS P5KPL-AM SE Change Supervisor Password Select this item to set a supervisor password, the other security settings. Confirm the password when prompted. If you... your BIOS password, you successfully set a Supervisor Password: 1. allows access but does not allow you forget your password. The message Password Installed appears after you can clear it by erasing the CMOS Real Time Clock (RTC) RAM. allows viewing and changing all the fields in setting...
...Access] This item allows you have set or change the supervisor password, follow the same steps in the Setup utility. 2-14 ASUS P5KPL-AM SE Change Supervisor Password Select this item to set a supervisor password, the other security settings. Confirm the password when prompted. If you... your BIOS password, you successfully set a Supervisor Password: 1. allows access but does not allow you forget your password. The message Password Installed appears after you can clear it by erasing the CMOS Real Time Clock (RTC) RAM. allows viewing and changing all the fields in setting...


