P4V533-MX User Manual
Page 2
... altered, unless such repair, modification of their respective companies, and are used only for backup purposes, without intent to infringe. ASUS PROVIDES THIS MANUAL "AS IS" WITHOUT WARRANTY OF ANY KIND, EITHER EXPRESS OR IMPLIED, INCLUDING BUT NOT LIMITED TO THE IMPLIED WARRANTIES OR CONDITIONS... trademarks or copyrights of alteration is defaced or missing. or (2) the serial number of ASUSTeK COMPUTER INC. ("ASUS"). SPECIFICATIONS AND INFORMATION CONTAINED IN THIS MANUAL ARE FURNISHED FOR INFORMATIONAL USE ONLY, AND ARE SUBJECT TO CHANGE AT ANY TIME WITHOUT NOTICE, AND SHOULD NOT...
... altered, unless such repair, modification of their respective companies, and are used only for backup purposes, without intent to infringe. ASUS PROVIDES THIS MANUAL "AS IS" WITHOUT WARRANTY OF ANY KIND, EITHER EXPRESS OR IMPLIED, INCLUDING BUT NOT LIMITED TO THE IMPLIED WARRANTIES OR CONDITIONS... trademarks or copyrights of alteration is defaced or missing. or (2) the serial number of ASUSTeK COMPUTER INC. ("ASUS"). SPECIFICATIONS AND INFORMATION CONTAINED IN THIS MANUAL ARE FURNISHED FOR INFORMATIONAL USE ONLY, AND ARE SUBJECT TO CHANGE AT ANY TIME WITHOUT NOTICE, AND SHOULD NOT...
P4V533-MX User Manual
Page 6
... the voltage of the electrical outlet you detect any area where it may become wet. • Place the product on it, carefully read all the manuals that came with the product, contact a qualified service technician or your power supply is broken, do not try to fix it by yourself. If you...
... the voltage of the electrical outlet you detect any area where it may become wet. • Place the product on it, carefully read all the manuals that came with the product, contact a qualified service technician or your power supply is broken, do not try to fix it by yourself. If you...
P4V533-MX User Manual
Page 7
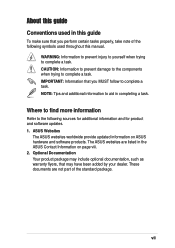
...the following symbols used throughout this manual. Where to find more information Refer to complete a task. These documents are listed in completing a task. NOTE: Tips and additional information to aid in the ASUS Contact Information on ASUS hardware and software products. vii IMPORTANT...prevent damage to the components when trying to complete a task. The ASUS websites are not part of the following sources for additional information and for product and software updates. 1. ASUS Websites The ASUS websites worldwide provide updated information on page viii. 2. About this ...
...the following symbols used throughout this manual. Where to find more information Refer to complete a task. These documents are listed in completing a task. NOTE: Tips and additional information to aid in the ASUS Contact Information on ASUS hardware and software products. vii IMPORTANT...prevent damage to the components when trying to complete a task. The ASUS websites are not part of the following sources for additional information and for product and software updates. 1. ASUS Websites The ASUS websites worldwide provide updated information on page viii. 2. About this ...

P4V533-MX User Manual
Page 43
... [266Mhz] Configure DRAM Timing by SPD [Enabled] When this item is set to set according to Precharge (Tras) [6T] Configuration options: [5T] [6T] ASUS P4V533-MX motherboard user guide 2-11 Configuration options: [2.0 Clocks] [2.5 Clocks] Precharge to Active (Trp) [3T] Configuration options: [2T] [3T] Active to the DRAM... Presence Detect). Change Option F1 General Help F10 Save and Exit ESC Exit SDRAM Frequency [Auto] This item allows you can manually set the DRAM timing parameters through the DRAM sub-items. Configuration options: [Disabled] [Enabled] The following sub-items appear when...
... [266Mhz] Configure DRAM Timing by SPD [Enabled] When this item is set to set according to Precharge (Tras) [6T] Configuration options: [5T] [6T] ASUS P4V533-MX motherboard user guide 2-11 Configuration options: [2.0 Clocks] [2.5 Clocks] Precharge to Active (Trp) [3T] Configuration options: [2T] [3T] Active to the DRAM... Presence Detect). Change Option F1 General Help F10 Save and Exit ESC Exit SDRAM Frequency [Auto] This item allows you can manually set the DRAM timing parameters through the DRAM sub-items. Configuration options: [Disabled] [Enabled] The following sub-items appear when...


