User Guide
Page 2
... ASUS. No part of this manual, including the products and software described in this manual may or may not be reproduced, transmitted, transcribed, stored in a retrieval system, or translated into any problems in obtaining the full corresponding source code we can coordinate the terms and cost of such software and/or other Free Open Source Software Licenses. Product warranty or service...
... ASUS. No part of this manual, including the products and software described in this manual may or may not be reproduced, transmitted, transcribed, stored in a retrieval system, or translated into any problems in obtaining the full corresponding source code we can coordinate the terms and cost of such software and/or other Free Open Source Software Licenses. Product warranty or service...
User Guide
Page 6
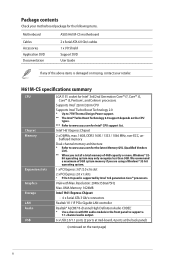
... items. Motherboard Cables Accessories Application DVD Documentation ASUS H61M-CS motherboard 2 x Serial ATA 6.0 Gb/s cables 1 x I/O Shield Support DVD User Guide If any of 4GB capacity or more, Windows® 32bit operating system may only recognize less than 3GB. UMA Memory: 1024MB Intel® H61 Express Chipset - 4 x Serial ATA 3 Gb/s connectors Realtek® 8111F PCIe Gigabit LAN controller Realtek® ALC887 8-channel High Definition Audio CODEC * Use a chassis with Max. VGA with HD audio module in the front panel to www.asus.com...
... items. Motherboard Cables Accessories Application DVD Documentation ASUS H61M-CS motherboard 2 x Serial ATA 6.0 Gb/s cables 1 x I/O Shield Support DVD User Guide If any of 4GB capacity or more, Windows® 32bit operating system may only recognize less than 3GB. UMA Memory: 1024MB Intel® H61 Express Chipset - 4 x Serial ATA 3 Gb/s connectors Realtek® 8111F PCIe Gigabit LAN controller Realtek® ALC887 8-channel High Definition Audio CODEC * Use a chassis with Max. VGA with HD audio module in the front panel to www.asus.com...

User Guide
Page 7
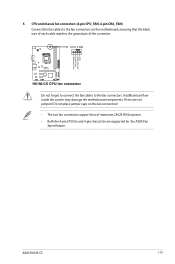
...2 USB 2.0/1.1 ports 4 x SATA 3 Gb/s connectors 1 x 4-pin CPU fan connector 1 x 4-pin chassis fan connector 1 x Front panel audio connector 1 x System panel connector 1 x Speaker connector 1 x 24-pin ATX power connector 1 x 4-pin ATX 12V power connector 1 x Clear CMOS jumper 64 Mb Flash ROM, UEFI BIOS, PnP, DMI v2.0, WfM 2.0, ACPI v2.0a, SM BIOS v2.7, SLP 3.0, EUP-ready, Multi-language BIOS, ASUS EZ Flash 2, ASUS CrashFree BIOS 3, F12 PrintScreen function, F3 Shortcut function, and ASUS DRAM SPD (Serial Presence Detect) memory information WOL, PXE, PME Wake Up Drivers ASUS utilities ASUS Update...
...2 USB 2.0/1.1 ports 4 x SATA 3 Gb/s connectors 1 x 4-pin CPU fan connector 1 x 4-pin chassis fan connector 1 x Front panel audio connector 1 x System panel connector 1 x Speaker connector 1 x 24-pin ATX power connector 1 x 4-pin ATX 12V power connector 1 x Clear CMOS jumper 64 Mb Flash ROM, UEFI BIOS, PnP, DMI v2.0, WfM 2.0, ACPI v2.0a, SM BIOS v2.7, SLP 3.0, EUP-ready, Multi-language BIOS, ASUS EZ Flash 2, ASUS CrashFree BIOS 3, F12 PrintScreen function, F3 Shortcut function, and ASUS DRAM SPD (Serial Presence Detect) memory information WOL, PXE, PME Wake Up Drivers ASUS utilities ASUS Update...

User Guide
Page 16
... 32-bit Windows® OS, when you install 4GB or more on the motherboard. • This motherboard does not support DIMMs made up of the following: - The system maps the total size of the lower-sized channel for manual memory frequency adjustment. • For system stability, use of memory, we recommend that you install memory modules of these memory modules depend on the CPU's capabilities and other installed devices. •...
... 32-bit Windows® OS, when you install 4GB or more on the motherboard. • This motherboard does not support DIMMs made up of the following: - The system maps the total size of the lower-sized channel for manual memory frequency adjustment. • For system stability, use of memory, we recommend that you install memory modules of these memory modules depend on the CPU's capabilities and other installed devices. •...
User Guide
Page 18
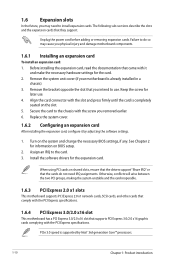
... This motherboard supports PCI Express 2.0 x1 network cards, SCSI cards, and other cards that comply with the PCI Express specifications. 1.6.4 PCI Express 3.0/2.0 x16 slot This motherboard has a PCI Express 3.0/2.0 x16 slot that they support. Failure to use . 4. Turn on the slot. 5. Remove the bracket opposite the slot that came with the PCI Express specifications. Assign an IRQ to the card. 3. PCIe 3.0 speed is already installed in a chassis). 3. Remove the system unit cover (if your motherboard is supported by adjusting the software settings. 1. Align the card connector...
... This motherboard supports PCI Express 2.0 x1 network cards, SCSI cards, and other cards that comply with the PCI Express specifications. 1.6.4 PCI Express 3.0/2.0 x16 slot This motherboard has a PCI Express 3.0/2.0 x16 slot that they support. Failure to use . 4. Turn on the slot. 5. Remove the bracket opposite the slot that came with the PCI Express specifications. Assign an IRQ to the card. 3. PCIe 3.0 speed is already installed in a chassis). 3. Remove the system unit cover (if your motherboard is supported by adjusting the software settings. 1. Align the card connector...

User Guide
Page 23
... this connector to avail of the motherboard's high-definition audio capability. • If you want to connect a high-definition front panel audio module to this connector, set the Front Panel Type item in the BIOS setup to [AC97]. By default, this connector is for details. See section 2.5.6 Onboard Devices Configuration for a chassis-mounted front panel audio I /O module cable to this connector, set to this connector. If you want to connect an AC'97 front panel audio module to [HD]. ASUS H61M-CS...
... this connector to avail of the motherboard's high-definition audio capability. • If you want to connect a high-definition front panel audio module to this connector, set the Front Panel Type item in the BIOS setup to [AC97]. By default, this connector is for details. See section 2.5.6 Onboard Devices Configuration for a chassis-mounted front panel audio I /O module cable to this connector, set to this connector. If you want to connect an AC'97 front panel audio module to [HD]. ASUS H61M-CS...
User Guide
Page 27
... place jumper caps on the motherboard, ensuring that the black wire of each cable matches the ground pin of maximum 2A (24 W) fan power. • Both the 4-pin CPU fan and 4-pin chassis fan are not jumpers! CPU_FAN H61M-CS H61M-CS CPU fan connector Do not forget to connect the fan cables to the fan connectors on the fan connectors! • The two fan connectors support fans of the connector. ASUS H61M-CS 1-19 CPU FAN PWM CPU FAN IN CPU FAN PWR GND 5. CPU and chassis fan connectors (4-pin CPU_FAN, 4-pin CHA_FAN) Connect the fan cables to the fan connectors. Insufficient...
... place jumper caps on the motherboard, ensuring that the black wire of each cable matches the ground pin of maximum 2A (24 W) fan power. • Both the 4-pin CPU fan and 4-pin chassis fan are not jumpers! CPU_FAN H61M-CS H61M-CS CPU fan connector Do not forget to connect the fan cables to the fan connectors on the fan connectors! • The two fan connectors support fans of the connector. ASUS H61M-CS 1-19 CPU FAN PWM CPU FAN IN CPU FAN PWR GND 5. CPU and chassis fan connectors (4-pin CPU_FAN, 4-pin CHA_FAN) Connect the fan cables to the fan connectors. Insufficient...

User Guide
Page 30
... OS version and corresponding updates to maximize the features of the Support DVD to your hardware. • Motherboard settings and hardware options vary. Visit the ASUS website at any time without notice. Click Drivers, Utilities, Make Disk, Manual, and Contact tabs to install If Autorun is NOT enabled on your computer, the DVD automatically displays the Specials screen. 1.9 Software support 1.9.1 Installing an operating system This motherboard supports Windows® XP / Windows® Vista / Windows® 7 / Windows...
... OS version and corresponding updates to maximize the features of the Support DVD to your hardware. • Motherboard settings and hardware options vary. Visit the ASUS website at any time without notice. Click Drivers, Utilities, Make Disk, Manual, and Contact tabs to install If Autorun is NOT enabled on your computer, the DVD automatically displays the Specials screen. 1.9 Software support 1.9.1 Installing an operating system This motherboard supports Windows® XP / Windows® Vista / Windows® 7 / Windows...
User Guide
Page 31
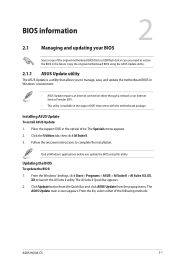
... Suite II. 3. The ASUS Update main screen appears. XX to complete the installation. From the list, select either through a network or an Internet Service Provider (ISP). • This utility is a utility that comes with the motherboard package. Place the support DVD in the support DVD that allows you update the BIOS using the ASUS Update utility. 2.1.1 ASUS Update utility The ASUS Update is available in the optical drive. From the Windows® desktop, click Start > Programs > ASUS > AI Suite II > AI...
... Suite II. 3. The ASUS Update main screen appears. XX to complete the installation. From the list, select either through a network or an Internet Service Provider (ISP). • This utility is a utility that comes with the motherboard package. Place the support DVD in the support DVD that allows you update the BIOS using the ASUS Update utility. 2.1.1 ASUS Update utility The ASUS Update is available in the optical drive. From the Windows® desktop, click Start > Programs > ASUS > AI Suite II > AI...
User Guide
Page 33
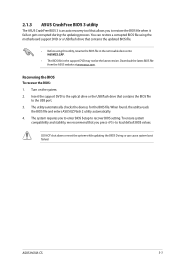
....asus.com. Doing so can restore a corrupted BIOS file using this utility, rename the BIOS file in the removable device into H61MCS.CAP. • The BIOS file in the support DVD may not be the latest version. The system requires you press to recover BIOS setting. ASUS H61M-CS 2-3 DO NOT shut down or reset the system while updating the BIOS! Insert the support DVD to the optical drive or the USB flash drive that you to enter BIOS Setup to load default BIOS...
....asus.com. Doing so can restore a corrupted BIOS file using this utility, rename the BIOS file in the removable device into H61MCS.CAP. • The BIOS file in the support DVD may not be the latest version. The system requires you press to recover BIOS setting. ASUS H61M-CS 2-3 DO NOT shut down or reset the system while updating the BIOS! Insert the support DVD to the optical drive or the USB flash drive that you to enter BIOS Setup to load default BIOS...

User Guide
Page 34
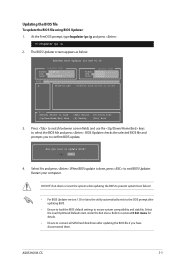
.... Download the latest BIOS file and BIOS Updater from Drive C (optical drive) to a hard disk drive or USB flash drive in DOS environment. The actual utility screen displays may not be same as the boot device. 3. asus.com and save the BIOS file and BIOS Updater to Drive D (USB flash drive). 2-4 Chapter 2: BIOS information Do not save them on the USB flash drive. At the FreeDOS prompt, type d: and press to update BIOS in NTFS format. 3. Prepare the motherboard support DVD and a USB flash drive in DOS environment 1. Insert the USB flash drive...
.... Download the latest BIOS file and BIOS Updater from Drive C (optical drive) to a hard disk drive or USB flash drive in DOS environment. The actual utility screen displays may not be same as the boot device. 3. asus.com and save the BIOS file and BIOS Updater to Drive D (USB flash drive). 2-4 Chapter 2: BIOS information Do not save them on the USB flash drive. At the FreeDOS prompt, type d: and press to update BIOS in NTFS format. 3. Prepare the motherboard support DVD and a USB flash drive in DOS environment 1. Insert the USB flash drive...
User Guide
Page 35
... keys to exit BIOS Updater. BIOS Updater checks the selected BIOS file and prompts you have disconnected them. ASUSTek BIOS Updater for details. • Ensure to connect all SATA hard disk drives after updating BIOS. • Ensure to load the BIOS default settings to confirm BIOS update. 4. Updating the BIOS file To update the BIOS file using BIOS Updater: 1. The BIOS Updater screen appears as below. DO NOT shut down or reset the system while updating the BIOS to prevent system boot failure!. • For BIOS Updater version 1.30 or later, the utility...
... keys to exit BIOS Updater. BIOS Updater checks the selected BIOS file and prompts you have disconnected them. ASUSTek BIOS Updater for details. • Ensure to connect all SATA hard disk drives after updating BIOS. • Ensure to load the BIOS default settings to confirm BIOS update. 4. Updating the BIOS file To update the BIOS file using BIOS Updater: 1. The BIOS Updater screen appears as below. DO NOT shut down or reset the system while updating the BIOS to prevent system boot failure!. • For BIOS Updater version 1.30 or later, the utility...

User Guide
Page 43
...-turbo CPU ratio. Use and key to run faster than marked frequency in decreased average consumption and decreased average heat production. Turbo Mode [Enabled] [Enabled] Allows processor cores to adjust the value at any given time for CPU cores. Primary Plane Current Limit [Auto] Maximum instantaneous current allowed at 0.125A increment. CPU Ratio [Auto] Allows you set the DRAM timing control features. ASUS H61M-CS 2-13 To restore the default setting, type [auto] using the keyboard...
...-turbo CPU ratio. Use and key to run faster than marked frequency in decreased average consumption and decreased average heat production. Turbo Mode [Enabled] [Enabled] Allows processor cores to adjust the value at any given time for CPU cores. Primary Plane Current Limit [Auto] Maximum instantaneous current allowed at 0.125A increment. CPU Ratio [Auto] Allows you set the DRAM timing control features. ASUS H61M-CS 2-13 To restore the default setting, type [auto] using the keyboard...

User Guide
Page 45
... OS. [Auto] Set this item automatically. [Disabled] Disables this function. [Enabled] Allows you to set the ratio between the CPU Core Clock and the BCLK Frequency. Use and keys to virtually function as several systems. [Disabled] Disables this function. The valid value ranges vary according to perform adjacent cache line prefetching. ASUS H61M-CS 2-15 Enhanced Intel SpeedStep Technology [Enabled] Allows you to disable or enable the CPU C3 report to turn on /off...
... OS. [Auto] Set this item automatically. [Disabled] Disables this function. [Enabled] Allows you to set the ratio between the CPU Core Clock and the BCLK Frequency. Use and keys to virtually function as several systems. [Disabled] Disables this function. The valid value ranges vary according to perform adjacent cache line prefetching. ASUS H61M-CS 2-15 Enhanced Intel SpeedStep Technology [Enabled] Allows you to disable or enable the CPU C3 report to turn on /off...
User Guide
Page 47
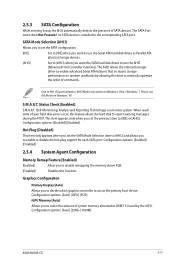
... works on random workloads by the iGPU. Configuration options: [Auto] [32M]~[1024M] ASUS H61M-CS 2-17 The SATA Port items show Not Present if no SATA device is a monitor system. SATA Mode Selection [AHCI] Allows you to set the SATA Mode Selection item to [AHCI] and allows you want to report warning messages during the POST. Due to use the AHCI (Advanced Host Controller Interface). Configuration options: [Auto] [iGPU] [PCIE] iGPU Memory [Auto] Allows you to decide which graphics controller to enable...
... works on random workloads by the iGPU. Configuration options: [Auto] [32M]~[1024M] ASUS H61M-CS 2-17 The SATA Port items show Not Present if no SATA device is a monitor system. SATA Mode Selection [AHCI] Allows you to set the SATA Mode Selection item to [AHCI] and allows you want to report warning messages during the POST. Due to use the AHCI (Advanced Host Controller Interface). Configuration options: [Auto] [iGPU] [PCIE] iGPU Memory [Auto] Allows you to decide which graphics controller to enable...

User Guide
Page 48
... legacy USB support is enabled. USB Single Port Control USB1~6 [Enabled] Allows you to the section 1.3.3 Motherboard layout in this item to [Enabled] to enable the iGPU Multi-Monitor. The USB port numbers may not be used only for the locations of USB devices at startup. Configuration options: [Disabled] [Enabled] 2.5.5 USB Configuration The items in this user manual for the BIOS setup program. [Auto] Allows the system to reduce the iGPU power use when idle. Intel USB2.0 EHCI Controller [Enabled] [Disabled] Disables the Intel USB2.0 EHCI controller. [Enabled] Enables...
... legacy USB support is enabled. USB Single Port Control USB1~6 [Enabled] Allows you to the section 1.3.3 Motherboard layout in this item to [Enabled] to enable the iGPU Multi-Monitor. The USB port numbers may not be used only for the locations of USB devices at startup. Configuration options: [Disabled] [Enabled] 2.5.5 USB Configuration The items in this user manual for the BIOS setup program. [Auto] Allows the system to reduce the iGPU power use when idle. Intel USB2.0 EHCI Controller [Enabled] [Disabled] Disables the Intel USB2.0 EHCI controller. [Enabled] Enables...

User Guide
Page 49
... mode to high definition audio. [AC97] Sets the front panel audio connector (AAFP) mode to generate a wake event. Power On By PCI/PCIE [Disabled] [Disabled] Disables the PCI/PCIE devices to generate a wake event. [Enabled] Enables the PCI/PCIE devices to legacy AC'97. ASUS H61M-CS 2-19 Front Panel Type [HD] Allows you set the front panel audio connector (AAFP) mode to legacy AC'97 or high-definition audio depending on state, whatever the system state was before the AC power loss. 2.5.6 Onboard Devices Configuration HD Audio Controller [Enabled] [Enabled...
... mode to high definition audio. [AC97] Sets the front panel audio connector (AAFP) mode to generate a wake event. Power On By PCI/PCIE [Disabled] [Disabled] Disables the PCI/PCIE devices to generate a wake event. [Enabled] Enables the PCI/PCIE devices to legacy AC'97. ASUS H61M-CS 2-19 Front Panel Type [HD] Allows you set the front panel audio connector (AAFP) mode to legacy AC'97 or high-definition audio depending on state, whatever the system state was before the AC power loss. 2.5.6 Onboard Devices Configuration HD Audio Controller [Enabled] [Enabled...

User Guide
Page 52
... chassis fan speed. Duty Cycle(%) [100] Use the and keys to 100%. When the chassis temperature is under 40ºC, the chassis fan will operate at the minimum duty cycle. Configuration options: [Disabled] [Enabled] 2-22 Chapter 2: BIOS information The values range from 60% to 90ºC. CPU Fan Min. Duty Cycle(%) [60] Use the and keys to enable or disable the Anti Surge function. Anti Surge Support [Disabled] This item allows you set...
... chassis fan speed. Duty Cycle(%) [100] Use the and keys to 100%. When the chassis temperature is under 40ºC, the chassis fan will operate at the minimum duty cycle. Configuration options: [Disabled] [Enabled] 2-22 Chapter 2: BIOS information The values range from 60% to 90ºC. CPU Fan Min. Duty Cycle(%) [60] Use the and keys to enable or disable the Anti Surge function. Anti Surge Support [Disabled] This item allows you set...

User Guide
Page 54
... F1 key to [Enabled]. PS/2 Keyboard and Mouse Support [Auto] Select any circumstances. These settings only apply when Fast Boot is set Full Screen Logo to be available until your computer enters the operating system. Configuration options: [Disabled] [Enabled] 2-24 Chapter 2: BIOS information This process will extend POST time. [Disabled] For the fastest POST time, all PS/2 devices will only work under normal boot. Network Stack Driver Support [Disabled] [Disabled] Select to skip the network stack driver from...
... F1 key to [Enabled]. PS/2 Keyboard and Mouse Support [Auto] Select any circumstances. These settings only apply when Fast Boot is set Full Screen Logo to be available until your computer enters the operating system. Configuration options: [Disabled] [Enabled] 2-24 Chapter 2: BIOS information This process will extend POST time. [Disabled] For the fastest POST time, all PS/2 devices will only work under normal boot. Network Stack Driver Support [Disabled] [Disabled] Select to skip the network stack driver from...
User Guide
Page 55
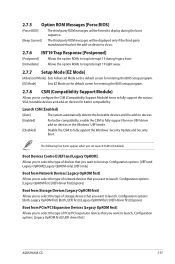
... set the add-on devices for entering the BIOS setup program. 2.7.8 CSM (Compatibility Support Module) Allows you want to launch. Boot Devices Control [UEFI and Legacy OpROM] Allows you to select the type of PCIe/PCI expansion devices that you want to launch. Configuration options: [UEFI and Legacy OpROM] [Legacy OpROM only] [UEFI only] Boot from PCIe/PCI Expansion Devices [Legacy OpROM first] Allows you to select the type of devices that you want to launch. Configuration options: [Legacy OpROM first] [UEFI driver first] ASUS H61M-CS...
... set the add-on devices for entering the BIOS setup program. 2.7.8 CSM (Compatibility Support Module) Allows you want to launch. Boot Devices Control [UEFI and Legacy OpROM] Allows you to select the type of PCIe/PCI expansion devices that you want to launch. Configuration options: [UEFI and Legacy OpROM] [Legacy OpROM only] [UEFI only] Boot from PCIe/PCI Expansion Devices [Legacy OpROM first] Allows you to select the type of devices that you want to launch. Configuration options: [Legacy OpROM first] [UEFI driver first] ASUS H61M-CS...


