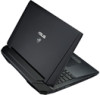
User's Manual for English Edition
Page 3
... Bottom ...18 Right Side...20 Left Side ...22 Rear View...24 Chapter 2: Using your Notebook PC Getting started 26 Install the battery pack (on selected models 26 Charge your Notebook PC 27 Lift to open the display panel 28 Press the power button 28 Gestures for the touchpad 29 Moving the... pointer 29 One-finger gestures 30 Two-finger gestures 32 Three-finger gestures 33 Using the keyboard 34 Function keys 34 Function keys for ASUS Apps 35 Windows®8 keys 35 Multimedia control keys 36 Numeric keypad 36 Using the optical drive 37 Notebook PC E-Manual
User's Manual for English Edition
Page 5
...) module 88 Replacing the Hard Disk Drive (HDD 92 Installing a new battery pack 98 Appendices DVD-ROM Drive Information (on selected models 102 Blu-ray ROM Drive Information (on selected models 104 Internal Modem Compliancy 105 Overview...105 Network Compatibility Declaration 105 Network Compatibility Declaration 106 Non-Voice Equipment 106 Federal Communications...
User's Manual for English Edition
Page 14
The top view may vary per region or country. Getting to know your Notebook PC Top View NOTE: The keyboard's layout may also vary in appearance depending on the Notebook PC model. 14 Notebook PC E-Manual
User's Manual for English Edition
Page 15
... hibernate mode and wake it up from sleep or hibernate mode. NOTE: For more details, refer to turn your Notebook PC on selected models) The 3D Vision IR port transmits 3D Vision signals to take pictures or record videos using your 3D glasses while playing 3D video games... the event that your Notebook PC becomes unresponsive, press and hold the power button for photos, videos, and other multimedia files on Notebook PC model. Display panel This display panel provides excellent viewing features for about four (4) seconds until your Notebook PC. NOTE: The display resolution may vary ...
User's Manual for English Edition
Page 16
NOTE: • The keyboard layout differs by model or territory. • Some selected models come with a comfortable travel depth for typing. It also simulates the functions of multi-gestures to Windows®, and controls other multimedia functions. Touchpad The ...
User's Manual for English Edition
Page 18
The bottom of the Notebook PC can block the vents. IMPORTANT! WARNING! When working on your Notebook PC, do not place it on model. Bottom NOTE: The bottom side may vary in appearance depending on surfaces that can get warm to hot while in use or while charging the battery pack. The battery pack cannot be disassembled. 18 Notebook PC E-Manual Battery time varies by usage and by the specifications for this Notebook PC.
User's Manual for English Edition
Page 20
... Side Headphone output and S/PDIF output combo jack port This port allows you to USB 2.0. Mini DisplayPort/Thunderbolt port (varies by model) Use a Thunderbolt adapter to connect your Notebook PC to Sony/Philips Digital Interconnect Format (S/PDIF) compliant devices. USB 3.0 port with USB Charger+ This USB 3.0 port ...
User's Manual for English Edition
Page 26
Align and insert the battery pack into the Notebook PC's battery slot. 26 Notebook PC E-Manual IMPORTANT! If your Notebook PC does not have its battery pack installed, use the following procedures for installation. Getting started Install the battery pack (on selected models).
User's Manual for English Edition
Page 34
... a backlit keyboard Increases keyboard brightness for Notebook PC models with a backlit keyboard Decreases display brightness Increases display brightness Turns the display panel off Toggles the display mode NOTE: Ensure that the second display is ...
User's Manual for English Edition
Page 36
... control keys allow you to control multimedia files, such as audios and videos, when played in combination with the arrow keys on selected Notebook PC models. Press in your Notebook PC, illustrated as below: Stop Numeric keypad Skip to previous track or rewind Play or pause Skip to next track or...
User's Manual for English Edition
Page 37
... NOTE: The actual location of the electronic eject button may get jammed under the drive tray. 3. While the Notebook PC is on your Notebook PC model. Be careful not to partially eject the optical drive tray. 2. Push down the disc's plastic hub until it inside the hub. 4. Ensure that there are...
User's Manual for English Edition
Page 69
...your Notebook PC is available in battery mode. Using the USB Charger+ Settings The USB Charger+ Settings lets you set the charge limit when your ASUS Notebook PC is running on battery power and allows you to charge devices while your Notebook PC is on sleep, hibernate, or shutdown mode. ...the USB Charger+ icon on the desktop tray, then click Settings. 2. NOTE: USB Charger+ is on sleep, hibernate, or shutdown mode (available on selected models only). Notebook PC E-Manual 69 Tick Enable USB Charger+ in your USB 3.0 charge port with the icon. USB Charger+ USB Charger+ allows you to quick...
User's Manual for English Edition
Page 70
Select one or both options. Tap OK to set the limit for charging devices. 5. Otherwise, tap Cancel. 70 Notebook PC E-Manual Move the percentage slider to the left or to the right to save the settings made. NOTE: On some models, the USB Charger+ automatically selects both of these two options, if necessary. 4. 3. You can deselect these charging options: Enable quick charge when the system is running or Enable quick charge when the system is in sleep/hibernate/ shutdown mode.
User's Manual for English Edition
Page 71
... lets you save more . The standby time varies according to thirty (30) days or more battery power while your ASUS Notebook PC is default-enabled in your Notebook PC's remaining battery capacity, computer model, configuration, and operating conditions. Performance mode This mode is on deep sleep mode (Deep S3) using Instant On...
User's Manual for English Edition
Page 75
... F9 : Optimized Defaults F10 : Save & Exit ESC : Exit Version 2.15.1231. The actual screens may refer to set your boot priority. 1. You may differ by model and territory. Copyright (C) 2012 American Megatrends, Inc. Aptio Setup Utility -
User's Manual for English Edition
Page 81
...Save Changes Discard Changes Restore Defaults Boot Override Atheros Boot Agent P1: Hitachi HTS547575A9E384 Windows Boot Manager Launch EFI Shell from the ASUS website. 2. Connect your flash disk drive to a flash disk drive. 3. Aptio Setup Utility - Copyright (C) 2012 American Megatrends..., Inc. Copyright (C) 2012 American Megatrends, Inc. Verify the Notebook PC's exact model then download the latest BIOS file for your Notebook PC. 4. Restart your configuration settings, select Save Changes and Exit before exiting the ...
User's Manual for English Edition
Page 88
.... Visit an authorized service center or retailer for information on RAM module upgrades for your Notebook PC's bottom side and RAM module may vary per model but the RAM module installation remains the same. 88 Notebook PC E-Manual Disconnect all the connected peripherals, any telephone or telecommunication lines and power connector...
User's Manual for English Edition
Page 92
... reliability. Purchase an HDD from authorized retailers of this Notebook PC to replace the hard disk drive of your Notebook PC. You may vary per model but the HDD installation remains the same. 92 Notebook PC E-Manual Replacing the Hard Disk Drive (HDD) Refer to the following steps if you replace...
User's Manual for English Edition
Page 102
... must only be capable of CSS protected content. DVD-ROM Drive Information (on regionalized content. CSS (sometimes called copy guard) is playback restrictions on selected models) The DVD-ROM drive allows you to protect against unlawful content duplication. You can only play DVD movies for multiple regions, CSS design rules require...
User's Manual for English Edition
Page 104
Blu-ray ROM Drive Information (on selected models) The Blu-ray ROM Drive allows you to Blu-ray Disc website at www.blu-raydisc.com/en/ Technical/FAQs/Blu-rayDiscforVideo.aspx for more ...