User Manual
Page 54
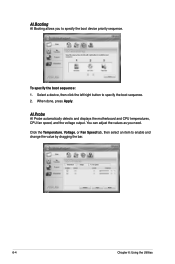
AI Booting AI Booting allows you need. Click the Temperature, Voltage, or Fan Speed tab, then select an item to specify the boot device priority sequence. When done, press Apply. You can adjust the values as you to enable and change the value by dragging the bar. 6-4 Chapter 6: Using the Utilities Select a device, then click the left/right button to specify the boot sequence. 2. AI Probe AI Probe automatically detects and displays the motherboard and CPU temperatures, CPU fan speed, and the voltage output. To specify the boot sequence: 1.
AI Booting AI Booting allows you need. Click the Temperature, Voltage, or Fan Speed tab, then select an item to specify the boot device priority sequence. When done, press Apply. You can adjust the values as you to enable and change the value by dragging the bar. 6-4 Chapter 6: Using the Utilities Select a device, then click the left/right button to specify the boot sequence. 2. AI Probe AI Probe automatically detects and displays the motherboard and CPU temperatures, CPU fan speed, and the voltage output. To specify the boot sequence: 1.
User Manual
Page 56
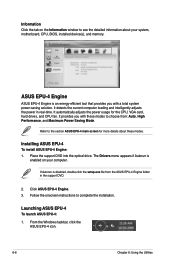
... DVD. 2. Refer to see the detailed information about these modes to complete the installation. Launching ASUS EPU-4 To launch ASUS EPU-4: 1. From the Windows taskbar, click the ASUS EPU-4 icon. 6-6 Chapter 6: Using the Utilities It automatically adjusts the power usage for more details...Mode. Place the support DVD into the optical drive. Click ASUS EPU-4 Engine. 3. Follow the onscreen instructions to choose from the ASUS EPU-4 Engine folder in real-time. Information Click the tab on your system, motherboard, CPU, BIOS, installed device(s), and memory. It provides you...
... DVD. 2. Refer to see the detailed information about these modes to complete the installation. Launching ASUS EPU-4 To launch ASUS EPU-4: 1. From the Windows taskbar, click the ASUS EPU-4 icon. 6-6 Chapter 6: Using the Utilities It automatically adjusts the power usage for more details...Mode. Place the support DVD into the optical drive. Click ASUS EPU-4 Engine. 3. Follow the onscreen instructions to choose from the ASUS EPU-4 Engine folder in real-time. Information Click the tab on your system, motherboard, CPU, BIOS, installed device(s), and memory. It provides you...
User Manual
Page 57
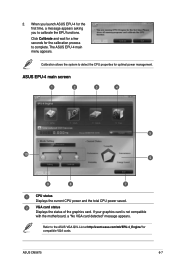
...ASUS CM5675 6-7 Calibration allows the system to calibrate the EPU functions. When you launch ASUS EPU-4 for the first time, a message appears asking you to detect the CPU properties for compatible VGA cards. Click Calibrate and wait for a few seconds for the calibration process to the ASUS VGA QVL List at http://event.asus....com/mb/EPU-4_Engine/ for optimal power management. The ASUS EPU-4 main menu appears. If your graphics card is not compatible with the motherboard, a "No VGA card detected" message ...
...ASUS CM5675 6-7 Calibration allows the system to calibrate the EPU functions. When you launch ASUS EPU-4 for the first time, a message appears asking you to detect the CPU properties for compatible VGA cards. Click Calibrate and wait for a few seconds for the calibration process to the ASUS VGA QVL List at http://event.asus....com/mb/EPU-4_Engine/ for optimal power management. The ASUS EPU-4 main menu appears. If your graphics card is not compatible with the motherboard, a "No VGA card detected" message ...
User Manual
Page 60
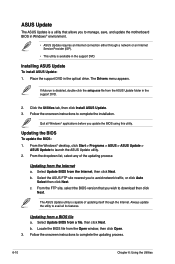
... Open window, then click Open. 3. From the FTP site, select the BIOS version that allows you to manage, save, and update the motherboard BIOS in Windows® environment. • ASUS Update requires an Internet connection either through a network or an Internet Service Provider (ISP). • This utility is capable of the updating...
... Open window, then click Open. 3. From the FTP site, select the BIOS version that allows you to manage, save, and update the motherboard BIOS in Windows® environment. • ASUS Update requires an Internet connection either through a network or an Internet Service Provider (ISP). • This utility is capable of the updating...


