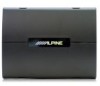
Owner's Manual (english/french)
Page 2
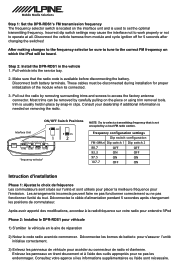
...These cables must be disconnected during installation for 5 seconds after changing the switches! Interface Unit ON/OFF Switch Positions OFF 1 ON 2 "frequency selector" NOTE: Try to access the factory antenna connector. Step 1: Set the DPR-RDS1's FM transmission frequency The frequency selector...; initialise correctement. 3) Enlevez les panneaux de véhicule pour accéder au connecteur de radio et d'antenne. Step 2: Install the DPR-RDS1 in clips. Frequency configuration settings Dip switch configuration FM (MHz) Dip switch 1 Dip switch 2 88.7 OFF OFF 93.3 ON ...
...These cables must be disconnected during installation for 5 seconds after changing the switches! Interface Unit ON/OFF Switch Positions OFF 1 ON 2 "frequency selector" NOTE: Try to access the factory antenna connector. Step 1: Set the DPR-RDS1's FM transmission frequency The frequency selector...; initialise correctement. 3) Enlevez les panneaux de véhicule pour accéder au connecteur de radio et d'antenne. Step 2: Install the DPR-RDS1 in clips. Frequency configuration settings Dip switch configuration FM (MHz) Dip switch 1 Dip switch 2 88.7 OFF OFF 93.3 ON ...
Owner's Manual (english/french)
Page 3
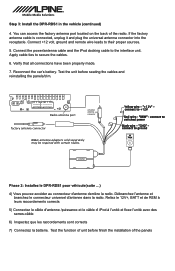
"+12V" connect to the interface unit. Step 3: Install the DPR-RDS1 in the vehicle (continued) 4. You can access the factory antenna port located on the back of the panels Connect the power/antenna cable and the ... sold separately may be required with certain radios. connect to ground Phase 2: Installez le DPR-RDS1 pour véhicule(suite ...) 4) Vous pouvez accéder au connecteur d'antenne derrière la radio. Test the unit before finish the installation of the radio. "GND" connect to switched power Black wire - Connect +12 volt...
"+12V" connect to the interface unit. Step 3: Install the DPR-RDS1 in the vehicle (continued) 4. You can access the factory antenna port located on the back of the panels Connect the power/antenna cable and the ... sold separately may be required with certain radios. connect to ground Phase 2: Installez le DPR-RDS1 pour véhicule(suite ...) 4) Vous pouvez accéder au connecteur d'antenne derrière la radio. Test the unit before finish the installation of the radio. "GND" connect to switched power Black wire - Connect +12 volt...
Owner's Manual (english/french)
Page 4
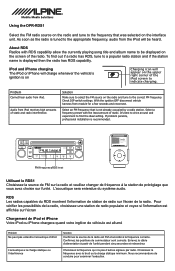
...montrent l'information de station de radio sur l'écran de la radio. Nous recommandons de conduire pour examiner l'exécution. Using the DPR-RDS1 Select the FM radio source on the radio and tune to the frequency that is not already occupied by a radio station. As soon as... de fréquence à la station de préréglage que vous avez choisie sur l'unité. If problem persists, professional installation is displayed then the radio has RDS capability. With the ignition OFF disconnect vehicle harness from iPod. Enlevez le câble d'alimentation à...
...montrent l'information de station de radio sur l'écran de la radio. Nous recommandons de conduire pour examiner l'exécution. Using the DPR-RDS1 Select the FM radio source on the radio and tune to the frequency that is not already occupied by a radio station. As soon as... de fréquence à la station de préréglage que vous avez choisie sur l'unité. If problem persists, professional installation is displayed then the radio has RDS capability. With the ignition OFF disconnect vehicle harness from iPod. Enlevez le câble d'alimentation à...


