
Owners Manual
Page 4
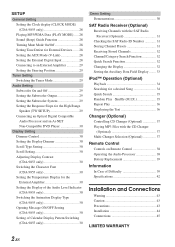
... Setting the Clock display (CLOCK MODE) (CDA-9855 only 28 Playing MP3/WMA Data (PLAY MODE) ..... 28 Sound (Beep) Guide Function 28 Turning Mute Mode On/Off 28 Setting Tone Defeat for External Devices ....... 28 Setting the AUX Mode (V-Link 28 Setting the External Digital Input...Amplifier 30 Setting the Display of the Audio Level Indicator (CDA-9853 only 30 Switching the Animation Display Type (CDA-9855 only 30 Opening Message ON/OFF Setting (CDA-9855 only 30 Setting of Calendar Display Pattern Switching (CDA-9855 only 30 Demo Setting Demonstration 30 SAT Radio Receiver (Optional)...
... Setting the Clock display (CLOCK MODE) (CDA-9855 only 28 Playing MP3/WMA Data (PLAY MODE) ..... 28 Sound (Beep) Guide Function 28 Turning Mute Mode On/Off 28 Setting Tone Defeat for External Devices ....... 28 Setting the AUX Mode (V-Link 28 Setting the External Digital Input...Amplifier 30 Setting the Display of the Audio Level Indicator (CDA-9853 only 30 Switching the Animation Display Type (CDA-9855 only 30 Opening Message ON/OFF Setting (CDA-9855 only 30 Setting of Calendar Display Pattern Switching (CDA-9855 only 30 Demo Setting Demonstration 30 SAT Radio Receiver (Optional)...
Owners Manual
Page 23
...pressed while adjusting or setting the itmes in 60 seconds, the unit will return to the Owner's Manual of compression. About the MX indicator display (CDA-9853 only) MX Level Display Lights up when MX is pressed while adjusting or setting the itmes in step 3. • Each music source, such... your finger on the GlideTouch bar to the media connected. CMPM/SAT (MX level 1 to 3): This corrects information that corresponds to the left or right. AUX (MX level 1): Choose the MX mode (CMPM, MUSIC, or MOVIE) that was lost at least 2 seconds. 7 Select the MX mode by sliding your ...
...pressed while adjusting or setting the itmes in 60 seconds, the unit will return to the Owner's Manual of compression. About the MX indicator display (CDA-9853 only) MX Level Display Lights up when MX is pressed while adjusting or setting the itmes in step 3. • Each music source, such... your finger on the GlideTouch bar to the media connected. CMPM/SAT (MX level 1 to 3): This corrects information that corresponds to the left or right. AUX (MX level 1): Choose the MX mode (CMPM, MUSIC, or MOVIE) that was lost at least 2 seconds. 7 Select the MX mode by sliding your ...
Owners Manual
Page 29
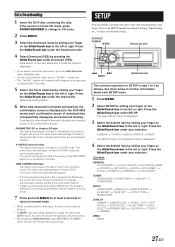
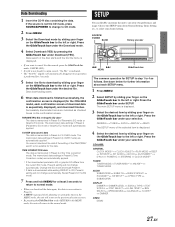
... g f MENU GlideTouch bar The common operation for further information about each confirmation screen of the selected item is performed for the CDA-9853 model, each SETUP menu. 1 Press MENU. 2 Select SETUP by sliding your selection. Choose the SETUP menu from the ...automatically. Data Downloading 1 Insert the CD-R disc containing the data. CDA-9855: GENERAL CLOCK MODE*1 ↔ CLOCK ADJUST ↔ PLAY MODE ↔ BEEP ↔ INT MUTE ↔ INT AUDIO ↔ AUX IN ↔ (AUX NAME)*2 ↔ D-AUX ↔ POWER IC ↔ STEERING ↔ CLOCK MODE*1 TUNER...
... g f MENU GlideTouch bar The common operation for further information about each confirmation screen of the selected item is performed for the CDA-9853 model, each SETUP menu. 1 Press MENU. 2 Select SETUP by sliding your selection. Choose the SETUP menu from the ...automatically. Data Downloading 1 Insert the CD-R disc containing the data. CDA-9855: GENERAL CLOCK MODE*1 ↔ CLOCK ADJUST ↔ PLAY MODE ↔ BEEP ↔ INT MUTE ↔ INT AUDIO ↔ AUX IN ↔ (AUX NAME)*2 ↔ D-AUX ↔ POWER IC ↔ STEERING ↔ CLOCK MODE*1 TUNER...
Owners Manual
Page 30
... the MENU mode, the unit will return to this case, press SOURCE/POWER to select AUX mode and then press BAND to "Setting the Time and Calender (CDA-9855 only)" (page 7). Select the AUX name by pressing the GlideTouch bar under RETURN in 60 seconds, the unit will return to... the normal mode. • If no peration is received from the CD data portion of CD data only. Setting the External Digital Input D-AUX ON / D-AUX OFF (Initial setting) When an ALPINE...
... the MENU mode, the unit will return to this case, press SOURCE/POWER to select AUX mode and then press BAND to "Setting the Time and Calender (CDA-9855 only)" (page 7). Select the AUX name by pressing the GlideTouch bar under RETURN in 60 seconds, the unit will return to... the normal mode. • If no peration is received from the CD data portion of CD data only. Setting the External Digital Input D-AUX ON / D-AUX OFF (Initial setting) When an ALPINE...
Owners Manual
Page 32
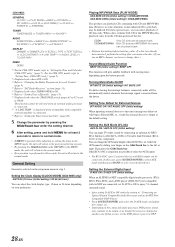
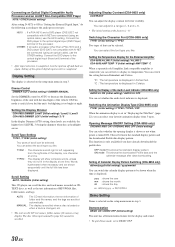
...) Two types of scroll can switch the calendar display pattern to be selected. Setting the Temperature Display for the External Amplifier CDA-9855:A-LINK F (Initial setting) / A-LINK C CDA-9853:AMP TEMP °F (Initial setting)/ AMP TEMP °C When a separately sold Amplifier Link compatible amplifier is displayed... Connecting an Optical Digital Compatible Audio Processor and an Ai-NET Non-Compatible DVD Player H510 / OTHER (Initial setting) After setting D-AUX to ON in "Setting the External Digital Input," do not fit in the display at one character at a time. Dimmer Control ...
...) Two types of scroll can switch the calendar display pattern to be selected. Setting the Temperature Display for the External Amplifier CDA-9855:A-LINK F (Initial setting) / A-LINK C CDA-9853:AMP TEMP °F (Initial setting)/ AMP TEMP °C When a separately sold Amplifier Link compatible amplifier is displayed... Connecting an Optical Digital Compatible Audio Processor and an Ai-NET Non-Compatible DVD Player H510 / OTHER (Initial setting) After setting D-AUX to ON in "Setting the External Digital Input," do not fit in the display at one character at a time. Dimmer Control ...

Owners Manual
Page 39
... If you use 2 Switching devices, you can connect two changers and two external outputs (AUX). 1 Press SOURCE/POWER on page 28. 37-EN Alternatively press BAND on the Remote Control... 1 Press SOURCE/POWER to activate the CD Changer Selection mode. Multi-Changer Selection (Optional) Alpine's Ai-NET system will resume playback. • The unit can play CDROMs, CD-Rs, ... Audio function mode ↔ Direct disc recall mode ↔ Source operation mode* ↔ Source selection mode * CDA-9855 only 3 Select a disc (1 to 6) by this unit. Using the KCA-400C (Multi-Changer Switching device) ...
... If you use 2 Switching devices, you can connect two changers and two external outputs (AUX). 1 Press SOURCE/POWER on page 28. 37-EN Alternatively press BAND on the Remote Control... 1 Press SOURCE/POWER to activate the CD Changer Selection mode. Multi-Changer Selection (Optional) Alpine's Ai-NET system will resume playback. • The unit can play CDROMs, CD-Rs, ... Audio function mode ↔ Direct disc recall mode ↔ Source operation mode* ↔ Source selection mode * CDA-9855 only 3 Select a disc (1 to 6) by this unit. Using the KCA-400C (Multi-Changer Switching device) ...
Owners Manual
Page 3
... Setting the Clock display (CLOCK MODE) (CDA-9855 only 28 Playing MP3/WMA Data (PLAY MODE) ..... 28 Sound (Beep) Guide Function 28 Turning Mute Mode On/Off 28 Setting Tone Defeat for External Devices ....... 28 Setting the AUX Mode (V-Link 28 Setting the External Digital Input...Amplifier 30 Setting the Display of the Audio Level Indicator (CDA-9853 only 30 Switching the Animation Display Type (CDA-9855 only 30 Opening Message ON/OFF Setting (CDA-9855 only 30 Setting of Calendar Display Pattern Switching (CDA-9855 only 30 Demo Setting Demonstration 30 SAT Radio Receiver (Optional)...
... Setting the Clock display (CLOCK MODE) (CDA-9855 only 28 Playing MP3/WMA Data (PLAY MODE) ..... 28 Sound (Beep) Guide Function 28 Turning Mute Mode On/Off 28 Setting Tone Defeat for External Devices ....... 28 Setting the AUX Mode (V-Link 28 Setting the External Digital Input...Amplifier 30 Setting the Display of the Audio Level Indicator (CDA-9853 only 30 Switching the Animation Display Type (CDA-9855 only 30 Opening Message ON/OFF Setting (CDA-9855 only 30 Setting of Calendar Display Pattern Switching (CDA-9855 only 30 Demo Setting Demonstration 30 SAT Radio Receiver (Optional)...
Owners Manual
Page 22
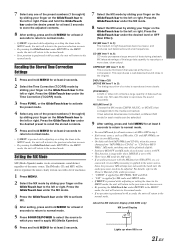
... the left or right. DVD (Video CD) (MOVIE MX level 1 to 3): CD mode processes a large amount of data during playback. About the MX indicator display (CDA-9853 only) MX Level Display Lights up when MX is connected, its own MX setting. • On disks with both MP3/WMA and CD-DA... the MX Level by sliding your finger on the GlideTouch bar to the original. This reproduces a well-balanced sound close to the left or right. AUX (MX level 1): Choose the MX mode (CMPM, MUSIC, or MOVIE) that was lost at least 2 seconds. 2 Select the Time Correction (T.CORR) mode by sliding your...
... the left or right. DVD (Video CD) (MOVIE MX level 1 to 3): CD mode processes a large amount of data during playback. About the MX indicator display (CDA-9853 only) MX Level Display Lights up when MX is connected, its own MX setting. • On disks with both MP3/WMA and CD-DA... the MX Level by sliding your finger on the GlideTouch bar to the original. This reproduces a well-balanced sound close to the left or right. AUX (MX level 1): Choose the MX mode (CMPM, MUSIC, or MOVIE) that was lost at least 2 seconds. 2 Select the Time Correction (T.CORR) mode by sliding your...
Owners Manual
Page 28
... MENU. 2 Select SETUP by pressing the GlideTouch bar under your own preferences and usage. CDA-9855: GENERAL CLOCK MODE*1 ↔ CLOCK ADJUST ↔ PLAY MODE ↔ BEEP ↔ INT MUTE ↔ INT AUDIO ↔ AUX IN ↔ (AUX NAME)*2 ↔ D-AUX ↔ POWER IC ↔ STEERING ↔ CLOCK MODE*1 TUNER TUNER MODE ↔ TUNER AREA...
... MENU. 2 Select SETUP by pressing the GlideTouch bar under your own preferences and usage. CDA-9855: GENERAL CLOCK MODE*1 ↔ CLOCK ADJUST ↔ PLAY MODE ↔ BEEP ↔ INT MUTE ↔ INT AUDIO ↔ AUX IN ↔ (AUX NAME)*2 ↔ D-AUX ↔ POWER IC ↔ STEERING ↔ CLOCK MODE*1 TUNER TUNER MODE ↔ TUNER AREA...
Owners Manual
Page 29
... Input D-AUX ON / D-AUX OFF (Initial setting) When an ALPINE Ai-NET compatible digital audio processor (PXAH510, PXA-H701) and a DVD player (DVE-5207) not compatible with Ai-NET are connected, set the DVD player's power to this component. Setting the Clock display (CLOCK MODE) (CDA-9855 only) AM12...3WAY switch (pages 45 to 47) is set to "Setting the Time and Calender (CDA-9855 only)" (page 7). For the CDA-9853 model, refer to "Setting Time (CDA-9853 only)" (page 7). *2 Displayed only when AUX is ON. *3 Refer to "Changing the Radio Frequencies for external devices is received ...
... Input D-AUX ON / D-AUX OFF (Initial setting) When an ALPINE Ai-NET compatible digital audio processor (PXAH510, PXA-H701) and a DVD player (DVE-5207) not compatible with Ai-NET are connected, set the DVD player's power to this component. Setting the Clock display (CLOCK MODE) (CDA-9855 only) AM12...3WAY switch (pages 45 to 47) is set to "Setting the Time and Calender (CDA-9855 only)" (page 7). For the CDA-9853 model, refer to "Setting Time (CDA-9853 only)" (page 7). *2 Displayed only when AUX is ON. *3 Refer to "Changing the Radio Frequencies for external devices is received ...

Owners Manual
Page 31
... selected on . Setting of the unit with Ai-NET are on the setup main menu in step 3. Switching the Animation Display Type (CDA-9855 only) TYPE1 (initial setting) / TYPE2 / TYPE3 / OFF When the animation display is completed. Connecting an Optical Digital Compatible Audio Processor...DVD Player H510 / OTHER (Initial setting) After setting D-AUX to ON in "Setting the External Digital Input," do not fit in the display at one character at a time. Setting the Display Dimmer CDA-9855:DIMMER Level1 (initial setting) / Level2 / Level3 CDA-9853:DIMMER LEV1 (initial setting) / 2 / 3 In...
... selected on . Setting of the unit with Ai-NET are on the setup main menu in step 3. Switching the Animation Display Type (CDA-9855 only) TYPE1 (initial setting) / TYPE2 / TYPE3 / OFF When the animation display is completed. Connecting an Optical Digital Compatible Audio Processor...DVD Player H510 / OTHER (Initial setting) After setting D-AUX to ON in "Setting the External Digital Input," do not fit in the display at one character at a time. Setting the Display Dimmer CDA-9855:DIMMER Level1 (initial setting) / Level2 / Level3 CDA-9853:DIMMER LEV1 (initial setting) / 2 / 3 In...

Owners Manual
Page 38
... press -/J. For details, please see "Setting the AUX Mode (V-Link)" on the display. to activate the direct disc recall mode. Source selection mode ↔ Audio function mode ↔ Direct disc recall mode ↔ Source operation mode* ↔ Source selection mode * CDA-9855 only 3 Select a disc (1 to 6) by ...Playing MP3 Files with the CD Changer (Optional) If you can connect up to activate the CHANGER mode. Multi-Changer Selection (Optional) Alpine's Ai-NET system will be used. The CD Changer Selection mode remains active for the CD player of this unit, the CD Changer ...
... press -/J. For details, please see "Setting the AUX Mode (V-Link)" on the display. to activate the direct disc recall mode. Source selection mode ↔ Audio function mode ↔ Direct disc recall mode ↔ Source operation mode* ↔ Source selection mode * CDA-9855 only 3 Select a disc (1 to 6) by ...Playing MP3 Files with the CD Changer (Optional) If you can connect up to activate the CHANGER mode. Multi-Changer Selection (Optional) Alpine's Ai-NET system will be used. The CD Changer Selection mode remains active for the CD player of this unit, the CD Changer ...


