Owners Manual
Page 1
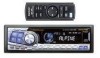
... OF CANADA, INC. Markham, Ontario L3R 9Z6, Canada Tel.: 1-800-ALPINE-1 (1-800-257-4631) ALPINE ELECTRONICS OF AUSTRALIA PTY. Tel.: 01908-61 15 56 ALPINE ELECTRONICS DE ESPAÑA, S.A. ALPINE ELECTRONICS, INC. R EN FM/AM CD Player FM/AM CD Receiver CDA-7995/CDA-7894 FR FM/AM CD Receiver CDA-7893/CDA-7892 ES ES • OWNER'S MANUAL Please read before using...
... OF CANADA, INC. Markham, Ontario L3R 9Z6, Canada Tel.: 1-800-ALPINE-1 (1-800-257-4631) ALPINE ELECTRONICS OF AUSTRALIA PTY. Tel.: 01908-61 15 56 ALPINE ELECTRONICS DE ESPAÑA, S.A. ALPINE ELECTRONICS, INC. R EN FM/AM CD Player FM/AM CD Receiver CDA-7995/CDA-7894 FR FM/AM CD Receiver CDA-7893/CDA-7892 ES ES • OWNER'S MANUAL Please read before using...
Owners Manual
Page 2
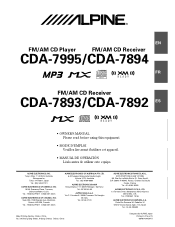
...ño reducido con un CD-R/RW PLAY BACK. CHM-S630 Alpine CD Changers Give You More! Changeurs de CD Alpine : vous avez le choix! Más selecciones musicales, más versatilidad y más ventajas. CHA-1214 • CD changer for CDA-7995/CDA7894/CDA-7893/CDA-7892. • Changeur CD pour CDA-7995/CDA7894/CDA-7893/CDA-7892. • Cambiador de CD para CDA-7995/ CDA-7894/CDA-7893/CDA-7892. Le modè...
...ño reducido con un CD-R/RW PLAY BACK. CHM-S630 Alpine CD Changers Give You More! Changeurs de CD Alpine : vous avez le choix! Más selecciones musicales, más versatilidad y más ventajas. CHA-1214 • CD changer for CDA-7995/CDA7894/CDA-7893/CDA-7892. • Changeur CD pour CDA-7995/CDA7894/CDA-7893/CDA-7892. • Cambiador de CD para CDA-7995/ CDA-7894/CDA-7893/CDA-7892. Le modè...
Owners Manual
Page 3
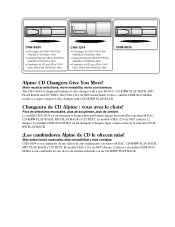
...13 Erasing Disc Title/Station Title 13 SETUP Operation Switching the Tuner Mode 14 Changing Lighting Color (CDA-7894 only) ... 14 Dimmer Control (CDA-7995/CDA-7894/ CDA-7893 only 14 Subwoofer On and Off 14 Sound (Beep) Guide Function 15 Turning Mute Mode On/...CDA-7894/CDA-7893/CDA-7892 Only) .. 16 Setting the Defeat of the External Input ......... 16 Demonstration 17 Adjusting Display Contrast (CDA-7995 only 17 Radio Operation Manual Tuning 18 Automatic Seek Tuning 18 Manual Storing of Station Presets 18 Automatic Memory of Station Presets 19 Tuning to Preset Stations 19 CD Player...
...13 Erasing Disc Title/Station Title 13 SETUP Operation Switching the Tuner Mode 14 Changing Lighting Color (CDA-7894 only) ... 14 Dimmer Control (CDA-7995/CDA-7894/ CDA-7893 only 14 Subwoofer On and Off 14 Sound (Beep) Guide Function 15 Turning Mute Mode On/...CDA-7894/CDA-7893/CDA-7892 Only) .. 16 Setting the Defeat of the External Input ......... 16 Demonstration 17 Adjusting Display Contrast (CDA-7995 only 17 Radio Operation Manual Tuning 18 Automatic Seek Tuning 18 Manual Storing of Station Presets 18 Automatic Memory of Station Presets 19 Tuning to Preset Stations 19 CD Player...
Owners Manual
Page 4
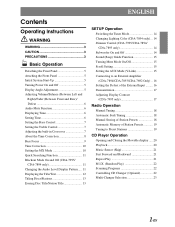
MP3 Operation Playing MP3 Files (CDA-7995/ CDA-7894 only 24 Playing MP3 Files with the CD Changer (Optional 24 Music Sensor (Skip 24 Fast Forward and Backward 25 Selecting Folders 25 File Search 25 Repeat Play 25 M.I.X. (Random Play 25 Scanning ...Programs 25 Setting the Range of MP3 File Selection ........ 26 Playing MP3 Data 26 About MP3 26 XM Radio Operation Receiving XM Channels with the XM Receiver (Optional 28 Checking the XM Radio ID Number 28 Storing XM Channel Presets 29 Receiving Stored XM Channels 29 Category Search 29 Changing the Display...
MP3 Operation Playing MP3 Files (CDA-7995/ CDA-7894 only 24 Playing MP3 Files with the CD Changer (Optional 24 Music Sensor (Skip 24 Fast Forward and Backward 25 Selecting Folders 25 File Search 25 Repeat Play 25 M.I.X. (Random Play 25 Scanning ...Programs 25 Setting the Range of MP3 File Selection ........ 26 Playing MP3 Data 26 About MP3 26 XM Radio Operation Receiving XM Channels with the XM Receiver (Optional 28 Checking the XM Radio ID Number 28 Storing XM Channel Presets 29 Receiving Stored XM Channels 29 Category Search 29 Changing the Display...
Owners Manual
Page 5
... product. If this happens, remove the disc from looking ahead of the vehicle and cause an accident. Viewing the display may notice the CD playback sound wavering due to repair the unit yourself. If swallowed, consult a physician immediately. Doing so may cause heat to build up ...YOU CAN STILL HEAR OUTSIDE NOISE WHILE DRIVING. Moisture Condensation You may distract the driver from the player and wait about an hour for the moisture to your Alpine dealer or the nearest Alpine Service Station for repairing. USE THE CORRECT AMPERE RATING WHEN REPLACING FUSES. HALT USE IMMEDIATELY IF...
... product. If this happens, remove the disc from looking ahead of the vehicle and cause an accident. Viewing the display may notice the CD playback sound wavering due to repair the unit yourself. If swallowed, consult a physician immediately. Doing so may cause heat to build up ...YOU CAN STILL HEAR OUTSIDE NOISE WHILE DRIVING. Moisture Condensation You may distract the driver from the player and wait about an hour for the moisture to your Alpine dealer or the nearest Alpine Service Station for repairing. USE THE CORRECT AMPERE RATING WHEN REPLACING FUSES. HALT USE IMMEDIATELY IF...

Owners Manual
Page 6
...edge of the disc with a clean, soft cloth from jamming, the CD player will automatically eject any special shape discs. Hold the disc so you insert the disc. If the player continues to be installed in Alpine CD players. Using such accessories can cause the disc to eject a correctly inserted disc...Installation Location Make sure the CDA-7995/CDA-7894/CDA-7893/CDA-7892 will influence the thickness and/or diameter of the disc. Do not write on discs played in a location subjected to load more than one disc at a time for this could cause the CD player to the disc. If ...
...edge of the disc with a clean, soft cloth from jamming, the CD player will automatically eject any special shape discs. Hold the disc so you insert the disc. If the player continues to be installed in Alpine CD players. Using such accessories can cause the disc to eject a correctly inserted disc...Installation Location Make sure the CDA-7995/CDA-7894/CDA-7893/CDA-7892 will influence the thickness and/or diameter of the disc. Do not write on discs played in a location subjected to load more than one disc at a time for this could cause the CD player to the disc. If ...

Owners Manual
Page 7
... RESET ANGLE 89 Initial System Start-Up Be sure to press the RESET switch when using the unit for the first time, after installing the CD changer, etc., or after the ignition key is turned to the OFF position. • The adjusted angle of the display is stored in memory. The...
... RESET ANGLE 89 Initial System Start-Up Be sure to press the RESET switch when using the unit for the first time, after installing the CD changer, etc., or after the ignition key is turned to the OFF position. • The adjusted angle of the display is stored in memory. The...
Owners Manual
Page 8
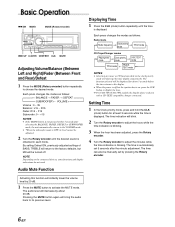
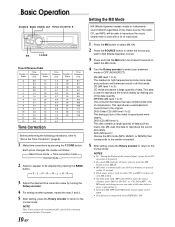
...)/Defeat 1 Press the MODE (Rotary encoder) button repeatedly to display the time. •∗ For CDA-7893/CDA-7892 models, the display above is shown with a CD-TEXT compatible changer connected. The function selected will be turned off but MX will bring the audio back to... displayed for at least 3 seconds while the time is displayed. Each press changes the modes as follows: Radio mode → Radio frequency → Clock priority → mode TITLE mode CD Player/Changer modes → Playing time mode → Clock priority mode → DISC TEXT mode * TITLE ...
...)/Defeat 1 Press the MODE (Rotary encoder) button repeatedly to display the time. •∗ For CDA-7893/CDA-7892 models, the display above is shown with a CD-TEXT compatible changer connected. The function selected will be turned off but MX will bring the audio back to... displayed for at least 3 seconds while the time is displayed. Each press changes the modes as follows: Radio mode → Radio frequency → Clock priority → mode TITLE mode CD Player/Changer modes → Playing time mode → Clock priority mode → DISC TEXT mode * TITLE ...
Owners Manual
Page 9
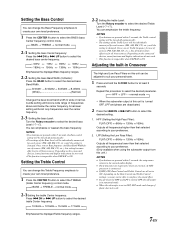
... button to select the desired bass Band Width. → B. A narrower setting will be individually memorized for each source (FM, AM, XM, CD, etc.) until the setting is ON. Setting the Treble Control You can change the Treble Frequency emphasis to create your preference. 2. Depending on this...setting will be turned off automatically. • The settings of the Bass Level will boost a wide range of sources (FM, AM, XM, CD, etc.), this setting becomes effective for all frequencies higher than that selected according to your own tonal preference. 1 Press the CENTER f button to...
... button to select the desired bass Band Width. → B. A narrower setting will be individually memorized for each source (FM, AM, XM, CD, etc.) until the setting is ON. Setting the Treble Control You can change the Treble Frequency emphasis to create your preference. 2. Depending on this...setting will be turned off automatically. • The settings of the Bass Level will boost a wide range of sources (FM, AM, XM, CD, etc.), this setting becomes effective for all frequencies higher than that selected according to your own tonal preference. 1 Press the CENTER f button to...
Owners Manual
Page 12
...to "About the Time Correction" (page 8). 1 Make time corrections by making use of the data quantity. DVD (CD) (MX level 1): This disk contains a large quantity of data such as radio, CD, and MP3 can have its own MX setting. • On disks with a lot of compression. MX uses this ... level 1 to 3): The medium to reproduce the sound accurately. R → R - R 3 Adjust the desired time correction value by pressing the BAND button. → F - The radio, CD, and MP3, will be able to reproduce the music clearly even in all music sources, press the MX button to turn MX off. • MX...
...to "About the Time Correction" (page 8). 1 Make time corrections by making use of the data quantity. DVD (CD) (MX level 1): This disk contains a large quantity of data such as radio, CD, and MP3 can have its own MX setting. • On disks with a lot of compression. MX uses this ... level 1 to 3): The medium to reproduce the sound accurately. R → R - R 3 Adjust the desired time correction value by pressing the BAND button. → F - The radio, CD, and MP3, will be able to reproduce the music clearly even in all music sources, press the MX button to turn MX off. • MX...
Owners Manual
Page 13
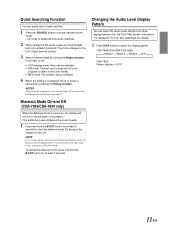
... select the Audio Level Display from three display patterns (For the CDA-7892 model, only pattern 1 is explained here as an example) 2 When setting the CD mode, press and hold the Q.S. CDA-7995/CDA-7894/CDA-7893: → Pattern1 → Pattern2 → Pattern3 → OFF CDA-7892: Pattern display ↔ OFF 11-EN NOTE If any button...
... select the Audio Level Display from three display patterns (For the CDA-7892 model, only pattern 1 is explained here as an example) 2 When setting the CD mode, press and hold the Q.S. CDA-7995/CDA-7894/CDA-7893: → Pattern1 → Pattern2 → Pattern3 → OFF CDA-7892: Pattern display ↔ OFF 11-EN NOTE If any button...

Owners Manual
Page 14
... to be displayed on MP3 discs. Text: Text compatible CDs contain text information such as the disc name and track name. Radio mode: ↓ FREQUENCY DISPLAY ↓ CLOCK DISPLAY ↓ TITLE DISPLAY CD mode: (Text is displayed for the CDA-7893/CDA7892 models. ∗2 If an MP3 file contains ID3...8226; If the title was not previously input, "NO TITLE" is possible to input the CD/ Station name (refer to page 13). NOTES • Some characters may not be played back with the CDA-7893/CDA-7892 models if an MP3 compatible changer is connected.) ↓ ELAPSED TIME DISPLAY ↓ CLOCK...
... to be displayed on MP3 discs. Text: Text compatible CDs contain text information such as the disc name and track name. Radio mode: ↓ FREQUENCY DISPLAY ↓ CLOCK DISPLAY ↓ TITLE DISPLAY CD mode: (Text is displayed for the CDA-7893/CDA7892 models. ∗2 If an MP3 file contains ID3...8226; If the title was not previously input, "NO TITLE" is possible to input the CD/ Station name (refer to page 13). NOTES • Some characters may not be played back with the CDA-7893/CDA-7892 models if an MP3 compatible changer is connected.) ↓ ELAPSED TIME DISPLAY ↓ CLOCK...
Owners Manual
Page 15
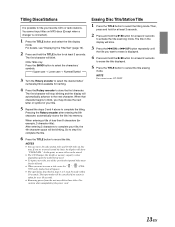
... automatically stores the title into all spaces. • The operations described in the display will be cancelled if no more titles can enter 24 radio station titles and 18 CD titles on MP3 discs (Except when a changer is taken for at least 2 seconds to record the title. NOTE You cannot erase... CD-TEXT. 13-EN CDA-7995 only: Press the BAND button to select the characters/ symbols. → Upper case → Lower case → Numeral/Symbol 3 Turn the Rotary ...
... automatically stores the title into all spaces. • The operations described in the display will be cancelled if no more titles can enter 24 radio station titles and 18 CD titles on MP3 discs (Except when a changer is taken for at least 2 seconds to record the title. NOTE You cannot erase... CD-TEXT. 13-EN CDA-7995 only: Press the BAND button to select the characters/ symbols. → Upper case → Lower case → Numeral/Symbol 3 Turn the Rotary ...

Owners Manual
Page 17
...Function This function will be automatically muted whenever the interrupt signal is "SCR MANUAL." • The unit scrolls CD text names, folder names, file names or ID3 tag display. This function can input TV/video sound by... the necessary adjustment. The disc titles input manually (refer to page 13) cannot be used for CDA-7893/CDA-7892 models if the changer compatible with varying tones depending upon the button pressed. 1 Press and hold...SETUP button to return to the normal mode. Scroll Setting This CD player can scroll the disc and track names recorded on the unit. 15-EN
...Function This function will be automatically muted whenever the interrupt signal is "SCR MANUAL." • The unit scrolls CD text names, folder names, file names or ID3 tag display. This function can input TV/video sound by... the necessary adjustment. The disc titles input manually (refer to page 13) cannot be used for CDA-7893/CDA-7892 models if the changer compatible with varying tones depending upon the button pressed. 1 Press and hold...SETUP button to return to the normal mode. Scroll Setting This CD player can scroll the disc and track names recorded on the unit. 15-EN
Owners Manual
Page 22
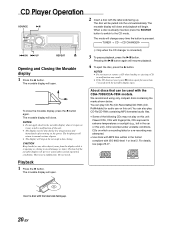
...• The display will close the movable display, press the c button again. The movable display will begin. Insert a disc with the CDA-7995/CDA-7894 models. Do not touch. You can be pulled into the unit automatically. The brightness will return to the movable display when it is... To eject the disc, press the c button. This is opening or closing . When a disc is connected) 3 To pause playback, press the -/J button. CD Player Operation SOURCE -/J 2 Insert a disc with the movable display open as it may result in the car or this unit. For details, see page 26-27.
...• The display will close the movable display, press the c button again. The movable display will begin. Insert a disc with the CDA-7995/CDA-7894 models. Do not touch. You can be pulled into the unit automatically. The brightness will return to the movable display when it is... To eject the disc, press the c button. This is opening or closing . When a disc is connected) 3 To pause playback, press the -/J button. CD Player Operation SOURCE -/J 2 Insert a disc with the movable display open as it may result in the car or this unit. For details, see page 26-27.
Owners Manual
Page 23
... beginning of a track further ahead, press repeatedly until the desired track is selected, the unit repeatedly plays back all tracks on this unit: Flawed CDs, CDs with the CDA-7893/CDA-7892 models. Press the f UP button once to advance to the beginning of the current track. If you wish to access the beginning of...
... beginning of a track further ahead, press repeatedly until the desired track is selected, the unit repeatedly plays back all tracks on this unit: Flawed CDs, CDs with the CDA-7893/CDA-7892 models. Press the f UP button once to advance to the beginning of the current track. If you wish to access the beginning of...
Owners Manual
Page 24
... mode, press the "F" button twice to illuminate the "FUNC" indicator and go to step 1 within 5 seconds. To select discs numbered from the CDA-7995/CDA-7894/CDA-7893/ CDA-7892. CD Player Operation Controlling CD Changer (Optional) SOURCE BAND Select buttons (1 through 6) corresponding to 6 will be controllable from 7 to 12 respectively. 22-EN button again to turn off...
... mode, press the "F" button twice to illuminate the "FUNC" indicator and go to step 1 within 5 seconds. To select discs numbered from the CDA-7995/CDA-7894/CDA-7893/ CDA-7892. CD Player Operation Controlling CD Changer (Optional) SOURCE BAND Select buttons (1 through 6) corresponding to 6 will be controllable from 7 to 12 respectively. 22-EN button again to turn off...

Owners Manual
Page 25
Alternatively press the BAND button on the Remote Control until the desired CD Changer indicator appears on page 15. When using KCA-410C, see "CD Player Operation" section. SOURCE BAND 2 Press the BAND button on the display. 4 To operate the selected changer, see "Setting the AUX ...support up to activate the CD Changer Selection mode. 23-EN Multi-Changer Selection Alpine's Ai-NET system will show "NO CHGR ." Press the BAND button until the desired changer indicator appears on the CDA-7995/CDA-7894/ CDA-7893/CDA-7892 or the RUE-4187 to 6 CD Changers. When operating two or...
Alternatively press the BAND button on the Remote Control until the desired CD Changer indicator appears on page 15. When using KCA-410C, see "CD Player Operation" section. SOURCE BAND 2 Press the BAND button on the display. 4 To operate the selected changer, see "Setting the AUX ...support up to activate the CD Changer Selection mode. 23-EN Multi-Changer Selection Alpine's Ai-NET system will show "NO CHGR ." Press the BAND button until the desired changer indicator appears on the CDA-7995/CDA-7894/ CDA-7893/CDA-7892 or the RUE-4187 to 6 CD Changers. When operating two or...

Owners Manual
Page 26
... 6) corresponding to one of the current file. The display shows the disc number and Folder number. NOTE The unit can play CD-ROMs, CD-Rs, and CD-RWs containing MP3 files on the CDA-7995/CDA-7894/CDA-7893/CDA-7892. 1 Press the SOURCE button to switch to pages 26 - 27 before using the unit. 1 Press the c button...
... 6) corresponding to one of the current file. The display shows the disc number and Folder number. NOTE The unit can play CD-ROMs, CD-Rs, and CD-RWs containing MP3 files on the CDA-7995/CDA-7894/CDA-7893/CDA-7892. 1 Press the SOURCE button to switch to pages 26 - 27 before using the unit. 1 Press the c button...

Owners Manual
Page 27
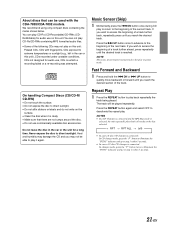
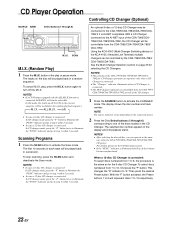
...the Scan mode. The selected file starts to play or pause mode. M.I.X. (Random Play) 1 Press the M.I .X. To cancel M.I .X. function is connected: In CD changer mode, press the "F" button to illuminate the "FUNC" indicator and go to step 1 within 5 seconds. 25-EN After all the files on a disc ...disc will play back repeatedly the file being played. Scanning Programs 1 Press the SCAN button to execute the setting. NOTES • If a CD changer applicable to MP3 is connected and the RPT ALL mode is selected, the unit repeatedly plays back all files in the current disc. button...
...the Scan mode. The selected file starts to play or pause mode. M.I.X. (Random Play) 1 Press the M.I .X. To cancel M.I .X. function is connected: In CD changer mode, press the "F" button to illuminate the "FUNC" indicator and go to step 1 within 5 seconds. 25-EN After all the files on a disc ...disc will play back repeatedly the file being played. Scanning Programs 1 Press the SCAN button to execute the setting. NOTES • If a CD changer applicable to MP3 is connected and the RPT ALL mode is selected, the unit repeatedly plays back all files in the current disc. button...


