
User Guide
Page 1
Table of Contents Precautions ...2 Special notes on LCD monitors 2 Package contents 3 Installation instructions 3 Assembling the monitor 3 Adjusting the viewing angle 4 Connecting the devices 4 Switching the power 5 Adjusting display settings 5 External controls 5 OSD options...6 OSD menu ...6 Troubleshooting 9 General specifications 10 1
Table of Contents Precautions ...2 Special notes on LCD monitors 2 Package contents 3 Installation instructions 3 Assembling the monitor 3 Adjusting the viewing angle 4 Connecting the devices 4 Switching the power 5 Adjusting display settings 5 External controls 5 OSD options...6 OSD menu ...6 Troubleshooting 9 General specifications 10 1

User Guide
Page 2
... is displayed for hours on LCD monitors The following symptoms are taken to the unit. If this IT product through electrocution or other hazards. Recycling information Acer cares very much about /sustainability.htm United States: http://www.ciwmb.ca.gov/electronics/act2003/Recovery/Approved/ Asia...screen. y When cleaning this problem. 2 Please contact a qualified engineer if the troubleshooting section does not solve your problem. Turning the LCD monitor off the power switch and then turn it from the display screen, including sprays. y Do not cover the slots and openings on ...
... is displayed for hours on LCD monitors The following symptoms are taken to the unit. If this IT product through electrocution or other hazards. Recycling information Acer cares very much about /sustainability.htm United States: http://www.ciwmb.ca.gov/electronics/act2003/Recovery/Approved/ Asia...screen. y When cleaning this problem. 2 Please contact a qualified engineer if the troubleshooting section does not solve your problem. Turning the LCD monitor off the power switch and then turn it from the display screen, including sprays. y Do not cover the slots and openings on ...

User Guide
Page 3
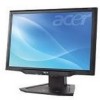
... base, find a clean, flat surface to place the monitor on the bottom side of the base. 2. To detach the monitor: 1. LCD monitor Package contents Power cord Audio cable VGA cable DVI cable User's Guide (CD) (Optional) Quick Start Guide (Optional) Assembling the monitor Installation instructions 1. Pull the 4 hooks on and place a clean dry cloth under...
... base, find a clean, flat surface to place the monitor on the bottom side of the base. 2. To detach the monitor: 1. LCD monitor Package contents Power cord Audio cable VGA cable DVI cable User's Guide (CD) (Optional) Quick Start Guide (Optional) Assembling the monitor Installation instructions 1. Pull the 4 hooks on and place a clean dry cloth under...

User Guide
Page 4
It may cause damage or break the LCD screen. • Careful attention is required not to catch your fingers or hands when you change the angle. Adjusting the viewing angle The viewing angle of the monitor ranges from the power supply. 4 NOTES • Do not touch the LCD screen when you change the angle. Connecting the devices Caution: Make sure that the computer and the monitor are both disconnected from -5 - 20°.
It may cause damage or break the LCD screen. • Careful attention is required not to catch your fingers or hands when you change the angle. Adjusting the viewing angle The viewing angle of the monitor ranges from the power supply. 4 NOTES • Do not touch the LCD screen when you change the angle. Connecting the devices Caution: Make sure that the computer and the monitor are both disconnected from -5 - 20°.

User Guide
Page 5
... to appear. Adjusting display settings External controls 1 Auto If the OSD is inactive, press Auto and the monitor will automatically optimize the position, focus, and clock of the audio cable. If the OSD is active, press... Auto to exit a selection in the OSD. 1 Power cord Attach the monitor to the power cord, and then insert the power cord into . Then tighten the thumbscrews on Orange: in sleep... connector. 4 Audio cable Connect the audio input socket (AUDIO IN) of the LCD monitor and the computer (Optional) by means of your computer.
... to appear. Adjusting display settings External controls 1 Auto If the OSD is inactive, press Auto and the monitor will automatically optimize the position, focus, and clock of the audio cable. If the OSD is active, press... Auto to exit a selection in the OSD. 1 Power cord Attach the monitor to the power cord, and then insert the power cord into . Then tighten the thumbscrews on Orange: in sleep... connector. 4 Audio cable Connect the audio input socket (AUDIO IN) of the LCD monitor and the computer (Optional) by means of your computer.

User Guide
Page 10
... the Electronic Industries Alliance at www.eiae.org. Stand by OFF Dimension and weight Dimensions (W×H×D) Weight (Net/Gross) Specification 19-inch flat panel active-matrix TFT LCD SXGA 1280×1024 pixels 0.294 mm 16.2 M 300 cd/m² (Typical) 700:1 (Typical) 8 ms 150° ...Star] On. Stand by OFF Power consumption Max. For lamp-specific disposal information, check www.lamprecycle.org. 10 General specifications Item LCD panel Display Max resolution Pixel pitch Color Brightness Contrast ratio Response time View angle of horizontal View angle of according to local, state ...
... the Electronic Industries Alliance at www.eiae.org. Stand by OFF Dimension and weight Dimensions (W×H×D) Weight (Net/Gross) Specification 19-inch flat panel active-matrix TFT LCD SXGA 1280×1024 pixels 0.294 mm 16.2 M 300 cd/m² (Typical) 700:1 (Typical) 8 ms 150° ...Star] On. Stand by OFF Power consumption Max. For lamp-specific disposal information, check www.lamprecycle.org. 10 General specifications Item LCD panel Display Max resolution Pixel pitch Color Brightness Contrast ratio Response time View angle of horizontal View angle of according to local, state ...


