Generic User Guide
Page 5
... electric shock from Electrical and Electronics Equipment (WEEE) regulations, visit http://www.acer-group.com/public/Sustainability/sustainability01.htm http://www.acer-group.com/public/Sustainability/sustainability04.htm Mercury advisory For projectors or electronic products containing an LCD/CRT monitor or display: Lamp(s) inside this electronic device into the trash when discarding. For...
... electric shock from Electrical and Electronics Equipment (WEEE) regulations, visit http://www.acer-group.com/public/Sustainability/sustainability01.htm http://www.acer-group.com/public/Sustainability/sustainability04.htm Mercury advisory For projectors or electronic products containing an LCD/CRT monitor or display: Lamp(s) inside this electronic device into the trash when discarding. For...
Generic User Guide
Page 7
...brightness and/or contrast to a comfortable level for more than your documents, place the display at a higher level than the top edge of the monitor, using drapes, shades or blinds. • Using a task light. • Changing the display's viewing angle. vii If you view your desk... the side faces the window or any other recurring or persistent discomfort and/or pain related to achieve maximum comfort. Taking care of your monitor more comfortable computer use , consult a physician immediately and inform your eyes. Observe the following tips: • Refrain from drying out. ...
...brightness and/or contrast to a comfortable level for more than your documents, place the display at a higher level than the top edge of the monitor, using drapes, shades or blinds. • Using a task light. • Changing the display's viewing angle. vii If you view your desk... the side faces the window or any other recurring or persistent discomfort and/or pain related to achieve maximum comfort. Taking care of your monitor more comfortable computer use , consult a physician immediately and inform your eyes. Observe the following tips: • Refrain from drying out. ...
Generic User Guide
Page 9
... 4 Taking care of your optical discs 4 2 Setting up your computer 5 Arranging a comfortable work area 6 Positioning your monitor 6 Positioning your keyboard 6 Positioning your mouse 7 Connecting peripherals 7 Connecting your mouse and keyboard 7 USB interface 7 PS/2 interface 7 Connecting a monitor 7 Connecting the power cable 8 Turning on your computer 8 Turning off your computer 8 3 Upgrading your computer 9 Installation...
... 4 Taking care of your optical discs 4 2 Setting up your computer 5 Arranging a comfortable work area 6 Positioning your monitor 6 Positioning your keyboard 6 Positioning your mouse 7 Connecting peripherals 7 Connecting your mouse and keyboard 7 USB interface 7 PS/2 interface 7 Connecting a monitor 7 Connecting the power cable 8 Turning on your computer 8 Turning off your computer 8 3 Upgrading your computer 9 Installation...
Generic User Guide
Page 16
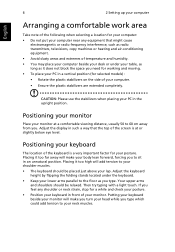
...below eye level. Placing it does not block the space you type. Then try typing with a light touch. Putting your keyboard beside your monitor will make you turn your head while you . CAUTION: Please use the stabilizers when placing your neck muscles. Adjust the keyboard height by flipping... near any shoulder or neck strain, stop for a while and check your posture. • Position your keyboard in front of your monitor. Positioning your monitor Place your lower arms parallel to sit in an unnatural position. Your upper arms and shoulders should be relaxed. If you to the ...
...below eye level. Placing it does not block the space you type. Then try typing with a light touch. Putting your keyboard beside your monitor will make you turn your head while you . CAUTION: Please use the stabilizers when placing your neck muscles. Adjust the keyboard height by flipping... near any shoulder or neck strain, stop for a while and check your posture. • Position your keyboard in front of your monitor. Positioning your monitor Place your lower arms parallel to sit in an unnatural position. Your upper arms and shoulders should be relaxed. If you to the ...
Generic User Guide
Page 17
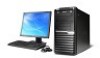
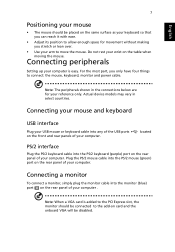
... For the most part, you stretch or lean over. • Use your arm to connect: the mouse, keyboard, monitor and power cable. Connecting a monitor To connect a monitor, simply plug the monitor cable into any of the USB ports on the rear panel of your computer . Note: When a VGA card is ...easy. Connecting your mouse and keyboard USB interface Plug your USB mouse or keyboard cable into the monitor (blue) port on the front and rear panels of your computer. Note: The peripherals shown in select countries. Actual device models may vary...
... For the most part, you stretch or lean over. • Use your arm to connect: the mouse, keyboard, monitor and power cable. Connecting a monitor To connect a monitor, simply plug the monitor cable into any of the USB ports on the rear panel of your computer . Note: When a VGA card is ...easy. Connecting your mouse and keyboard USB interface Plug your USB mouse or keyboard cable into the monitor (blue) port on the front and rear panels of your computer. Note: The peripherals shown in select countries. Actual device models may vary...
Generic User Guide
Page 18
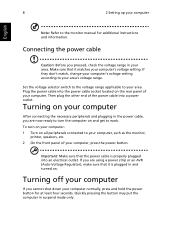
...outlet. If you proceed, check the voltage range in and turned on. Set the voltage selector switch to the voltage range applicable to the monitor manual for at least four seconds. Turning on the rear panel of your computer's voltage setting. Turning off your computer normally, press and ...Connecting the power cable Caution: Before you are now ready to turn on your computer: 1 Turn on and get to your computer, such as the monitor, printer, speakers, etc. 2 On the front panel of your computer English Note: Refer to your area's voltage range. Make sure that it is...
...outlet. If you proceed, check the voltage range in and turned on. Set the voltage selector switch to the voltage range applicable to the monitor manual for at least four seconds. Turning on the rear panel of your computer's voltage setting. Turning off your computer normally, press and ...Connecting the power cable Caution: Before you are now ready to turn on your computer: 1 Turn on and get to your computer, such as the monitor, printer, speakers, etc. 2 On the front panel of your computer English Note: Refer to your area's voltage range. Make sure that it is...
Generic User Guide
Page 26
... located on the rear panel of your dealer or technical support center for assistance. If the LED is correctly attached to the computer and the monitor. Do the following: • Make sure the printer is connected to a power outlet and that may arise during the use of the computer is set...
... located on the rear panel of your dealer or technical support center for assistance. If the LED is correctly attached to the computer and the monitor. Do the following: • Make sure the printer is connected to a power outlet and that may arise during the use of the computer is set...


