
Safety Guide
Page 6
... shoulders. • Install the external display, keyboard and mouse properly and within comfortable reach. • If you view your monitor more than the top edge of the display so your eyes point downward when looking away from the monitor and focusing on how to keep your display in such a way that the side faces the window or any light source, •...
... shoulders. • Install the external display, keyboard and mouse properly and within comfortable reach. • If you view your monitor more than the top edge of the display so your eyes point downward when looking away from the monitor and focusing on how to keep your display in such a way that the side faces the window or any light source, •...

Safety Guide
Page 10
..., as opening or removing covers may expose you to dangerous voltage points or other controls may result in performance, indicating a need for service. • The product does not operate normally after following the operating instructions. Safety instructions Product servicing Do not attempt to service this product from the wall outlet and refer servicing to qualified service personnel when: • The power cord or plug is turned on...
..., as opening or removing covers may expose you to dangerous voltage points or other controls may result in performance, indicating a need for service. • The product does not operate normally after following the operating instructions. Safety instructions Product servicing Do not attempt to service this product from the wall outlet and refer servicing to qualified service personnel when: • The power cord or plug is turned on...
Safety Guide
Page 11
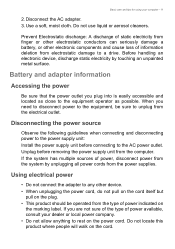
... power to the power supply unit: Install the power supply unit before removing the power supply unit from the electrical outlet. When you plug into is easily accessible and located as close to the equipment operator as possible. Unplug before connecting to the AC power outlet. If the system has multiple sources of power indicated on the marking label. Basic care and tips for using...
... power to the power supply unit: Install the power supply unit before removing the power supply unit from the electrical outlet. When you plug into is easily accessible and located as close to the equipment operator as possible. Unplug before connecting to the AC power outlet. If the system has multiple sources of power indicated on the marking label. Basic care and tips for using...
Safety Guide
Page 14
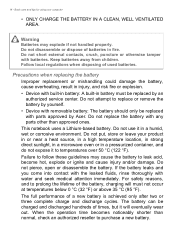
.... Warning Batteries may cause the battery to purchase a new battery. Do not short external contacts, crush, puncture or otherwise tamper with built-in battery: A built-in battery must be replaced by yourself. • Device with removable battery: The battery should only be charged and discharged hundreds of times, but it to replace or remove the battery by an authorized service center. This notebook uses a Lithium-based battery. The...
.... Warning Batteries may cause the battery to purchase a new battery. Do not short external contacts, crush, puncture or otherwise tamper with built-in battery: A built-in battery must be replaced by yourself. • Device with removable battery: The battery should only be charged and discharged hundreds of times, but it to replace or remove the battery by an authorized service center. This notebook uses a Lithium-based battery. The...
Safety Guide
Page 15
... might happen, for example, when you carry a spare battery in rechargeable battery, battery replacement must be susceptible to interference from the battery, which could affect performance. Short-circuiting the terminals may also explode if damaged. Batteries may damage the battery or the connecting object. Wireless devices may be done by following the instruction included in temperatures well below freezing. Note Please...
... might happen, for example, when you carry a spare battery in rechargeable battery, battery replacement must be susceptible to interference from the battery, which could affect performance. Short-circuiting the terminals may also explode if damaged. Batteries may damage the battery or the connecting object. Wireless devices may be done by following the instruction included in temperatures well below freezing. Note Please...
Safety Guide
Page 19
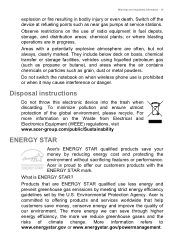
... change. Environmental Protection Agency. They include below deck on when wireless phone use less energy and prevent greenhouse gas emissions by meeting strict energy efficiency guidelines set by reducing energy cost and protecting the environment without sacrificing features or performance. Disposal instructions Do not throw this electronic device into the trash when discarding. Switch off the device at service...
... change. Environmental Protection Agency. They include below deck on when wireless phone use less energy and prevent greenhouse gas emissions by meeting strict energy efficiency guidelines set by reducing energy cost and protecting the environment without sacrificing features or performance. Disposal instructions Do not throw this electronic device into the trash when discarding. Switch off the device at service...
Safety Guide
Page 20
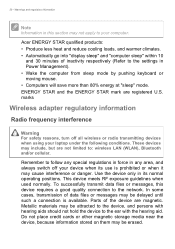
... the settings in this device requires a good quality connection to your computer. Parts of data files or messages may be erased. Warnings and regulatory information Note Information in Power Management). • Wake the computer from sleep mode by pushing keyboard or moving mouse. • Computers will save more than 80% energy at "sleep" mode. Use the device only in any area, and always switch...
... the settings in this device requires a good quality connection to your computer. Parts of data files or messages may be erased. Warnings and regulatory information Note Information in Power Management). • Wake the computer from sleep mode by pushing keyboard or moving mouse. • Computers will save more than 80% energy at "sleep" mode. Use the device only in any area, and always switch...
Safety Guide
Page 22
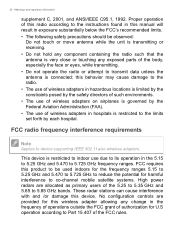
... touching any change in the frequency of operations outside the FCC grant of authorization for harmful interference to the instructions found in the 5.15 to 5.25 GHz and 5.470 to the limits set forth by the Federal Aviation Administration (FAA). • The use of the 5.25 to 5.35 GHz and 5.65 to device supporting IEEE 802.11a/ac wireless adapters...
... touching any change in the frequency of operations outside the FCC grant of authorization for harmful interference to the instructions found in the 5.15 to 5.25 GHz and 5.470 to the limits set forth by the Federal Aviation Administration (FAA). • The use of the 5.25 to 5.35 GHz and 5.65 to device supporting IEEE 802.11a/ac wireless adapters...
User Manual
Page 2
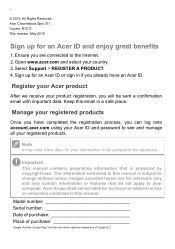
... liable for an Acer ID or sign in this manual is protected by copyright laws. Model number Serial number Date of purchase Place of Google LLC. Acer Chromebook Spin 311 Covers: R721T This revision: May 2019 Sign up for technical or editorial errors or omissions contained in if you can log onto account.acer.com using your Acer ID and password to the Internet. 2. Register your Acer product After...
... liable for an Acer ID or sign in this manual is protected by copyright laws. Model number Serial number Date of purchase Place of Google LLC. Acer Chromebook Spin 311 Covers: R721T This revision: May 2019 Sign up for technical or editorial errors or omissions contained in if you can log onto account.acer.com using your Acer ID and password to the Internet. 2. Register your Acer product After...
User Manual
Page 3
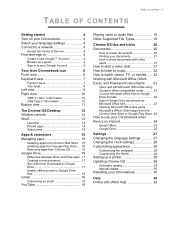
... Table of contents - 3 Getting started 4 Turn on your Chromebook 4 Select your language settings 4 Connect to a network 4 Accept the Terms of Service 4 First-time sign-in 4 Create a new Google™ Account 4 Browse as a guest 4 Sign in to your Google Account 5 Your Acer Chromebook tour 6 Front view 6 Keyboard view 7 Function keys 7 Touchpad 8 Left view 9 Right view 10 USB 3.1 Gen 1 information 10 USB Type-C information 10 Bottom view 11...
... Table of contents - 3 Getting started 4 Turn on your Chromebook 4 Select your language settings 4 Connect to a network 4 Accept the Terms of Service 4 First-time sign-in 4 Create a new Google™ Account 4 Browse as a guest 4 Sign in to your Google Account 5 Your Acer Chromebook tour 6 Front view 6 Keyboard view 7 Function keys 7 Touchpad 8 Left view 9 Right view 10 USB 3.1 Gen 1 information 10 USB Type-C information 10 Bottom view 11...
User Manual
Page 4
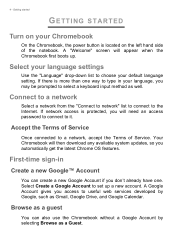
... list to useful web services developed by selecting Browse as well. If there is protected, you will need an access password to connect to it. If network access is more than one . Your Chromebook will appear when the Chromebook first boots up a new account. First-time sign-in your language, you access to choose your Chromebook On the Chromebook, the power button is located on your default language setting. A Google...
... list to useful web services developed by selecting Browse as well. If there is protected, you will need an access password to connect to it. If network access is more than one . Your Chromebook will appear when the Chromebook first boots up a new account. First-time sign-in your language, you access to choose your Chromebook On the Chromebook, the power button is located on your default language setting. A Google...
User Manual
Page 6
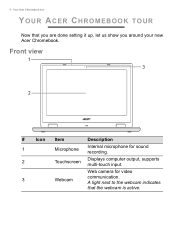
6 - A light next to the webcam indicates that you are done setting it up, let us show you around your new Acer Chromebook. Front view 1 3 2 # Icon Item Description 1 Microphone Internal microphone for video 3 Webcam communication. Your Acer Chromebook tour YOUR ACER CHROMEBOOK TOUR Now that the webcam is active. Web camera for sound recording. 2 Touchscreen Displays computer output, supports multi-touch input.
6 - A light next to the webcam indicates that you are done setting it up, let us show you around your new Acer Chromebook. Front view 1 3 2 # Icon Item Description 1 Microphone Internal microphone for video 3 Webcam communication. Your Acer Chromebook tour YOUR ACER CHROMEBOOK TOUR Now that the webcam is active. Web camera for sound recording. 2 Touchscreen Displays computer output, supports multi-touch input.
User Manual
Page 7
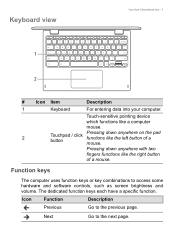
Keyboard view Your Acer Chromebook tour - 7 1 2 # Icon Item Description 1 Keyboard For entering data into your computer. The dedicated function keys each have a specific function. Next Go to access some hardware and software controls, such as screen brightness and volume. Function keys The computer uses function keys or key combinations to the next page. Icon Function Description Previous Go to the previous page. Touch-sensitive pointing device which functions like a computer mouse. 2 Touchpad / click button Pressing down anywhere with two fingers...
Keyboard view Your Acer Chromebook tour - 7 1 2 # Icon Item Description 1 Keyboard For entering data into your computer. The dedicated function keys each have a specific function. Next Go to access some hardware and software controls, such as screen brightness and volume. Function keys The computer uses function keys or key combinations to the next page. Icon Function Description Previous Go to the previous page. Touch-sensitive pointing device which functions like a computer mouse. 2 Touchpad / click button Pressing down anywhere with two fingers...

User Manual
Page 8
... Lock screen Search Description Reload the current page. Your Acer Chromebook tour Icon Function Reload Full-screen Next window Brightness down Brightness up Mute Volume down Volume up and down on the keyboard and tapping the alt-click) touchpad with one finger both fingers to the next window. Tapping the touchpad with two fingers or pressing Two-finger tap (or (and holding) Alt on any part...
... Lock screen Search Description Reload the current page. Your Acer Chromebook tour Icon Function Reload Full-screen Next window Brightness down Brightness up Mute Volume down Volume up and down on the keyboard and tapping the alt-click) touchpad with one finger both fingers to the next window. Tapping the touchpad with two fingers or pressing Two-finger tap (or (and holding) Alt on any part...

User Manual
Page 9
... microphone. Connects to USB devices. Connects to the provided USB Type-C power adapter and to USB devices with DC-in AC mode. MicroSD card slot Insert a microSD card into this slot. Charging: The light shows amber when the battery is charging. Left view Your Acer Chromebook tour - 9 123 4 5 6 # Icon 1 2 3 4 5 6 Item Description Power button Turns the computer on and off. Fully charged: The light shows blue when in USB port Indicates the computer's battery status. Supports DisplayPort™ over USB-C™. Battery indicator USB Type-C port...
... microphone. Connects to USB devices. Connects to the provided USB Type-C power adapter and to USB devices with DC-in AC mode. MicroSD card slot Insert a microSD card into this slot. Charging: The light shows amber when the battery is charging. Left view Your Acer Chromebook tour - 9 123 4 5 6 # Icon 1 2 3 4 5 6 Item Description Power button Turns the computer on and off. Fully charged: The light shows blue when in USB port Indicates the computer's battery status. Supports DisplayPort™ over USB-C™. Battery indicator USB Type-C port...
User Manual
Page 10
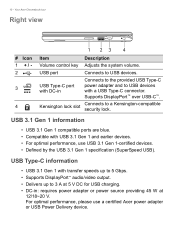
... performance, use a certified Acer power adapter or USB Power Delivery device. Kensington lock slot Connects to USB devices. For optimal performance, please use USB 3.1 Gen 1-certified devices. • Defined by the USB 3.1 Gen 1 specification (SuperSpeed USB). USB 3.1 Gen 1 information • USB 3.1 Gen 1 compatible ports are blue. • Compatible with a USB Type-C connector. 10 - Supports DisplayPort™ over USB-C™. USB Type-C information • USB 3.1 Gen 1 with transfer speeds up to 5 Gbps. • Supports DisplayPort™ audio/video output. •...
... performance, use a certified Acer power adapter or USB Power Delivery device. Kensington lock slot Connects to USB devices. For optimal performance, please use USB 3.1 Gen 1-certified devices. • Defined by the USB 3.1 Gen 1 specification (SuperSpeed USB). USB 3.1 Gen 1 information • USB 3.1 Gen 1 compatible ports are blue. • Compatible with a USB Type-C connector. 10 - Supports DisplayPort™ over USB-C™. USB Type-C information • USB 3.1 Gen 1 with transfer speeds up to 5 Gbps. • Supports DisplayPort™ audio/video output. •...

User Manual
Page 14
...To pin an app to display a box with more options. Select Unpin. Click to shelf. Select Pin to select All Apps (or type the name of the desired app). 3. Status area The Status area enables you to see vital computer ...information at a glance, such as the time, Wi-Fi signal strength, and battery life. 14 - To unpin an app from the shelf. 2. Icon Description Icon Description Notifications Shut down Lock screen Volume control Bluetooth status Settings Wireless network connection Battery status Night light Keyboard Brightness control Locate ...
...To pin an app to display a box with more options. Select Unpin. Click to shelf. Select Pin to select All Apps (or type the name of the desired app). 3. Status area The Status area enables you to see vital computer ...information at a glance, such as the time, Wi-Fi signal strength, and battery life. 14 - To unpin an app from the shelf. 2. Icon Description Icon Description Notifications Shut down Lock screen Volume control Bluetooth status Settings Wireless network connection Battery status Night light Keyboard Brightness control Locate ...
User Manual
Page 17
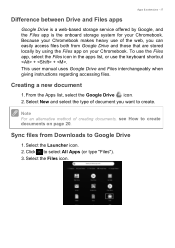
... Apps list, select the Google Drive icon. 2. Select the Files icon. This user manual uses Google Drive and Files interchangeably when giving instructions regarding accessing files. Select the Launcher icon. 2. Select New and select the type of document you can easily access files both from Downloads to create. Because your Chromebook makes heavy use the keyboard shortcut + + . To use the Files app, select the Files icon in the apps list...
... Apps list, select the Google Drive icon. 2. Select the Files icon. This user manual uses Google Drive and Files interchangeably when giving instructions regarding accessing files. Select the Launcher icon. 2. Select New and select the type of document you can easily access files both from Downloads to create. Because your Chromebook makes heavy use the keyboard shortcut + + . To use the Files app, select the Files icon in the apps list...

User Manual
Page 21
... icon. 2. Login using your keyboard or select the Launcher icon. 2. Select My Drive (or whatever folder you've created to put your files in). How to start a video chat For all you Skype users out there, Google+ Hangouts are saved online and available anywhere you have internet access. Click to select All Apps (or type "Hangouts"). The sharing option works with them...
... icon. 2. Login using your keyboard or select the Launcher icon. 2. Select My Drive (or whatever folder you've created to put your files in). How to start a video chat For all you Skype users out there, Google+ Hangouts are saved online and available anywhere you have internet access. Click to select All Apps (or type "Hangouts"). The sharing option works with them...
User Manual
Page 30
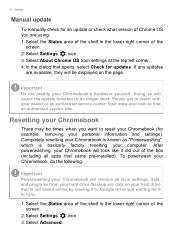
... will cause the update function to Google Drive and waiting for example, removing your Chromebook will remove all apps that came pre-installed). Please get in touch with your Chromebook's hardware yourself. After powerwashing, your personal information and settings). Backup any updates are using: 1. Select Settings icon. 3. Resetting your Chromebook There may be displayed on your hard drive that opens, select Check for an update or check what version of the box...
... will cause the update function to Google Drive and waiting for example, removing your Chromebook will remove all apps that came pre-installed). Please get in touch with your Chromebook's hardware yourself. After powerwashing, your personal information and settings). Backup any updates are using: 1. Select Settings icon. 3. Resetting your Chromebook There may be displayed on your hard drive that opens, select Check for an update or check what version of the box...


