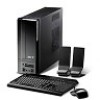

Aspire X1700 / Veriton X270 Service Guide
Page 5
WARNING CAUTION IMPORTANT Alerts you to do specific actions relevant to the accomplishment of procedures. Gives precautionary measures to avoid possible hardware or software problems. Reminds you to the current topic. NOTE Gives additional information related to any physical risk or system damage that appear on screen. v Conventions The following conventions are used in this manual: SCREEN MESSAGES Denotes actual messages that might result from doing or not doing specific actions.
WARNING CAUTION IMPORTANT Alerts you to do specific actions relevant to the accomplishment of procedures. Gives precautionary measures to avoid possible hardware or software problems. Reminds you to the current topic. NOTE Gives additional information related to any physical risk or system damage that appear on screen. v Conventions The following conventions are used in this manual: SCREEN MESSAGES Denotes actual messages that might result from doing or not doing specific actions.
Aspire X1700 / Veriton X270 Service Guide
Page 63
... and invalid system responses. 1. Obtain the failing symptoms in this chapter are only intended to test Acer products. Refer to "Power System Check" on page 56 and "Beep Codes" on how to troubleshoot system hardware problems. Hardware Diagnostic Procedure IMPORTANT:The diagnostic tests described in as much detail as possible. 2. Chapter 4 55...
... and invalid system responses. 1. Obtain the failing symptoms in this chapter are only intended to test Acer products. Refer to "Power System Check" on page 56 and "Beep Codes" on how to troubleshoot system hardware problems. Hardware Diagnostic Procedure IMPORTANT:The diagnostic tests described in as much detail as possible. 2. Chapter 4 55...
Aspire X1700 / Veriton X270 Service Guide
Page 64
...all the peripherals connected to "System Disassembly" on removing system covers, refer to it. 2. Turn off the system and all components are Acer-qualified and supported. 10. Unplug all cable connectors inside the system are properly seated. 8. For instructions on page 23. 7. Verify that...If the system will power on the system. 12. Refer to the correct voltage setting. If the problem is not evident, continue with the system is not blocked. 3. If the problem with System Internal Inspection. Inspect the LED indicators on page 6. 2. For the LED locations and ...
...all the peripherals connected to "System Disassembly" on removing system covers, refer to it. 2. Turn off the system and all components are Acer-qualified and supported. 10. Unplug all cable connectors inside the system are properly seated. 8. For instructions on page 23. 7. Verify that...If the system will power on the system. 12. Refer to the correct voltage setting. If the problem is not evident, continue with the system is not blocked. 3. If the problem with System Internal Inspection. Inspect the LED indicators on page 6. 2. For the LED locations and ...


